How To Get The Most Out Of Your Pots And Pans
Eventually, we all find ourselves alone, stomach beyond empty, cabinets full of ingredients we don't remember buying, with no idea how to turn any of it into food. It's how you know you've made it as a confused, directionless adult, unironically nostalgic for cafeteria food.
In life, you don't always have to know what you're doing to look like you've got a handle on things. In the kitchen, deception is not so easy. Expertise is evident in the outcome, but not everyone has the time or inclination to become an expert. Thankfully, you can still eat like one if you know how to get the most out of your pots and pans.
Account for stove variances
When you're reading a recipe, how hot do you consider "medium heat"? How long does your electric burner need to run before it's reached the correct temperature? Is your house wired correctly? There are a number of factors that can impact a stove's thermal output, so even manufacturer ratings are a guess based on best-case scenarios. Thankfully, there are a handful of tricks you can try at home to get a functional sense of how hot your stove runs.
IR thermometers give a ballpark estimate for how quickly heat moves into the pan, which is a good start, but to measure how quickly it moves into food you need a food thermometer. Knowing when a burger has reached a safe temperature takes all the guesswork out of flipping, and it's the easiest way to spare yourself the agony of having to eat well-done meat.
If a pan is hot enough to sizzle water, it is hot enough to evaporate moisture out of food, thereby caramelizing it. You can find your stove's sizzle point by heating a dry pan until a droplet of water skitters across the surface. You can repeat this experiment with cooking oils to find where on the dial your stove turns them to smoke. "Canola smokes at 400 degrees" is a fine Jeopardy fact, but it's useless to a stove that scales temperature as five dots between LOW and MED. Use a marker to draw lines on frequently used temperature points, just to spite lazy stove designers.
Use the right vessel for the meal

You can probably describe the difference between a pot and a pan, but what's the difference between a frying pan and a skillet? Good luck! There's no appreciable difference between these similar-looking tools. Another broadly applied name is "griddle," which might refer to a short-sided pan ideal for pancakes and bacon just as easily as it would refer to the enormous metal plate at your neighborhood teppanyaki grill. Many home models utilize a fluid trough, making it easy to reuse the bacon grease later or just drink it straight.
The difference between a saucepan and a sauce pot is one of scale, as a saucepan holds about 1 quart to a sauce pot's 8 quarts. Stock pots are often taller than sauce pots, in order to render an entire carcass with lids designed to allow a minimum of evaporation. When choosing a pot, make sure the volume of food you're cooking doesn't exceed ¾ the total volume of the vessel, as it may boil over.
If you want to retain moisture in whatever you're cooking, choose something with tall sides and grab a lid. If you want to dry out your food, choose low sides and cook uncovered. It won't matter to your drunk friends that you cooked your eggs in a sautoir pan rather than a sauteuse pan as long as you don't break the yolk. They don't mind if your pan has sloped or straight sides.
Assault your irons
We've told you how soap and water are actually pretty safe on properly seasoned cast iron, but here's another tip for keeping your cookware in fine shape: use salt. Salt's cubic shape makes a great scouring agent for stubborn, burned-in residue, limiting the necessary exposure to soap and water. Use enough salt to cover the bottom of the pan, but remember that a sufficiently greasy pan will absolutely require multiple coats to clean.
As you move salt around the pan, you'll notice it adhering to residual streaks of oil, burned-on food, and other weaknesses in the seasoning. As it scours, the salt will grow greyish-black and take on the consistency of wet sand. Salt is chemically too soft to chip or scratch iron, so don't worry if you notice flecks rising from the pan, it's probably burned-on food.
Grinding a cup of salt into cast iron will shred through even the brawniest paper towels, so be sure to dedicate a rag for this. Something that can get greasy and salty and discarded after it starts to smell, like a wedding dress, or perhaps the Sorting Hat. Whatever method you choose, make sure your pan is bone dry before putting it away.
Use the cleaning power of chemistry
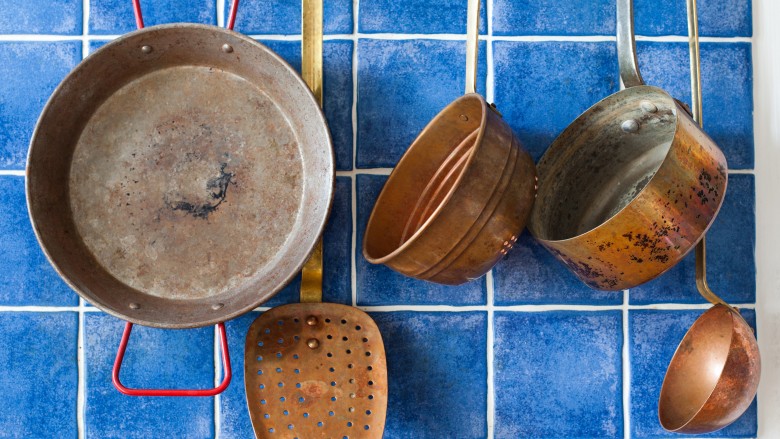
Copper oxide is the reason the Statue of Liberty is green. It's the key ingredient in the makeup that made the Wicked Witch wicked, and if it gets into your food it will permanently ruin your appetite.
When copper reacts with air and moisture, a chemical exchange takes place, physically transforming the exposed metal. Many polishes involve physically removing the oxidized layer, which will permanently damage the pot over time. Thankfully, it's much easier and faster to use the power of chemistry to undo the oxidization.
If you've ever covered a penny with ketchup, you've seen this kitchen wizardry in action. Salt and vinegar, salt and lemon juice, even Worcestershire sauce are all acidic enough to safely remove copper tarnish. To save yourself the scrubbing, mix in a bit of corn starch or flour to make a spreadable paste you can scrape off when dry.
Likewise, why let a charred pan ruin your night, when you can clean it with chemistry? Simply add a few drops of water to a sufficient amount of baking soda to make a paste, apply it to the burnt area, and wait. When the paste is dry, remove it with vinegar and watch the char float off with it.
Be gentle with nonstick surfaces
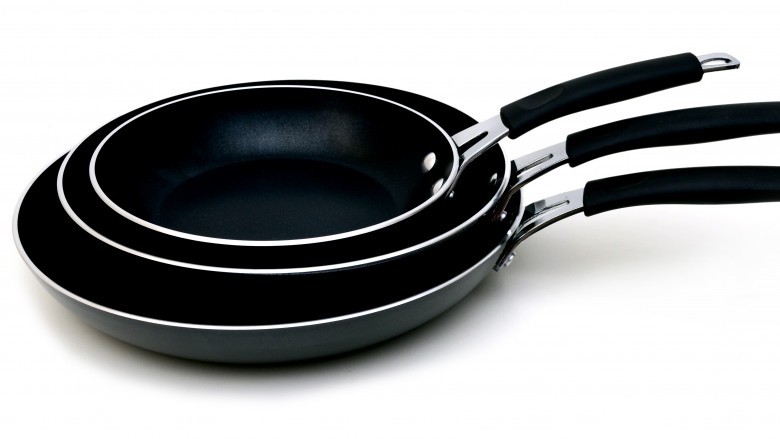
Nonstick surfaces are a marvel, but proper care must be exercised to avoid damaging them. Even a metal lid could be enough to nick the exposed edges of the coating. Metal implements will tear a nonstick pan to ribbons, so consider keeping them separate from softer tools, like wood and plastic. Even the scouring side of a sponge might flake a pan, so make sure to only use soft sponges with hand-wash detergent. If stubborn residue persists, let it soak or quickly deglaze it on the stovetop.
High heat and acidic foods can damage the surface's bond to the pan underneath, and sudden temperature changes can warp even the thickest metals. Furthermore, aerosol sprays will build up a residue over repeated use, neutralizing the nonstick coating.
Damage will slowly accumulate as repeated heating and cooling cycles exacerbate even minor nicks and dents. If you have limited storage space, consider installing hooks on your walls to avoid having to stack other dishes on a non-stick pan. Baby your nonstick pans, and they will treat you kindly in return.
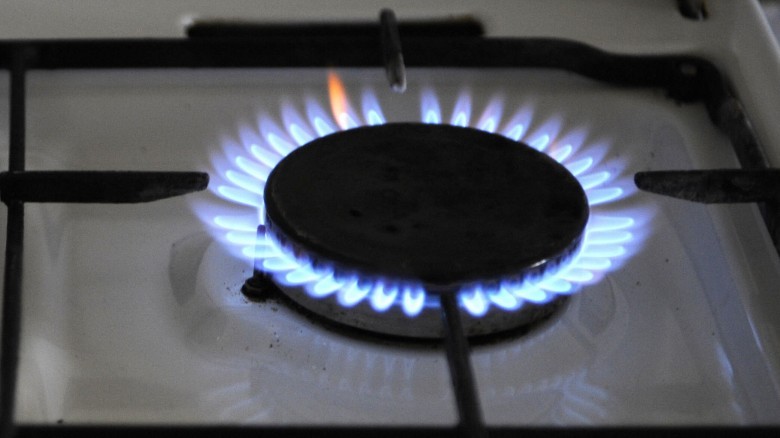
The two-burner trick

Electric burners are designed to retain a lot of heat, unlike a gas stove's hair-trigger response. Once, as a young child, I preheated an electric element so much it charred the whole outer layer of copper off the family Revereware the moment I set it on the stove. Even after clearing off the burnt crust, a distinct ring pattern remained branded onto its bottom.
If you know you'll need to take something down off a boil quickly, such as a pot of rice, just go ahead and use two burners. Heat one to boil, and set the other one to a simmer temperature when you're close to making the switch. Waiting for the surface to cool on its own throws off texture and cooking time, plus you're much less likely to see a boil-over when moving to a properly prepared burner.
Soap the outside of your pots
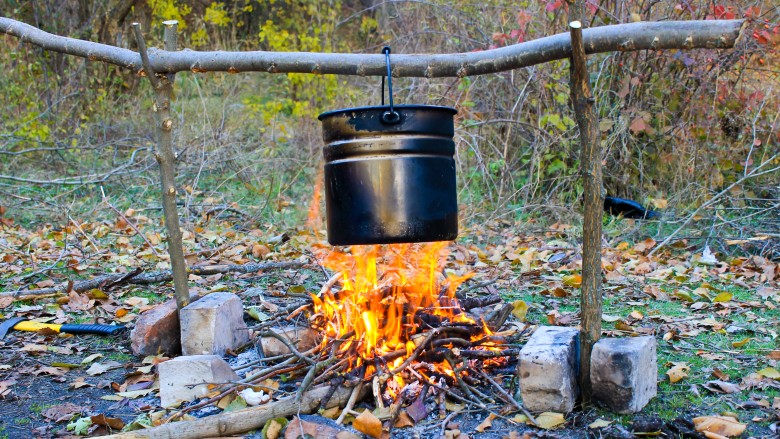
Here's an old Eagle Scout trick. Any time you're cooking over a campfire, coat the bottom of your pot with a thin layer of liquid soap. Fan it over the flame before setting it down to make sure it dries out. You'll know you've got it right if the soot wipes off under a finger.
You'll know you've got it wrong if it takes you three hours to scour one finger-wipe's worth of soot off your troop's ramen pot. Furthermore, be sure to finish applying and drying the soap before you fill the pot with food.
Any time you want to try something that would otherwise ruin a shiny finish, coat it with soap. Toss a pot of corn on the charcoal to preboil before grilling the ears, husk and all. Smoke a whole pot of chili. Eat fearlessly, knowing the dishes are already half washed.
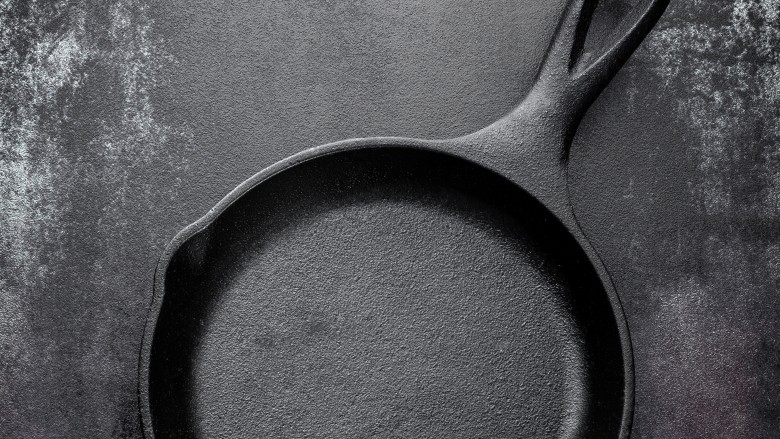
Mercilessly preheat your cast iron
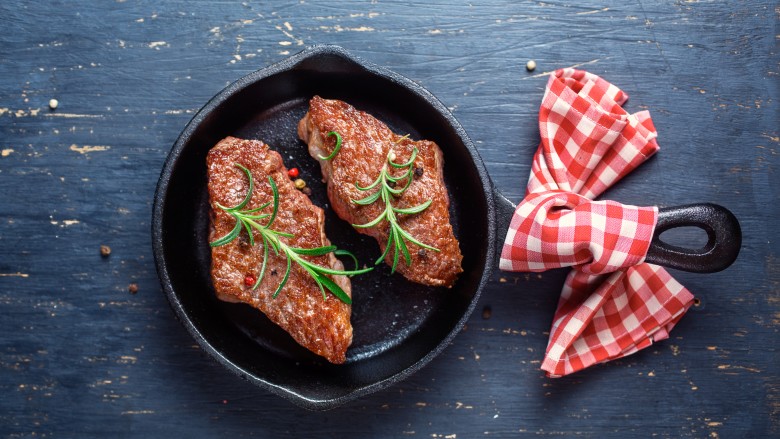
It's no secret that high heat is the key to proper caramelization, but unless your stove puts out restaurant-grade BTUs, you won't be able to pan-sear a steak like a pro.
Not unless you've got a cast-iron wonderpan, that is! Take a tip from chef superstar Grant Achatz, and preheat the pan for around half an hour over an open flame. Turn it regularly, as cast iron is far better at retaining heat than distributing it.
You'll know it's hot enough when a drop of grapeseed or canola oil immediately smokes. Red meats and burly vegetables benefit the most from this level of intense caramelization, but poultry and seafood work just as well. Broccoli florets crisp nicely while the stems remain firm, and thick-skinned squash melts to tender sweetness, easily separating from its rind.
Electric stove owners need not despair. Alton Brown suggests preheating your cast-iron pan in the oven and switching back and forth between the oven and stovetop.
Deglaze your pans
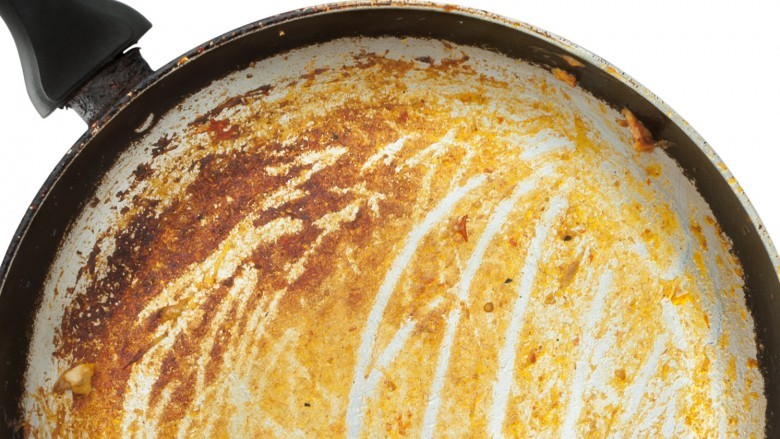
The tastiest parts of food are the browned crunchy bits heavy with salted fats. This is an undeniable fact, so why trash all that flavor seared to the bottom of your pan when you could instead make a sauce out of it? If you want to watch a meal mature, dress it in its own sauce. Feel free to hum "Pomp and Circumstance" if you'd like because you've just graduated to the big leagues.
Deglazing a pan is as simple as draining off the excess grease, heating the pan, and splashing in a cold fluid to steam-lift the stuck-on brown bits, called fond. You'll want to avoid pans with char, as a burned sauce tastes as bitter and smoky as the city of Reno.
Stock and wine are two popular choices. Beer makes for a thick full-bodied sauce. As the fluid boils, stir with a soft spatula. I prefer wood over firm plastic for this kind of high-heat work, but if the pan was heated enough there shouldn't be much scraping left to do. Once the fond has mixed into the fluid, deglazing is complete. Continue to reduce till the fluid has halved itself in volume, then apply directly to the food. There are any number of ways to turn a panful of deglazed fond into sauce, most of which involve shallots and a heart-choking amount of butter. Dig in!
Woks are ideal for gas ranges
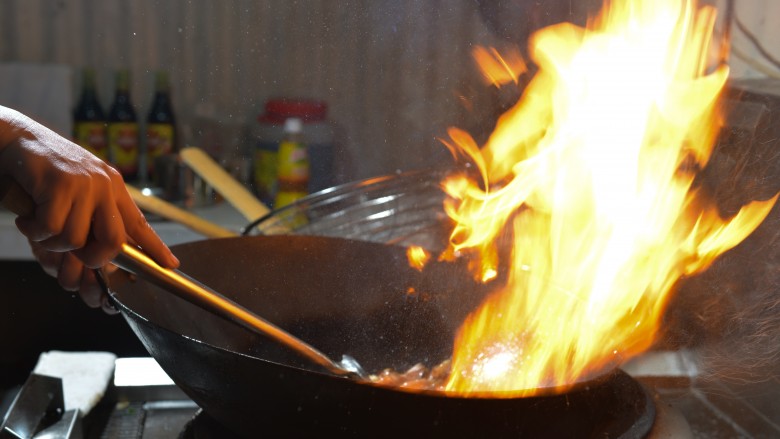
The key ingredient to a successful stir-fry is a screaming hot carbon steel wok. Bad news for electric range owners, the round bottom of a wok will absolutely damage the glass surface. The round bottom is crucial to successful wok technique, as having a wide surface area to cook on prevents food from sitting on top of itself. More of the meal is directly seared by the heat, rather than convected through steam.
When you use your wok, expose as much of the food's surface area as you can to allow for maximum caramelization. High-heat oil is a must, along with a carefully maintained seasoning regimen not unlike the variety lavished upon cast iron.
Flat-bottom woks do exist, effectively making them skillets with generously proportioned sides. But because the sides of the wok aren't in contact with the element, the edges can be much colder than the center. When cooking a medium-sized batch of curry, I observed a significant difference in the cooking fluid around the circumference of the wok.
Moreover, since a flat-bottomed wok is unable to rotate during sauteeing, less of the overall cooking surface gets hot enough to caramelize food. While they are a thing of beauty on gas ranges, electric stove owners are probably better off with a solid cast-iron pan.
Dutch ovens can do almost anything
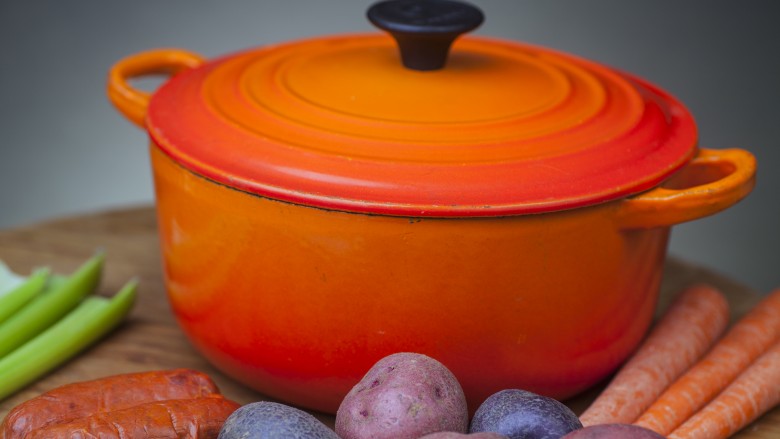
Every food writer worth his or her pink Himalayan mountain salt knows to reflexively praise versatility in cookware. The only reason Alton Brown isn't a cult leader is because he hasn't figured out a good way to turn "avoid unitaskers" into a chanted mantra.
There is perhaps no piece of modern cookware less unitasked than a well-made Dutch oven. It'll boil, braise, roast, stew, fry, and bake anything you can put into it. Invest in a solid 6-quart model with an enamel lining to prevent acidic foods from acquiring a metallic taste.
Anything you start on the stovetop can be easily finished in the oven. Many models are campfire safe, meaning they can be buried in coals for that unforgettable, buried-in-coals taste. Invest in a heavy duty model and chances are it'll outlast your stove. Just try not to giggle too much when saying the name, or no one will trust your cooking.