19 Mistakes Everyone Makes When Baking A Cake
Despite the common expression, baking a perfect cake isn't always "a piece of cake!" Whether you're making an easy cake recipe or something far more complicated, cake-baking is far from child's play. The truth is, it's easy to make mistakes when baking a cake — you might be making some without even realizing it! There are some mistakes everyone makes when baking a cake that can result in uneven texture, cracks, holes, and more.
Luckily, most cake-baking mistakes are easy to avoid if you know what to look for. From starting with the right ingredients to giving yourself enough time to perfect the final cake, adopting the right baking habits will pave the way for phenomenal results every time: even layers with a tender, moist crumb, and gorgeous frosting evenly coating each and every inch.
With that in mind, here are some of the mistakes everyone makes when baking a cake — and the best ways to avoid making them and sabotaging your awesome cakes ever again!
1. Starting with cold ingredients
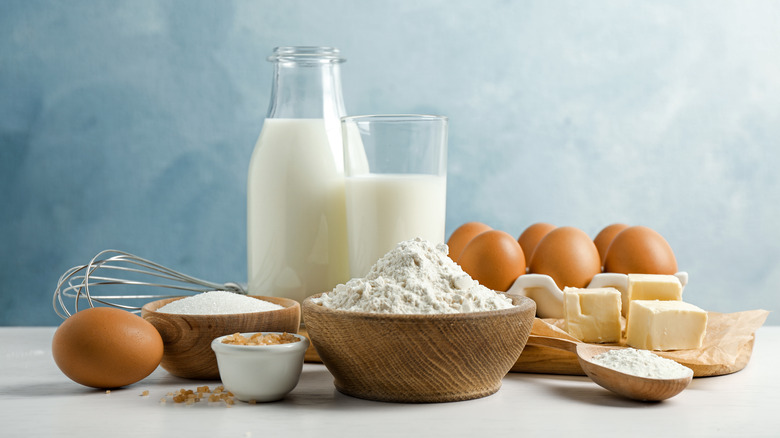
Despite what cake recipes would have you believe, baking a cake actually begins long before you preheat the oven. While many cake ingredients from eggs to butter to milk live in the fridge, it's essential to begin your cake recipes with room temperature ingredients.
As Sally of Sally's Baking Addiction explains, the reason behind this is purely scientific: it's simply easier to emulsify room temperature fat than cold fat! Room temperature butter creams better into sugar, and room temperature eggs don't just hold air bubbles better, lending a lighter, airier texture to baked goods; cold eggs also risk shocking your other ingredients (like the aforementioned creamed butter-and-sugar combo, for instance) curdling the fat and giving you a far from appetizing texture in your batter. (The same room temperature rules apply for pie crusts, too.)
So before you even begin your recipe — about an hour ahead of time, depending on the season — pull all of your ingredients together. Not only will this encourage you to have your mise en place ready to go (which means you'll never end up in the unfortunate position of realizing you're out of flour halfway through a recipe), but you'll also ensure that all of your ingredients are at the perfect temperature: room temperature.
2. Using expired leavener
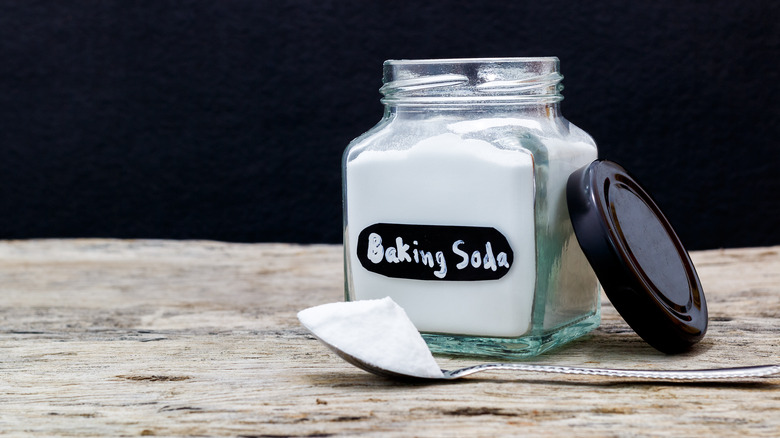
While you're assembling your mise en place and bringing all of your cold cake ingredients to room temperature, be sure to take a moment to check the expiration date of your leavener. Leavening agents like baking powder, baking soda, and yeast do indeed go off, and while using them after they expire isn't as dire as, say, using expired eggs, which could be hazardous to your health, it can keep your cakes from rising properly, according to Livestrong.
Baking powder usually lasts about 18 months in the cupboard, according to Livestrong, but if you're ever not sure, there's a simple test you can do to make sure it's still potent enough to help your cake gain that ideal fluffy texture. Iowa State University Extension and Outreach suggests mixing a teaspoon of baking powder into ⅓ cup of warm water. If the mixture bubbles, it's still good to use!
3. Assuming butter is better
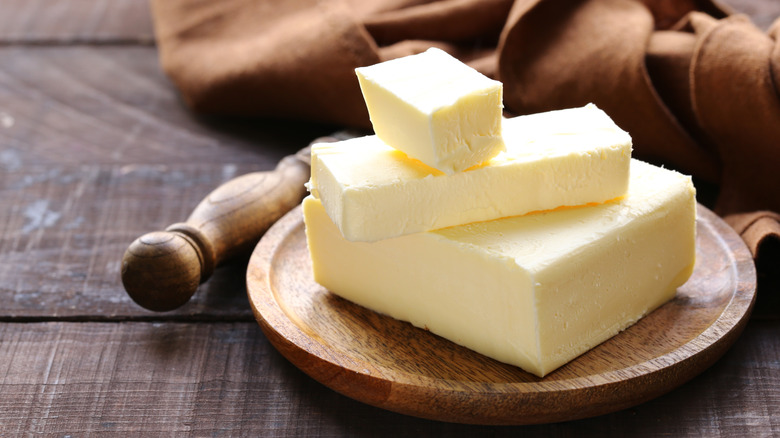
Rich, buttery cakes are certainly delicious, but oil has its place in cake-baking too! According to Epicurious, while oil certainly doesn't boast the flavor of butter, cakes made with oil often have a better texture than their butter-based counterparts.
This, the outlet explains, is due to the density difference between the two common cooking fats. Oil, Epicurious writes, is lighter than butter, contributing to a cake with a lighter texture. And oil is pure fat, as compared to butter, which also contains both milk solids and water. The latter strengthens the gluten structure of the flour, leading to a denser cake that won't be as tender as one made with oil.
While in some cases, like in a traditional madeira cake, this denseness is welcome, in an interview with cookbook author Rose Levy Beranbaum, Epicurious detailed some of the cakes that are actually better when made with oil. These include light chiffon cake and chocolate cake, which can have a tendency to be dry when made with butter.
4. Not measuring your ingredients properly
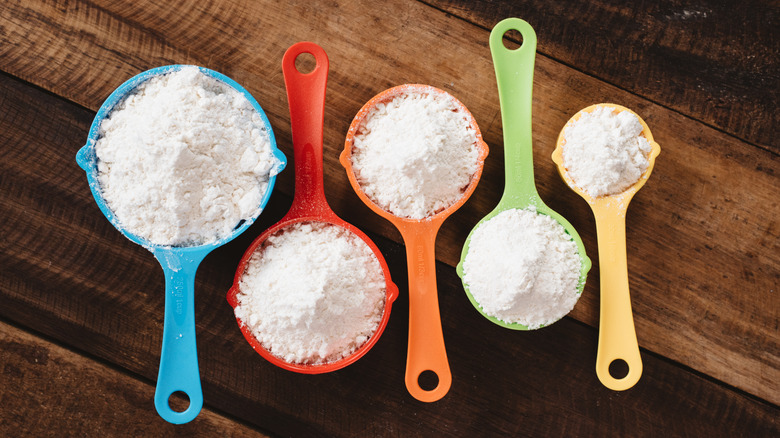
We find the commonly held idea that cooking is an art and baking a science a bit reductive, to say the least, but there is something to be said for a detail-oriented mentality in baking, specifically when it comes to measuring. Unlike in cooking, where a touch less salt or a bit more butter won't usually change the integrity of a dish, in baking, every gram counts. Literally.
While most American baking recipes use volume-based measures like cups and tablespoons, there's a reason why most European recipes — and most American pastry pros — use weight-based measures like grams. Investing in a small kitchen scale is a great way to make your cakes more consistent, but if you'd rather continue to use volume measures, it's essential to at least learn how to measure properly and avoid common measuring mistakes. After all, a packed cup of flour does not weigh the same as a compressed cup.
According to Sally's Baking Addiction, the best way to measure flour is using the "spoon and level" method. To do this, use a spoon to scoop flour out of a bag or jar and into your measuring cup, without packing it down. When you've reached the top of the cup, level any surplus back into the bag or jar. You'll end up with a far more accurate measurement.
5. Neglecting to sift the dry ingredients
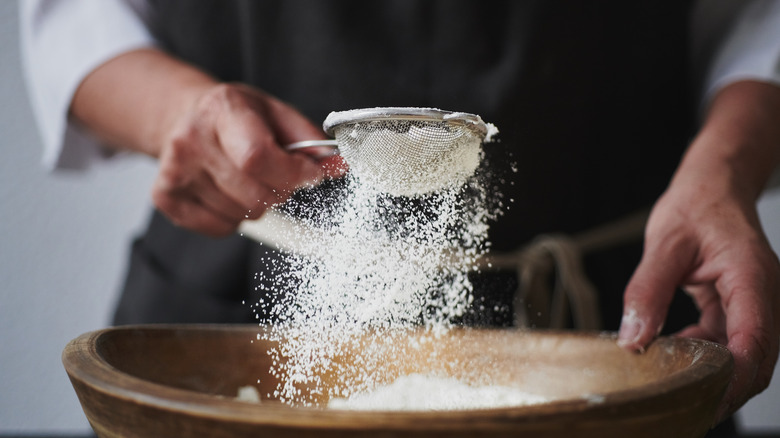
We've all fallen victim to laziness in the kitchen when it comes to sifting: after all, sifting the dry ingredients means one more dish to wash, and it certainly couldn't make that much of a difference on the final cake ... right? Wrong.
Neglecting to sift your dry ingredients is a huge cake-baking mistake. If you fail to sift the flour, this can lead to lumps in the batter and prevent your cake from rising properly in the oven. It also might result in pockets in your batter and thus in your final cake. Sifting also allows you to get an accurate measurement. If a recipe calls for 1 cup of sifted flour, this is a far different amount than if you'd used 1 cup of packed flour. It's also a great way to ensure that all of your dry ingredients are well incorporated with one another, which can help you avoid over-mixing your batter later on. So don't skip this essential step!
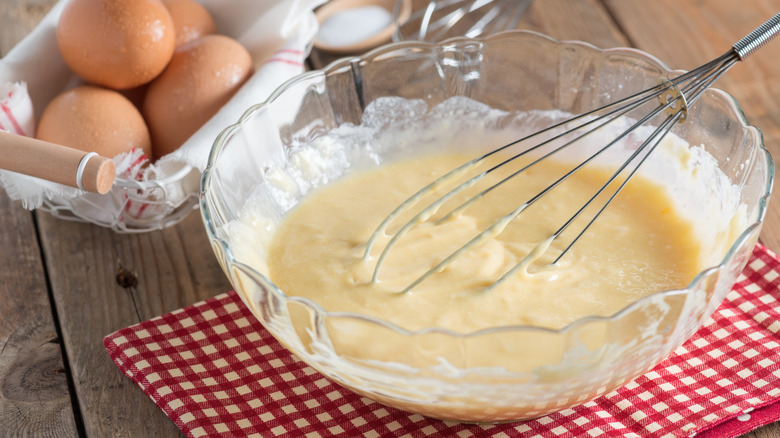
6. Overmixing the cake batter
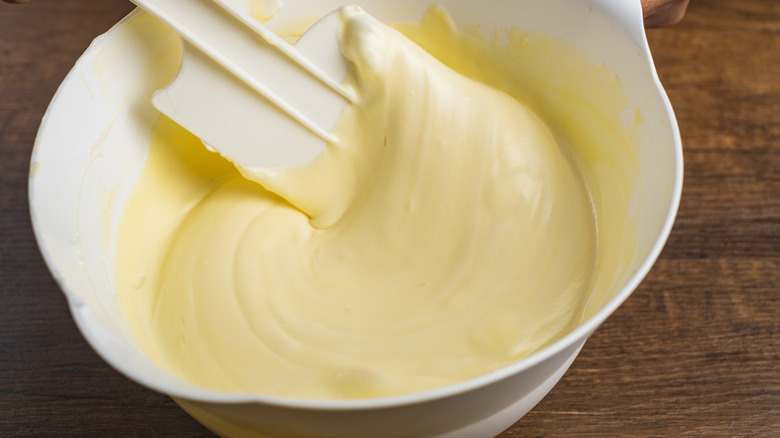
It can be tempting, especially for first-time bakers, to mix the batter until it's silky smooth. After all, there's no better way to have a lump-free cake than to have a lump-free batter, right? The reality is ... a bit more complex.
Flour naturally contains gluten, a protein that, when kneaded, forms the elastic structure we so desire in our chewy loaves of country bread or baguette. But when it comes to cake, you want something pillowy and tender, which means that you want to mix your flour as little as possible, hindering the production of too much elastic gluten.
The Cake Decorist recommends mixing cake batter only until the ingredients are just combined and any streaks of flour have been incorporated. Use long, broad strokes to bring the ingredients together, and as soon as no visible flour remains, stop! Any more, and you may have a tough cookie — er, cake — on your hands.
7. Undermixing the cake batter
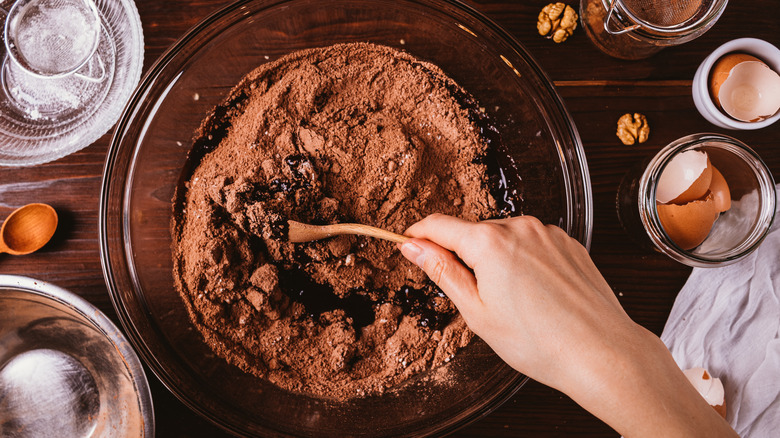
Of course, once you know about overmixing, another issue surfaces: undermining. Undermixing cake batter can occur at multiple steps of the baking process. To undermix at the last stage of mixing means you may have streaks or even clumps of flour, usually, the last ingredient added to cake batter, in your final mix. This can lead to a lumpy or floury finished cake.
But depending on the kind of cake you're making, you may also run the risk of accidentally undermixing at an earlier stage, especially if you need to cream butter and sugar together, or beat egg whites until they're fluffy and provide support for the final structure of a genoise or angel food cake.
As a rule of thumb, you only really need to worry about overmixing once a gluten-containing flour — like rye or wheat — is added. In earlier stages, make sure you mix until the desired texture is reached before moving on to the next step. If you've been patient and mixed well at each of these stages — and taken the care to sift your flour to remove any lumps — it should be pretty difficult to undermix the batter at the last stage.
8. Using the wrong pans
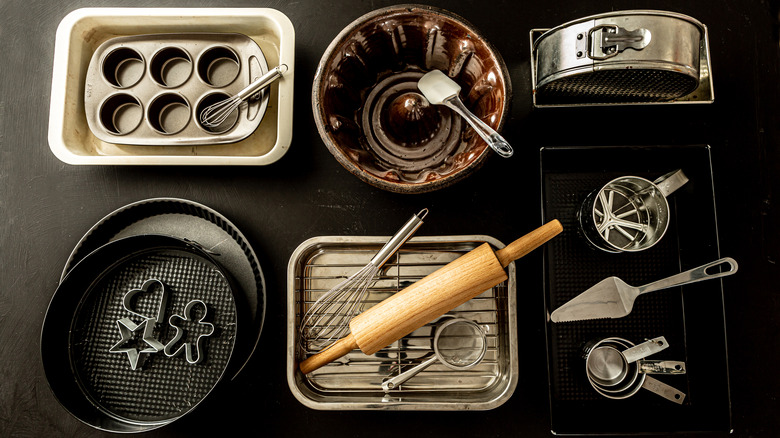
Whether a recipe calls for a 12-inch loaf pan, an 8-inch round cake pan, or a bundt pan, be sure you don't go off-script! Cake recipes render a certain volume of batter, and the recipe developer will have tested it using the pan they recommend. Using too big or too small a pan can lead to overflow or uneven baking, and using a different shape pan than the one called for might mean that the baking time isn't what the recipe promises.
Of course, if you're armed with a cake tester and a calculator, you won't need to buy more cake pans than you need! Food52 offers a guide to adapting any recipe to the cake pans you already have at home ... provided you understand that once you change up the pan, you're gonna need to pay far closer attention to signs other than the time indicated in the recipe to know when the cake is done.
And size isn't the only issue! Different materials, from aluminum to glass to cast iron, conduct heat in different ways. Choosing the right material for your baking pan is essential for a successful cake.
9. Forgetting to grease the pan
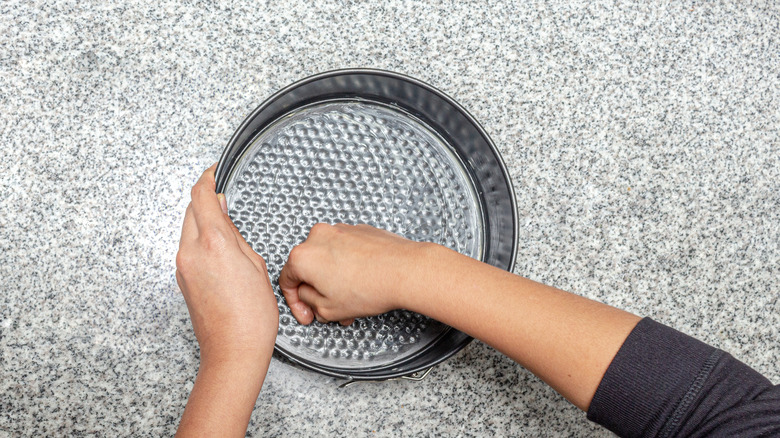
Since most cake recipes include some sort of fat, be it butter or oil, it can be tempting to forego the greasing of the pan, especially if it's a nonstick one. But do you really want to risk all that effort going to waste? There's nothing quite as disappointing as making a cake from scratch and patiently waiting for it to emerge from the oven, only to realize it refuses to come loose from the pan — or leaves behind chunks clinging to the sides or bottom.
Greasing a pan properly will ensure that your cake comes free from the tin easily, without leaving anything behind. Hummingbird Bakery also recommends the added precaution of lining the pan with parchment paper, which will slide easily from the pan and peel effortlessly away from the cake once it's baked. Use the bakery's guide to trimming the paper to fit any pan, and you'll be ready to go.
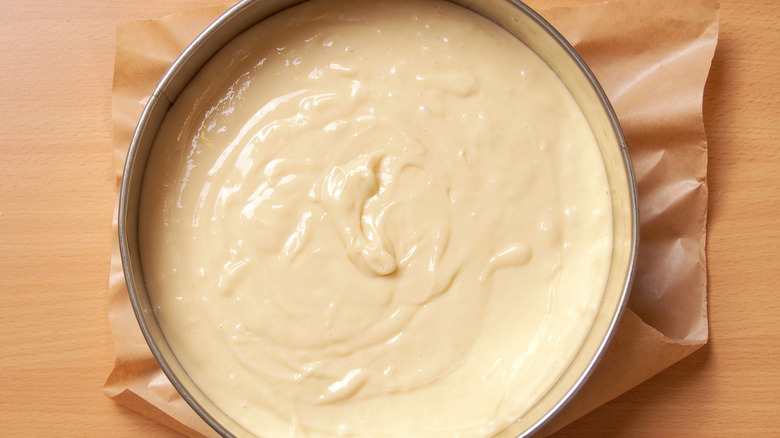
10. Not tapping the air bubbles out of the cake
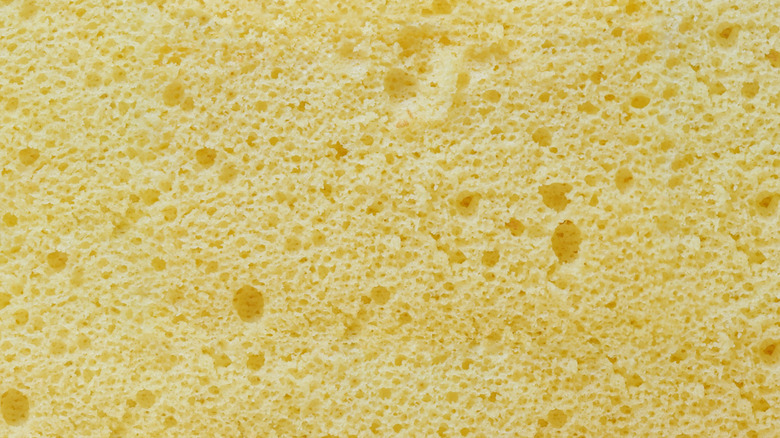
Once you've made your batter and poured it into your lined tin, it might seem like the next step is simply to slip it into the oven! But if you want a perfectly smooth cake top, there's one more step that's worth carrying out: tapping out any bubbles that have formed in the batter.
Bubbles can form in cake batter either from over-mixing or simply because of the presence of chemical leavener — either baking powder or baking soda — used to help the cake rise. It's a natural reaction, and there's nothing wrong with the bubbles per se, except that these air pockets can result in an uneven crumb in the final cake.
Luckily, there's an easy fix. Simply tap the sides of the cake tin to pop the bubbles just before you slip the cake into the oven. You'll be rewarded with a lovely, smooth top and an even crumb.
11. Letting the batter sit too long before baking
There's a reason that recipes call for preheating the oven before you do anything else. Unlike bread, which needs to rest before baking, cakes are designed to be baked immediately.
The reason for this comes down to the way that chemical leaveners work. Baking powder and baking soda react with the other ingredients in the cake batter, causing a chemical reaction that helps the cake to rise. You know that volcanic eruption experiment you did with baking soda and vinegar in school? Picture that, but tastier. And like with that volcanic eruption, you can't make the chemical reaction wait for you.
As the experts at Nigella explain, once a cake batter is made, it must be put in the oven immediately, so that it sets during the reaction, not after. Otherwise, the cake may begin to set only after the reaction has taken place. The result will be a dense fallen cake with none of the airy texture you're looking for!
While similar, baking powder works slightly differently than baking soda (an ingredient in the former), in that it actually causes two chemical reactions: one, like baking soda, when it's mixed with the liquid ingredients, and another when heated. A baking powder batter may thus be slightly more forgiving of delayed baking than one made with baking soda alone. Either way, the sooner you get it in the oven, the sooner you can eat cake!
12. Allowing the cake to dome
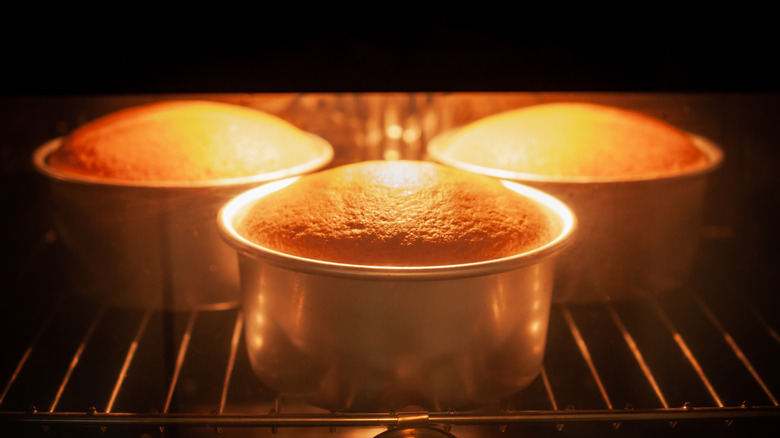
Sometimes, your cake seems to get a bit too big for its britches (and by britches, we of course mean cake pan). There's nothing really wrong with a doming cake in theory. It's still tasty, and if you are indeed layering it with other cakes and need that flat top, you can always slice off the puffy center with a serrated knife. But while we love nibbling on the cake scraps that result from this method of remedying this cake baking mistake, there is another way to get flat cakes that don't need to be trimmed quite so much.
To understand how to stop a cake from doming, it's important first to understand why this happens. As Magdalena, the professional baker behind the blog Yum Eating explains, cakes bake from the outside in: the material of the cake pan, be it glass or metal, conducts the heat from the oven, baking the edges faster than the middle. This means that the edges of the cake set while the middle is still rising, which occasionally results in a domed cake.
Magdalena offers several solutions to this possible problem, from lowering the temperature of the oven for more even baking to making a dip in the center of your cake to over-compensate for possible doming to wrapping the cake in cold cake baking strips to keep the edges cooler than the middle.
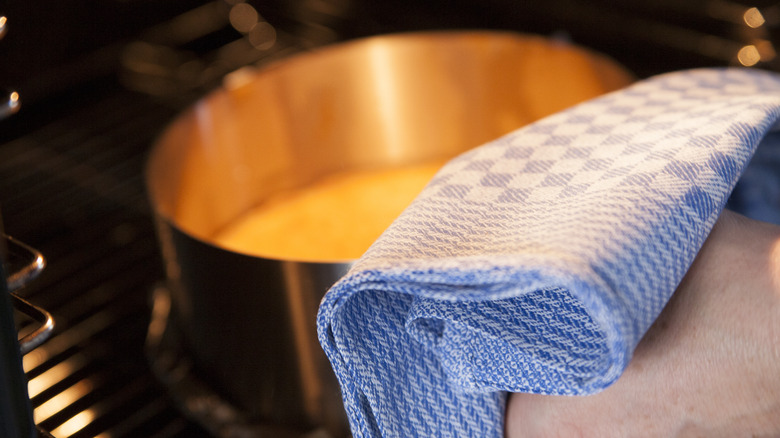
13. Peeking while it bakes

As your cake bakes, it will begin to release the most incredible aroma. But resist the urge to peek until your cake is done!
Opening the oven door to peek at your baking cake releases some of the heat, which can cause the oven temperature to drop. This may mean that you inadvertently extend the cooking time of your cake, and if you follow the recipe instructions, you risk underbaking it. This can lead to the cake being too damp in the middle or even falling, according to blogger Chelsweets.
Even if you compensate for your curiosity by baking your cakes a little bit longer, they may still fall if you peek due to the vibrations of the oven door closing. Chelsweets notes that if you do peek at your cake while it bakes, it's essential to close the oven door slowly and carefully to prevent this. Then again, it's probably better to resist the urge to peek entirely!
14. Not rotating the cakes
While we do discourage peeking at your cake while it bakes, you may need to open the oven door at least once during baking: to rotate your cakes. Most ovens don't heat evenly, which is why a lot of recipes call for baking things on the middle rack. But especially if you're baking multiple cake layers that won't all fit in the middle, it's a good idea to rotate them partway through baking.
Cook's Illustrated tested rotating even delicate cakes to see if they would fall and found that as long as you wait until the cake is set — about halfway through the baking time — even the most delicate cakes are no worse for the wear and even brown slightly better than their unrotated counterparts. And while we don't recommend you imitate the conditions of the team's experiment, "jostling them clumsily in order to drive the point home," it's good to know that you don't have to be ultra-delicate with a cake for it to turn out okay.
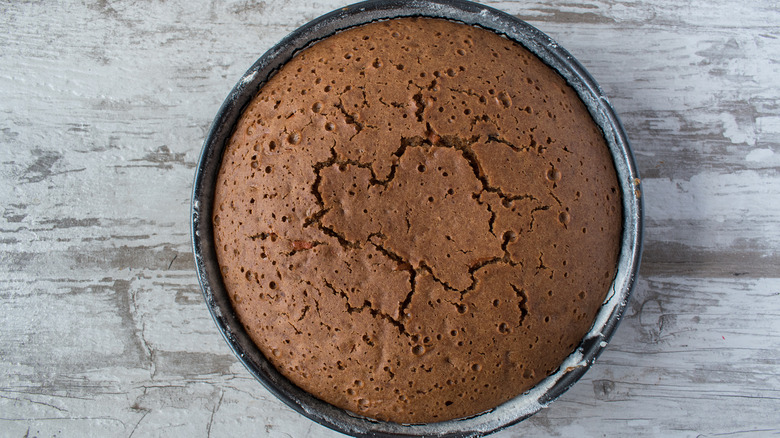
15. Underbaking your cake
Look, we get it. No one wants their cake to turn out burned or dry. And since the tops of cakes often brown early on during their time in the oven, it can be really tempting to assume that a cake is cooked through before it really is.
Your best bet in ensuring that you're taking a cake out at the right time is to use a cake tester, but if you still manage to underbake your cake, luckily there are a few solutions. Returning it to the oven — covering it with foil if it's too browned on the outside but underdone within — is perhaps the best solution. You may also want to reduce the oven temperature to help it cook through more evenly. But Leaf notes that if your cake has already collapsed, you can actually scoop the uncooked batter out of the middle of the cake and transfer it to a new pan to bake separately. Your cake may not look the way you expected it to, but it'll still taste good!
16. Overbaking chocolate cake
A lovely, golden-brown color is usually the ideal sign that your cake is cooked through. But what about if the cake was brown from the get-go?
Whether you're making a delightful chocolate sponge or a rich tunnel of fudge cake, chocolate cake to its perfect doneness is an art form, and many are the home bakers who have accidentally overcooked a chocolate cake because they didn't realize it was done until too late.
Luckily, King Arthur's Flour offers a few tips to cooking this the most difficult of cakes, to perfection: The edges of the cake will have pulled away from the pan, the top of the cake will transition from shiny to matte, and the surface of the cake will spring back when touched lightly (do this in test in the middle of the cake, which takes the longest to cook through!) Use a toothpick or cake tester to be sure: when it comes out clean with just a few crumbs attached, your cake is done!
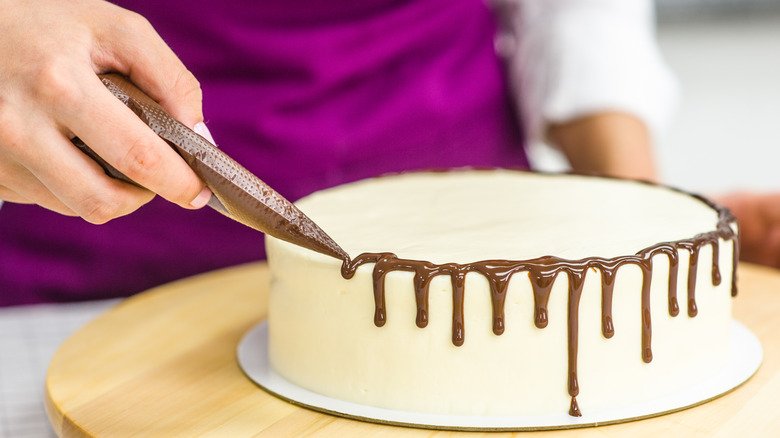
17. Frosting a warm cake
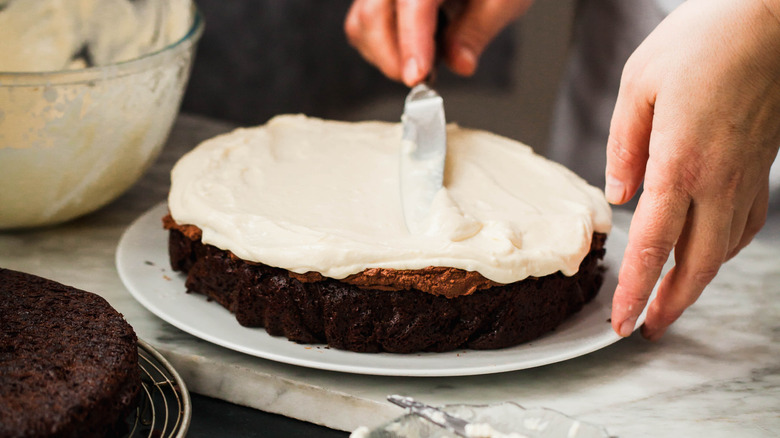
You've been patiently waiting for your cake to emerge from the oven, so of course the second it comes clean from the pan, you're ready to frost it and dig in! Unfortunately, if you want a really beautiful final result, you're going to have to wait a little longer: Frosting a hot or even a warm cake is a recipe for disaster. Don't make this frosting mistake.
Most frostings, from buttercream to cream cheese, rely on a fat that is solid at room temperature but liquid when warmed. This means that if you apply such a frosting to a still-warm cake, the fat in the frosting will melt, causing it to slide right off the cake. Give your cakes ample time to cool all the way through before attempting to level, stack, and frost: ideally it should be cool to the touch. It requires a bit of patience, but you'll have a much prettier result.
18. Forgetting the crumb coat
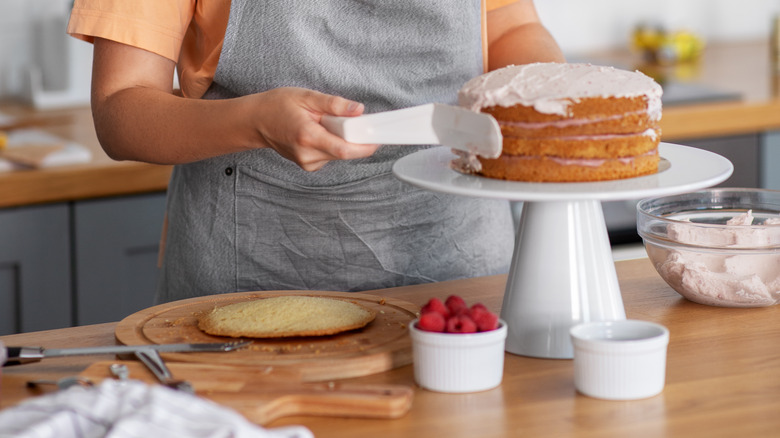
Much like nail polish, frosting should be applied in two coats. The first coat is called the crumb coat, and it serves an essential role that should be evident from its name: This frosting catches and contains any crumbs that come loose from the cake, ensuring that the final coat is smooth and pristine. But that's not all!
As cake expert Lindsay of Sprinkles for Breakfast writes, a crumb coat can also help you fill in spots where your cake might not be totally even, like gaps between layers or even jagged edges. It's sort of the last tool you have in your toolbox to help you overcome any missteps and ensure that the final cake looks as beautiful as possible. After crumb coating your cake, you'll want to chill it for 15 to 30 minutes to allow this layer to set before adding the final layer of icing and any decorations.
19. Rushing to bake fresh the day of your event

From bringing all of your ingredients to room temperature to baking your cake for just long enough to letting it cool to chilling the crumb coat ... cake-baking is indeed a time-consuming venture. And it can be a really fun one, provided you give yourself the time to proceed through these steps stress-free. As anyone who's tried to bake a cake the morning of a big dinner party can attest, baking with a deadline can be super stressful. This is why you might want to do at least some of the work the day before!
According to Betty Crocker, both cake layers and frostings can be made a day or two in advance and stored, tightly wrapped or sealed, until ready to use. You can even make and crumb coat your cake a day in advance and wrap it in plastic until you're ready to apply the final layer of icing and any decorations!