The Angel Food Cake Recipe You've Been Looking For
Angel food cake is a timeless, classic dessert. As good as a slice of heaven. Tall, light, fluffy, and chewy with a sweet crumb. Made with just a few ingredients, you'll be wildly impressed just how marvelous this cake truly is without any butter or egg yolks — two ingredients that traditionally contribute to the richness of cake. No matter what you make it with, this classic cake is sure to be a hit with kids and adults alike, and you'll want to serve it up all the time.
As you'll learn though, this recipe takes an excessive amount of egg beating, and hand-beating eggs is a hard, laborious process! If you want to beat your eggs by hand for this recipe, you totally can. But since it's so much work, it's definitely a lot easier if you have a mixer.
Follow along as Chef Tara Rylie of RylieCakes walks you through how to make this cloud-like angel food cake to perfection.
Pulse and sift and sift again for this angel food cake
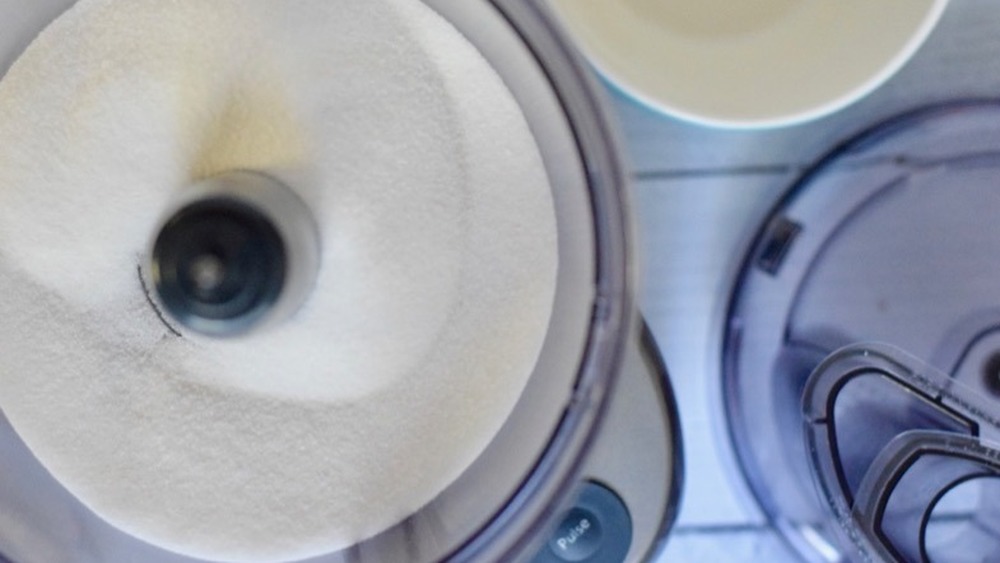
To make this angel food cake as light and airy as it should be, you don't want to skip all the extra little steps to make the sugar extra fine and the flour just a little bit softer. The first step in this recipe is to process all the sugar on high in a food processor for a couple minutes until it resembles caster sugar. Caster sugar is a super-fine sugar, between sugar and powdered sugar in coarseness. You could just buy caster sugar, but it's not always easy to find, and you probably wouldn't use it often. Pulsing regular sugar works perfectly well here and means you don't have to buy extra ingredients.
After running your sugar through the food processor, you'll sift half of the sugar with your salt and flour and set the remaining half aside. The finer your flour, the lighter your cake, so don't skip this step!
The best way to separate eggs for your angel food cake
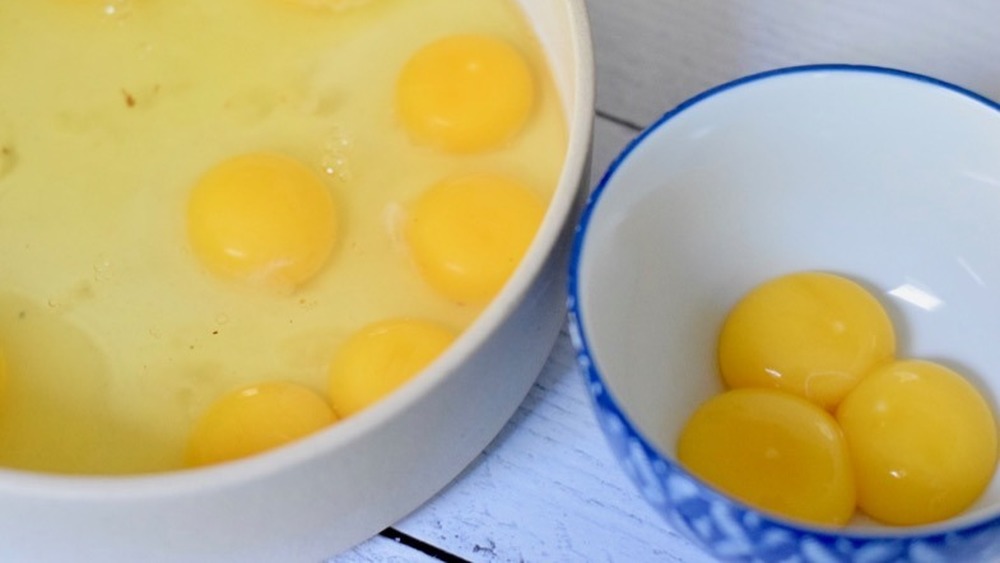
This angel food cake recipe calls for a dozen eggs. So, as you can imagine, the heart and soul of this cake relies on the egg whites and whipping them up just right. One thing to note here is that egg whites won't whip if any fat is present. That means if you accidentally get some yolk in your whites, you've got to start over. So we recommend cracking all your eggs into one large bowl and then separating out the yolks by hand. This will ensure you have clean whites to whip up.
It also helps to wipe down your mixing bowl and whisk attachment with lemon juice to remove any fat residue from previous use.
Whisk your egg whites right for this angel food cake recipe

In your stand mixer fitted with a whisk attachment, whisk your egg whites, water, citrus extract of choice, and cream of tartar on medium-low speed until soft peaks form. This will take approximately five minutes. For this recipe, we chose to use blood orange extract, but regular orange, lemon, or lime extract would all work well here. And note, citrus extract is far different from, say, lemon juice. Do not use fresh squeezed lemon/orange/lime juice in place of extract. If all you have on hand is vanilla extract, go ahead and use that!
Once soft peaks form, slowly add your set-aside sugar one tablespoon at a time. Then, increase mixer speed to medium-high and continue to whip until medium peaks form. The meringue should hold its shape when the whisk attachment is lifted out of the mixture, but the peaks should roll over themselves rather than stick straight up.
Fold your angel food cake batter lightly

Angel food cake is a tender, delicate cake, and so is its batter. The trick to folding in your sifted flour mixture is to actually fold as little as possible. The best way to do this is to sift your flour mixture over the meringue in three separate batches, folding your batter gently with a spatula in between each addition. In case you're wondering, yes, you are sifting your already-sifted flour mixture. Remember, we want this cake as light and fluffy as possible. The smaller the granules of flour, the better.
Spoon batter into the pan for this angel food cake recipe
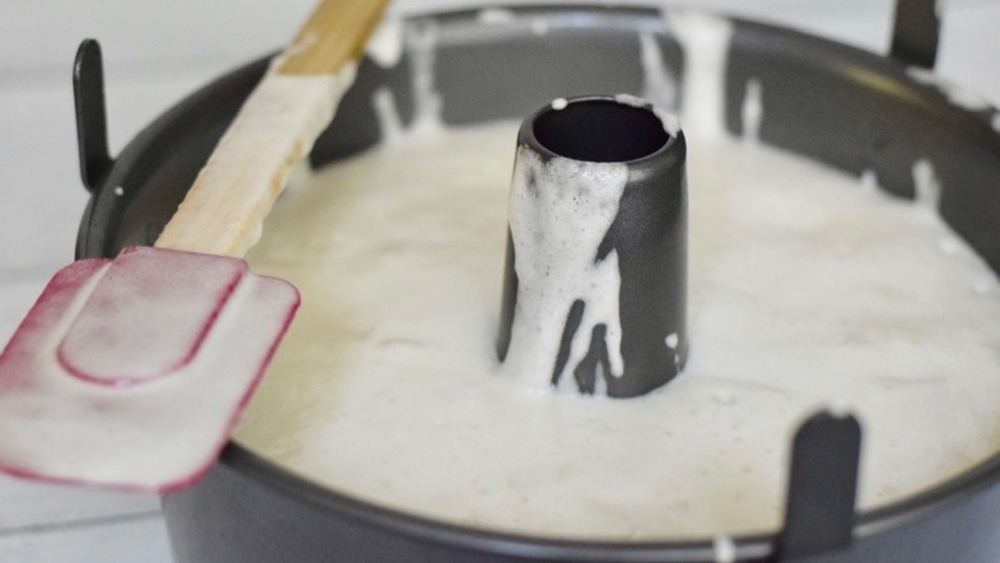
The final and yet nearly most important step: Spoon your batter into an un-greased pan as opposed to pouring your batter into the pan as you would with most cakes. We know this step probably goes against everything your mom or grandma taught you, but here's why you want to do it this way.
Angel food cake rises by climbing up the side of your pan, and it does this by clinging to the sides as it bakes. Therefore, you don't want to grease the pan. An un-greased pan will allow for a beautifully tall angel food cake.
As for spooning your batter rather than pouring it — this protects your whipped egg whites. If you pour the batter into the pan, the pressure will deflate your whipped whites, and your cake will have issues rising. So there you have it, and we'll say it again: Spoon your batter into an un-greased pan.
Cool angel food cake upside down
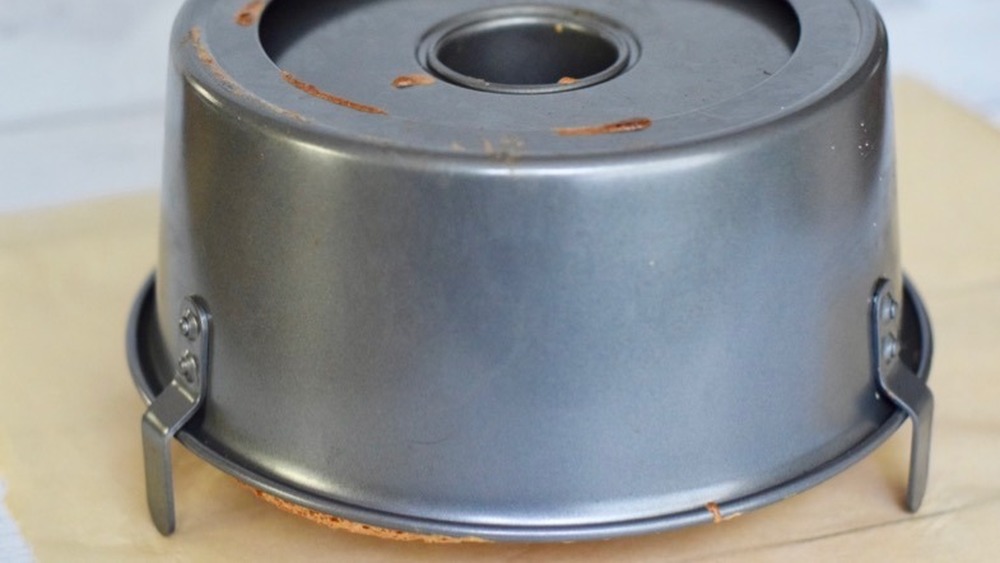
We're almost there! There's just one last step to make sure this cake is tall, tender, light, airy, and fluffy as it should be and that's to cool the cake upside down. This ensures the cake doesn't collapse on itself while cooling, and we promise you, your cake won't fall out of the pan.
Angel food cake pans are actually designed with little legs on them so that when you flip your cake upside down to cool, the legs lift the pan about an inch off the counter. If you don't have a pan like this and are just using a tunnel cake pan, then use a funnel or wine bottle to support your mold. Simply flip your cake upside down and place your funnel or wine bottle through the center hole. This will support your cake and keep it raised off the counter while it cools.
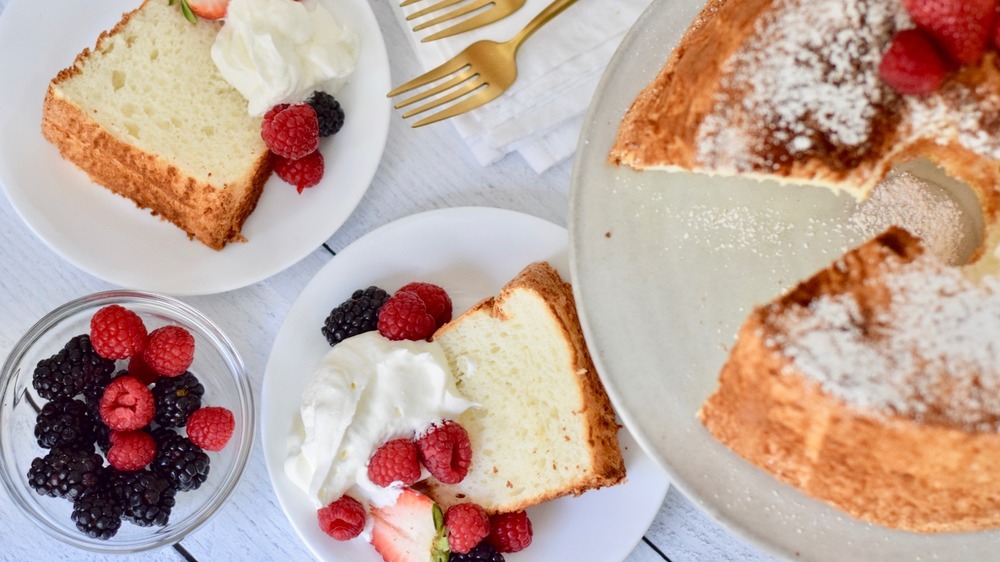
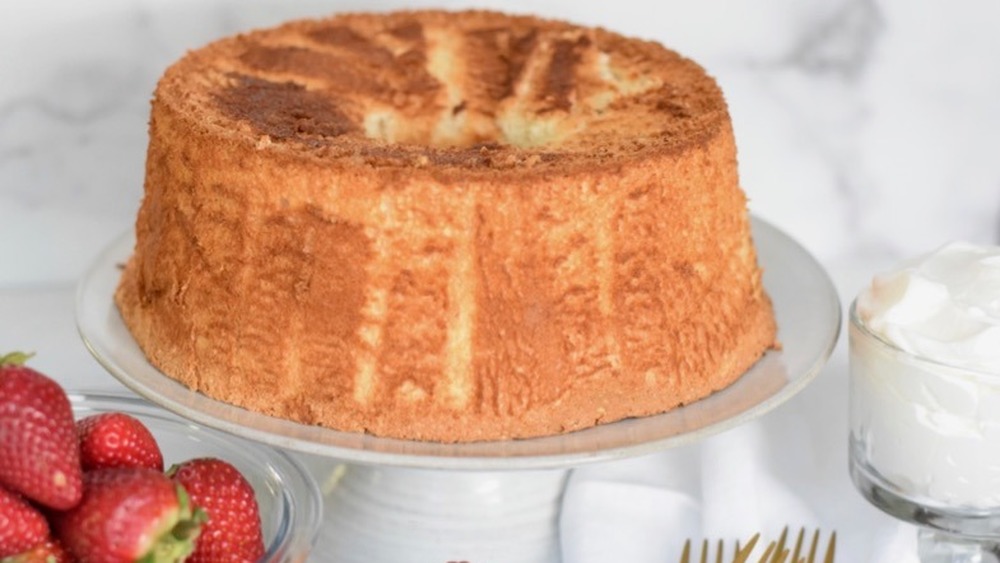
When ready, enjoy this marvelous cake with whipped cream and fresh berries. After all this work, you deserve it!
Angel food cake directions
Angel food cake is a timeless, classic dessert. As good as a slice of heaven. Tall, light, fluffy, and chewy with a sweet crumb.
Ingredients
- 1 ¾ cups + 2 tablespoons sugar, divided
- ¼ teaspoon salt
- 1 cup cake flour, sifted
- 12 egg whites
- 1/3 cup warm water
- ½ teaspoon citrus extract
- 1 ½ teaspoon cream of tartar
Directions
- Preheat oven to 350 degrees Fahrenheit, half fan. Do NOT grease tube pan.
- In food processor, pulse sugar on high for 1 minute until it is super fine. Set half of the sugar aside (approximately 1 cup) and sift the remaining half with salt and cake flour into medium bowl.
- In stand mixer fitted with whisk attachment, whisk egg whites, water, extract, and cream of tartar on medium-low speed until soft peaks form, approximately 5 minutes.
- Once soft peaks form, slowly add the set-aside sugar 1 tablespoon at a time. Increase mixer to medium-high and continue to whip until medium peaks form. The meringue should hold its shape when the whisk attachment is lifted out of the mixture but, the peaks should roll over rather than stick straight up.
- Sift flour mixture over the meringue in three batches, folding gently with a spatula in between each addition. The trick here is to fold as little as possible while incorporating flour mixture into meringue.
- Carefully spoon mixture with spatula into an un-greased tube pan. Do not pour. Bake for approximately 45 minutes — a toothpick should come out clean when inserted.
- Cool upside down and elevated before removing from pan. Wait at least one hour.
- After removing cake from pan, serve with whipped cream, fresh fruit, powdered sugar, or even a dollop of lemon curd! Store leftovers in an airtight container in refrigerator or on counter for up to 4 days.
Nutrition
| Calories per Serving | 212 |
| Total Fat | 0.2 g |
| Saturated Fat | 0.0 g |
| Trans Fat | 0.0 |
| Cholesterol | 0.0 mg |
| Total Carbohydrates | 48.7 g |
| Dietary Fiber | 0.2 g |
| Total Sugars | 37.7 g |
| Sodium | 111.9 mg |
| Protein | 4.6 g |