Onigiri Recipe
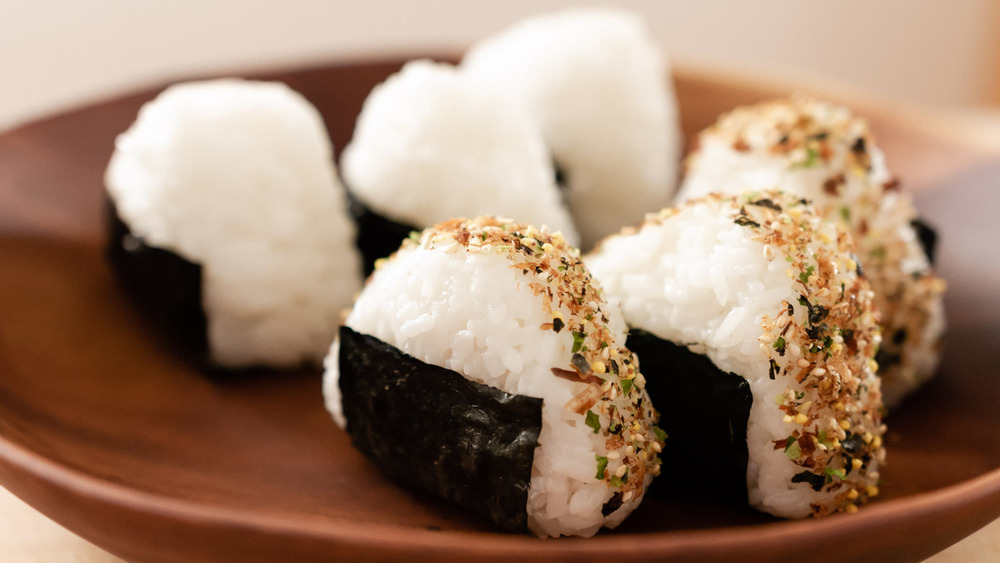
Japanese cuisine is so much more than sushi. It's one of the most creative cuisines in the world, and this onigiri recipe is a perfect example of Japanese cuisine's simplicity and beauty. Onigiri are stuffed rice balls or triangles, wrapped in nori (dried seaweed), and served in Japan as a snack, lunch, or side dish. This easy recipe for onigiri was created by chef and nutritionist Cindy Chou, whose blog Healthy Feels features plant-forward recipes that are inspired by her Taiwanese background. She's also a food stylist, and the stunning photographs of her culinary creations are intended to awaken all of the senses.
Chou's onigiri recipe may look challenging to make, but this recipe is surprisingly easy. If you can make rice — and we'll guide you how to cook perfect rice — then you can make this simple and elegant recipe for onigiri that are perfect for picnics and bento boxes.
Gather the ingredients for this easy onigiri recipe
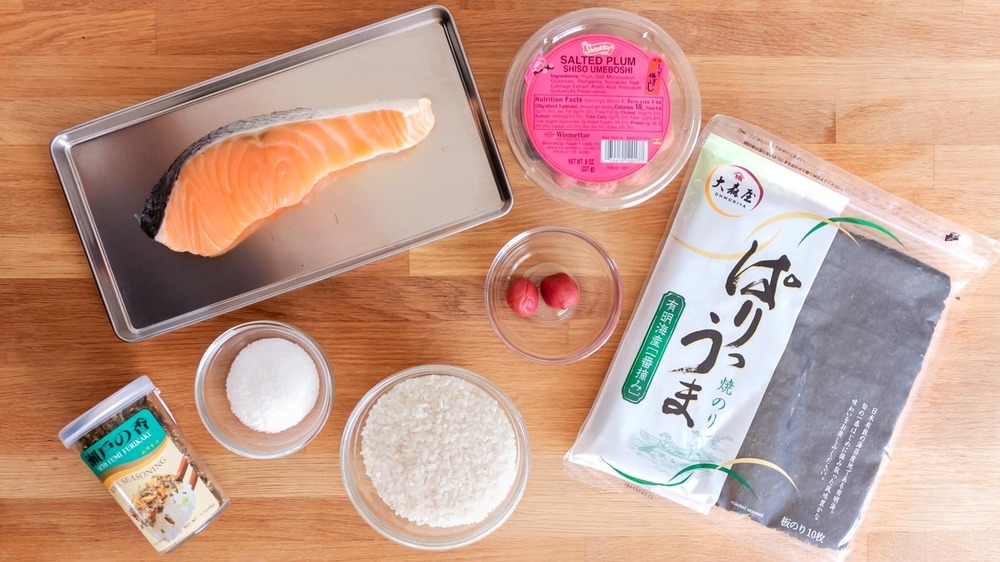
There are only a few ingredients in Chou's onigiri recipe. For one of the fillings, Chou uses fresh salmon — one of the most popular fillings in Japan — but other fillings for onigiri include tuna with mayonnaise, chopped chicken, shrimp, or chopped vegetables. Once you've mastered Chou's version, use your imagination and try other fillings.
Chou's second filling is umeboshi — another Japanese favorite — or salted plum, which you can find in any Asian food market, where you'll also find furikake, a Japanese condiment made of nori (dried seaweed), toasted sesame seeds, salt, sugar, and sometimes bonito (dry fish) flakes. There are many varieties of furikake (not all include fish) that are sprinkled on rice, vegetables, and even oatmeal. Nori sheets are readily available in most supermarkets, and for the rice, Chou recommends white, short-grain rice.
Bake then flake the salmon for this easy onigiri recipe
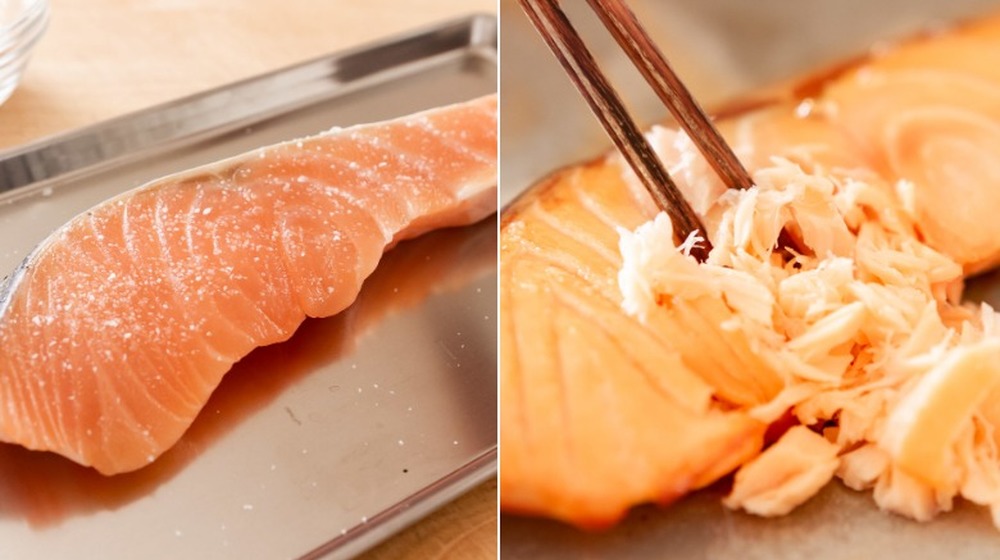
The first step in this onigiri recipe is baking the salmon. Preheat the oven to 400 degrees Fahrenheit. Pat the salmon filet dry with paper towels. Line a baking sheet with parchment paper, and lay the salmon steak on the parchment. Season both sides with one teaspoon of kosher salt (or if you're using table salt, reduce the amount by half.) If you prefer a saltier salmon filling, you can salt the filet one day in advance. Put the salted salmon in a covered container that you've lined with paper towels, and store it in the refrigerator overnight.
This process for salting fish — widely used in Japan — seasons the salmon, eliminates any potential fishy odor, and keeps the fish moist. Some Japanese markets sell salted or cured salmon in jars that can be found in the refrigerated section. Once you've salted the salmon, bake it for 15 to 20 minutes. When the salmon is done, use chopsticks or two forks and flake the fish into small pieces while removing the skin and any pin bones.
Rinse and cook the rice for this onigiri recipe
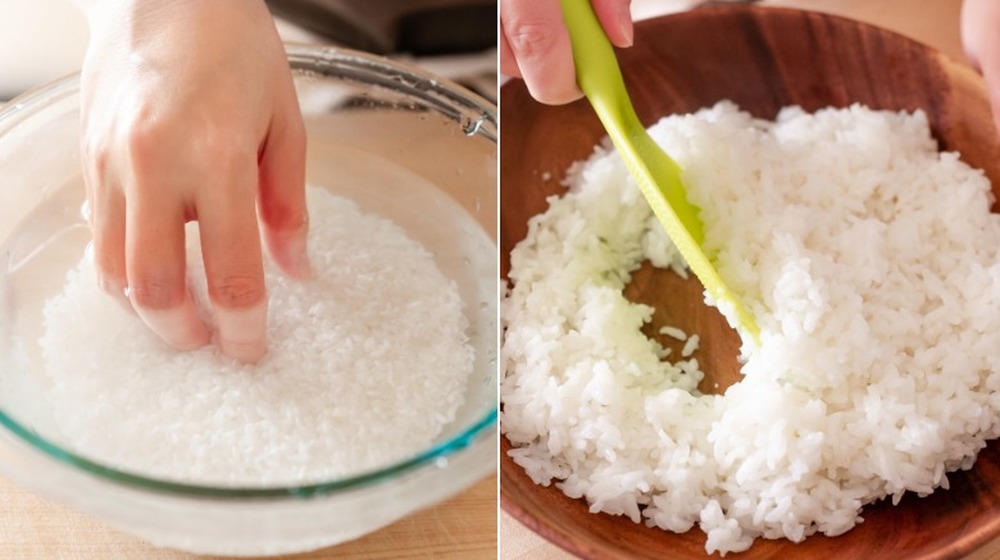
While the salmon is baking, it's time to cook the rice for this onigiri recipe. An essential step for cooking rice is rinsing it several times first. "It's well worth the extra few minutes of prep," Chou told us. "It gets rid of excess surface starch from the rice grains so you don't end up with mushy rice." By rinsing the rice, the cooked rice will be slightly sticky (which it needs to be for making the balls), yet individual grains will retain texture. Chou recommends rinsing the rice three times. Fill a bowl with cold water and the uncooked rice. Swish the rice around by hand, then drain it through a fine mesh strainer. By the third time, the water should be clear with no cloudy residue.
Transfer the rinsed rice to a saucepan and add 1-1/4 cups of fresh water. Bring to a boil over medium-high heat. When the rice starts to boil, cover the saucepan and immediately lower the heat to low. The rice will be done in 15 minutes. (If you're using a rice cooker, combine the rinsed rice and water, cover, and cook according to your device's instructions.) Transfer the cooked rice to a large plate, and spread it out to cool.
Deseed the umeboshi for this onigiri recipe
Umeboshi are fermented and pickled Japanese plums (via Eat This, Not That!) and are hailed for their taste and supposed medicinal qualities. Umeboshi are exceedingly sour and salty, but they can be used to add umami to vegetables and rice, which makes it one of the top choices for filling onigiri. If you're unable to find umeboshi, Chou suggests using another pickled fruit or vegetable. "Get creative, and see what flavor combinations you like!"
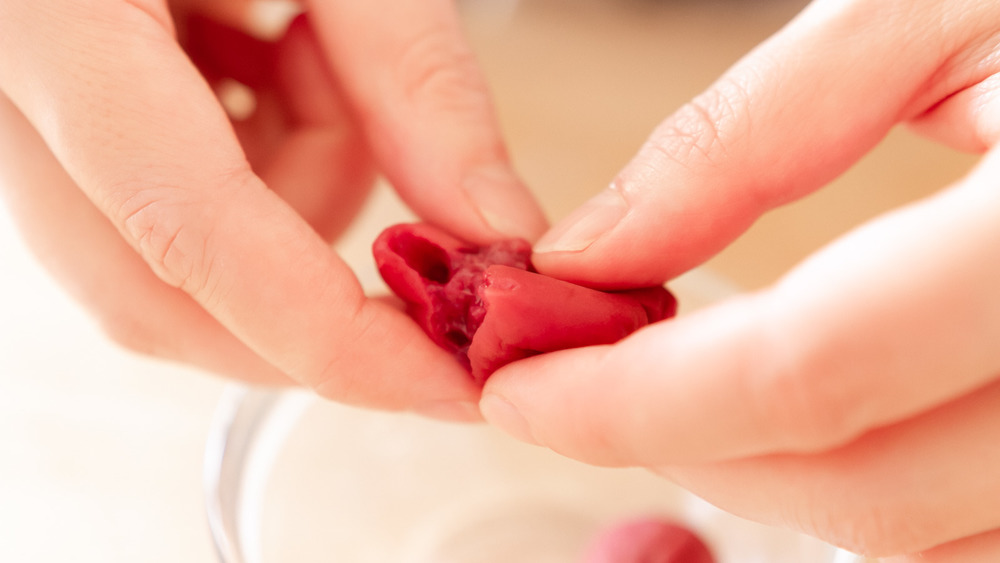
Umeboshi have a large pit that needs to be deseeded before preparing it for the filling. It's easy to do, and since you only need two umeboshi for this recipe, it will take no time at all. Gently press the umeboshi with your fingers, and separate the fruit into three small pieces. Pluck out the pit and discard. That's it! You'll be using two pieces of umeboshi for three onigiri, so try to divide the pieces evenly.
Fill portions of rice with salmon or umeboshi for this onigiri recipe
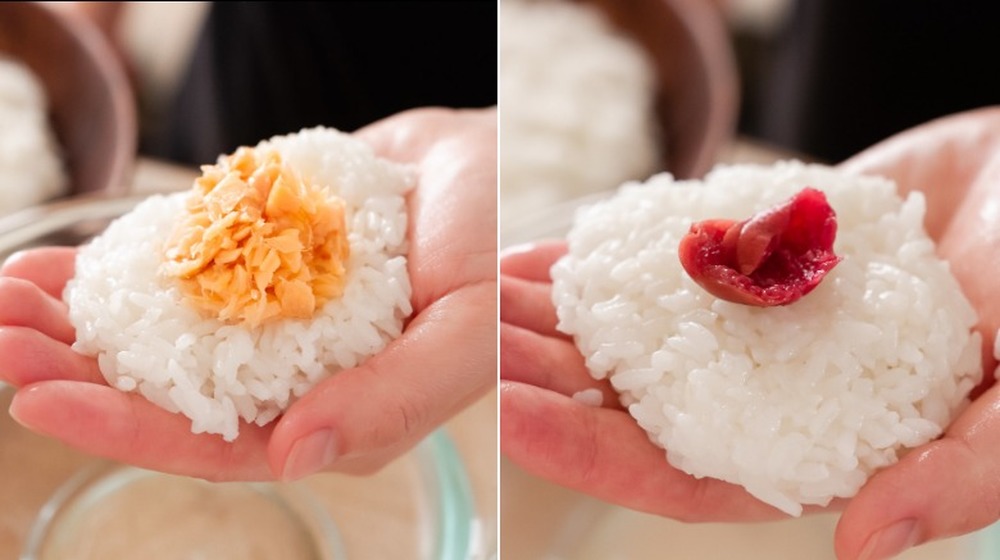
With your onigiri recipe fillings ready and your rice cooled, it's time to stuff the onigiri. Fill a bowl with water to wet your hands while you're making the onigiri, and have a clean kitchen towel handy. Dip your hands into the water, then rub your palms together to get rid of excess water. This will prevent the rice from sticking to your hands. Any time the rice begins to stick, simply wet your hands again. Divide the rice into six equal portions.
Place one rice portion into the palm of your non-dominant hand. Put about one teaspoon of either the salmon filling or two pieces of umeboshi in the center of the rice. Press the filling with the thumb of your other hand, while you form the rice around the filling. If you don't want to form the onigiri with wet hands, Chou recommends using plastic wrap instead. But she actually finds it easier to form the rice in her hands.
Form the onigiri into balls then shape them in your hand
Although some onigiri are shaped like balls (usually the size of a tennis ball), most onigiri are shaped by hand as thick triangles. Even though it's very easy to do, a plethora of videos demonstrates how to make onigiri, and there are even plastic triangular molds into which you can stuff the rice. (We do wonder how you get the onigiri out of the mold without it falling apart.)
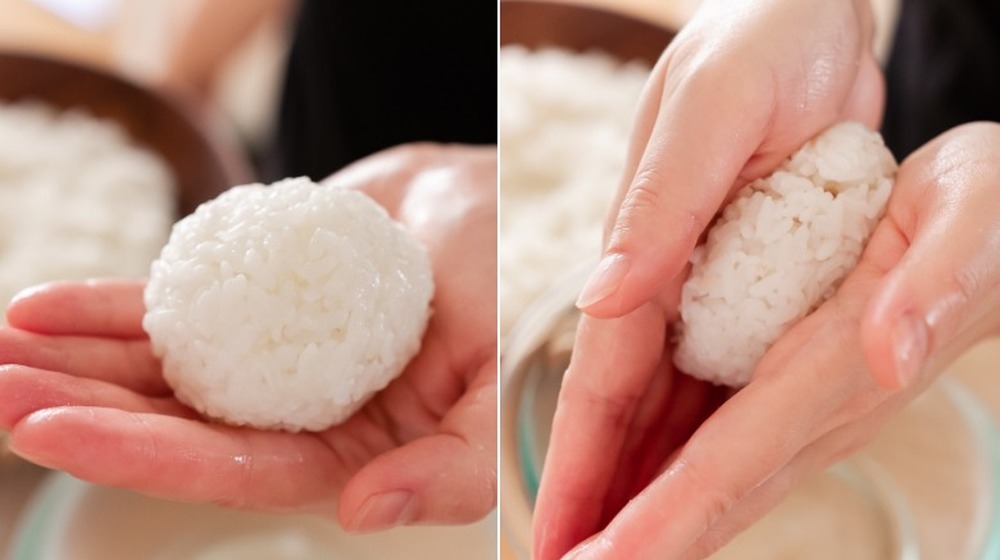
Chou's method in this onigiri recipe is the simplest. With the rice and filling in the palm of your hand, gently shape it into a ball, squeezing slightly so the rice holds together and retains its shape. Squeezing between both of your hands, flatten the ball to resemble a hockey puck. Now, mold the onigiri into a triangle. Chou recommends the triangle should be about one or 1-1/4-inch thick with 2-1/2-inch edges. Repeat with the remaining rice and fillings, and set the onigiri aside, making sure they're separated so they don't stick together.
Cut the nori into strips for this onigiri recipe
Nori sheets are pre-toasted, and you want to keep them dry so your onigiri have a crispy texture when assembled. The nori sheets may absorb moisture from the air, so keep them covered or in their packaging until just before serving this onigiri recipe. You might be able to find pre-cut nori sheets at a Japanese market, but Chou prefers the nori sheets that are made for making sushi, which are easier to find.
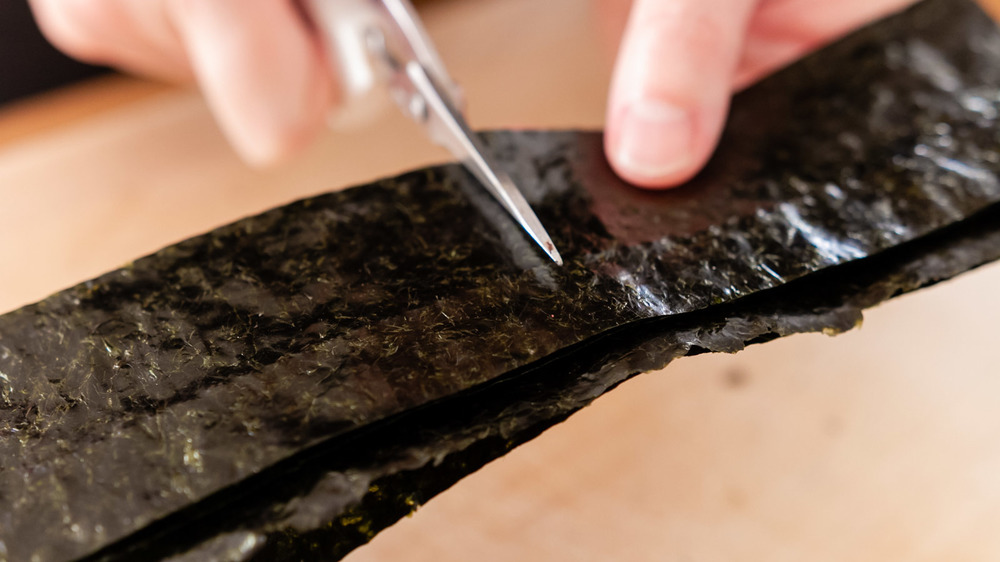
For this recipe, you'll need six to eight nori sheets. If you have any leftover nori, you can use it for plating the onigiri or save it (well-wrapped) for later. Before you cut the nori into strips, dry your hands thoroughly. For the larger nori sheets for sushi, cut the nori into eight strips with kitchen shears. Use the perforated lines on the nori as a guide for cutting straight edges.
Apply the nori and coat the onigiri recipe with furikake
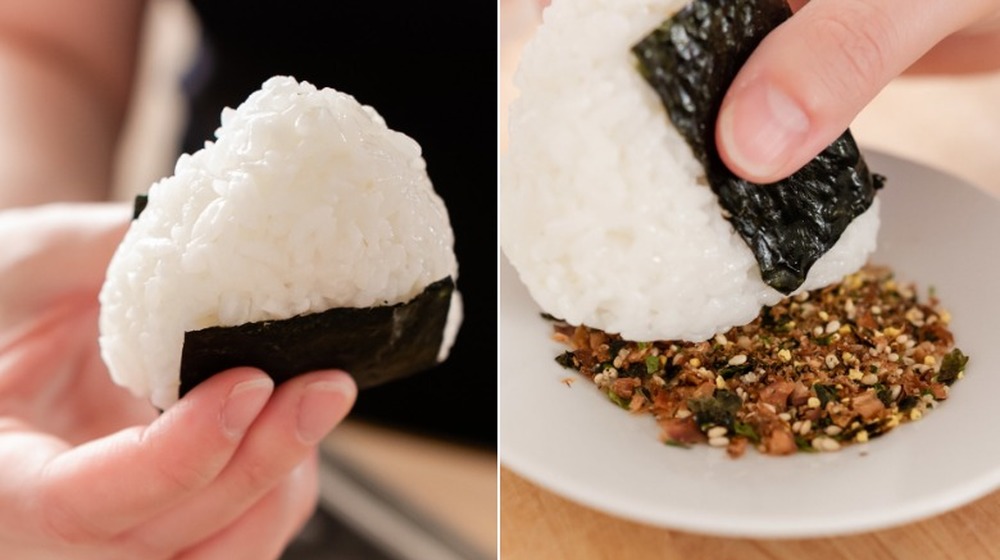
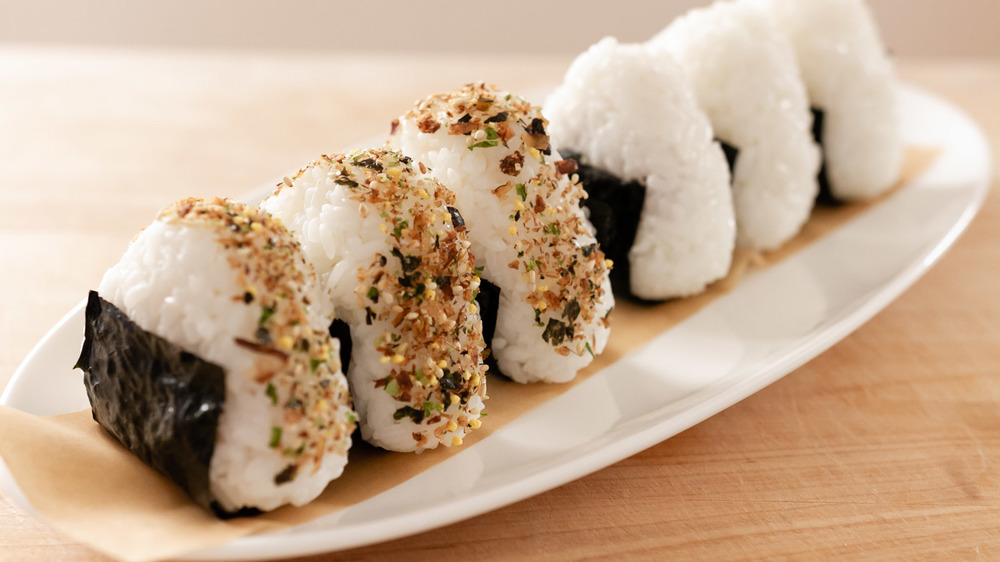
You're now at the final step right before serving this onigiri recipe. Cover the bottom of each onigiri with one of the strips of nori you've just cut. Transfer the umeboshi-filled onigiri to a serving plate. Traditionally, umeboshi onigiri are not coated with furikake, but for the salmon-filled onigiri, it's a must. Spread some furikake on a small plate. Pick up one of the three salmon onigiri by the nori strip, and coat the top two edges by pressing each side into the furikake.
Transfer it to the serving plate, keeping the salmon onigiri separate from the umeboshi. Coat the remaining two salmon onigiri, and you're ready to eat this delicious and healthy Japanese snack that's so easy and fun to make.
Onigiri recipe directions
It make, but this onigiri is surprisingly easy. If you can make rice — and we'll guide you how to cook perfect rice — then you can make this simple recipe.
Ingredients
- 4-ounce salmon fillet, about 1 inch thick
- 1 teaspoon kosher salt (or 1/2 teaspoon table salt)
- 1 cup uncooked short grain white rice, rinsed
- 1-1/4 cup water
- 2 umeboshi (Japanese pickled plum)
- 1 sheet nori (seaweed), cut into 8 equal size strips
- 1 tablespoon furikake
Directions
- Preheat oven to 400 degrees Fahrenheit.
- Pat the salmon dry with paper towels. Line a small baking sheet with parchment paper, then place the salmon on the sheet. Season both sides with salt.
- Bake 15 to 20 minutes until well done and flaky. Using chopsticks or two forks, flake the salmon, removing the skin and any pin bones.
- Rinse the rice three times in cold water and drain. Place rice and water in a small saucepan, and bring to a boil over medium-high heat. When the water boils, immediately cover with a lid and reduce the heat to low. Simmer 15 minutes. Transfer the cooked rice to a serving dish and allow it to cool completely. If you're using a rice cooker, combine the rinsed rice and water, cover, and cook according to your device's instructions.
- Deseed the umeboshi by gently pressing it with your fingers to divide each one into three small pieces, and remove the seed.
- Fill a bowl with water and wet your hands, rubbing your palms together to get rid of excess water. (You can moisten your hands any time if the rice starts to stick.)
- Place one-sixth of the cooked rice in the palm of your non-dominant hand. Place about 1 teaspoon of salmon or 2 pieces of umeboshi in the center of the rice. Press the filling with the thumb of your other hand while you form the rice around the filling.
- Form the rice into a ball shape while gently squeezing with both hands. Flatten the ball into a puck shape, then mold the rice into a triangle. Each onigiri should be about 1 to 1-1/4-inch thick with 2-1/2-inch long edges.
- Set aside until all of the onigiris are filled and formed. Keep them separated so they won't stick together. Repeat the same steps using the remaining rice and fillings.
- With a clean dish towel, dry your hands before handling the nori. Just before serving, cover the bottom edge of each onigirl with a strip of nori.
- Put the furikake on a small plate. For the salmon onigiri, coat the top two edges by pressing each side into the furikake. Serve as a snack or as a side dish.
Nutrition
| Calories per Serving | 167 |
| Total Fat | 2.8 g |
| Saturated Fat | 0.6 g |
| Trans Fat | 0.0 |
| Cholesterol | 10.4 mg |
| Total Carbohydrates | 28.3 g |
| Dietary Fiber | 0.3 g |
| Total Sugars | 2.2 g |
| Sodium | 286.5 mg |
| Protein | 6.2 g |