11 Meal Prep Hacks That Will Save You Time And Money
 Shutterstock
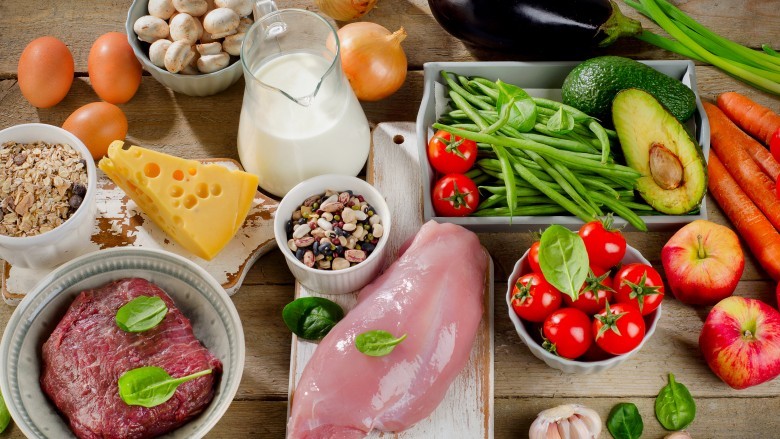
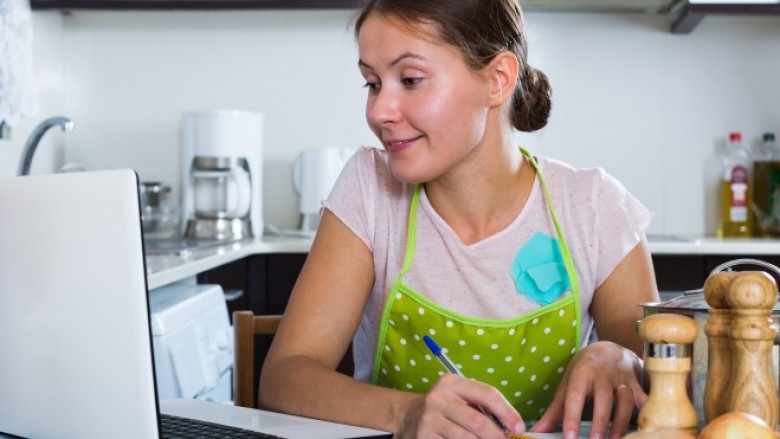
Congrats! You've made the decision to start meal prepping, a surefire way to healthify your family's diet and give a healthy boost to your wallet. Maybe you're already a meal prep pro, with a fridge and freezer full of meals to last you the next seven days. But it never hurts to pick up a few more tricks to add to your meal-prepping arsenal. The following are my absolute favorite meal prep tips to get you through the week. I promise they'll save you time and money.
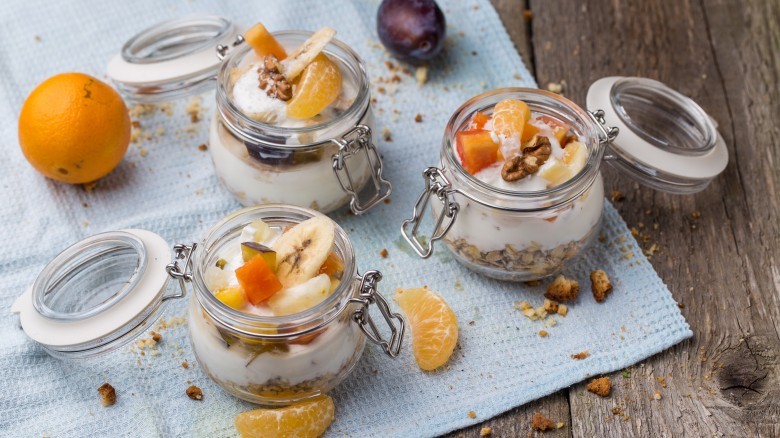
Overnight oats
The last thing you want to do is be scrambling in the morning, whether you're scrambling or your eggs are. Here's the first of my favorite make-ahead grab-and-go breakfasts that get me out the door in a jiffy.
Have you ever tried overnight oats? The flavor and texture isn't exactly like hot oatmeal; it's more like you turned a delicious oatmeal cookie into a soft porridge. There are a zillion variations you can try, but the most basic recipe to get started with is ½ cup liquid to ½ cup of dry oatmeal. (Standard rolled oats are said to work best.) The liquid can be cow's milk or nut milk, and many people prefer to sub a portion of the liquid with Greek yogurt. Add a pinch of salt and your sweetener of choice, then whatever else you desire. I love mine with chia seeds, raspberries, coconut, and chocolate chips. Overnight oats can be made in all manner of containers. My favorite for grab-and-go is a small Mason jar.
Oven-baked "hard-boiled" eggs
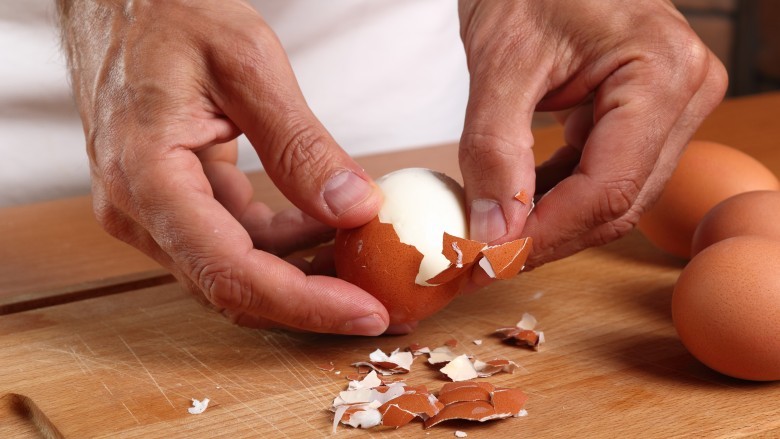
Certainly not limited to breakfast, I love having hard-boiled eggs in my fridge at all times for a quick protein-filled snack, to top a salad, sliced on a sandwich, or to whip up a quick batch of deviled eggs. Setting up the massive pot of boiling water and large bowl to transfer the eggs to can be a bit of a pain, though. So skip one major step, and bake your eggs in the oven.
Set your desired number of eggs in a muffin tin, which stops them from rolling around and cracking against each other. Place your eggs in a 350 degree oven for exactly 30 minutes, then (and this part is important!) carefully transfer the eggs to a bowl of ice water. Allow them to cool completely before you store them in the fridge, or effortlessly peel and enjoy when you're ready. Because this method relies heavily on the temperature of your oven and cooking time, you may want to do a test batch. I have found that my eggs are perfect after 30 minutes at 315 degrees because my oven runs hot.
Individual frittata muffins
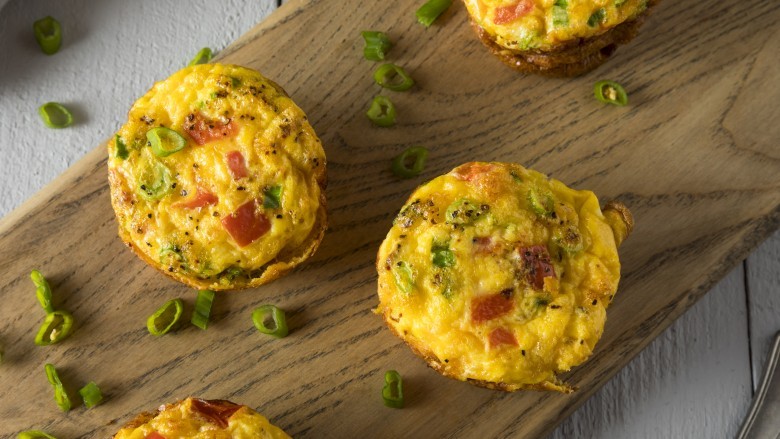
It's a frittata, it's a muffin, it's delicious ... what's not to love about grab-and-go frittata muffins? My preferred way to make frittata muffins is with a mini-muffin tin. The two-bite frittata it creates is perfect for going on the road, and it also makes a nice snack later in the day or even an appetizer at a get-together. If you prefer a heftier portion, though, you can adjust for a standard muffin tin and just cook them a bit longer. Spray your muffin tin with the nonstick spray of your choice. I've found that coconut oil spray works fine (you can't taste the coconut) and that silicone cups work even better. Whisk eggs with milk, unless you prefer dairy-free, in which case you can omit the milk. Fill each muffin cup a little more than halfway, then add in your favorite ingredients. You can really go frittata crazy here — cheeses, meats, fresh veggies, leftover butternut squash. There are few limits. Just don't let your filling overflow your muffin cups. Cook in a 350-375 degree oven for 10-15 minutes. Check to see if the centers are jiggly. Once they're set but not too firm, remove them from the oven and enjoy.
Make your own salad dressings
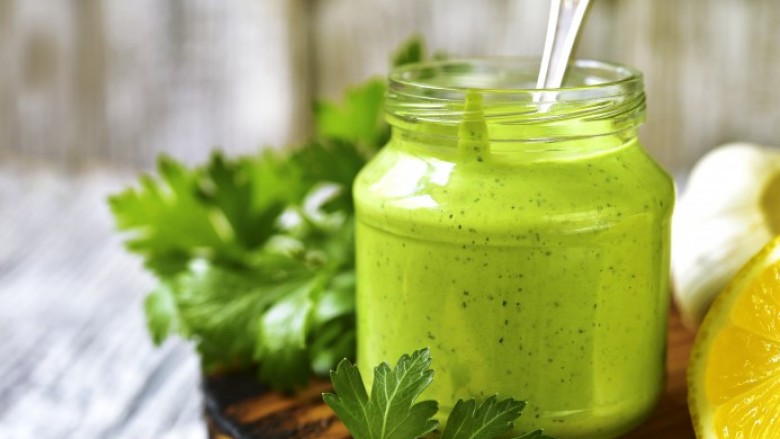
I adore making homemade salad dressings. And I use them for so much more than just salad. I pour them on steamed veggies, baked sweet potatoes, and hot quinoa. I use homemade dressings as a dip for raw veggies, a sandwich spread, and I even make my own soy-free carrot ginger dressing for dunking my takeout sushi rolls. Not to mention this delicious homemade ranch I make for my daughter. Ounce for ounce, I'm definitely saving money, and it's a fantastic way to use up leftover sour cream, herbs, and salad veggies. I use my blender and store my dressings in washed commercial dressing bottles or Mason jars.
My favorite dressing I make weekly is my own vegan green goddess dressing. I blend together 1 tablespoon Dijon mustard, 1 tablespoon coarse mustard, 1 cup raw yellow onion, 1 tablespoon vinegar (I alternate between raw cider vinegar, rice vinegar, and using a bit of each), a small squeeze of fresh lemon, 1 tablespoon honey, 3-4 tablespoons olive oil, ¼ cup water, and a large pinch of salt. For the finishing touch, I add handfuls of whatever green herbs I have on hand. My favorite combo has parsley, dill, and scallions or chives. Adjust the seasoning and acid to your own preference. These proportions make a lot of dressing, but it's low in oil, so use liberally. It's amazing on roasted or poached salmon!
Make stocks and broths with kitchen scraps
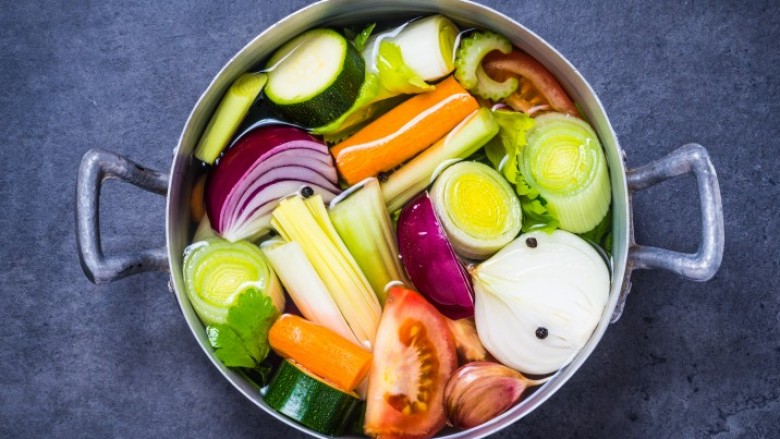
By all means, grab boxes of organic veggie, chicken, and beef stock when it's on sale at the store. I certainly do. It's always handy to have around for making soups, stews, rice, and sauces. But I make batches of my own as well that I store in plastic containers in the freezer. (I also store smaller amounts in ice cube trays for smaller portions.) Instead of making a special shopping trip for cooking stock, I save up items in plastic bags that I store in the freezer until I have enough to use. I currently have a couple bags of chicken bones, some from what I cooked myself and some from store-bought organic rotisserie chicken. Also in the freezer are the nubs of onions, carrot peel shavings (plus the gnobbly ends), and any stock-appropriate veggie or herb that didn't look like it would stay fresh by the time I could use it. I love the Barefoot Contessa's chicken stock recipe, but even if you're missing a couple ingredients, just throw what you have in a pot with some water and make yourself some stock. It's guaranteed to be more nutritious, more flavorful, and a better value than anything you can get at the supermarket.
Make large batches of grains and beans
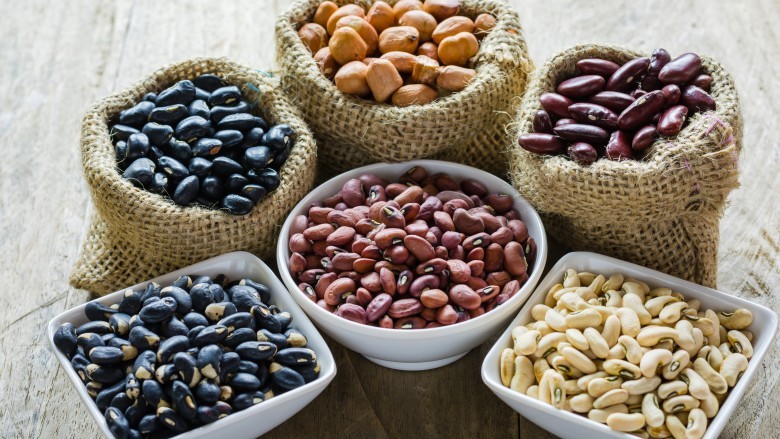
Having large pots of belly-filling grains and beans in your fridge at all times provides you with a quick and easy base for a healthy meal in minutes, whether you're eating at home or packing it for the road. My weekly meal prep begins with preparing a huge pot of either brown rice, wild rice, or quinoa. I cook them with broth or stock to boost the nutrients and the flavor. I mostly avoid gluten, but great choices that do include gluten are farro (tastes just like Thanksgiving stuffing when you add poultry seasoning), barley, and bulgur wheat. I use my grains for side dishes, I throw them into salads, and I top them with any healthy ingredient I may have on hand.
Depending how many meals I plan to make for myself that week, I also prepare a big batch of beans. I rely on the simplicity and practicality of canned beans for topping a quick salad or adding to a soup, but I do frequently love to make dried bean soup mixes (like a 16-bean soup), and cook them down to more of a mashed consistency similar to refried beans. I add onions, carrots, chilies, herbs, and spices, and I ditch the spice pack the soup mix comes with. I use this fabulous bean-mash concoction to spread on tortillas or serve as the base to a healthy bowl I top with shredded chicken, steamed veggies, salad greens, chopped tomatoes, hard-boiled (or oven-baked) egg, and a healthy dose of my vegan green goddess dressing. When packing a "bowl" like this for the road, remember to pack your dressing in a separate container so everything stays fresh and beautiful.
Utilize your freezer
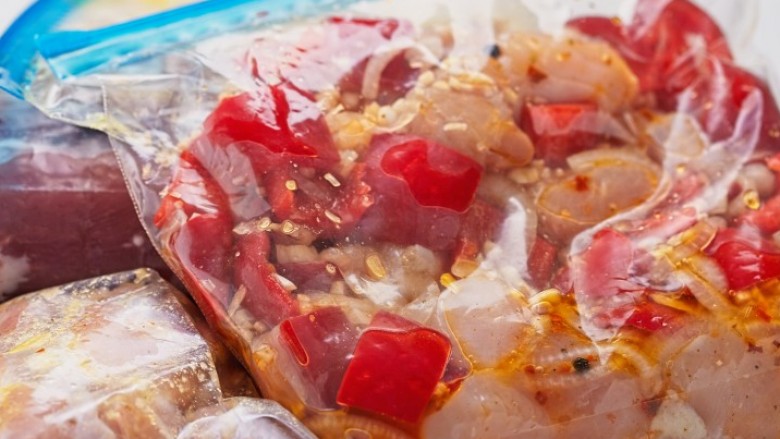
Your freezer is your trusty meal prep companion. Use it to store leftover stews, soups, and chili in individual portions for quick weeknight meals. If you love smoothies, you can prep the fruit and store it in small plastic freezer bags to just grab and toss into the blender. Leftover fresh herbs can be frozen with oil or melted butter in ice cube trays. When making all sorts of meals, from meatballs to pumpkin muffins to casseroles, make a double batch so you can eat one now and freeze the rest for a future meal. (You may even consider joining a freezer club.) Foods you can freeze that may surprise you includes hummus, butter, chocolate, and brown sugar. (On the contrary, avoid freezing sour cream, cream cheese, yogurt, and salad greens.) If you have a crockpot, plan and freeze ingredients in advance for easy meals that will be ready and waiting when you get home from the office.
Organization is key to meal prep
There's nothing worse than coming home from the grocery store and realizing you bought items you already had or didn't need. Take stock of what you currently have in your cupboards, even way in the back. If you bought something months ago and still haven't used it, figure out a use or give it to someone who can use it. Before you head to the store, plan ahead your meals for the week. Make a thorough list, and stick to it. Plan around the meats and veggies you still have left from last week. Label freezer meals and indicate the date you made them. Use clothespins or paper clips to seal bagged items to keep fresh. Transfer flours, cereals, and sugars to glass jars with lids that can easily be identified (I use old spaghetti sauce jars that I clean and save.) Buy zippered plastic freezer bags, and invest in some glass or BPA-free dishwasher-safe storage containers. A clean and organized kitchen makes meal prepping a much easier process.
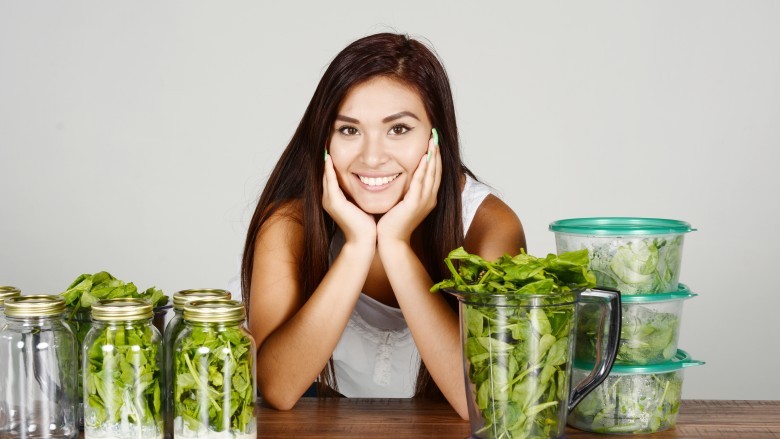
Prep veggies in advance
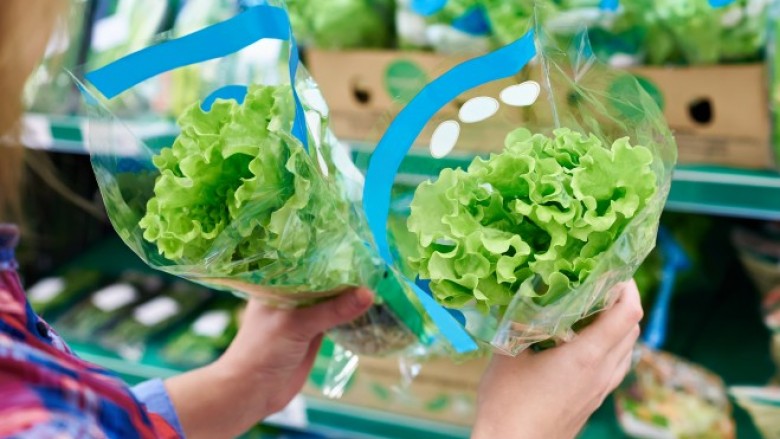
The secret to eating more veggies is having them cleaned, cut, cooked, and ready to grab at a moment's notice. Each week after your big shopping trip, plan to prep your weekly veggies to add now or add later to meals, as well as for quick snacks. Wash leafy greens and herbs, dry them in a salad spinner or on towels on your kitchen counter. Store the greens and herbs loosely in plastic storage bags, lined with a paper towel to absorb any extra moisture.
For raw veggies, cut what you'll eat over a 2- or 3-day period so you can eat them before they dry out too quickly. Or zoodle them if that's your thing. (And it should be!) You can even store cut veggies like carrots, celery, and bell peppers in water in your fridge, but you'll have to change the water daily. It's your call — however you get your veggies in is your call. Saute or steam veggies like onions and spinach to grab and add quickly to wraps and omelettes. Roast heartier veggies like Brussels sprouts, cauliflower, or butternut squash in large batches for easy side dishes and additions to bowls and salads.
Make energy balls

Let's face it, no matter how meticulous you are about planning your meals, sometimes you just need a good old snack. Something sweet, something salty, something you can grab out of your purse, something that goes great with a cup of Darjeeling tea. Sure, you can grab an organic nut bar, but at $2 a pop they aren't doing any favors to your wallet. So do yourself a favor, and make yourself a batch of no-bake energy balls to have on hand (or in your car) to get you through that time of day when you just need a little something something.
Hands down my go-to, fave energy ball recipe is from Smashed Peas and Carrots. The combo of oats, nut butter, chocolate chips, honey, and chia seeds, all rolled into tiny 2-bite, perfect portions is the ideal midday pick-me-up. I store them in an airtight container in the fridge, but they last fine for a day in my purse. There are tons of variations on energy bites out there. You can make them low-carb, nut-free ... whatever your heart desires.
Pick one day for cooking and prepping
You've done all that planning, so now it's time to do the work. For me, I prep sporadically during the week, but I have a sporadic schedule and have the free time on weekdays when most other folks don't. If you have a more regimented schedule, your best bet is to pick one day to do your shopping and prepping for the week. Get your grains and beans cooked, your veggies chopped and roasted, your casseroles and crockpot meals assembled, and your grab-and-go items ready. All you'll need to do the rest of the week is heat and enjoy. You can even get the whole family involved. Make them responsible for certain dishes or meals, and they'll begin to look forward to enjoying their creations later in the week. After a few weeks of getting yourself on a meal prep schedule, you'll never go back to scrambling for a meal. And believe me, your wallet will thank you.