Getting Perfect Crosshatch Marks On Your Steak Is Easier Than You Thought
Grilling steak is one of those things that seems like it should be fairly straightforward, but there's a certain level of mastery to it (via Better Grills). Why is it that when we go to a restaurant our steaks come out with perfect crosshatch marks from the grill, but whenever we cook at home it's nearly impossible to achieve those same results? All we're asking for is an Outback Steakhouse-level looking steak, but for some reason that always seems to be a tall order.
Fortunately, achieving those commercial grill marks on your steak is easier than you thought; it just takes a little bit of precision and patience. Before you know it you'll have gorgeous looking steaks that will impress dads everywhere, and will make you king or queen of the neighborhood barbecue. Well, maybe it won't do that, but at the very least you'll have some attractive steaks that are grilled well!
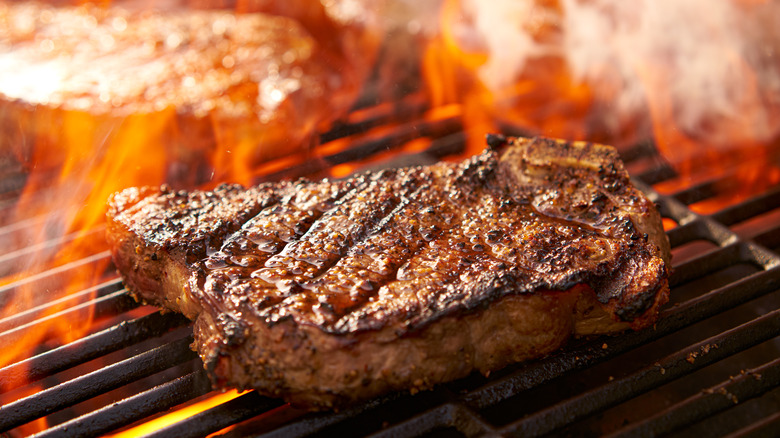
Make sure you line up your steaks correctly
Before you start grilling, be sure your grill is preheated with two temperature zones: a hot searing zone and a medium temperature zone for cooking it after it's seared. According to Better Grills, you want to set the steak up in a position that resembles 10:00 on the clock face. They say you should be doing this on a clean and oiled grill, too.
After a few minutes, rotate the steaks to a 2:00 position and wait until the marks are there too. Voila! Perfect crosshatch marks. You can either repeat this on the other side, or simply move the steak to the cooler part of the grill to allow it to keep cooking, whichever you prefer. Griller's Spot recommends doing both sides, especially if you like a good sear and prefer your meat on the medium-rare end. Once you're finished, allow the meat to rest for at least five minutes before serving it up and digging in.