Bakery-Style Buttermilk Biscuits
When I returned to New York City after living in South America, I spent a year making pastries in popular Brooklyn bakeries. My days in these commercial kitchens made me stronger physically and mentally. They also gave me time to develop new recipes through trial and error, as well as refine my techniques and skills. Additionally, I learned how to move around the kitchen efficiently, effectively, and safely. To this day, I find myself in crowded grocery stores yelling, "Behind you!" to the befuddlement of fellow customers.
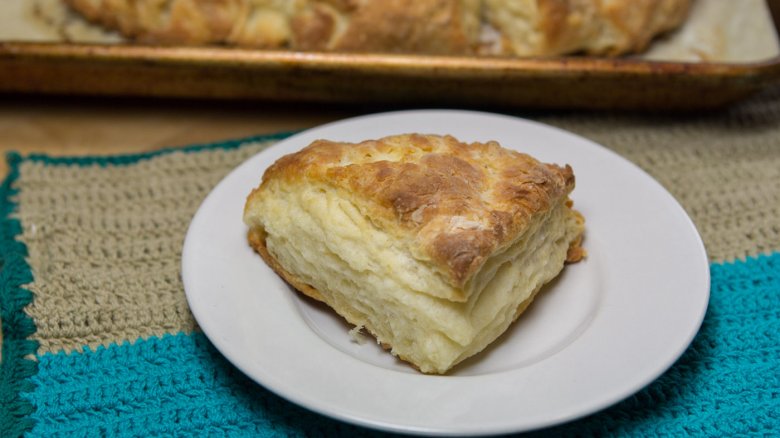
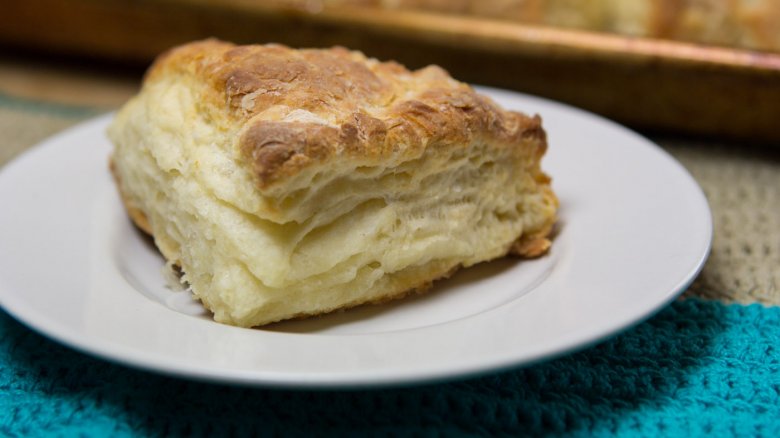
One of the best things I gained from my kitchen experience was learning how to make buttery, flaky, perfect bakery-style biscuits. After some brief initial training, I turned out biscuits that were good but unremarkable. Through self-correction and experimentation, I eventually found ways to make the biscuits truly my own. This buttermilk biscuit recipe is adapted from the one I once made day in and day out at one of those bakeries. The proportions are standard, but the technique is what really gives the pastries oomph. Fold, fold, and fold. They are splendid split open and smeared with butter and jam...or as breakfast sandwiches. Just saying.
Whatever you do with this biscuit recipe, don't neglect to have fun. It's a good basic to have in your back pocket but even better when you go rogue. There are countless ways to put your personal stamp on these. For herbaceous savory biscuits, fold thyme, rosemary, or your favorite herb into the dough before adding the buttermilk. Add your favorite shredded cheese for extra flavor. Brush the tops with honey for a sweet touch.
Here's what you'll need to get started
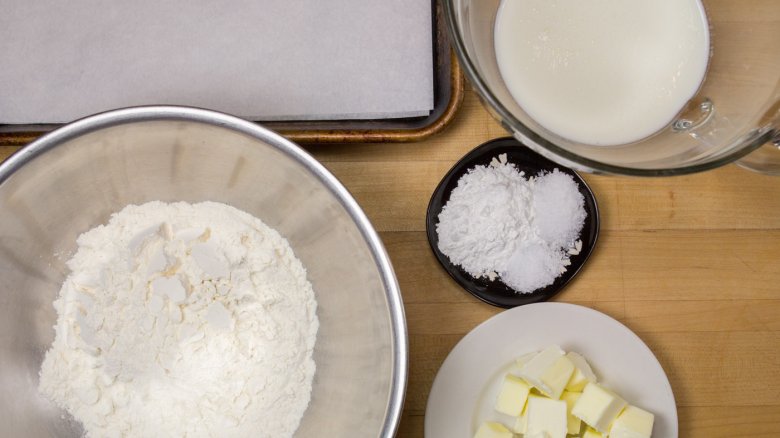
You don't need much to churn out fantastically flaky biscuits worthy of serving up at the finest hipster bakery in New York City. In fact, the basic ingredients for biscuits are exactly that: basic. Choose a good unbleached all-purpose flour like the kind from King Arthur Flour. It's a little pricier than other supermarket brands but yields consistently delicious results. The rest is pretty standard: kosher salt, baking powder, unsalted butter, and buttermilk. That said, be sure to use unsalted butter, as the salted kind may make the whole recipe too salty for your taste.
Time to make the dough
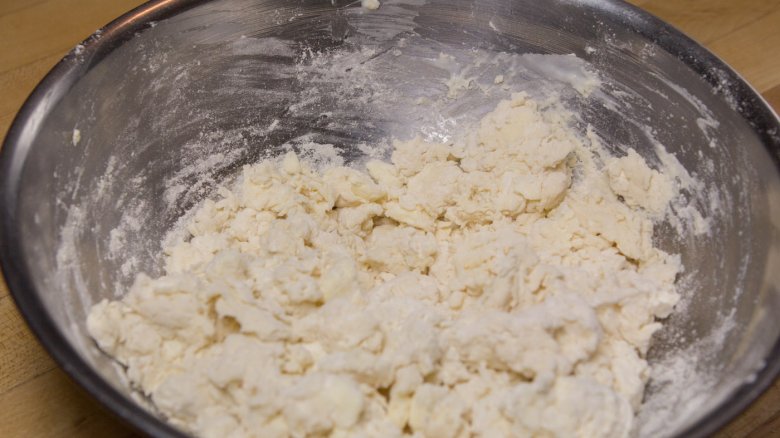
Mix together flour, a little salt, and baking powder before breaking chunks of cold butter into the mixture. The colder the butter, the flakier the pastry will be. While you can use cream or milk as the wet binder, for warm, cozy biscuits, I like to go with buttermilk since it offers creaminess and subtle tang. Be sure to work quickly when you're making the dough so the heat from your hands doesn't melt the butter too much. You should still be able to discern chunks of butter.
At this point, you can add your extras if you desire—cheese, herbs, nuts, whatever you want. Once you add the buttermilk, you only want to work the dough enough for it to come together and until most of the flour is incorporated. Not every bit of flour needs to be mixed in. While it's tempting to get overzealous, try not to overwork the dough that way. Doing so yields tough biscuits. Yikes!
Fold, fold, fold

The key to getting those beautiful layers in your biscuits? Fold the dough over itself a few more times than you think is necessary. I usually end up gently folding the dough at least a half dozen times, maybe more. Use a pastry bench scraper to help you lift the dough, as it can become sticky. Lightly dust with flour as you go along, being mindful not to incorporate too much extra flour since that can make the final product dense. Trust me, this technique results in lovely layers you can't help but marvel at.
Bake 'em up
Don't be afraid of the heat. A more senior pastry chef once told me on the job that opting for a low oven temp is the mark of a frightened baker. While I grimaced then, I now agree wholeheartedly! While 400 degrees Fahrenheit seems super hot, go with it. You want your biscuits to become stunningly golden all over and they can certainly withstand the heat. Check them around the 20-minute mark — but avoid opening the oven door too often, letting out the heat.
Eat your biscuits your way
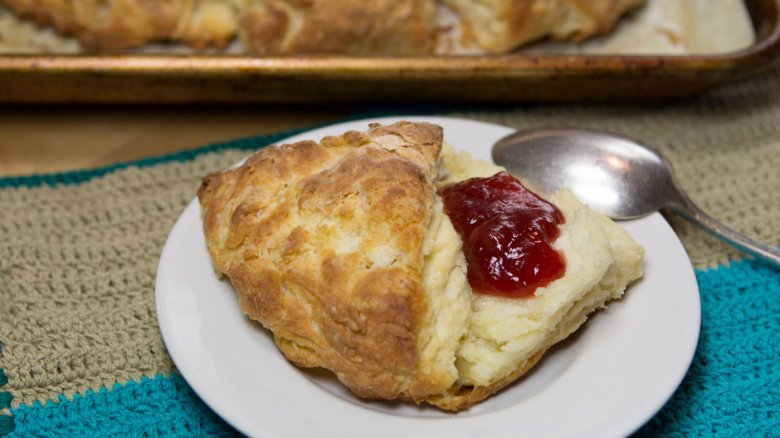
Once you remove the biscuits from the oven, set them aside and allow them to cool on the baking sheet for 5 to 10 minutes. You may feel impatient to taste the fruits of your labor, but you'll be glad you let the residual heat from the pan finish baking the biscuits just enough. Now for the best part. Whether you enjoy these buttery, flaky gems with pats of butter and spoonfuls of jam, dollops of hazelnut chocolate spread, or with soft scrambled eggs, you can't go wrong digging in while they're still slightly warm on the inside.
Directions
Prep time: 10 minutes
Cook time: 5 minutes
Servings: 6 biscuits
Ingredients:
- 2 cups all-purpose flour, plus more for folding biscuit dough
- 1 tablespoon baking powder
- 1 ½ teaspoons kosher salt
- 1 stick cold unsalted butter, cubed
- 1 cup cold buttermilk
Directions:
- Preheat the oven to 400 degrees Fahrenheit.
- In a large bowl, whisk together the flour, baking powder, and kosher salt.
- Add the butter and using your fingertips, break the chunks into the flour mixture until only pea-sized lumps remain.
- Stir in the buttermilk until the dough begins to come together and pull away from the sides of the bowl.
- Turn out the dough onto a clean, lightly floured surface. Using lightly floured hands, fold the dough onto itself. Repeat up to 5 times, alternating directions.
- Pat the dough into a rectangle, about ½-inch thick. Using a pastry cutter or sharp knife, cut into 6 squares and place close together on a parchment-lined baking sheet.
- Transfer the prepared biscuits to the middle rack of the oven and bake until golden all over, 22-25 minutes.
- Remove the biscuits from the oven and set aside to cool for at least five minutes before serving. Enjoy!