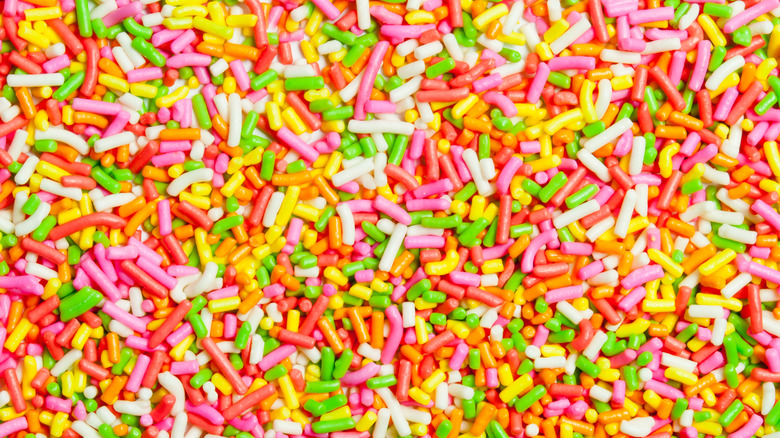
The Ultimate Guide To Homemade Sprinkles
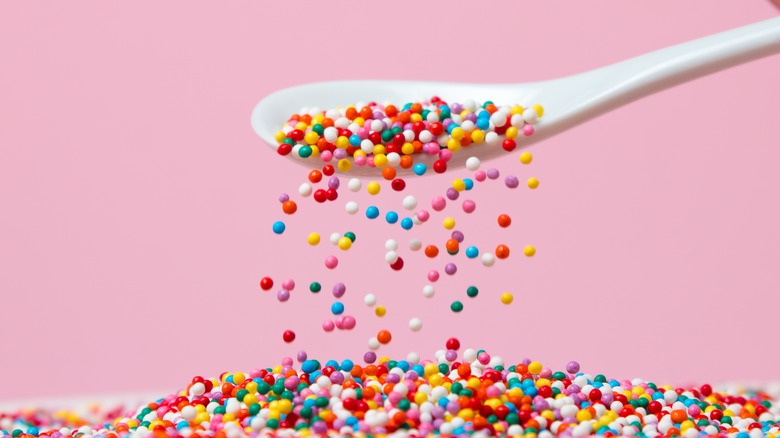
If you want to brighten up a wide array of baked goods, one of the best and easiest ways to decorate a cupcake, cookie, or traybake is to cover it with sprinkles! Sprinkles have played a massive part in baking since their invention in the 18th century.Known as nonpareils in their early history, sprinkles have been called various names, including hundreds and thousands in the UK and jimmies in some areas of America. The chocolate variety is known as hagelslag in the Netherlands, which wonderfully translates to "hailstorm."
For most bakers, you'll likely have a stash of store-bought, premade sprinkles in your pantry, ready to throw over the latest tasty treat you've created, but did you know that you can make sprinkles at home? Homemade sprinkles are super easy to create if you have the right ingredients and equipment, and making them yourself gives you better control over the colors of these tiny delights and what's in them.
If you want to call yourself the ultimate home baker, getting to grips with homemade sprinkles can help you elevate your game and impress the friends and family you may be baking for. Creating your own sprinkles makes the treats more personal and far more rewarding to cook. You'll also be able to taste the difference compared to the harder, manufactured options. Here's a look at everything you need to know about homemade sprinkles.
You can make them out of royal icing
One of the most straightforward ways to make sprinkles at home is to use royal icing. Although you can use premade royal icing, you'll get better results if you make it yourself, and doing so is much easier than you may think. In fact, making sprinkles with this method makes it one of many simple-to-follow recipes to make with your kids.
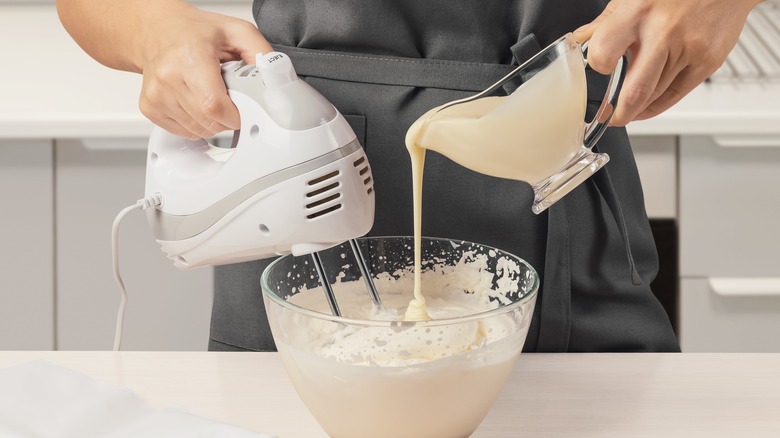
You can make royal icing by combining confectioners' sugar with egg whites and liquid glucose and beating them together, adding in flavoring such as lemon juice or vanilla extract as well as food coloring to give your sprinkles a joyful pop of color. Once the icing mixture is stiff enough to hold peaks when you lift the beaters, pop it into a piping bag
To start making your sprinkles, squeeze out a long line of icing on a baking sheet. The size of the nozzle you use will determine the thickness of your sprinkles. Once you have a few lines of icing, leave them to harden for over a few hours and then chop with a knife into smaller, sprinkle-sized pieces. Don't worry if the piped lines come out wonky and don't look perfect and uniform when you chop them up. If anything, the imperfections add to the charm of homemade sprinkles. Once made, the sprinkles can be applied to your baked goods or stored in a plastic container to save for later.
You can also make crunchier sprinkles at home
The sprinkles made from royal icing usually end up pretty soft to chew. If you're after harder sprinkles that better match the texture of storebought options, you may want to use a different recipe.
With this recipe, you'll need to mix powdered sugar with corn starch, corn syrup, your preferred flavoring such as vanilla extract, and a splash of water in a medium-sized bowl, adding the sugar gradually as it can be hard to stir all at once. Make sure that the water is cool, as boiling water will ruin the mixture, and make sure not to add too much, as this could make it runny. Once mixed, you can add food coloring to get the desired effect. Try not to add too much, as this can affect the flavor of the sprinkles. If you want to make several different colors, you can separate the mixture into different bowls and add the dye to each one.
Like the previous recipe, you'll then transfer the mixture into a piping bag and create long lines of this mixture. Once piped out, you'll need to leave these lines for at least 12 hours to harden properly and get that reflective shine. Once hard, you can cut the sprinkles out of the lines and either use them or store them in an airtight container for later usage.
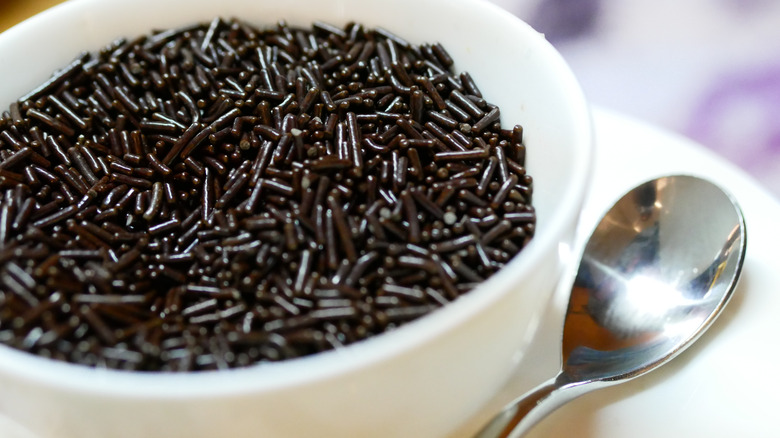
You can make chocolate sprinkles too
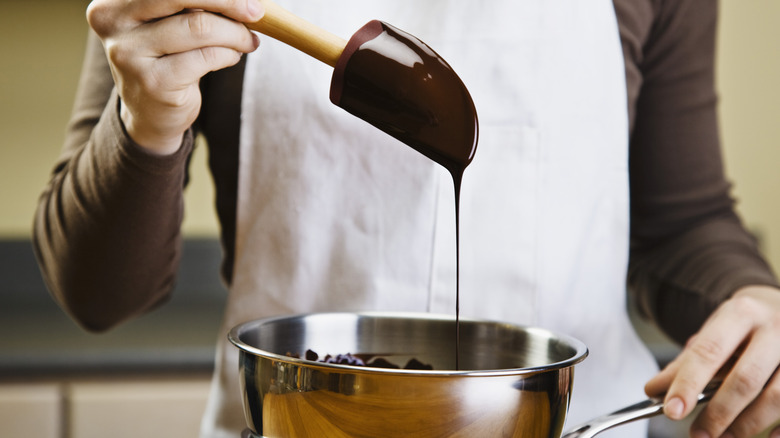
If you want to add decorations to a chocolate cake or treat, it's best to enhance the creation with specific chocolate-flavored sprinkles. Thankfully, making chocolate sprinkles, also known as Dutch hagelslag, only requires a single ingredient if you want to make a simple version. To make chocolate sprinkles, all you need to do is melt down some chocolate bars. The best way to do this is to break the bar into a bowl on top of a pan of boiling water, as this prevents the chocolate from burning. Once melted and slightly runny, pour it into a piping bag and make long lines like the other recipes. Let the chocolate set and harden, then break them into small pieces.
On an industrial scale, hagelslag is made by mixing cocoa with sugar and soy lecithin, which acts as an emulsifier to bind all these ingredients together. You can alter this recipe by mixing cocoa powder, powdered sugar, and water for a similar effect. After some mixing, you'll have a chocolatey dough that you can pipe into lines and break into little, delicious pieces.
Once you have your chocolate sprinkles, you can use them on cakes and other confectionery. However, if you want to stick to the Dutch roots of this type of sprinkle, you can also scatter it over buttered bread, which is a popular breakfast for the Dutch — they consume around 30 million pounds of the stuff, according to Stuff Dutch People Like.
You'll need a piping bag to make them
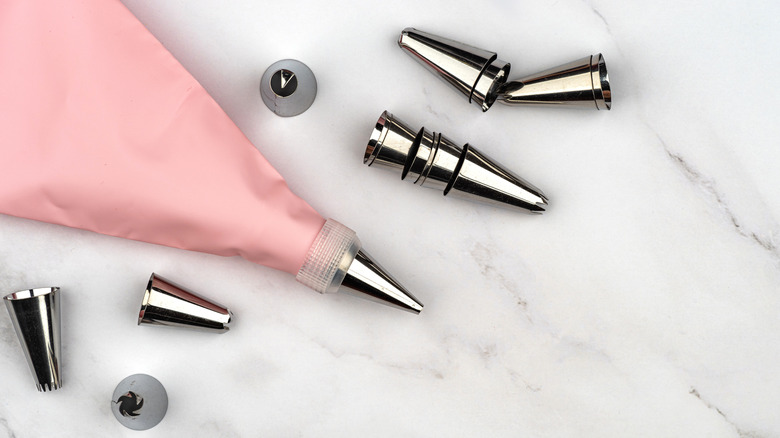
When following the previous recipes on how to make sprinkles, you may notice a bit of overlap, with them all requiring you to have a piping bag handy so that you can squirt out the mixture into lines for you to break up into sprinkles later.
The issue with this is that only some households will have a piping bag, which could mean homemade sprinkles are off the menu without this equipment. Thankfully, you should be able to make your own piping bag with items you have lying around the house. The best homemade piping bag is made of parchment paper. This is because this type of piping bag keeps its shape well. To make one, you'll need to make a few specific folds and then roll the paper into a cone, cutting the tip to create your nozzle. It can be a bit fiddly for first-timers, so don't be scared of a bit of trial and error.
For a makeshift option that should only be used as a last resort, you can also make a piping bag out of a Ziploc bag. Just gently place some of the mixture into the bag and make a tiny cut in the corner to squeeze it out. Ensure that your royal icing or other sprinkle mixture isn't too thick and pipes easily, as it could make the Ziploc bag pop if it isn't thin enough.
Your sprinkles can expire
When making homemade sprinkles, make sure you have a baking project planned for the near future when you will use them. Sprinkles don't last forever and can actually go bad and expire, and the time it takes for them to do so depends on how they're made and how you store them.
Homemade sprinkles last around one month when stored in an airtight container. This is because the sugar in the sprinkles helps to remove moisture and keeps them from spoiling. In fact, as high sugar concentrations inhibit bacterial growth, meaning the more sugar in your sprinkles, the longer they'll be able to last — although it's recommended to use them before a month has passed.
In terms of store-bought sprinkles, they'll have a much longer shelf life. How long Sprinkles are actually good for will depend on how well they're stored, as unopened sprinkles can last around three years, while an opened container can last for an entire year. This is why many people still opt for store-bought sprinkles when decorating their baking, as they're more versatile and can be used for at least a year. That said, they are not as fun as homemade sprinkles.
You shouldn't bake your sprinkles
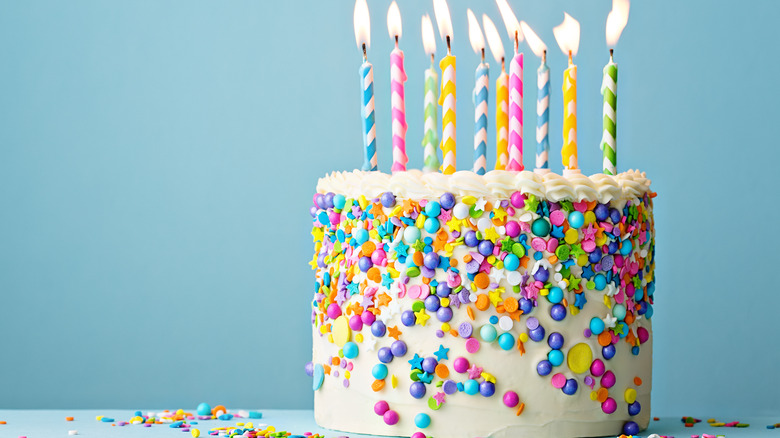
If you're new to using sprinkles in your baking and decorating, then you may be confused as to when to apply them to get the desired effect you're looking for. In most treats — but not all — sprinkles are one of the last things you add, used as a pop of color to make a sweet treat look more special. This means you should only add the sprinkles once the baked good is out of the oven.
Sprinkles can melt when exposed to high heat, especially homemade sprinkles made out of icing sugar or hardened chocolate. Sugar has a melting point of 367 degrees Fahrenheit. Exposing your sprinkles to this heat can make them runnier, losing their shape and color, ultimately making your baked goods look less appealing.
Furthermore, you should only add sprinkles to a cake or other baked good that has fully cooled down and has had time to rest after being in the oven. If the cake is too hot, the sprinkles could start to melt. Of course, this rule depends on what you're making. For example, things like rainbow cookies require you to bake your sprinkles, so feel free to deviate from this rule occasionally. That said, when decorating cakes or cupcakes, keep sprinkles as cool as possible to maintain their shape.
They can be made gluten-free
When you make sprinkles from home, you have ultimate control over what ingredients go into them. This means you can alter your sprinkle recipe to account for any dietary requirements, including gluten intolerance. According to Verywell Health, 6-7% of the U.S. population may be gluten-sensitive, so ensuring that there's no gluten in your homemade sprinkles can be very useful.
When buying store-bought sprinkles, there is a risk that they will contain gluten, not directly in the ingredients, but instead as a by-product of the manufacturing process. This is because there may be cross-contamination, as different products share the same production line, increasing the risk of the sprinkles containing gluten. When you make sprinkles at home, you can be extra careful to ensure that your surfaces are clean to ensure that there is no cross-contamination with gluten, ensuring that everyone can enjoy your excellent baking and sprinkles.
Homemade sprinkles are great for vegan baking
In addition to being an excellent option for gluten-free baking, homemade sprinkles can also be made for the vegan diet, ensuring that even more people can taste your desserts, cakes, and other baked goods. You may not be aware, but many store-bought sprinkles are not, in fact, vegan-friendly, which might make you think twice before eating sprinkles.
Many manufactured sprinkles aren't vegan because they can contain some animal by-products, especially within the confectioner's glaze that gives store-bought sprinkles their distinctive shine, which is often extracted from insects. You'll also need to look for other ingredients, such as beeswax or cochineal, made from crushed insects. Even if you're not vegan, that might be enough to put you off these seemingly sweet and innocent treats.
Thankfully, if you're making homemade sprinkles and are following any of the recipes mentioned earlier, then you should be able to make homemade sprinkles vegan, as long as you use an animal-free emulsifier to replace eggs. When adding a bit of color to your homemade sprinkles, ensure that the food coloring you use is vegan, as this could be where you go wrong.
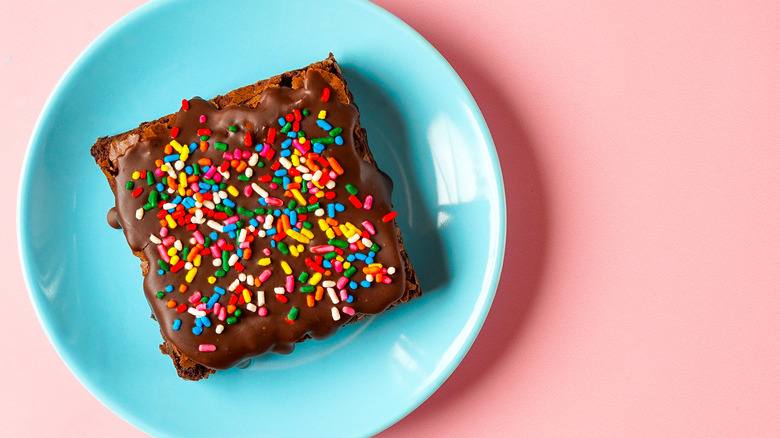
There are multiple ways you can decorate with sprinkles
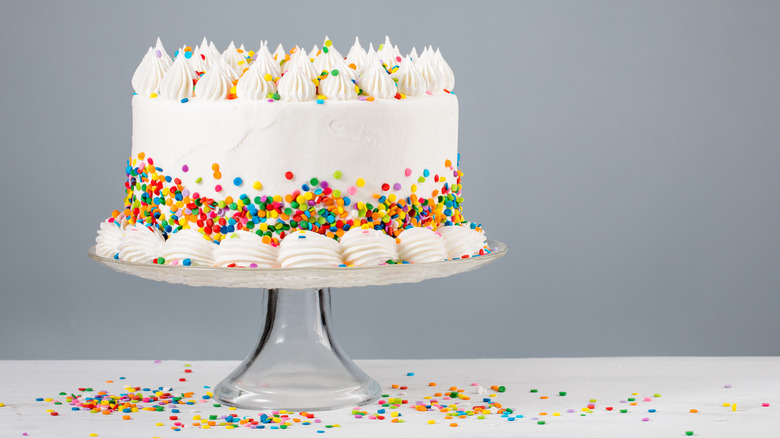
Sprinkles aren't just great for tossing over a freshly iced treat, as they can be applied to various desserts in unique and exciting ways to create some fantastic looks and designs. Of course, there's nothing wrong with the charmingly messy scatter of sprinkles to accent a cupcake, but if you want to go the extra mile, try adding sprinkles to the side of a full-sized cake.
The process isn't that hard to follow; to get started, smooth the sides of your cake with a scraper. Make sure that you do this before you chill the cake, as you want the frosting to be nice and sticky to act as glue for the sprinkles. To apply by hand, pour the sprinkles into your palm and gently push against the side of your cake. If you have a cake turntable, this will help, as you can spin the turntable to ensure you get an even line. This method is perfect if you only want to cover a small section of the side of your cake.
If you want to cover your entire cake, another great option is to lay your sprinkles on a baking tray and gently roll the side of your cake over the sprinkles. When using this method, make sure your cake is structurally sound, as the last thing you want is for your cake to fall apart all over your sprinkles.
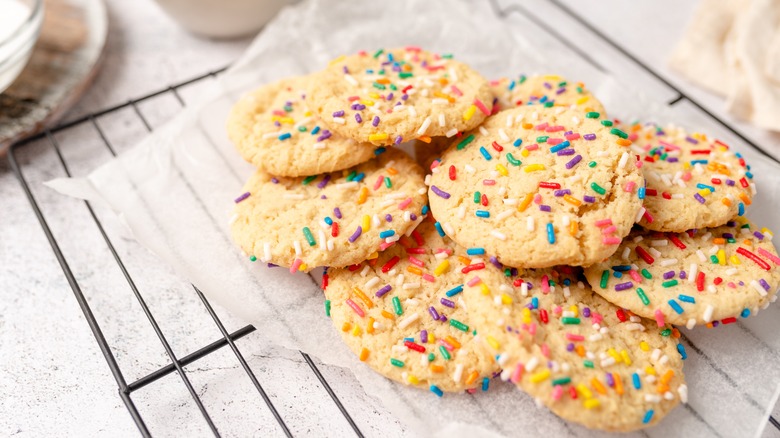
You can make confetti cookies with sprinkles
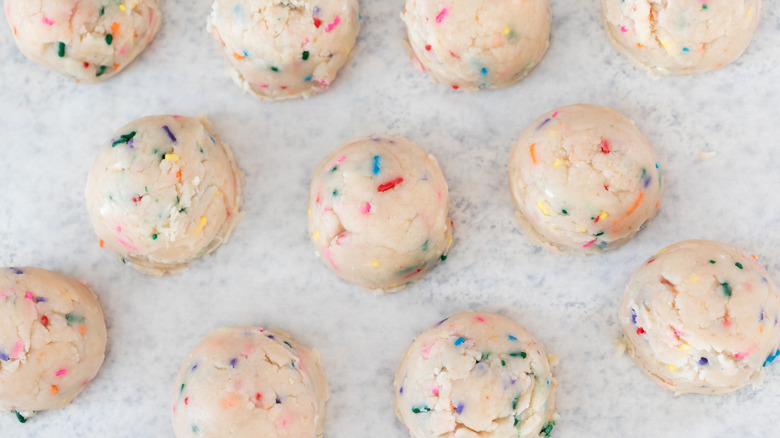
Sprinkles are perfect for decorating cakes and other iced treats. They can also be used to make some colorful, fun, and delicious cookies that the entire family will enjoy. These cookies are super easy to make, yet go against one of our earlier tips of not baking your sprinkles. That's right: We want to melt our sprinkles for this recipe.
The reason for this is that melted sprinkles help create incredible bursts of color within the cookies, which is what gives them their "confetti" name. They're also known as rainbow and funfetti cookies.
To make these cookies, you'll want to start by making vanilla cookie dough, using your family recipe if you have one, or you can borrow our Vanilla cake mix cookie recipe for some great results. Once you have dough, add your homemade sprinkles and any other extras you fancy, such as white chocolate, to give the cookies a creamy interior. Once mixed, bake for around 12 minutes, watching the sprinkles melt and inject the cookies with super fun bursts of color. Leave the cookies to cool off for a bit before tucking in, as they can come out super hot.