Big Mistakes Everyone Makes When Cooking Steak In The Oven
Taking the first bite into a tender, juicy steak can feel like a slice of heaven right on your plate. Cutting into a perfectly caramelized crust with a flavorful, pink center is among the best culinary joys in the world. The thing is, a lot of people resort to driving down to their favorite steakhouse when the craving hits because they still don't know how to cook a perfect steak. After all, why even try if you always end up with a tough, dry piece of meat?
The good news is that cooking a steak is a lot easier than it seems. With the right tools and tricks, you can make even cheaper cuts of beef taste expensive. Surprisingly, one of the best and easiest ways to get a perfectly evenly-cooked steak is right in your oven.
However, several common beginner mistakes can completely ruin your meal no matter where you cook it. But we've got you covered, as we've compiled all of those mistakes and can help you learn what to do instead to create a steak that's fit for a king. Keep reading to get the perfect steak every time in the oven.
Using the wrong cut of steak
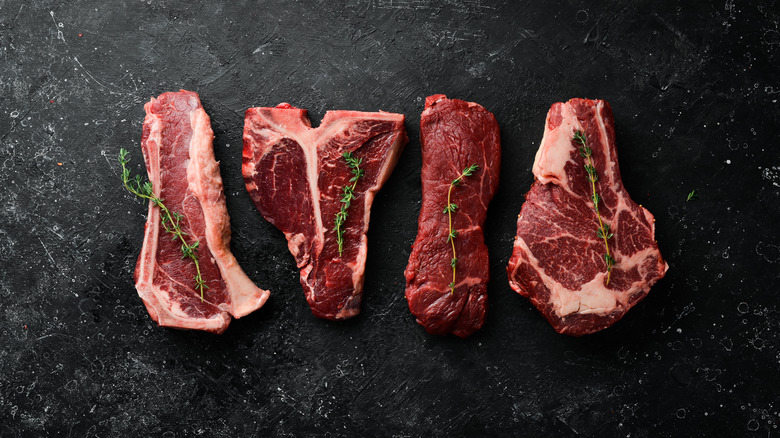
One mistake people make when cooking steaks happens before they even step into the kitchen. When the craving for a juicy cut of steak hits, it's important to remember you can't just buy any cut of beef and expect great results. Every cut has specific qualities that thrive in different settings. For example, a T-bone goes great on a grill, while a ribeye might work better on the frying pan thanks to its higher fat content.
According to Shawn Hill, founder and pitmaster of The Grilling Dad, choosing the right cut when oven-cooking steak is just as important. "While any cut of steak can be cooked in the oven," he says, "thicker cuts like ribeye and filet mignon work particularly well as they retain moisture and develop a beautiful crust. Look for steaks with a good amount of marbling for maximum flavor."
Also, keep away from lean cuts of beef. Although they have their place in the kitchen, they often end up dry and tough after a stint in the oven, as fat is what really brings flavor and juiciness to the perfect steak. However, the perfect cut of beef for your steak doesn't need to be expensive, as long as you know what to look for. This might take some trial and error, but once you develop an eye for the best cuts, it will create a great foundation for your steak.
Forgetting to let the steak come to room temperature
When you're hungry, it's easy for your growling stomach to cloud your judgment. It can be tempting for beginners to grab their beef from the fridge and throw it directly into the oven. Yet this is a big mistake when it comes to cooking steaks.
"To ensure even cooking, I suggest taking the steak out of the fridge and letting it come to room temperature for 30 to 60 minutes before cooking," says Melissa Wasserman Baker, founder of FoodQueries. This allows the steak to cook evenly throughout the second it hits the heat. If your cut of beef is still cold when it touches the hot pan, you could end up burning the outside while still leaving the inside cold. It will also bring down the temperature of the pan — which means you won't get that beautiful crust that's so necessary for a great steak.
This will also give you plenty of time to take care of your other prep, like preheating your oven, getting your ingredients ready, and pulling out the right vessel to transport your steak from the stove to the oven.
Not patting the steak dry first
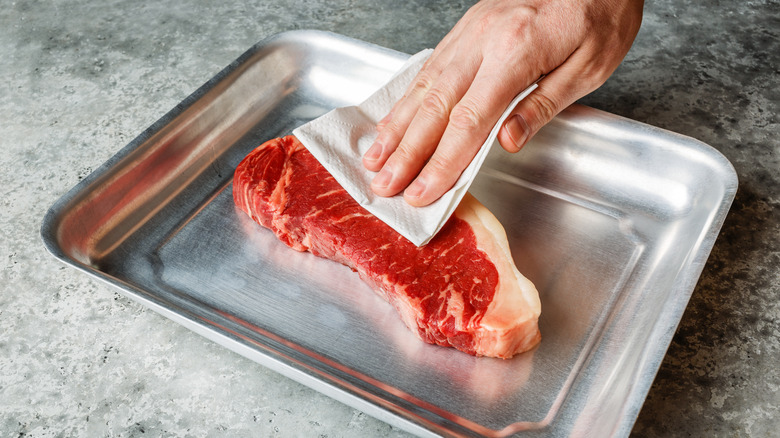
The most irresistible steaks have a beautiful crust that perfectly accents the tender, juicy meat inside. The number one enemy of that mouthwatering crust? Moisture.
Hill says that patting your meat dry after bringing it back up to room temperature is vital, as it allows you to get a much better sear once it touches the pan. This simple step is often the difference between a masterfully-prepared steak that looks like it was made by a professional chef and a pale, uncharred piece of meat that only looks and tastes okay.
The key to getting beautiful char on the steak lies in the Maillard reaction. This is what causes meat (and other foods) to get that beautiful brown look and complex flavor. When you cook food, evaporating moisture takes up a significant amount of energy that could (and should) be going toward the Maillard reaction. This is why it's so important to remove the moisture and use high heat when cooking to get that beautiful steakhouse crust.
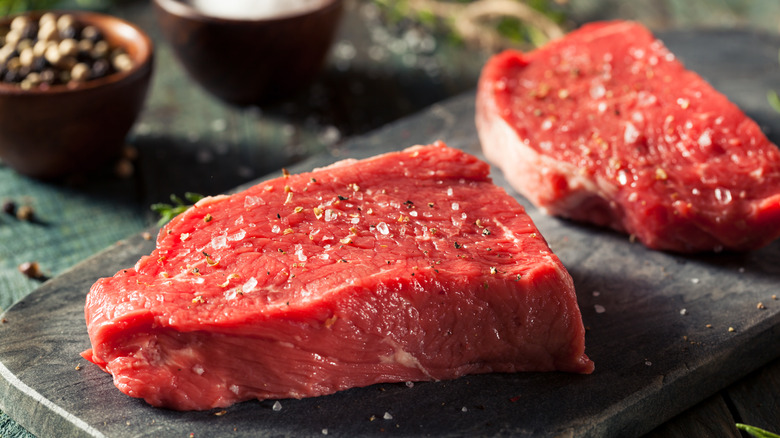
Not seasoning your steak enough beforehand
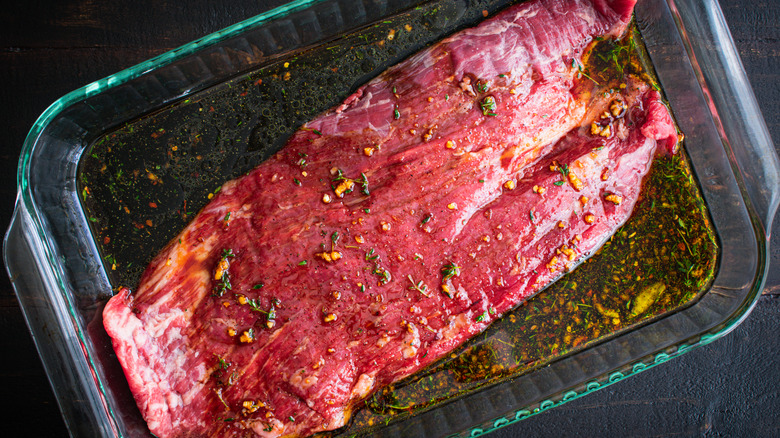
The last thing you want is to toil for hours in the kitchen, just to end up with an underseasoned piece of meat. Although it is understandable that you'd want to be careful with something like salt, steaks are not the place to get stingy with the seasonings. They can take it, we promise.
Liberally seasoning your steak at least a half hour before you begin cooking is helps the flavors to penetrate closer to the interior of the steak. The larger the cut of meat, the longer it will take for salt to sneak through. Salting your steak beforehand plays another crucial role as well: it helps dry brine the steak. This means the little pieces of salt bind themselves to the molecules in the steak, which helps retain moisture and dries the surface, resulting in an incredibly juicy product with a great crust.
You can use your favorite spice rub mixture, but there's no need to get fancy. You can simply season a high-quality steak with a touch of high quality oil and some coarse salt and freshly-ground pepper.
Not searing the steak first in a very hot pan
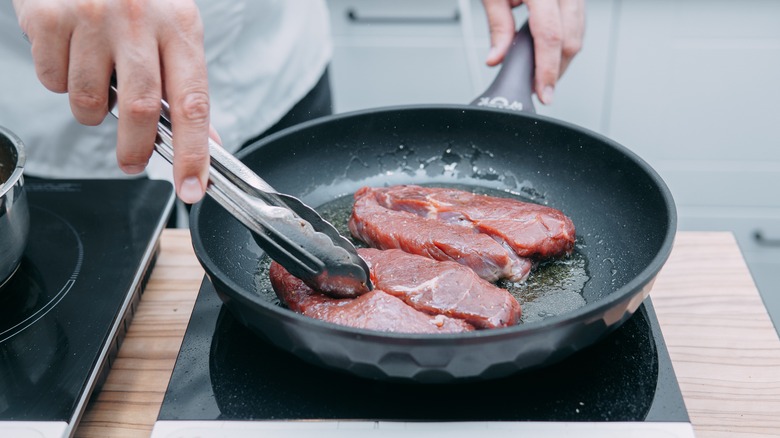
Although cooking your steak in the oven is a great way to get a juicy steak, it would be a big mistake to not get a nice sear on it with your frying pan first. Using a super hot pan will allow you to get a beautiful crust on the steak before you allow it to cook evenly in the oven. "To achieve a nice sear on the steak," says Baker, "heat a cast-iron skillet or oven-safe pan over high heat until it's smoking hot, add a little bit of oil to the pan, and then sear the steak for 2-3 minutes on each side until a nice crust forms."
That all-important Maillard reaction requires really high heat. Boiling water, which happens at 212 degrees Fahrenheit, is both too low and too wet enough to start the reaction, which is why a boiled steak comes out with an unappetizing gray color rather than a crispy brown texture and look. But when you put your steak in a ripping-hot pan, the surface will dehydrate quickly and it will reach temperatures of around 300 degrees. That's when the beautiful changes start to take place and produce unique aromas, flavors, and colors that we can simply package up as a beautiful crust.
According to Hill, "This step is really crucial for locking in the steak's natural juices and developing that coveted, caramelized exterior."
Using the wrong kind of pan
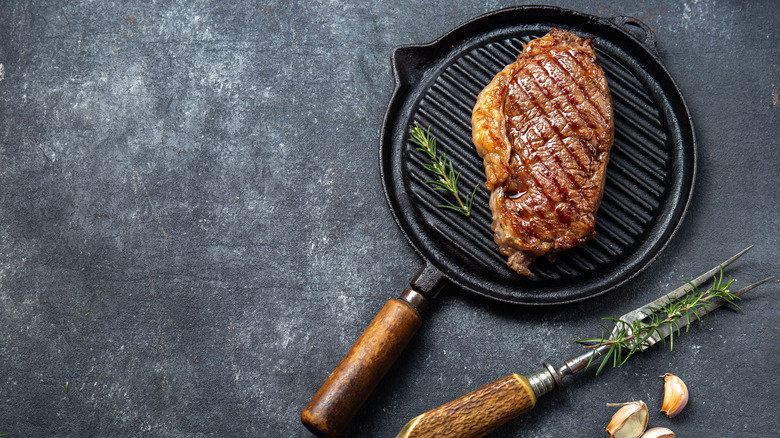
Getting an incredibly high heat in the pan or oven is crucial to building that delicious steak crust. For this reason, the two best materials for pans are cast iron and stainless steel. Both materials usually have a thick bottom that doesn't change shape when it interacts with high temperatures. Avoid aluminum and non-stick pans, as they may warp or heat unevenly under high temperatures. Cast iron is a fantastic choice for this very reason, as it retains heat well. This means when a piece of steak gets slapped onto its surface, it keeps its heat and cooks evenly.
With stainless steel or cast iron, you can easily transfer most pans from the stovetop directly into the oven. Not only does this make your life way easier, but a stainless steel pan is also perfectly safe to use up to 500 degrees, so long as it doesn't have parts that may melt in an oven, like those made from rubber. Sure, maintaining these types of pans might take a bit more effort when it comes to maintenance, but it's worth it in the long run for true steak lovers.
Using oil with a low smoke point

One mistake many beginners make when cooking steak is tossing any sort of oil that they have on hand into an extra-hot pan. Although extra virgin olive oil might be a fantastic option for other recipes because of its unique flavor and health benefits, it's not the best choice for your steak. This is because its smoke point is significantly lower than other cooking oils at a seriously low 320 degrees. Once the oil hits that temperature, it will start to give off smoke and can produce some very unpleasant flavors. So, keep your fancy olive oil for lower-temperature or no-heat applications such as for dipping bread or crafting salad dressings.
If you're searing your steak correctly, it will reach temperatures up to 500 degrees, so using olive oil or other low smoke point oils will negatively affect the final flavor of your steak. Instead, aim to use a lighter oil with a higher smoke point, so you know that it will be able to handle the heat. Hill prefers to use grapeseed or canola oil, but you can use other heat-resistant options such as peanut oil.
Not setting the right temperature
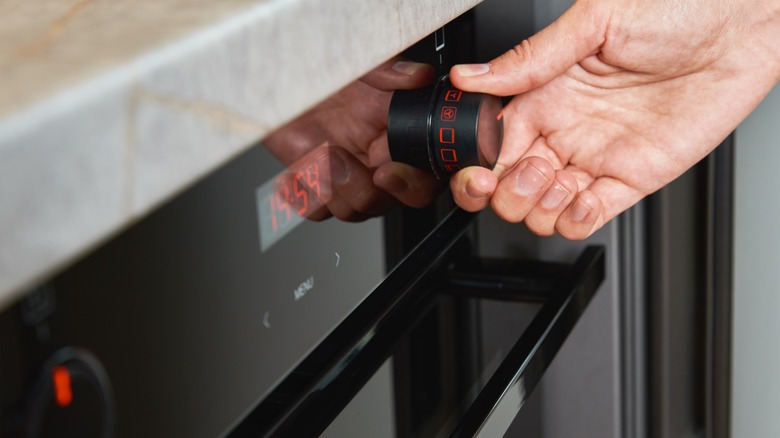
Once you get a good sear in a ripping-hot skillet on every side of the steak, it's time to transfer it to the oven. Although it may seem obvious, it's important to set the right temperature and allow your steak to come up to temperature for the right amount of time.
However, the perfect oven temperature may differ depending on who you ask. Sonny Ingui, the executive chef of Urban Farmer Philadelphia, says that "The cook time will vary based on the cut and thickness. Remember that the steak will continue to cook, even after you take it out of the oven, so take it out early."
Hill likes to preheat his oven to 400 degrees. After searing in a pan, he'll move the seared steak to the oven for about 5 to 8 minutes for a perfect medium-rare. On the other hand, professional chef Norah Clark of YummyTasteFood prefers the "low and slow" approach complemented with a reverse sear. She sets her oven to 275 degrees, allows her seasoned steak to cook in the oven for 25 to 30 minutes, and finishes it with a sear in a hot pan for 1 to 2 minutes on each side.
So, what's the moral of the story? Play around with the temperatures and techniques, but be mindful of how long you leave it in the oven. You don't want to end up with a dried-out or burnt steak.
Not using a meat thermometer
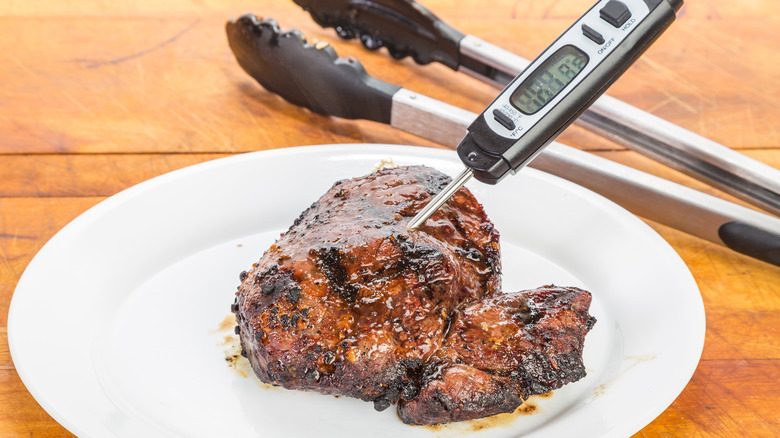
Yes, we've all heard of the little hacks you can use to test the doneness of a steak, like pressing your finger on your other hand and comparing it to the surface of your steak. Others might think they're experienced enough to guess when their steak is perfectly cooked, while still some other cooks will even cut into the steak to check if it's ready to go.
Do yourself a favor and stop guessing when your steak is done. Instead, lean on the fact that there are incredibly simple and effective tools that you can pick up that will make your life many times easier. Hill says to always use a meat thermometer to ensure accuracy — even a basic, low-cost model will do the job well. For a medium-rare steak, be sure to aim for 130 to 135 degrees.
After all, why risk ruining a beautiful piece of meat? If you get yourself a thermometer, you can ensure your steak is never undercooked or overcooked. Moreover, it will help ensure that you get a perfect pink and juicy medium-rare steak every time.
Not basting your steak with an easy sauce
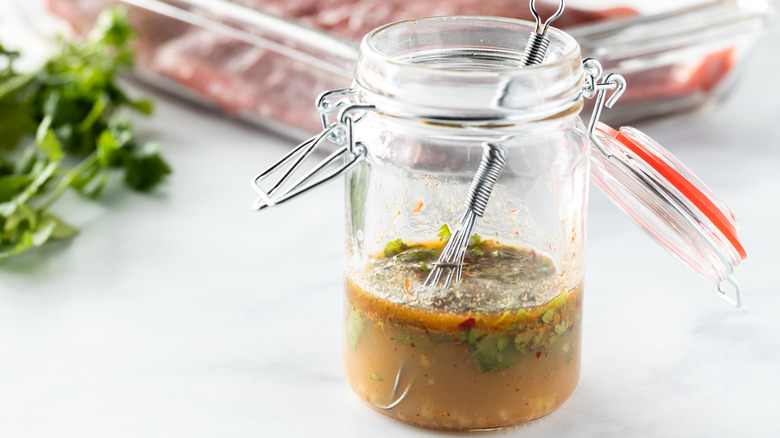
If you've purchased a good cut of meat, seasoned it properly, and cooked it to perfection, you'll no doubt get an incredibly flavorful and satisfying meal. But if you really want to take it to the next level, finishing your steak with a buttery sauce is a no-brainer.
According to Ingui, after you remove the steak from the oven, you should be sure to go the extra mile with a simple sauce. "Pour off the excess oil from the pan and add one tablespoon of whole butter, one clove of smashed garlic, and one sprig of either rosemary or thyme," he says. "Begin basting the steak with that butter and it will become a deliciously herbaceous sauce. Finish it with some sea salt and enjoy."
Adding those simple yet powerful final touches to a steak can be what separates it from tasting like a cheap cut of beef from the store or a masterful steakhouse classic.
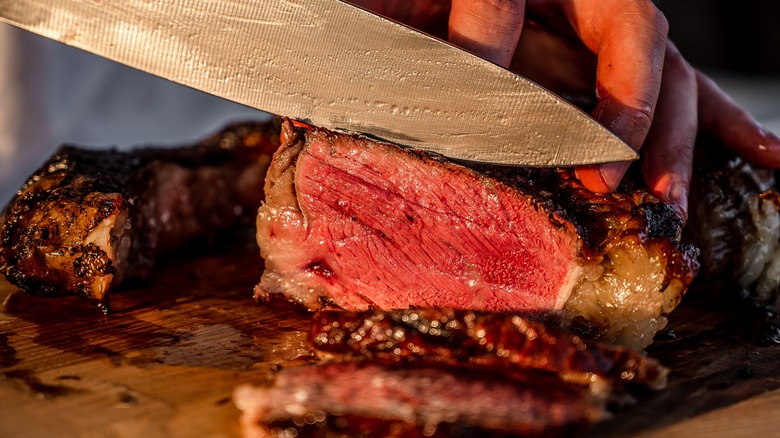
Cutting into the steak right after you finish cooking
You're almost at the finish line. Your stomach is growling as the aroma of perfectly cooked steak wafts into your nose. Your mouth fills with saliva. You grab the knife and descend upon the steak ... but wait!
One of the most common mistakes beginners make when cooking steak is not letting it rest after cooking. That's because, even after you remove the steak from the heat, it will continue to cook. Cutting into it can interrupt that all-important process and leave the meat dry. "Remove the steak from the oven and let it rest for at least 5 minutes, tented with foil, to allow the juices to redistribute. This will make your steak tender and juicy," says Hill.
That's right — you need to wait a few more minutes to ensure your steak is perfectly ready for eating. When you cook a steak at high temperatures, all of the muscle fibers in the steak start to tense up. This puts pressure on the juices to move the only place they can go: the surface of the steak. Allowing the steak to rest after cooking helps the muscle fibers relieve tension, allowing it to retain all of that juiciness. You can always cover it with foil if you're worried about it losing too much heat. And you'll be glad you waited when taking the first perfectly juicy bite.
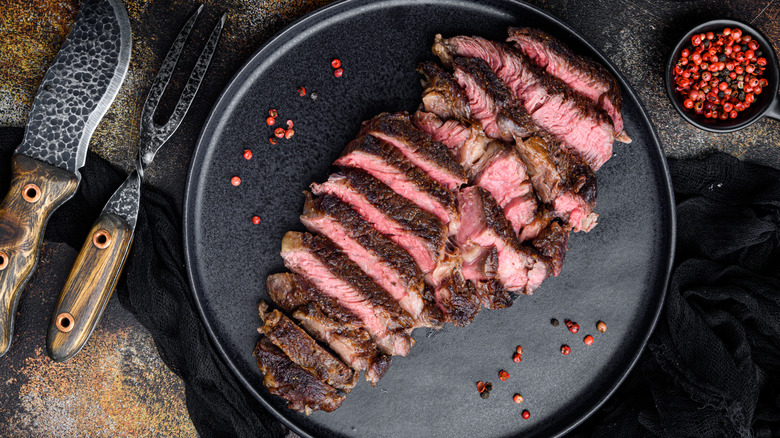
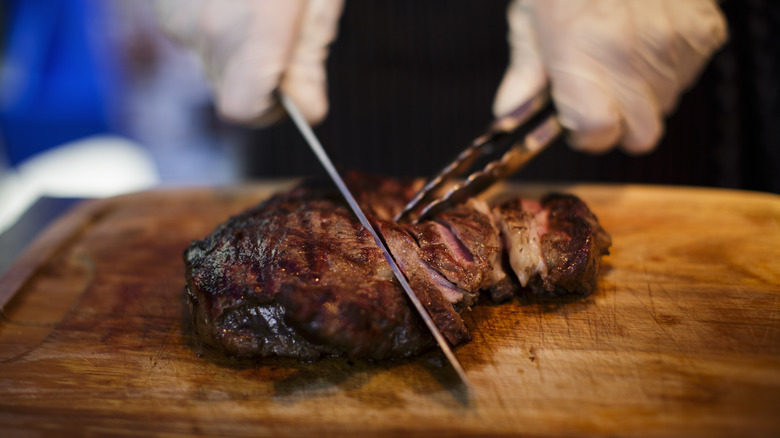
Not slicing against the grain
When your steak is ready to be served, take a minute to pay some attention to the grain of the meat. That's the direction in which all of the muscle fibers are running through the cut of your steak. Take a close look at your meat, and you'll see several of them going in a single direction.
It's important to slice in the opposite direction (that is, perpendicular) to these lines. This way, the muscle fibers are much shorter in every piece, allowing for more tender bites and warding off chewiness. It's important to note that it might be a bit harder to find the grain in more tender cuts of meat, such as the porterhouse, ribeye, or tenderloin cuts. Just take your time and be sure to look carefully at the steak. And if you find that you are cutting with the grain, you can always just turn the steak and continue cutting against the grain.