Mistakes Everyone Makes With Sourdough
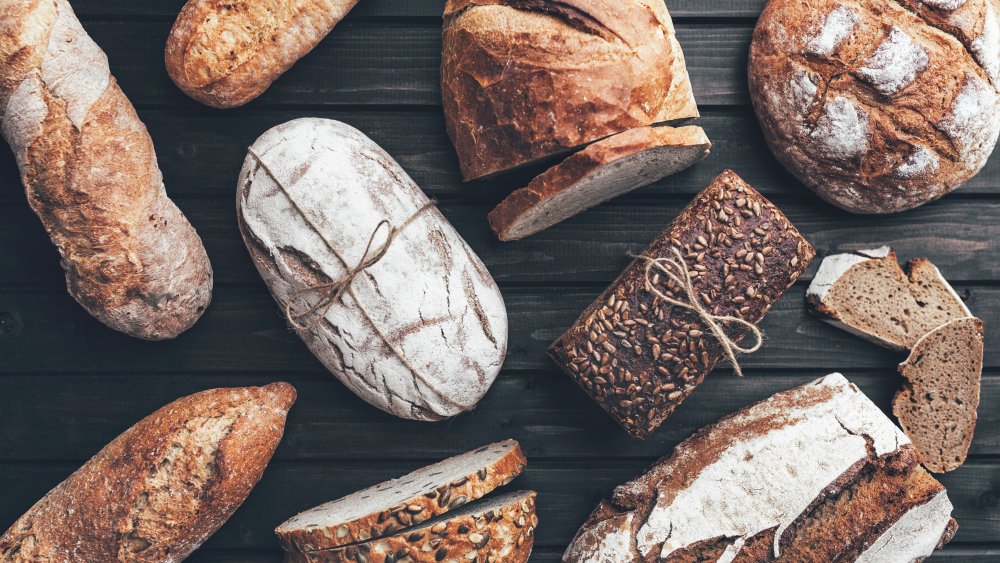
There's no two ways about it: sourdough bread is amazing. It has that unmistakable taste and tang to it, and a firmness that makes it pretty much the perfect thing to serve alongside a bowl of soup, stew, or chili.
People have been making sourdough for a long, long time— according to NPR, it goes all the way back to ancient Egypt.
What makes it different from other types of bread-making? The main thing is where your yeast comes from. Instead of using a package of commercial yeast, you're going to use a starter that you create yourself. What's that? Simply put, it's a combination of water and flour that's left to ferment and produce yeast naturally (via How Stuff Works). You'll use that in your bread instead, and the fermentation process it goes through is what gives it that distinctive, sourdough tang. A good starter, if properly cared for, can last a long, long time — you might even hand yours down to the grandkids someday!
Baking with sourdough can be challenging, and there's a good chance you'll make some mistakes with your sourdough that will hurt your final product. In spite of how long people have been making sourdough, it's far from an exact science — and that makes it a little difficult to work with. Fortunately, knowing some common pitfalls will help you get that perfect loaf.
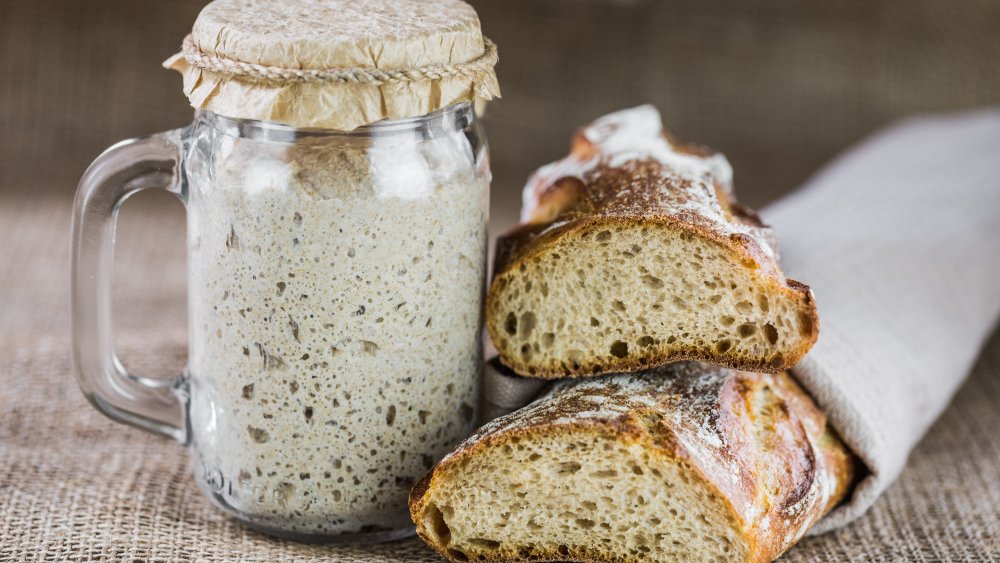
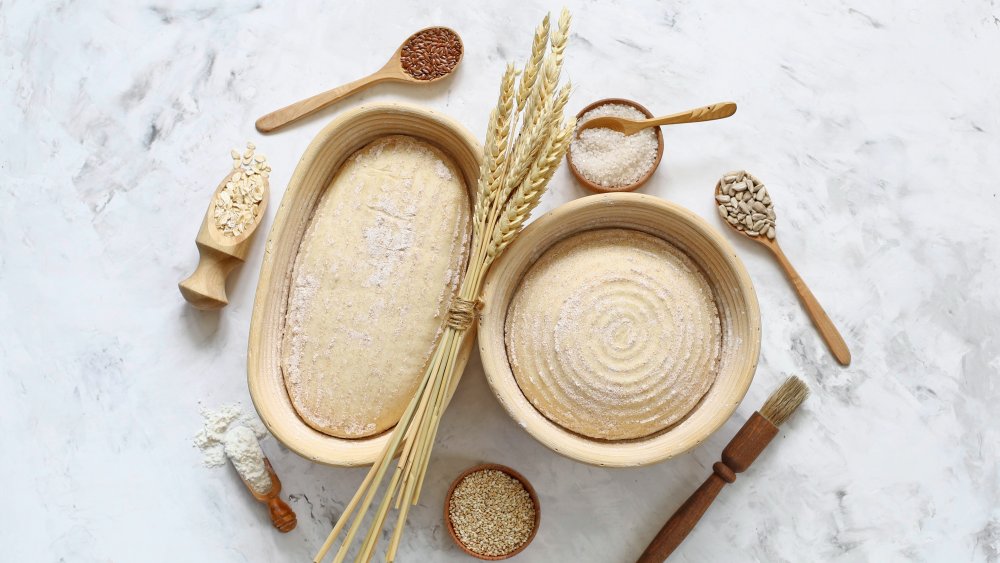
You're not storing your sourdough starter right
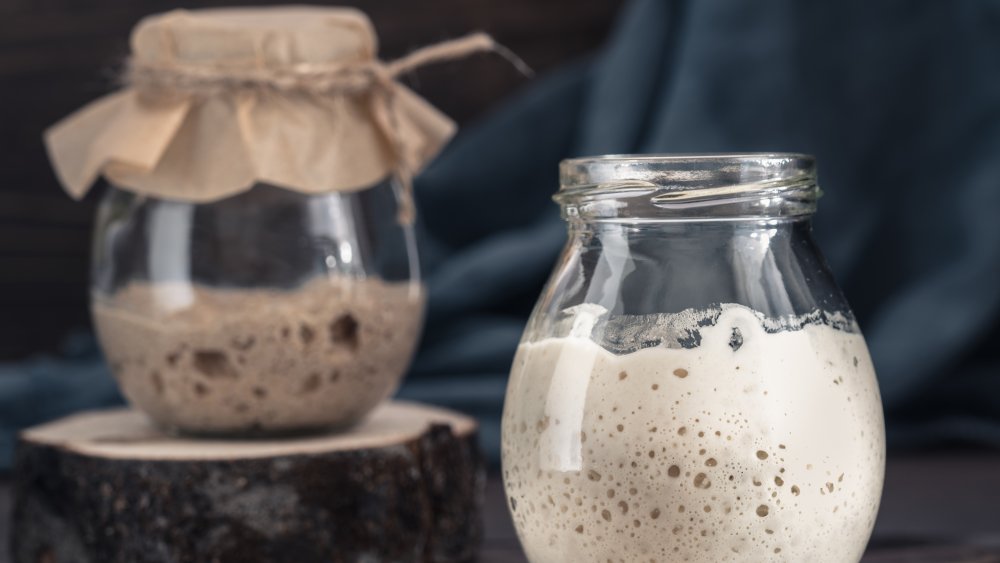
The key to sourdough is your starter, so you're going to want to make sure you're doing everything right from the start. That includes storing it in the right kind of container.
There are a few different options when it comes to choosing a container, so first, a word of caution: you should never use an airtight container, and there's a few reasons for this (via The Fresh Loaf). First, as your flour and water mixture starts to ferment, it's going to increase in size and give off some gases, like carbon dioxide. If there's no way for the gas to escape, it's possible for enough pressure to build up that it'll crack or even break your container. Even if that doesn't happen, the gas is going to take up room inside the container — and you want your starter to have space to expand in size.
Plastic containers can also be iffy. As The Clever Carrot notes, they can be hard to work with and you might find your starter outgrows a small plastic container pretty quickly.
What should you use? Preferably, you want to use a glass jar with a wide mouth, so it's easy to stir. You'll also be able to tell just what's going on inside your starter with a glance — and let's be honest... it's easy to forget about if you don't see it every now and then.
You're not caring for and feeding your sourdough starter right
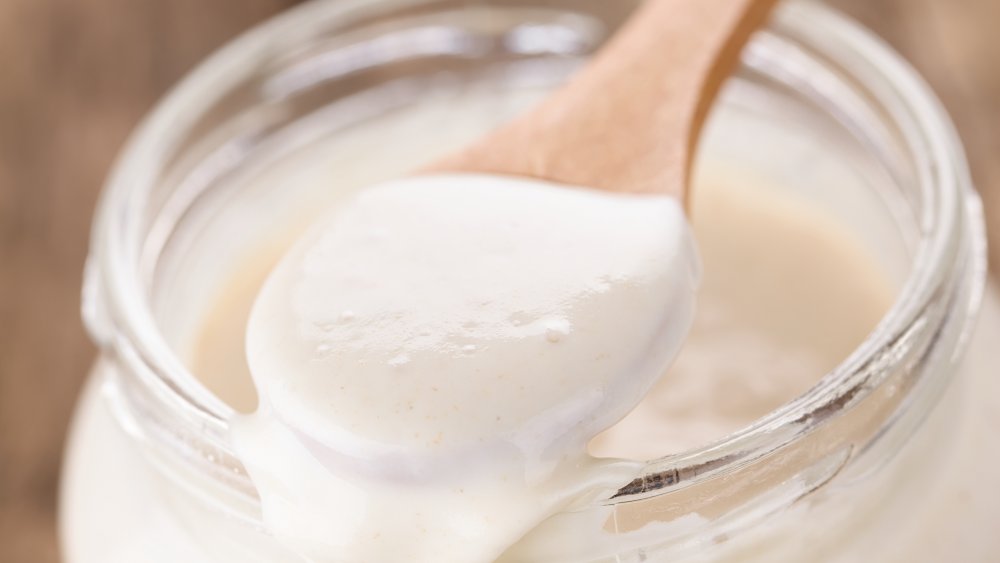
Sourdough can seem intimidating because it's definitely high maintenance, but once you get into a rhythm, it's easy to keep your starter fed and healthy.
According to King Arthur Flour, most starters need to be fed once every 12 hours, if they're kept at room temperature. It's easy: just remove one cup of the starter, then add one cup of flour, a half-cup of warm water, and stir. That's it! (You can use the starter you remove to bake with, or, just discard.) If you're baking outside of your 12-hour feeding schedule, you can feed it right away, then go back to the normal 12-hour schedule.
You're going to end up with a ton of starter — and that might be a good thing. But if you're making it faster than you're baking with it, you're making a huge mistake. In this case, don't keep it at room temperature, just pop it in the fridge. Stored here, you'll only have to feed it once a week, and it'll be much easier to fit some sourdough baking into a hectic schedule.
You're not waking up your sourdough starter after storing it in the fridge

Storing your sourdough starter in the refrigerator essentially slows down the fermentation process, and that means when you're getting ready to bake with a refrigerated starter, you shouldn't just take it out of the fridge and use it immediately.
According to King Arthur Flour, you should take it out of the fridge, feed it as you normally would, and let it sit at room temperature for at least 12 hours. You're essentially reactivating it, and should start to see it bubbling a bit at this point: feed it again, let it sit for another 12 hours, and check. It might take a few feedings to get it active enough that it has enough "oomph" to react properly and cause the bread to rise, but you'll know it's ready to go when it at least doubles in volume over the course of about six hours.
Before you bake, you're going to want to make sure you add enough to the starter that you're going to have some left. (For example, if your recipe calls for a cup of starter, make sure you have at least a cup left in your jar.) Take out what you're going to bake with, then feed it again. And here's the thing — don't just put it back in the fridge. Let it sit out for a few hours to get the process going, then pop it back in the fridge.
You're throwing away your discarded sourdough starter
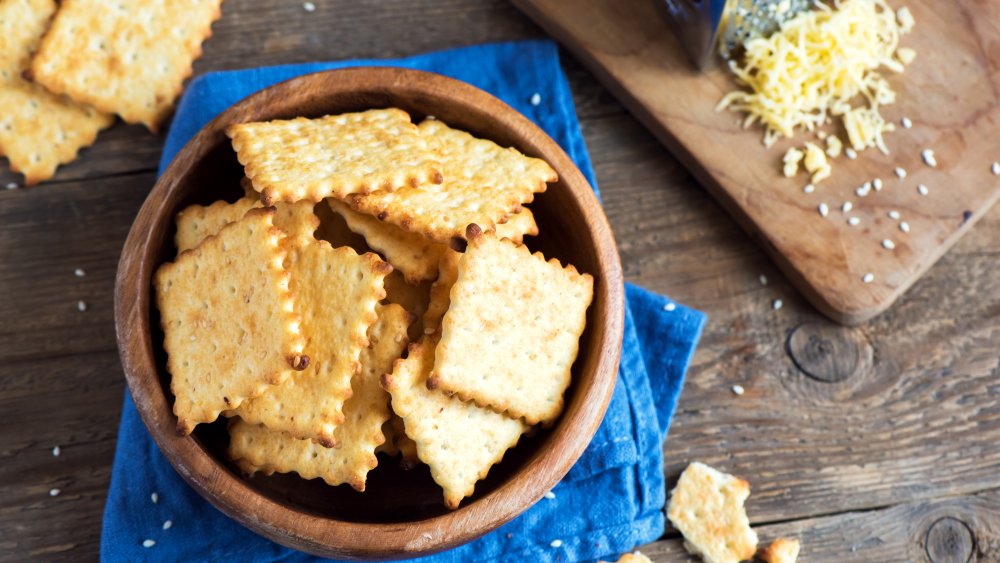
Making a loaf of sourdough bread can take a long time — longer than most people can regularly fit into their busy schedule. And throwing away some perfectly good starter every time you feed it can seem like a waste. If that (or the prospect of eating nothing but sourdough bread, all of the time) is keeping you from trying your hand at sourdough, don't let it!
There's a ton of things you can make with that discarded sourdough starter, and some of them aren't just yummy, they're quick and easy. One of the best might just be whipping up a batch of sourdough crackers with just a cup of your discarded starter, a cup of flour, a dash of salt, and about a quarter cup of butter. Mix, and add some spices, dried herbs, or even some cheese powder. It'll just take about 30 minutes in the fridge for the dough to firm until it's ready to roll. Roll, slice into bite-sized pieces, and bake at 350 for 20 minutes. That's it! With just a slight adjustment (use 2 and a half cups of flour instead of a cup, and let it rise for around 2 hours), you'll end up with a dough that's great for homemade pizzas.
You can also use it in other recipes that aren't going to take quite the time commitment. Make sourdough pancakes or waffles, add it to your blueberry muffins, and it's even a brilliant addition to a crumb cake. It's not just for bread!
You're not experimenting with flours in your sourdough starter
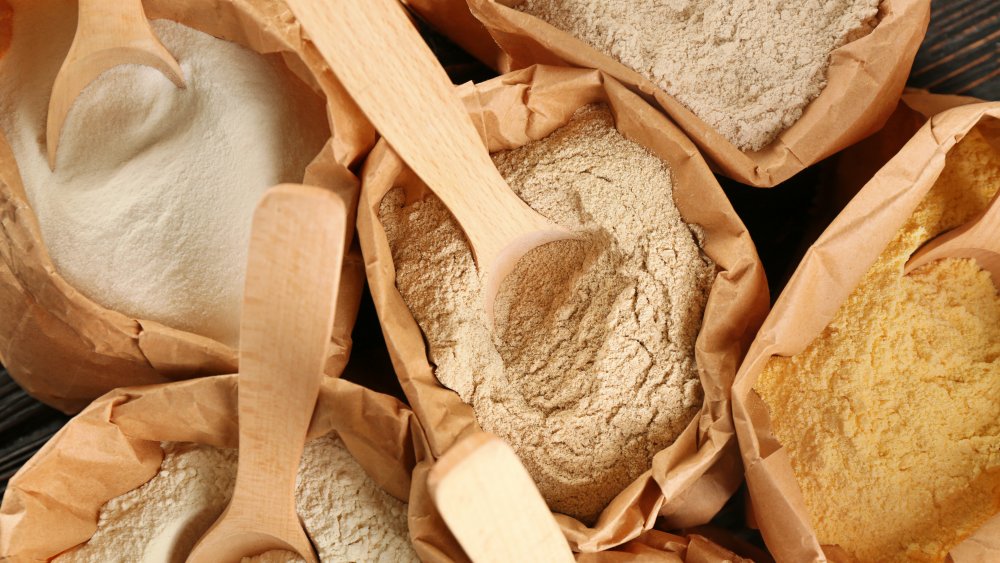
When you think of sourdough, you probably think of regular old white flour, and that's fine — it's certainly a great place to start. But if you really want to have some fun and bake some truly delicious bread, you should absolutely try different kinds of flour.
The principles of making the starter are the same, but different types of flour are going to give you different breads. While white flours are generally mild and high-rising, whole wheat flours are going to give you a denser bread that doesn't rise as much — but still has more flavor packed into it.
You can even get into the more obscure types of flours. True Sourdough says that using einkorn flour will give you a bread that's an Instagram-worthy gold color, while it's the sweet, nutty flavor that really makes a spelt loaf something special. And rye flour is an absolute must-try when it comes to sourdough: the enzymes in rye help it ferment much faster than other flours, and the resulting loaves are dense but moist, and will have an almost fruity, complex flavor. This bread definitely isn't boring!
You didn't get rid of the hooch in your sourdough starter
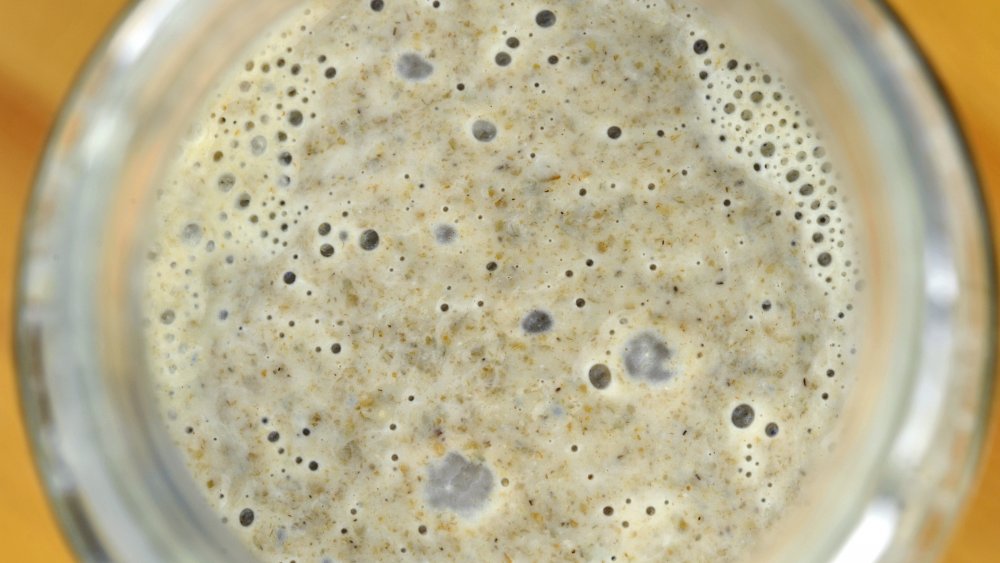
While a sourdough starter might seem like it's high-maintenance, it's actually pretty forgiving. King Arthur Flour says doing things like giving it too much flour or water, or missing a few feedings isn't going to do any lasting harm to your starter.
This does, however, come with a "but." If you forget about it for long enough, it's going to become overrun with bad bacteria and mold. If there are any strange colors in your starter, it's time to dump it and start over.
If you forget about your starter for a few days, you might start to notice a layer of liquid forming on the top. To some sourdough aficionados, that's called hooch, and it's a sign that you've gone too long without feeding.
Unless it's got a funny color to it, it doesn't mean your starter is ruined... but you don't necessarily want to keep it in your mix. If it's a thin layer that's just starting to form, stir it up and feed it. But according to Sourdough Home, if it's more than what you'd consider "a little bit," (and this depends on how wide your jar is), then pour it off. Otherwise, you're going to end up with some seriously funky bread.
You're not managing the moisture level in your sourdough dough
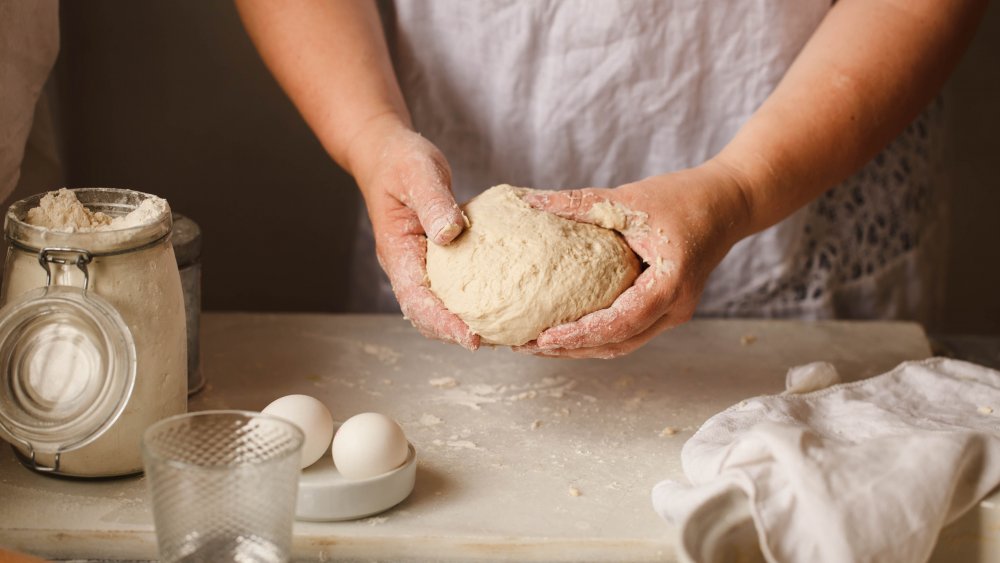
One of the biggest complaints you might have about your sourdough loaf is that it's very, very dense when it finally comes out of the oven, and that could be because you didn't adjust your recipe when it you mixed your dough. Basic sourdough bread recipes can be almost deceptively simple. Usually they just call for starter, flour, water, and salt, but just because there's only a few ingredients, that doesn't mean it's straightforward. The amount of water you actually need might not be what the recipe calls for.
Traditional Cooking School explains it like this: different flours absorb water differently, so depending on the makeup of your starter and your flours, you might need to add more water... or, don't add as much as the recipe calls for. If there's too much or too little water, your bread is going to be dense. Unfortunately, there's no tried-and-true method for figuring out just how much water you'll have to add or cut out — it's something you're going to have to experiment with, and learn to recognize.
That's not to say we can't give you any guidelines, though, so here's a tip. When you're kneading the dough, pay close attention to how it feels. If it feels dry, add a bit more water. You're looking for a dough that's slightly sticky... but not so sticky that it's hard to work with. Practice makes perfect!
You're skipping the autolysis phase when making sourdough

So, what the heck is the autolysis phase, and why is skipping it a mistake?
The autolysis phase takes place when you mix your flour and water until it's barely combined, then you let it sit for at least 10 minutes and up to five hours (different flours have different autolysis times). And yes, we're just talking about the flour and water — not the sourdough starter. What's going on as it sits is that the flour is fully absorbing the water, and the enzymes that are going to contribute to the creation of your final product are activated.
According to True Sourdough, adding this extra step will create dough that's easier to work and requires less kneading, and a final product that's taller, softer, and has a better taste and color.
Sounds pretty good, right? And it's super easy — remember, you're just mixing your flour and water enough to get everything wet, you're not kneading it at all. Doing too much to your pre-dough and you'll start to develop gluten, and that'll end up being worse than if you'd just skipped this in the first place. How do you know when the autolysis phase is complete? Pick up your dough, drape it over your fingertips, and stretch it. If you can stretch the dough thin enough that you can see your fingers through it — without tearing it — you're good to go.
You're not adding baking soda to your sourdough
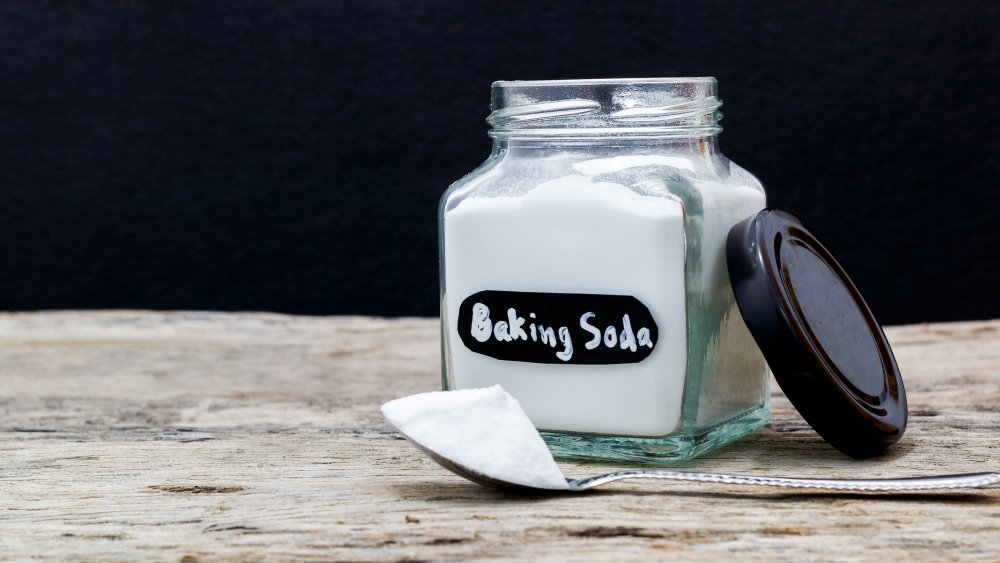
You usually think of baking soda in terms of making something rise, and since that's the job of your sourdough starter, you might think you don't need the baking soda. But if you skip it, you're making a mistake — and here's why.
First, Traditional Cooking School says that adding a bit of baking soda to your sourdough will help keep your final product from coming out too dense, and that's a good thing. It doesn't take much, either — just add between half a teaspoon and a whole teaspoon to the dough right before you start to shape it, and you'll find you get a lighter bread. Win!
Baking soda plays another role in sourdough, too. According to Cultures for Health, if you have a starter that's a little too acidic, that's going to make your bread a little too sour. (Did you stir in a thin layer of hooch? That's a sign it might be more sour.) Add a dash of baking soda and it'll neutralize some of the acid, and you won't get that tangy bite.
You're not taking temperature and environment into account when proofing your sourdough
If you've made sourdough before, you know there are two proofing stages: one happens after your dough is mixed, and the other happens after your dough is shaped into whatever form you're going to bake it in. (You might also call it "rising" or "proving," but it's the same thing.) Now, did you know the temperature you let your sourdough proof at has a major impact on how your bread comes out?
This is because yeast will consume sugars in different proportions depending on the temperature, says True Sourdough. It can get incredibly complicated, so here are some guidelines to keep in mind.
Yeast is most efficient if dough proofs at between 80 and 90 degrees Fahrenheit, which results in a more mildly flavored bread. When it comes to sourdough, though, you want some serious flavor — so proofing your sourdough between 75 and 82 degrees Fahrenheit is a good sort of general rule. If you want a more sour bread, you're going to want to get outside of that temperature range to change how the fermentation process happens, and that means proofing below 50 degrees Fahrenheit, or above 82 degrees Fahrenheit.
And yes, that may mean putting your bread in the fridge, or planning on getting some space in some direct sunlight, but it'll make all the difference in the world.
You're proofing too long... or not long enough
True Sourdough says that proofing time depends on temperature, and it varies... a lot. Hotter temperatures might make your bread finish in around four hours, but in cooler temperatures, it could take more than 24. While there are a lot of guidelines to figuring out about how long it's going to take, the best way to know when your proofing is done is to know the physical changes that indicate it's ready.
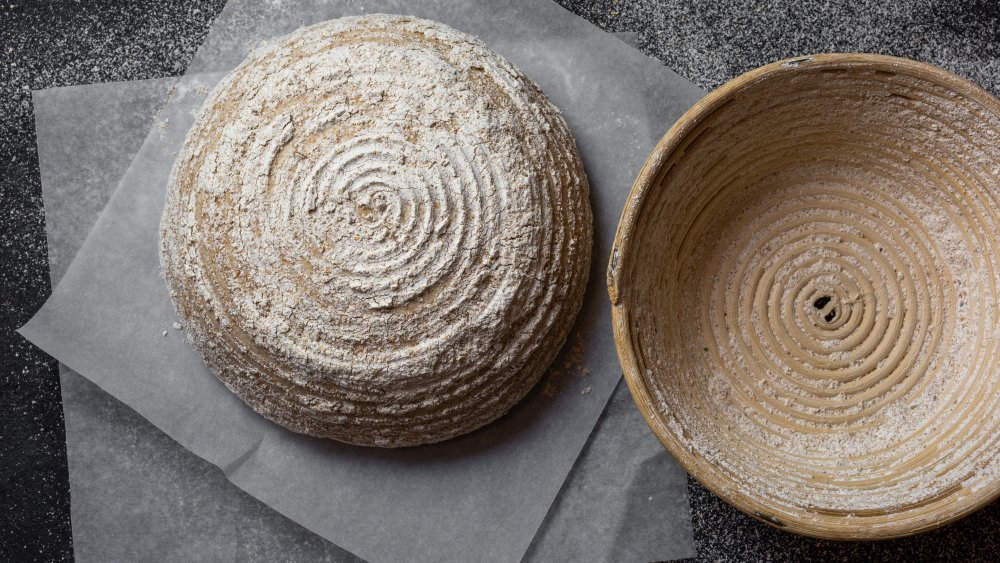
During the first fermentation, you'll notice that as the dough proofs, it's going to get much, much bigger. That's because of the air bubbles that are developing, and this is important: you're going to want to be gentle with it, because popping those air bubbles will mean you'll end up with an incredibly dense loaf. So, here's what you do: gently wiggle the proofing basket. Does it have a little bounce to it? You want bounce!
Then, poke it. If it springs back quickly, it still needs more time. If it doesn't spring back at all, you've over-proofed it. If it slowly springs back and stops when there's still a bit of an indentation, you're golden. Properly proofed dough should have a smooth, domed surface, and you should be able to see air bubbles forming. Don't worry — once you know what you're looking for, it'll be easy to spot!
You're not baking your sourdough in a Dutch oven
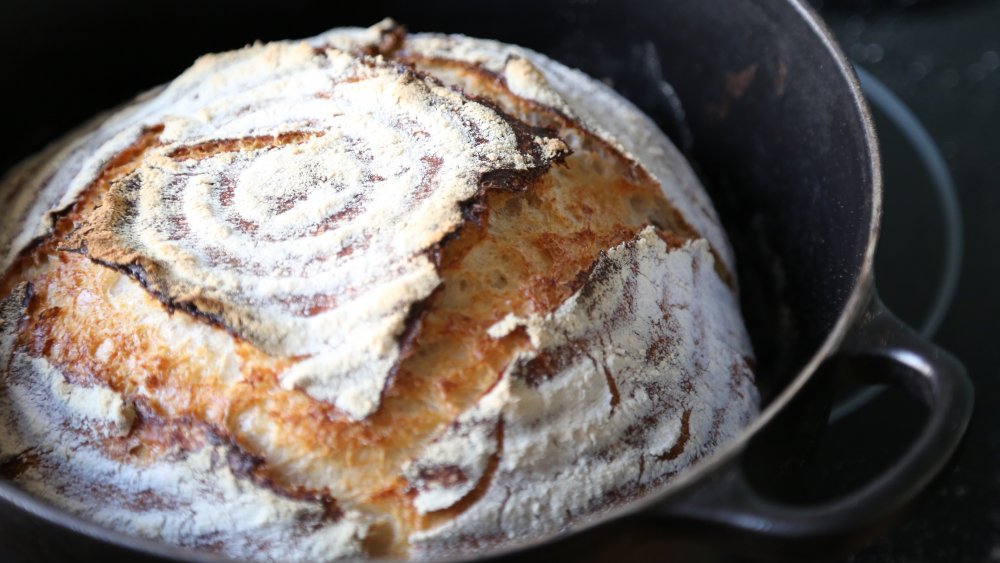
When it comes time to bake, do you reach for a bread pan? Don't!
Baking your sourdough loaf in a Dutch oven will absolutely make all the difference in the world. Why? Because the dough is going to release moisture as it bakes, and the Dutch oven will keep all that moisture in. The result will be a larger loaf, and a crust that's super shiny, deeply colored, and extra crispy, just as a good sourdough loaf should be.
According to The Perfect Loaf, there's one trick in particular you need to know. It's entirely possible that if you do everything the same way you would with a regular bread pan, you're going to burn the bottom of the bread. You'll need to either drop your baking temperature (by around 25 degrees Fahrenheit), insulate the bottom with a baking stone by putting it in the bottom of your oven beneath your Dutch oven, or sprinkling a layer of cornmeal on the bottom of the Dutch oven. That'll allow just enough space between the pan and the bread to prevent burning, and once you do it, you'll never go back!
You're expecting flawless consistency with your sourdough baking
Here's the thing about baking: Usually, you find a great recipe and you stick with it. You can make it over and over again, do it the same way, and get the same results. But if you're expecting sourdough to be like that, you're setting yourself up for disappointment.
As Modernist Cuisine explains, sourdough is complicated. Your starter is a living, ever-changing thing, and it's one of the most important ingredients to your sourdough — so that means you're starting off with something that's very different every time you scoop some out. It'll have different levels of moisture. Different spores. Different microbes, different contaminants — even dust particles can change your starter, and they note it's doing more than just changing, it's evolving.
Bottom line? It's going to change, and because of that, it's incredibly difficult to get consistency in your sourdough. So, don't expect it! What comes out of the oven can be a surprise no matter how much you've baked or how closely you follow the directions, so don't expect consistency, don't get discouraged at a failed loaf, and definitely try again.