No-Bake Cheesecake
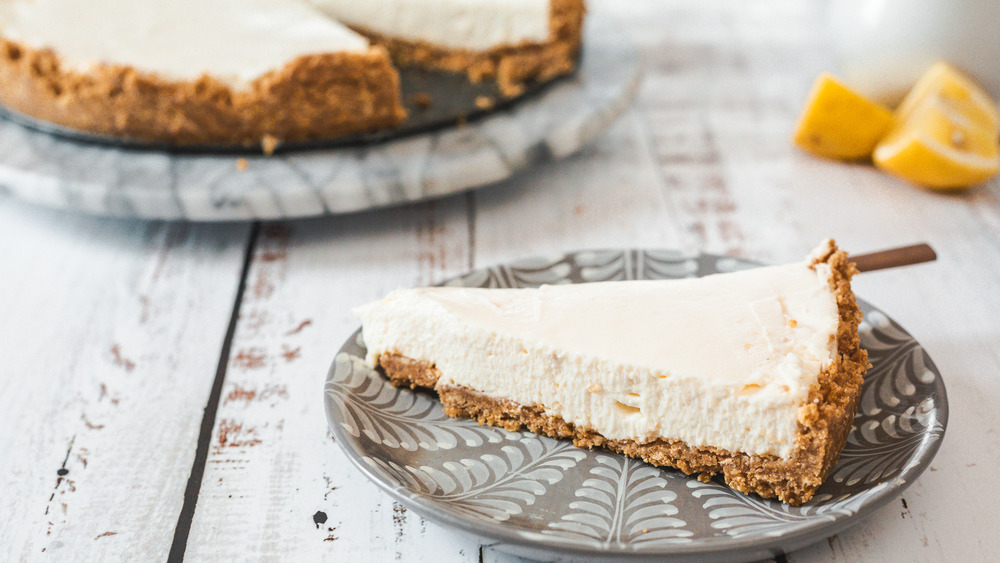
There are those days when you want a dessert, but you just don't feel like firing up the oven. Or mixing a complicated batter. Or you've run out of eggs. For all those times, there's no-bake cheesecake. Endlessly customizable with a variety of toppings, our classic no-bake cheesecake is a blank, rich, and creamy canvas. Scented lightly with the zest and juice of a lemon, and made up of easy-to-find, everyday ingredients, it's a lazy cook's dream.
The origins of cheesecake date back much further than you think — to ancient Greece, in fact, where molds attributed to cheesemaking were found as early as 2000 B.C. But the more familiar version most of us know and love, with a graham cracker crust and a cream cheese-based filling, was developed much later in the United States.
Making it into a no-bake cheesecake and turning the classic custard of eggs and cream into a mix of whipping cream and cream cheese was a fairly recent stroke of genius. And now, there's no going back. So next time you want a dessert, let your refrigerator do the cooking and whip yourself up a beautiful no-bake cheesecake.
Gather the ingredients for no-bake cheesecake
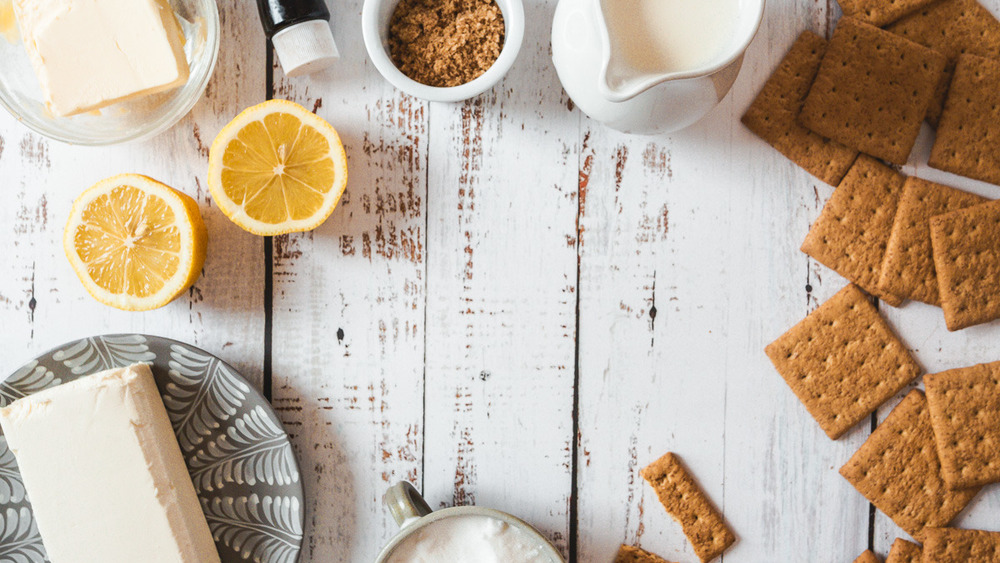
The classic American cheesecake requires graham crackers and butter for the crust, and a mix of cream cheese and whipping cream for the filling. The most common cream cheese used for cheesecake making across North America is the familiar tinfoil-wrapped Philadelphia brand cream cheese. Invented in 1872 by American dairyman William Lawrence of Chester, Philadelphia cream cheese is now owned by Kraft Foods.
While you don't have to use Philly cream cheese for your no-bake cheesecake, you do have to get yourself some heavy whipping cream. Though some cheesecakes rely on a mix of cream cheese and yogurt, we like the creamy, airy texture that whipped cream gives our no-bake cheesecake.
For best results, let your cream cheese soften for a while outside the fridge before making the cake. The whipping cream should be perfectly chilled and taken straight from the fridge. The other ingredients you'll need for this recipe are butter, brown and white sugar, the juice and zest of one lemon, and vanilla extract.
Crush graham crackers for the no-bake cheesecake's crust
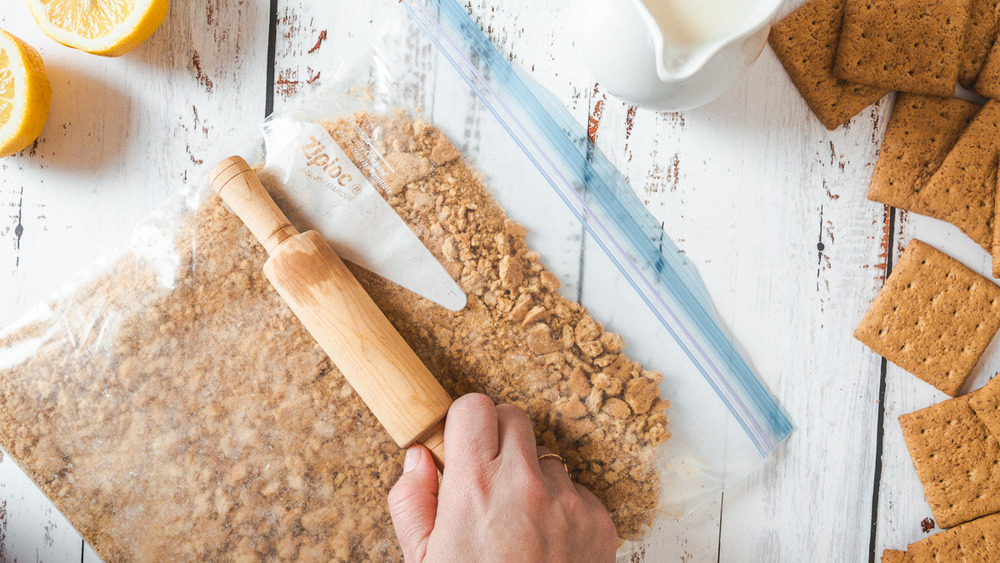
The crust of our classic no-bake cheesecake is a simple mixture of graham crackers crumbs, melted butter, and brown sugar. Brown sugar is used for its sticky texture, which works along with the butter to bind the cookie crumbles into a cohesive base that can be molded into your pan.
To prepare the base, start by transfer graham crackers to a large Ziploc bag. Crush them with a rolling pin until they turn into fine crumbs. This is the time to get out all your hidden aggressions! Alternatively, you can grind graham crackers into fine crumbs in a food processor. You just need to pulse the crumbs repeatedly, using an all-purpose blade.
Transfer the graham cracker crumbs to a large mixing bowl before moving onto the next stages of making the crust.
Mix ingredients for the no-bake cheesecake's base
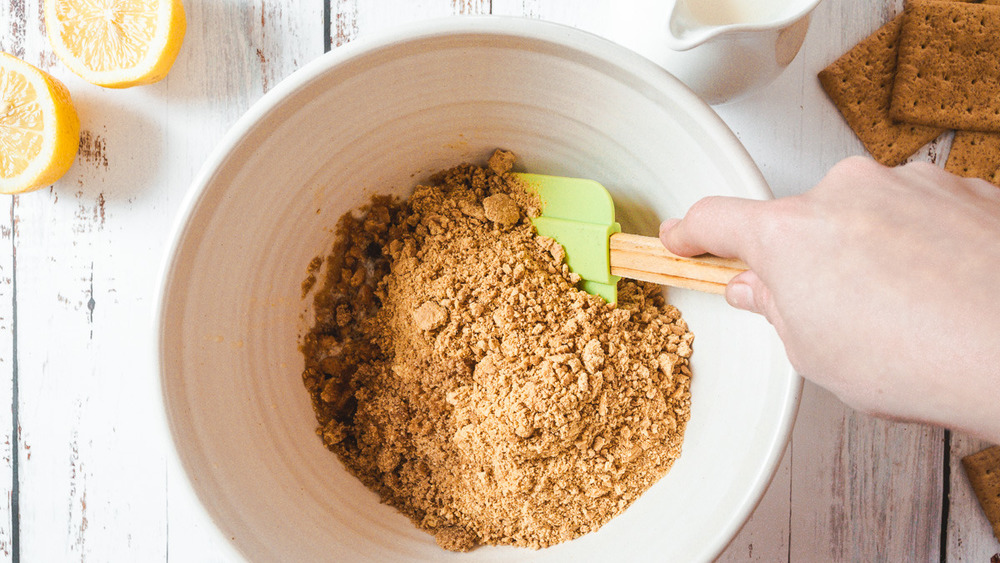
With your graham crackers now turned to crumbs and resting safely inside a large mixing bowl, we can add the rest of our cheesecake base ingredients.
Add brown sugar to the mixing bowl, and stir well to combine. You shouldn't be able to easily distinguish the brown sugar from graham crackers. Add the melted butter, stirring constantly with a spatula until the butter is fully incorporated. You should end up with a malleable dough that can be pressed together. The graham cracker crumbs should look fully rehydrated.
If you crushed your graham crackers by hand, you may end up with some larger chunks. Try to squeeze those between your fingers, but don't worry about it too much as it won't be noticeable once the cake firms up in the fridge.
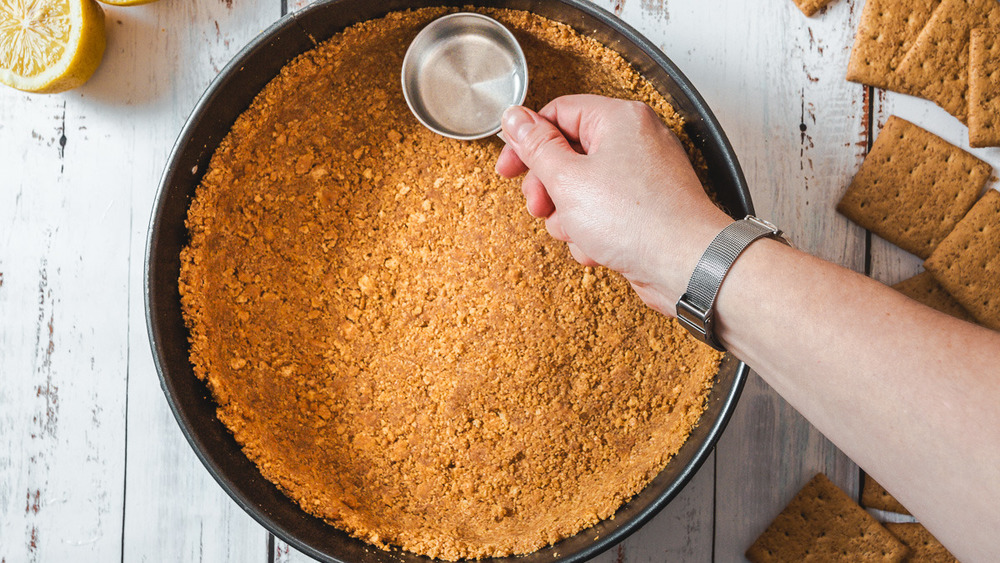
Arrange the no-bake cheesecake's base in a pan and freeze
Generously butter a 9-inch springform pan. It's important that you use a springform pan, which is a pan made up of two parts — a removable base and a removable ring with a lock-and-clasp mechanism that expands and contracts according to need.
However, If you don't have a springform pan, we have a solution for you! You can keep the cheesecake in the pan and serve it straight from there. It may not be as pretty, but it's definitely still just as delicious.
Press the crumb mixture into the pan, covering the bottom and up to 2-inches up the sides. Use the back of a measuring cup (as in the photo) or a straight-edged glass to really pack it in there; the better packed your crumb bottom is, the easier your cake will come out. Chill the base in the freezer for 20 minutes.
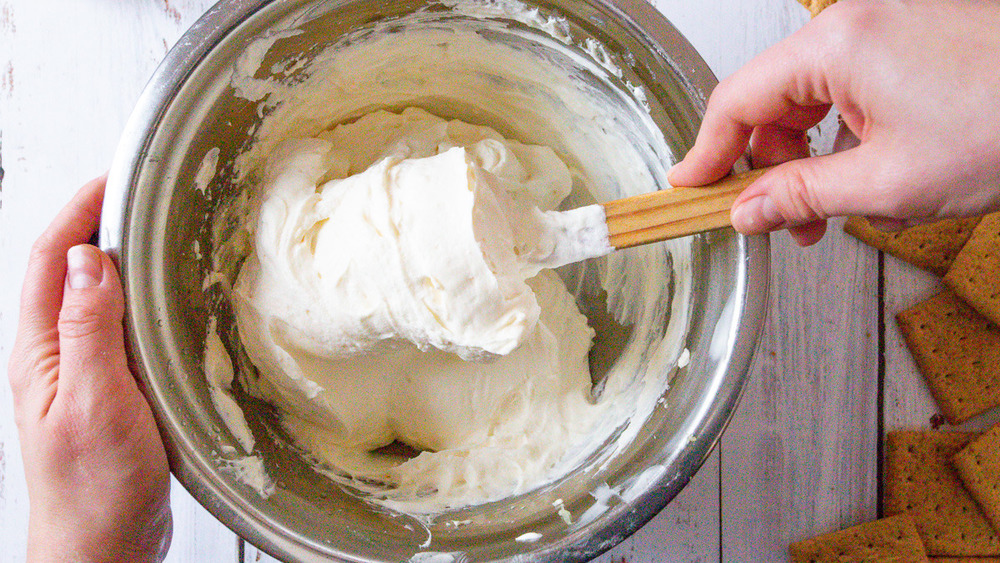
Whip the cream for no-bake cheesecake
While the base of your no-bake cheesecake is chilling in the fridge, let's move on to make the filling.
Pour chilled whipping cream into a large mixing bowl. Using a hand mixer or a standing mixer, whip on medium-high speed until stiff peaks form, about three or four minutes. This means that when you pull the blades of the mixer out, the cream should remain standing in sharp little curls, and not collapse into a heap. Once you have the right cream consistency, set it aside.
Whipping the cream helps the structural integrity of the cake. It ensures that when ready, your no-bake cheesecake could use it as a trophy stand. Or, you know, a tall and beautiful cake.
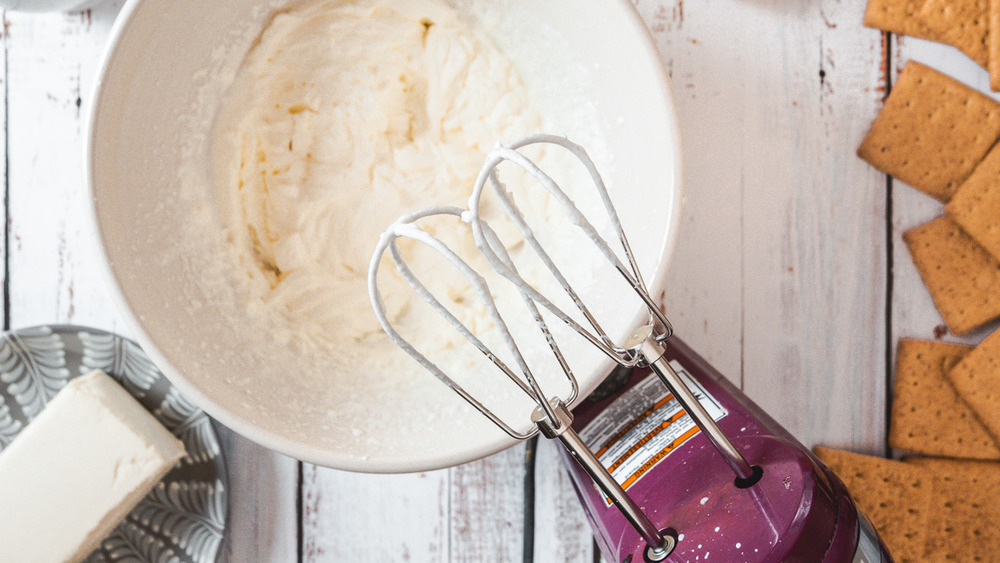
Now it's time to whip the cream cheese and sugar
Whipping cream is just half the no-bake cheesecake equation — and not even the main half, at that. The star of the show is, of course, our cream cheese. For this recipe, you will need two 8-oz packages of cream cheese. This results in a generous cake of eight servings.
Combine softened cream cheese and white sugar in a large mixing bowl. Using a hand mixer or a standing mixer, whip them together on medium speed until perfectly combined, smooth and creamy. This should take about two minutes.
Add lemon zest, lemon juice, vanilla extract, and beat for an additional three minutes, until well combined and no lumps remain.
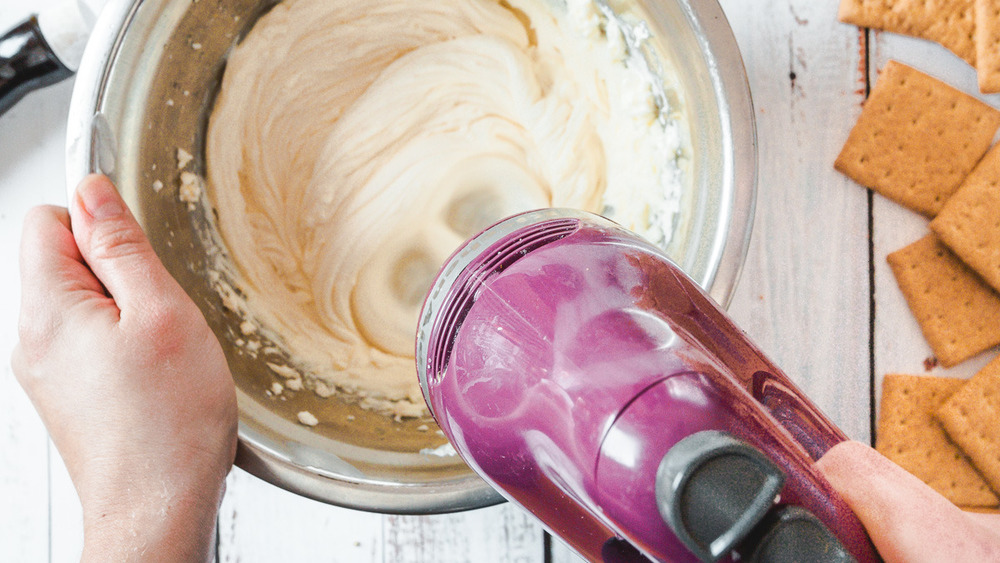
Combine the no-bake cheesecake's filling ingredients
To complete the process of making the filling for no-bake cheesecake, we need to bring together the two main components of the cheesecake — the whipped cream, and the cream cheese mixture.
Working in stages and using a spatula, fold in whipping cream into the cream cheese filling. Do this gradually and slowly to not lose all the volume. We have found it works best if you fold the whipping cream into the cream cheese, and not vice versa. Doing otherwise can really deflate your beautifully whipped topping.
Finish the no-bake cheesecake and chill overnight
We've now reached the "baking" part of making no-bake cheesecake. And by baking, I mean putting it in the refrigerator and forgetting about it for at least eight hours. No setting timers, no checking the oven obsessively to ensure your cake didn't collapse, and no sticking cake testers and praying they come out dry. In other words, this is what baking should always be like.
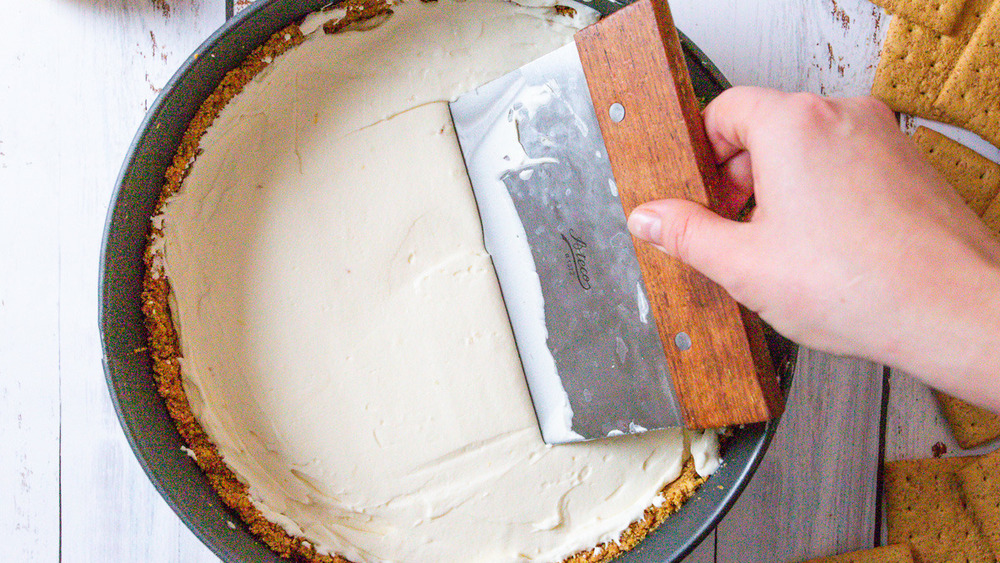
Remove the pre-frozen crumb crust from the freezer. Transfer the filling into the crust, smoothing down the top. For best results, you can use an offset spatula, or a bench scraper, however, even the bottom of a measuring cup or a butter knife blade will do in a pinch.
Cover your baking pan tightly with plastic wrap. Refrigerate overnight at the very least, and up to 24 hours. The longer you refrigerate your no-bake cheesecake, the better it will hold up
Remove your no-bake cheesecake from the cake pan
The hardest part of making no-bake cheesecake is, undoubtedly, waiting the full time it takes to chill to desired firmness. This should be a minimum of eight hours, though we really recommend the full 24 hours.
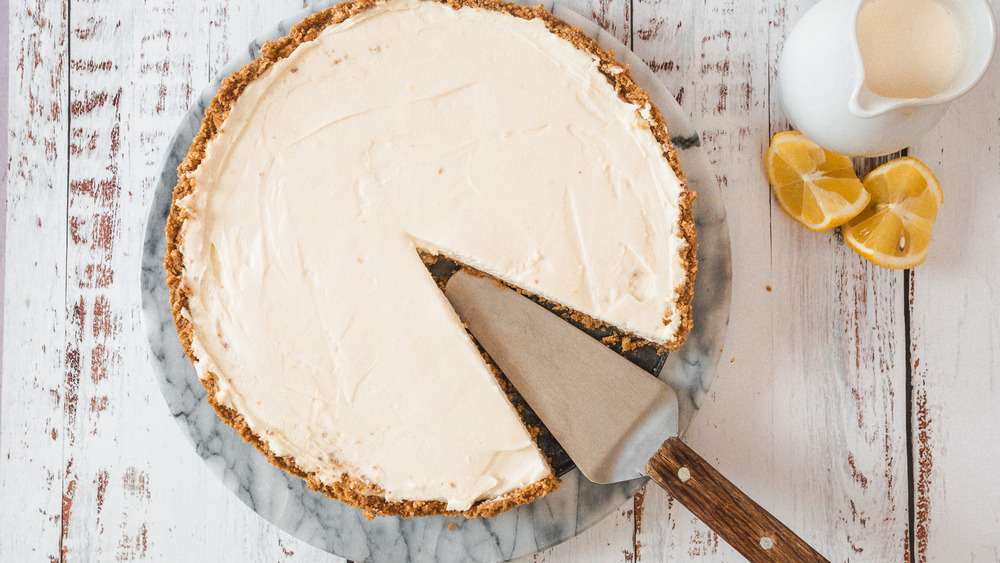
When the no-bake cheesecake has sufficiently chilled, run a butter knife along the inside of your pan prior to opening the clasp, to loosen your cake from the rim and ensure it separates. Remove the rim.
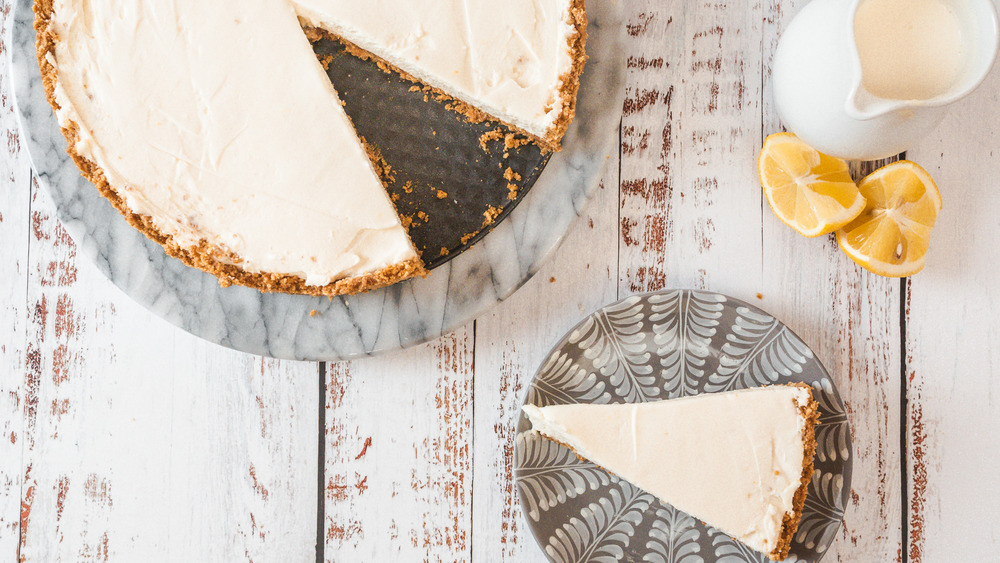
Cut the cake into slices using a clean, sharp knife. It's best to wash the knife between slices to avoid the crumbs mixing in with the filling.
You can serve no-bake cheesecake with a variety of optional toppings, or enjoy as is
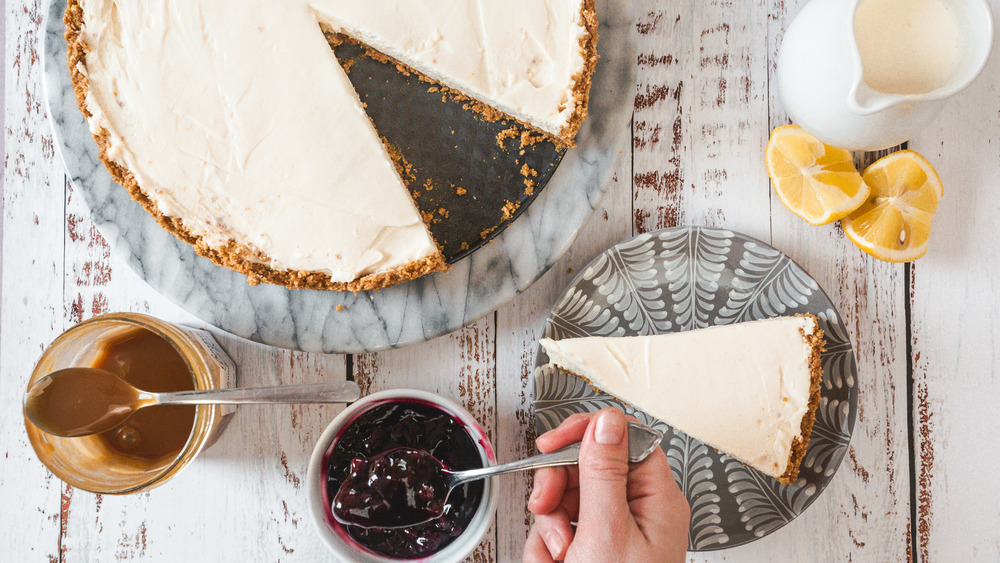
Traditional American cheesecake is usually served as is, in thick slices and white, pristine beauty. It's the perfect way to enjoy its faint lemon scent, the aftertaste of vanilla, and the crunch of the graham cracker crumb crust. If, however, you would like to change up the taste of your no-bake cheesecake, we can recommend serving it with a variety of toppings.
- Salted caramel or Dulce de Leche give it a bold sweetness.
- Store-bought, canned blueberry or cherry pie filling is a great contrast to the lemon cheesecake flavor.
- Homemade strawberry or raspberry coulis — made from blending frozen berries with a bit of sugar – is a perky, slightly lip-puckering sauce that goes beautifully with the cheesecake.
Finally, a few squirts of extra whipped cream would not be remiss in this lovely cake. Any way you slice it, no-bake cheesecake is a gorgeous dessert that comes together with minimal effort!
Directions for No-Bake Cheesecake
Making a delicious and creamy cheesecake doesn't get any easier than our no-bake cheesecake recipe. While no oven is needed here, patience is a must.
Ingredients
- 200 g graham crackers, broken into pieces
- 3/4 cups (1.5 sticks) unsalted butter, melted
- 1/3 cup brown sugar
- 1 cup heavy cream
- 2 8-oz cream cheese packages (450g)
- 1 cup granulated sugar
- zest of one lemon
- 2 teaspoons of lemon juice
- 1 teaspoon vanilla extract
Directions
- Transfer graham crackers to a large Ziploc bag. Crush them with a rolling pin or food processor until they turn into fine crumbs. Transfer to a large mixing bowl.
- Add sugar to mixing bowl, and stir well to combine. Add melted butter, stirring constantly until butter is fully incorporated. You should end up with a malleable dough that can be pressed together.
- Generously butter a 9-inch springform pan and press the crumb mixture into the pan, covering the bottom and up to 2-inches up the sides. Use the back of a measuring cup or a straight-edged glass to really pack it in there; the better packed your crumb bottom is, the easier your cake will come out.
- Chill in the freezer for 20 minutes.
- Make the filling: Pour whipping cream into a large mixing bowl. Using a hand mixer or a standing mixer, whip on medium-high speed until stiff peaks form, about 3-4 minutes. Set aside. Whipping the cream helps the structural integrity of the cake, so don't give up halfway!
- Combine cream cheese and sugar in a large mixing bowl. Using a hand mixer or a standing mixer, whip them together on medium speed until perfectly combined, smooth and creamy, about 2 minutes. Add lemon zest, lemon juice, and vanilla extract, and beat for an additional 3 minutes, until well combined and no lumps remain.
- Working in stages and using a spatula, fold in whipping cream into the cream cheese filling. Do this gradually and slowly to not lose all the volume.
- Transfer filling into pre-frozen crumb crust, smoothing down the top (use an offset spatula, or a bench scraper).
- Cover your baking pan tightly with plastic wrap. Refrigerate at least overnight, and up to 24 hours. The longer you refrigerate your no-bake cheesecake, the better it will hold up.
- When no-bake cheesecake has sufficiently chilled, run a butter knife along the inside of your pan prior to opening the clasp, to loosen your cake from the rim and ensure it separates. Remove the rim.
- Cut the cake into slices using a clean, sharp knife. It's best to wash the knife between slices to avoid the crumbs mixing in with the filling.
- If desired, top no-bake cheesecake with your favorite toppings and serve.
Nutrition
| Calories per Serving | 679 |
| Total Fat | 50.2 g |
| Saturated Fat | 29.0 g |
| Trans Fat | 0.7 g |
| Cholesterol | 148.4 mg |
| Total Carbohydrates | 54.3 g |
| Dietary Fiber | 1.1 g |
| Total Sugars | 40.0 g |
| Sodium | 335.9 mg |
| Protein | 5.9 g |