The Chocolate Mousse Recipe Everyone Will Love
You know a dish is a classic when it's got it's own national holiday! Chocolate mousse is celebrated every year on April 3rd and rightfully so. It's light and airy, yet rich and downright delicious. It's just as fabulous on it's own as it is layered in a cake, and once you've got the hang of it, you'll be able to whip it up in no time. So where did such magic come from?
The short and sweet history of mousse: In 1529, Spanish Conquistadors brought chocolate from Mexico to Spain. Many, many years later, in 1615, Spanish princess Anne of Austria married Louis XIII, bringing chocolate not only to France but to the palace itself. It's said that the palace chefs first began to experiment with chocolate then.
In the 18th century, French chefs mastered savory mousses and finally, in the 19th century, dessert mousses became a thing! By the 1930s, chocolate mousse was introduced to America as were the first electric mixers. Though many of these early recipes are thought to be more like pudding than mousse, electric mixers paved the way to create the airy consistency we expect of mousse today.
Chef Tara Rylie, of RylieCakes shares with us a chocolate mousse recipe that's sure to satisfy your sweet tooth.
The best ingredients make the best chocolate mousse
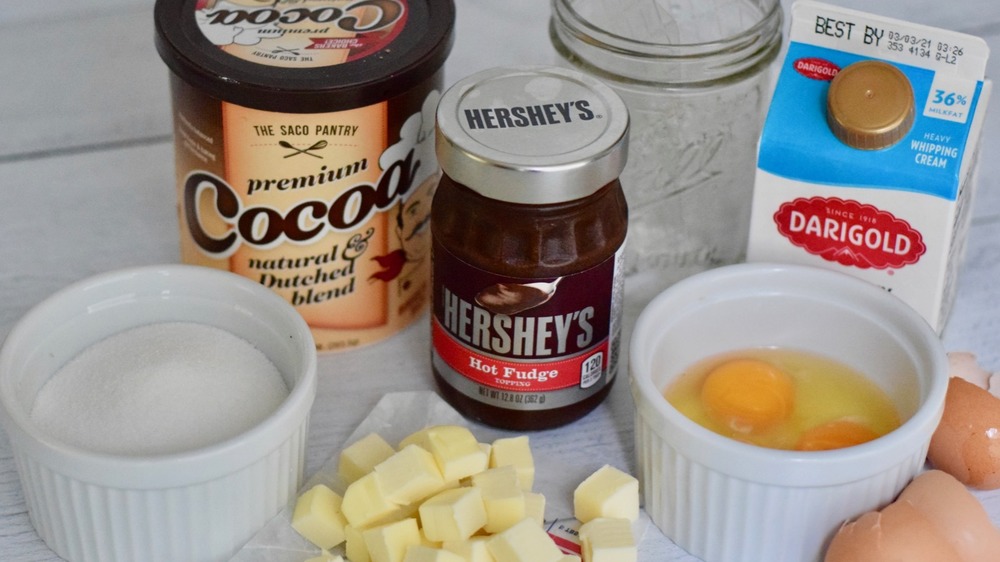
This recipe calls for so few ingredients meaning each one is just as important as the next. When it comes to choosing ingredients for this mousse, try to buy the best of the best. Spring for pricey cocoa, if you're budget allows, and pair it with your favorite hot fudge sauce. Unsalted butter is best but salted butter will do in a pinch, aim for fresh large eggs, and if cream from your local dairy is available, go for it. The higher quality ingredients, the better your mousse will taste! One thing to avoid here: chocolate sauce! It is too thin for this recipe and your mousse will not stabilize.
Chocolate mousse is all about the gelatin
Let's chat ingredients a little bit more. The gelatin in this recipe is so important, we wanted to give it it's own blurb!
We prefer to use sheet gelatin, also known as leaf gelatin, because it results in a clearer, smoother end product. Sheet gelatin is easy to find nowadays and is available in most kitchen stores, select groceries, and of course, on Amazon. You can substitute powdered gelatin in this recipe if you'd like, simply follow the substitution guide on packaging. Generally speaking, 1 tablespoon of powdered gelatin is equivalent to four sheets of leaf gelatin.
Blooming gelatin simply means to soak it in cold water, making sure the gelatin is fully submerged. For this recipe, you'll soak your gelatin sheets for the entire 15 minutes your base is cooking. When you're ready to use it, you'll simply squeeze it out — getting rid of any extra moisture — before adding to your mousse.
Finding the perfect fit for chocolate mousse
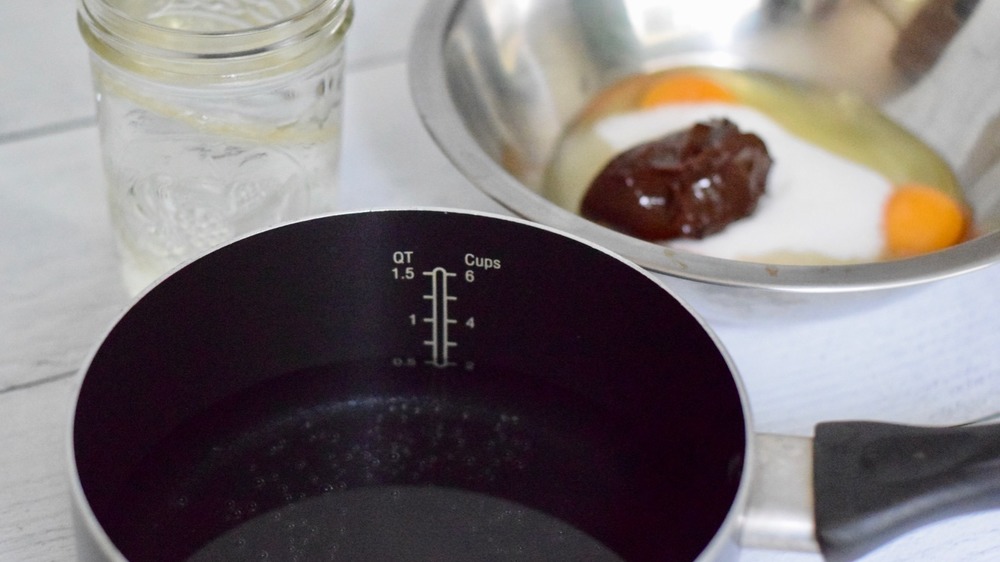
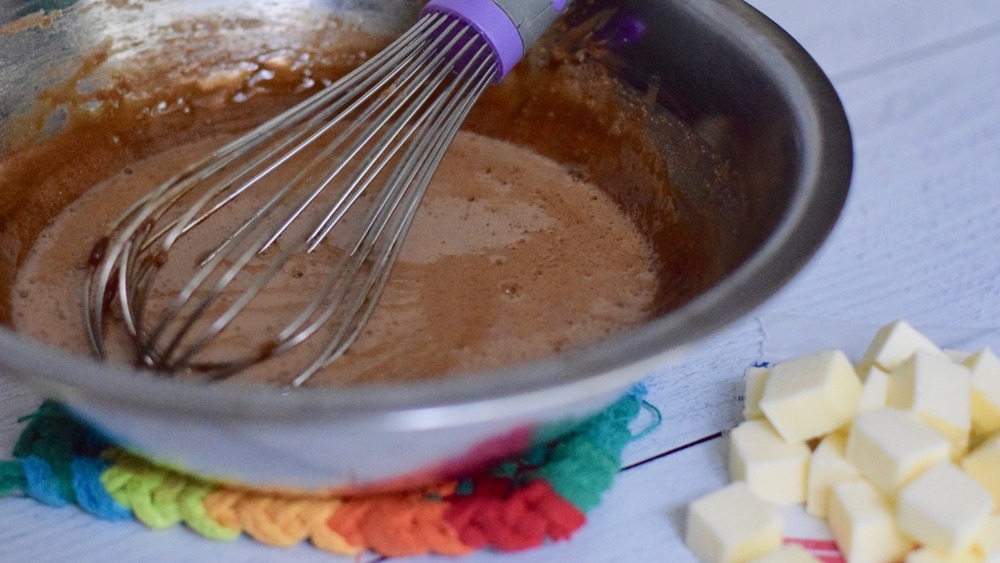
After you've combined your eggs, yolks, sugar, and hot fudge, you're ready to start cooking. But precision is everything in step three. You'll want to make sure your bowl sits on top of your saucepan perfectly before moving forward in recipe. The perfect fit will leave no gaps for steam to escape and the bowl will also not dip too far down into saucepan as to touch boiling water. This makeshift bain-marie will cook your ingredients slowly, which will help to avoid scrambling the eggs.
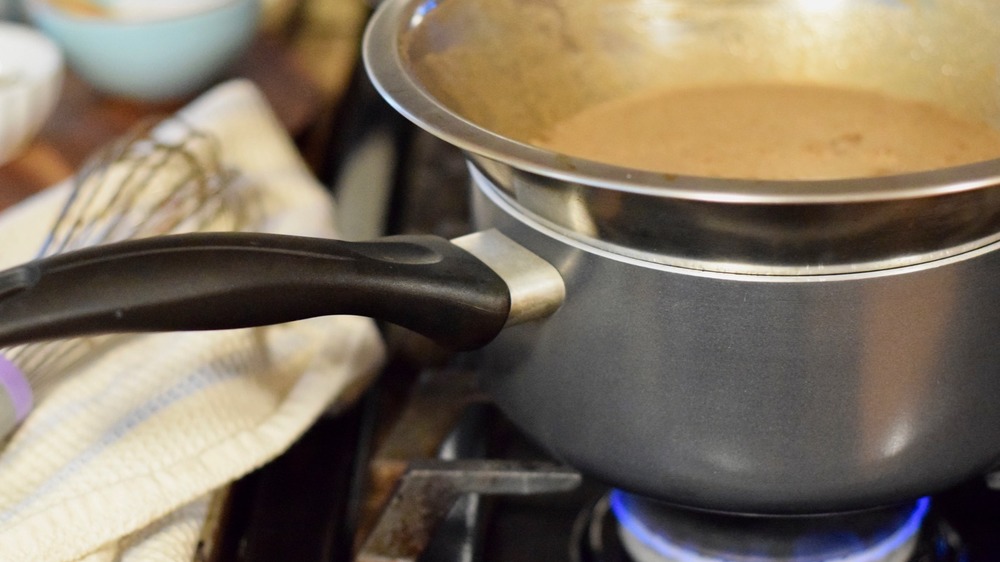
If you end up with cooked egg pieces in your mousse base, don't fret. When you remove the base from heat, simply strain mixture into another bowl before adding gelatin.
The chocolate mousse base should be firm but not too firm
After you remove your chocolate mousse base from heat, you'll add both the gelatin and butter. As previously mentioned, you'll want to squeeze any extra water out of the gelatin before adding it to your base. Whisk in gelatin and then add the butter. Continue to whisk until butter is completely combined. Gelatin will be the force that makes your mousse firm and butter will ensure it doesn't get too firm.
Create an ice bath for the chocolate mousse
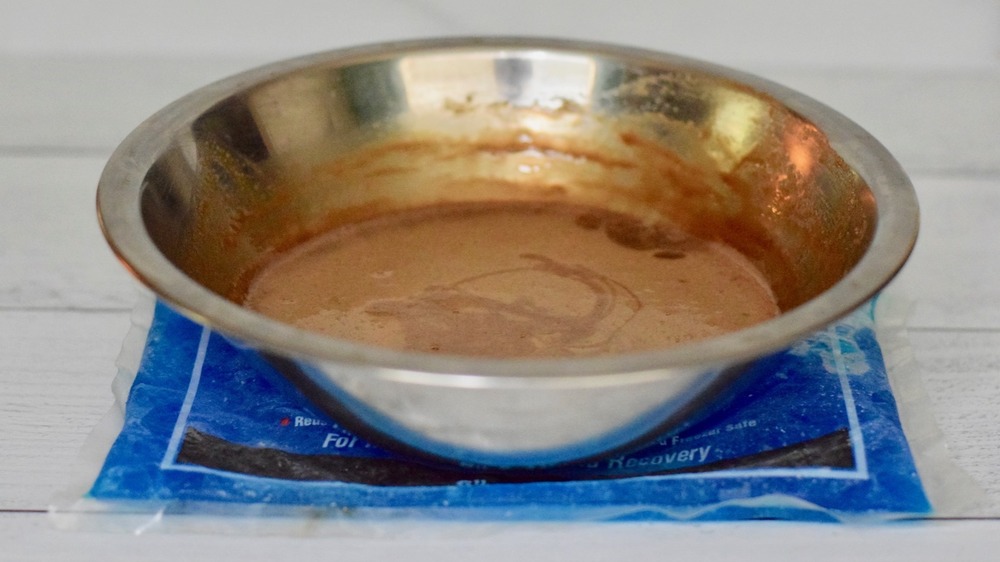
It's now time to chill your mixture and there are several ways to got about it. An ice bath is best, however, we find not many home chefs have enough ice on hand to create one. If you do have enough ice, definitely create an ice bath by filling a large bowl with ice. Then place your mousse base bowl directly into ice bowl. Wiggle it down so that ice is on the bottom and up the sides of the mousse base bowl. If you don't have enough ice, use ice packs or bags of frozen veggies wrapped in kitchen towels. This will take your base a little longer to cool but a little bit of creativity here does the trick.
Whipped cream makes this chocolate mousse stand out
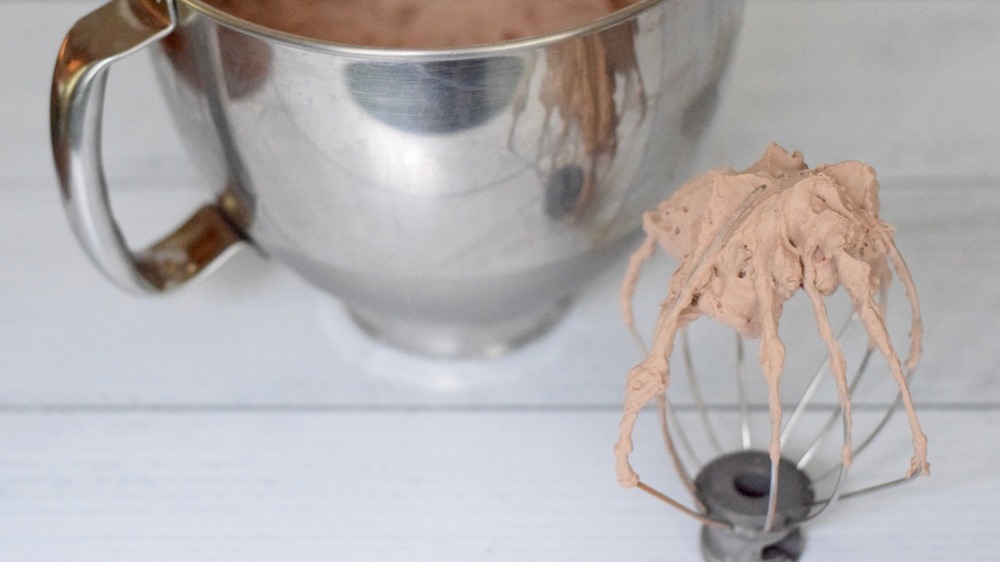
Chocolate whipped cream is what makes this mousse a show stopper! Cocoa not only stabilizes the whipped cream but it adds a tremendous amount of flavor. To make the perfect whipped cream, simply place the heavy cream and cocoa powder in the bowl of a stand mixer fitted with paddle attachment. Whisk on medium speed until stiff peaks form. Watch your whipped cream closely though, it can be over whipped. A handheld mixer works great here too and then you have no choice but to watch it whip!
Fold the chocolate mousse right and fold it light
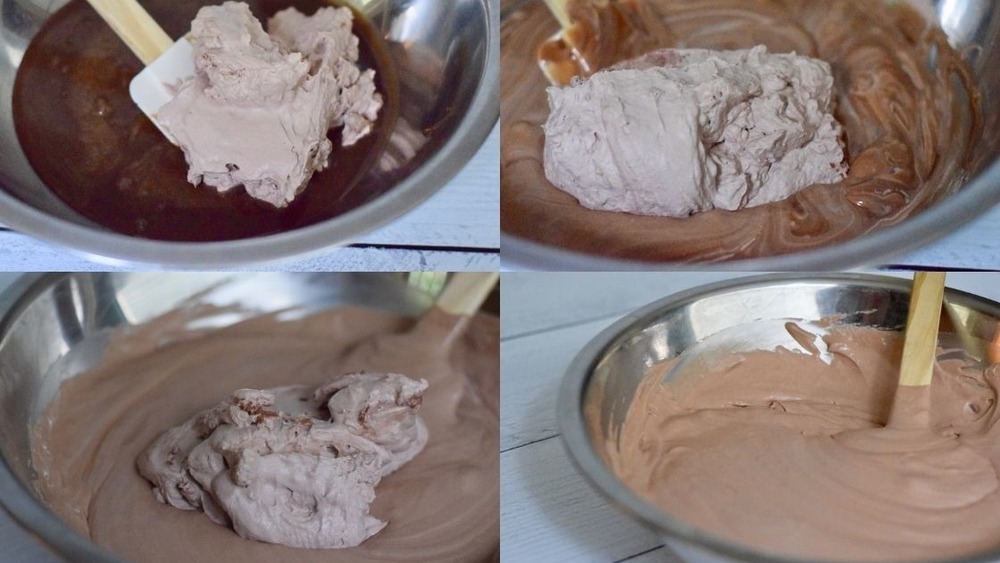
It might seem like a bit much to mix the whipped cream in, in three batches but it's an important detail that shouldn't be missed. The first batch of whipped cream folded in loosens the mousse base without deflating all of the whipped cream. With the second and third batch, be sure to fold underneath the entire mixture as well as around the edges of bowl — the less folding you can do while incorporating the two mixtures the better. This three step process creates a light, airy mousse.
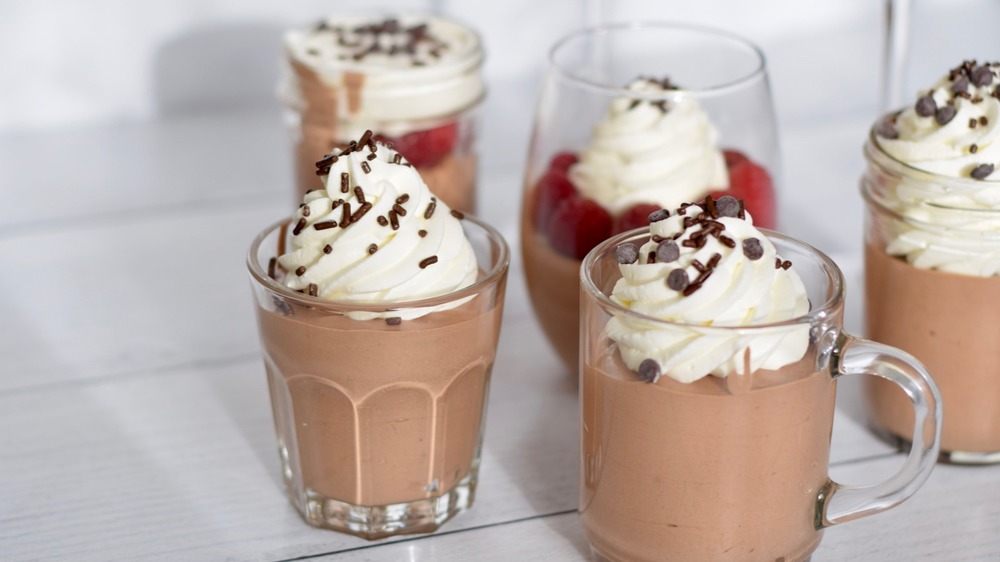
Prepare your chocolate mousse serving dishes
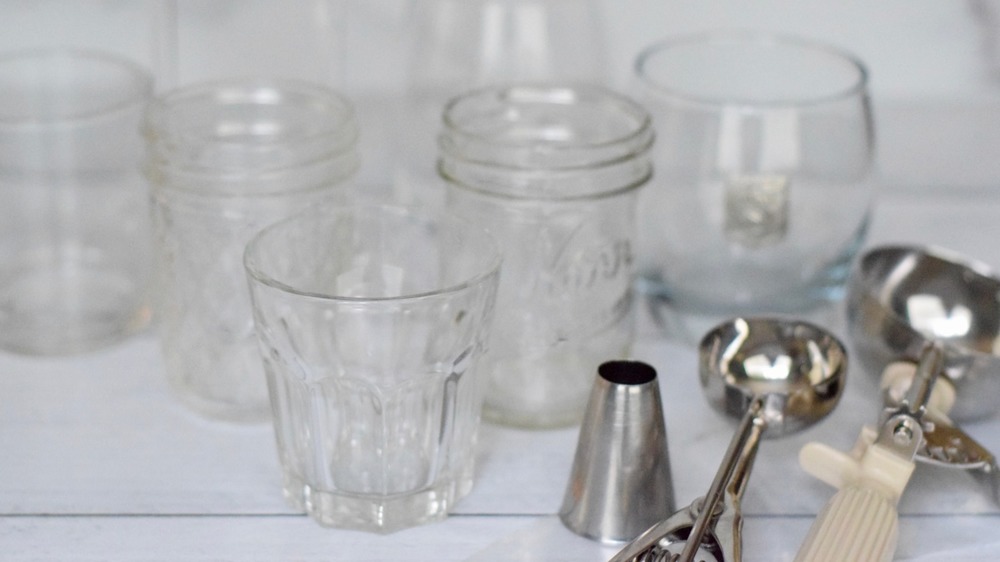
Chocolate mousse can be served a variety of ways. It can be layered into a cake, serve as filling for cupcakes, or be eaten all by itself. We pulled a selection of small jars and other clear glasses together to serve this mousse. Wine glasses, coffee mugs, or even small ice cream bowls would work, too. Just make sure your serving dish isn't too shallow, or your mousse won't set up.
As for filling your mousse cups, you can use portion scoops, ice cream scoops, a large spoon, or a piping tip and bag to fill your serving cups. Whatever you have on hand should work here.
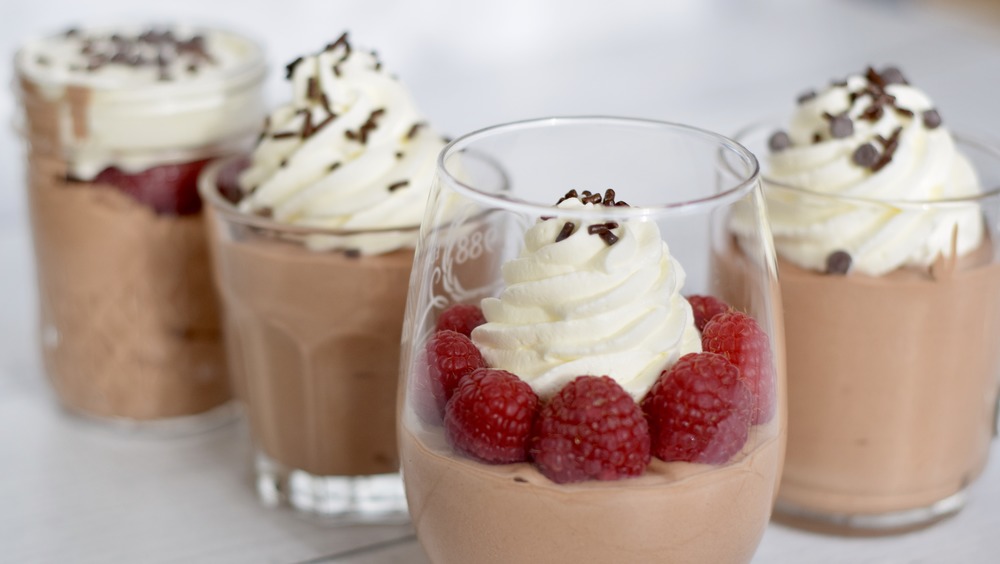
Add the finishing touches to the chocolate mousse
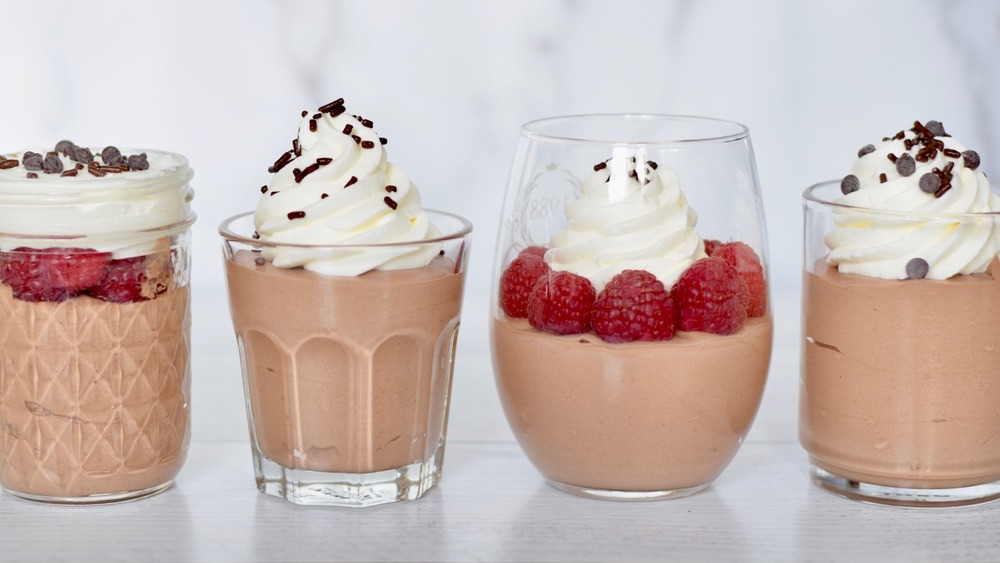
After you've filled your mousse cups, cover each cup and refrigerate for at least two hours to set; best if sets overnight. When you're ready to serve these adorable cups of sweet, silky smooth chocolate, top them off with some homemade whipped cream and chocolate sprinkles. Fresh berries, like raspberries or strawberries, can add a pop of color to your mousse cups. Other topping ideas: mini chocolate chips, chocolate shavings, a sprinkle of cinnamon, or crushed graham crackers.
Mousse can be made ahead of time and last up to seven days in refrigerator. So next time you have guests, impress them more than usual with this simple dessert that looks like a million bucks!
Ingredients + Directions
Light, airy, and chocolatey to the max, few desserts impress quite like chocolate mousse. This mousse recipe is divine for layering in cakes or eating as is.
Ingredients
- 1 1/2 sheets gelatin
- 2 eggs
- 1 yolk
- ¾ cup (5.75 oz) sugar
- ¼ cup (2.50 oz) Hershey's Fudge Sauce
- 6 tablespoons (3 oz) butter, cut in ½" cubes
- 1¾ cup (14 oz) heavy cream, keep refrigerated until ready to use
- 3 tablespoons cocoa powder
Optional Ingredients
- whipped cream
- chocolate sprinkles
- chocolate shavings
- fresh fruit
Directions
- Bloom (soak) gelatin sheets in cup filled with cold water. Be sure sheets are fully submerged in water; you can cut them in half to make them fit better if needed.
- Fill medium saucepan approximately 1 inch up the sides with water and place on stove over low heat.
- In medium size bowl, whisk together eggs, egg yolk, sugar, and fudge sauce.
- Place bowl on top of saucepan and turn heat up to medium. Cook for 15 minutes stirring continually with whisk. If egg starts to cook on sides of bowl, slightly turn down heat.
- After 15 minutes, sugar should be completely dissolved and the mixture thick. Remove from heat. Immediately press gelatin (squeeze out all excess liquid) and add to mixture; whisk until gelatin completely dissolves. Add butter and whisk until incorporated.
- Set bowl on ice packs and stir occasionally with spatula until chilled.
- Whip heavy cream and cocoa powder in bowl of stand mixer fitted with whisk attachment until medium-stiff peaks form.
- When chocolate base is cool to touch, begin folding in whipped cream. Scoop one-third of whipped cream into mousse base and fold with spatula until completely incorporated. Next, fold in half of remaining whipped cream. Lastly, fold in remaining whipped cream.
- Fill mousse your cups using either a piping bag, a large portion scoop (more common in restaurants than with home chefs), a large ice cream scoop, or with a large spoon. Let set for 2 hours or overnight if possible.
- When ready to eat, top mousse cups with whipped cream, chocolate sprinkles, chocolate shavings, a sprinkle of cinnamon, fresh raspberries, fresh strawberries, or just eat plain!
Nutrition
| Calories per Serving | 381 |
| Total Fat | 29.1 g |
| Saturated Fat | 17.7 g |
| Trans Fat | 0.4 g |
| Cholesterol | 130.9 mg |
| Total Carbohydrates | 28.6 g |
| Dietary Fiber | 1.0 g |
| Total Sugars | 24.9 g |
| Sodium | 68.6 mg |
| Protein | 4.2 g |