Easy Layered Taco Dip Recipe
Layered taco dip is a staple for any kind of party. Whether you're serving it at a child's birthday, a barbecue, as a side for a big game, or even just on a good old Taco Tuesday, this layered dip has so many beautiful ingredients to satisfy any cravings you might have. What could be better than refried beans, guac, sour cream, and cheese? Not to mention the fact that there are a few other items, like taco seasoning and diced green chilies, that give it a little kick. Trust us when we tell you that the flavors in this recipe are incredible. We also love the fact that you get a little bit of everything in each and every scoop. Another plus? It only takes five minutes of your time to make.
Miriam Hahn is the recipe developer for this yummy dip. "My favorite thing about this recipe is how pretty and delicious it is — great for entertaining, and it is a super quick recipe," she says, adding that it's also perfect for a fajita night or an appetizer party. "[It's] super versatile and a dish everyone typically loves!"
Keep scrolling to find out more details on how to make this easy and delicious layered dip.
Gather the ingredients
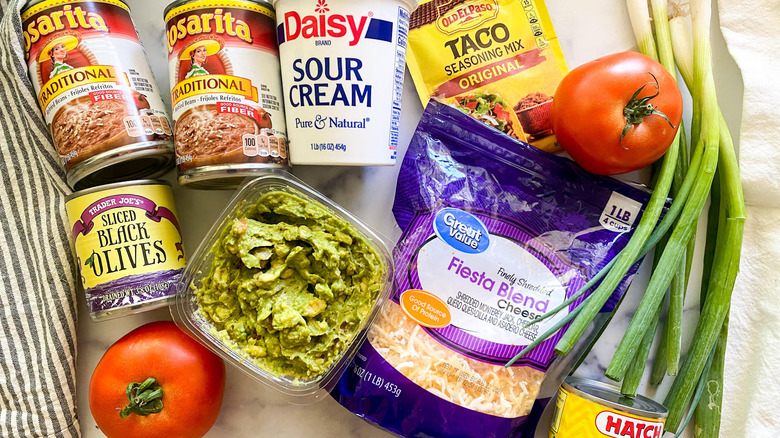
The first step in any recipe is to get all the items you need. If you make Mexican dishes frequently, you might have a few of the required ingredients for this layered dip in your pantry already, including refried beans, a package of taco seasoning mix, and canned diced green chilies. In addition, you'll need a container of pre-made guacamole (Hahn uses a mild and chunky version, but you can also make your own guacamole – you could even make your own refried beans if you were up for it), as well as sour cream, shredded cheese, black olives, scallions, and diced tomatoes. This is the perfect mix of fresh and smooth ingredients in our opinion.
Once you have all the ingredients in front of you, it's time to begin.
Season the beans
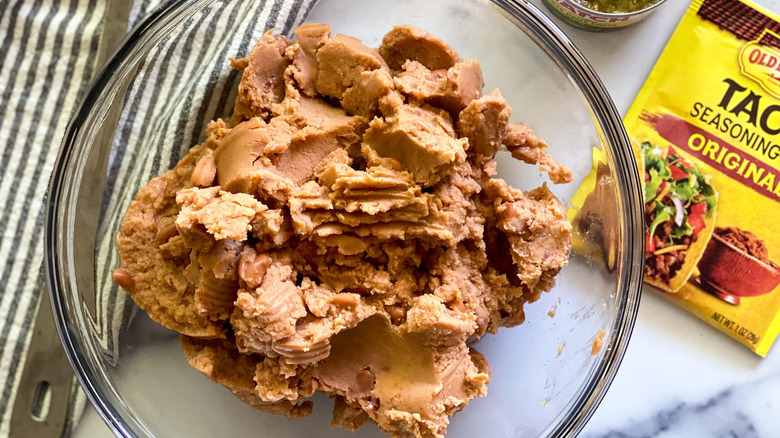
To begin, take out a bowl that is big enough to mix the taco seasoning, refried beans, and green chilies. Empty the cans of beans into the bowl.
Then, toss the taco seasoning and green chilies in the bowl with the beans and mix to combine. You'll only need a tablespoon of the taco seasoning, so you'll have leftovers for another recipe. If you don't have taco seasoning, Hahn says you can "add ½ teaspoon chili powder and ½ tsp cumin if you want to simplify even more."
The taco seasoning and chilies "add so much flavor and don't do anything to the appearance" of the beans, Hahn shares. She likes to keep the layers their true colors.
Once you have mixed the taco seasoning, beans, and chilies, you can set the bowl aside for a moment. Don't put it too far, though, because you will need it again in just a second. Luckily, this is the only stirring you need to do during the entire recipe. Pretty cool, huh?
Choose your bowl and start to layer
Now, you will want to get out a deep bowl for serving. Hahn suggests a glass bowl so you can see all of the beautiful layers and colors — presentation is everything, right? In her case, she used a 7 ½x5-inch bowl. If needed, you can make this in a smaller bowl or even a large glass measuring cup, but your layers will need to be very thin.
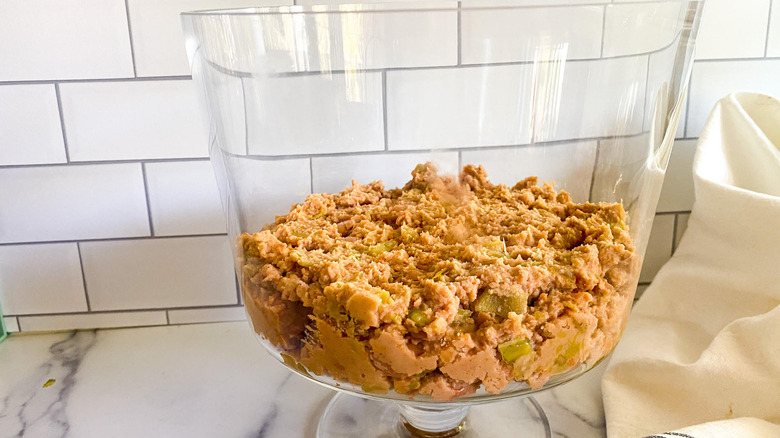
Once you figure out which bowl you'd like to use, add your base, which is the chilies mixed with the beans and taco seasoning.
Pro tip: When you add each layer, plop it in the middle and then spread it to the edges. This will help keep the sides of the dish clean and looking good for your guests.
Add the layers one by one
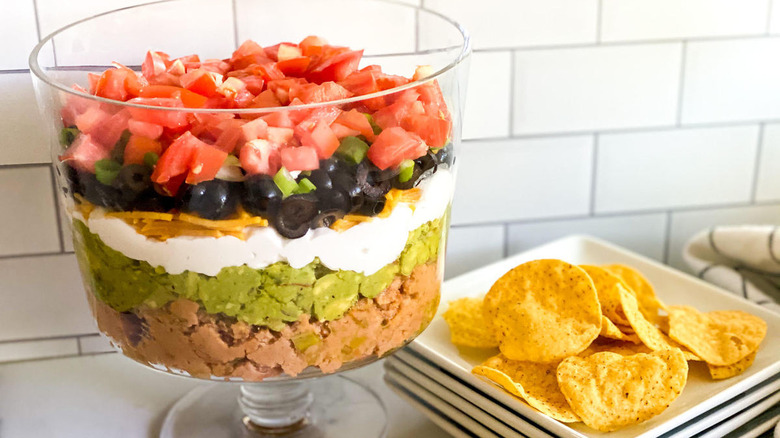
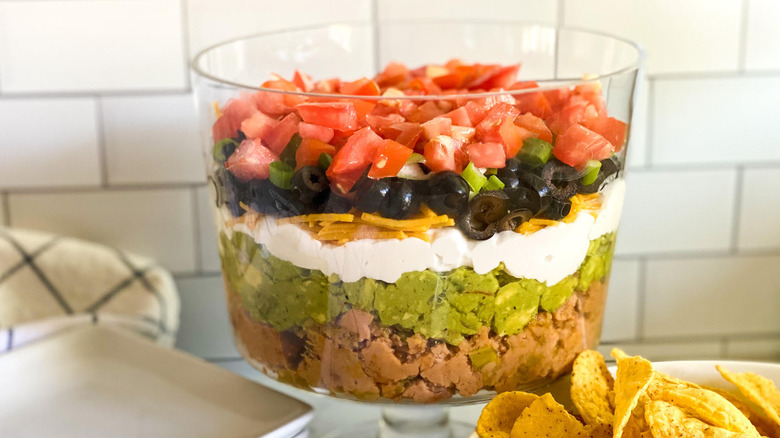
Once you have your base layer, you can continue to add the rest of the ingredients. On top of the base, you can add the sour cream, followed by a generous layer of cheese. Then put in your olives and then the scallions. Last but not least, you can add your tomatoes to the top of the dip. The tomatoes should go on top to avoid them getting soggy.
The finished product should be as beautiful as it is tasty. Doesn't it look like an absolute masterpiece?
Serve and enjoy

To serve, scoop out some dip, reaching all the way to the bottom layer. This ensures that you will get a little bit of everything in each bite. Obviously, this is great to serve with tortilla chips, but Hahn says there are other tasty options. "Tortilla chips work best, but potato chips are also delicious, or even a hearty cracker," she says. "Also, if you have leftovers, it tastes amazing wrapped in a tortilla!"
Please note that you can make this recipe ahead of time, but if you do, be sure to add a squeeze of lemon to the guacamole after you layer it so it won't turn brown. And for any vegans or people who are lactose intolerant, "One other side note, it is easy to make it dairy-free by using dairy-free sour cream (I like Forager brand) and dairy-free cheese," Hahn shares.
Easy Layered Taco Dip Recipe
Whether you're serving it at a birthday, a barbecue, a big game -- or even just a good old Taco Tuesday -- this easy layered taco dip recipe will satisfy.

Ingredients
- 2 (16-ounce) cans refried beans
- 1 tablespoon taco seasoning mix
- 1 (4-ounce) can diced green chilies
- 1 (16-ounce) container pre-made guacamole
- 1 ½ cups sour cream
- 1 cup shredded cheese
- 1 (3.8-ounce) can sliced black olives
- 4 scallions, chopped
- 1 to 2 tomatoes, diced
Directions
- Put the beans in a bowl and add 1 tablespoon taco seasoning and the green chilies. Mix to combine.
- Spread the bean mixture on the bottom of a deep serving bowl.
- Add a layer of guacamole, followed by layers of the sour cream, cheese, olives, scallions, and tomatoes.
- To serve, scoop out some of the dip starting from the bottom layer.
Nutrition
| Calories per Serving | 310 |
| Total Fat | 22.7 g |
| Saturated Fat | 6.9 g |
| Trans Fat | 0.1 g |
| Cholesterol | 29.5 mg |
| Total Carbohydrates | 19.9 g |
| Dietary Fiber | 4.4 g |
| Total Sugars | 2.8 g |
| Sodium | 764.6 mg |
| Protein | 10.1 g |