Mistakes Everyone Makes With Their Box Graters
In many people's kitchens, a box grater has one job: grating cheese. And most of us only end up using the large shredding holes — you know the ones we mean. But that's a criminal underuse of a box grater. There are all kinds of mistakes everyone makes with their box graters, from only using one side of the grater to using the wrong grating direction to not taking care of them properly.
These mistakes are extremely common, but they're easy to rectify. Once you know how to use your grater the right way and understand some of the excellent tasks a box grater can carry out, this simple kitchen tool will be your new culinary sidekick. Here's the secret: a box grater can do a lot of what a food processor can. Sure, it takes a little longer but compared to food processors, box graters are easy to clean, don't take up much cabinet space, don't require complicated setup, and are extremely cheap to buy.
So, now's the time for us to look at 11 common mistakes everyone makes with box graters. You might not be guilty of every one of these missteps, but we're sure you're doing at least a couple. Thankfully, it's easy to mend your ways and make the most out of your trusty box grater.
Grating up-and-down rather than side-to-side
Here's the way that most people use their box grater — they place the wide, open end on a cutting board or in a large bowl, and then grate whatever needs grating in an up-and-down or top-to-bottom motion. This seems to make sense at first, but sometimes it can cause problems. For instance, when you're grating on a cutting board and lift the grater up, all the shreds that are inside can come spilling out and make a mess. Plus, it isn't necessarily easy on your arm and hand. If you have a lot to grate, you're probably going to end up with a cramp and nobody wants that.
But, what's the alternative? Well, some people believe that the correct way to use a box grater is actually on its side. By this, we mean you lay it down on one of its long sides with whichever side you intend to use facing upwards. Then, you move the food that you're grating side to side instead of up and down. This is easier for a couple of reasons. Firstly, the side-to-side motion is easier on your arm than the up-and-down motion. Also, the grater supports the weight of whatever you're shredding, which is another way that makes cramps less likely. The shreds are then collected inside the grater and you just have to tip them onto a plate when you're done.
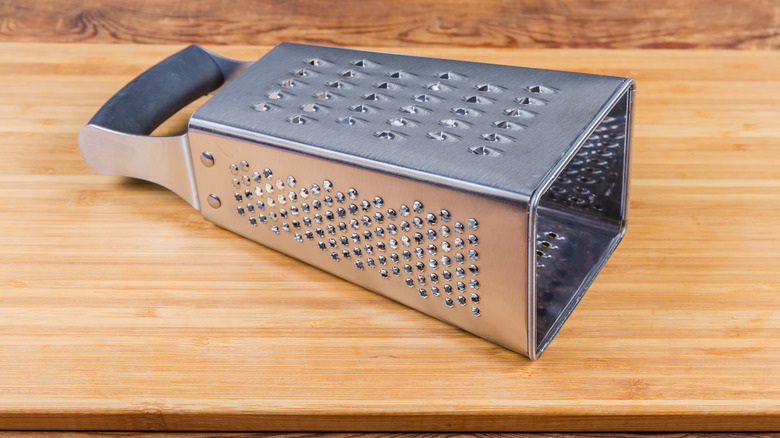
Only using one side
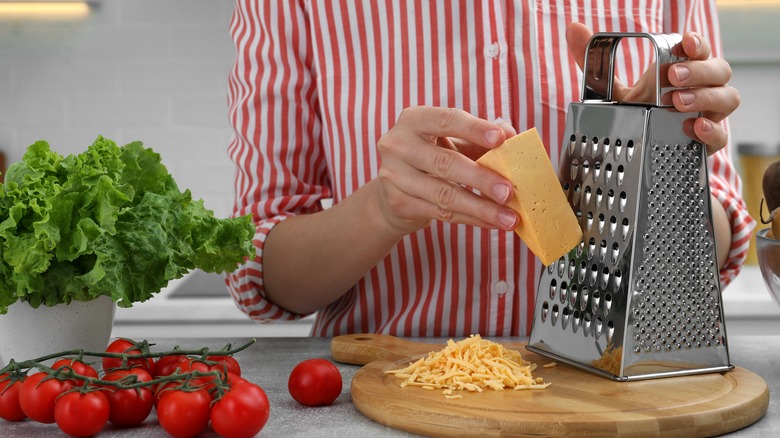
If we tell you that many people only use one side of their box graters, you probably won't be surprised at which side that is. Yup, you know the one — the side with the big holes that we use for everything from cheese to carrots. But that's just one side of the story. Sure, the side with the large holes is fantastic for quick grating, making mountains of shreds in no time. But flip that bad boy over, and you'll find three more sides just waiting to step up to the plate.
First off, there's the side with smaller holes. This side is perfect for tasks that require a finer touch, like grating Parmesan for that fancy pasta dish you've been eyeing. It's also great for making finer shreds of veggies like carrot or zucchini for when you want them to melt into a zucchini bread or carrot cake.
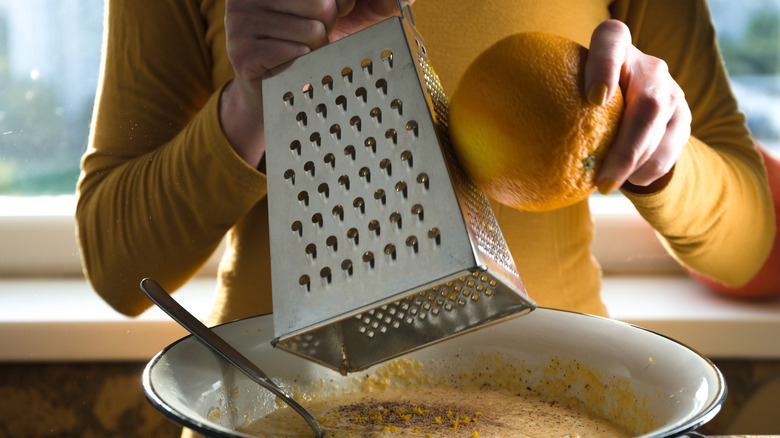
Then there's the side that has between one and three wide but thin rectangular openings. This is the slicing side. It's essentially like a miniature mandolin. Use it for effortlessly slicing cucumber, zucchini, or even potatoes for au gratin perfection. You can also use it to slice cheese. Finally, there's the side with the tiny, sharp star-shaped protrusions. This side is often the most confused and misunderstood. One of its main uses is zesting citrus, but you can also use it for whole nutmeg or for getting small pebble-shaped grates of hard cheese.
Not using them to mince garlic
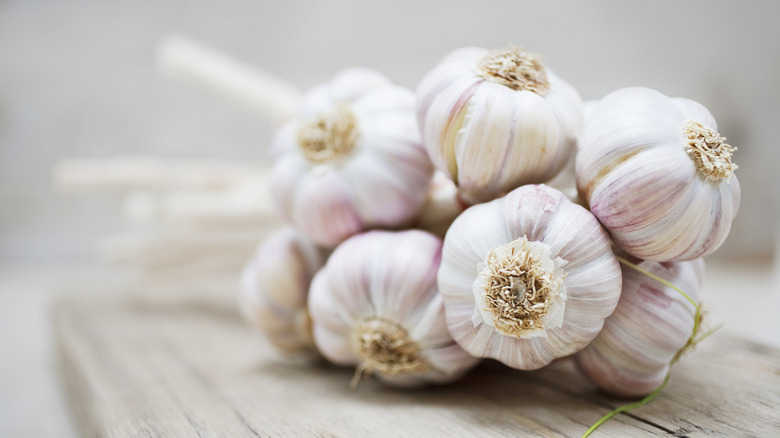
If you aren't using your box grater to help you prep garlic for meals, you're making a mistake. Now, we all know the struggle of mincing garlic with a knife: sticky fingers, uneven pieces, and the eternal battle against those pesky little cloves. But there's an alternative. Forget about finely honing your knife skills, the box grater is here to make mincing garlic a breeze. Grab a clove, peel off that papery skin, and get ready for the easiest garlic prep of your life.
Take the side of your trusty box grater with the small holes — the one you probably didn't pay much attention to before. Now, grate your garlic clove and you're left with tiny, uniform garlic bits that are ready to infuse your dishes with flavor. No more struggling with a knife, just perfectly minced garlic in seconds.
This method not only saves you time but also ensures a more consistent garlic distribution in your recipes. No more biting into a chunk of raw garlic when you were expecting a subtle hint of flavor. The box grater takes the guesswork out of it, giving you finely minced garlic that effortlessly blends into your culinary creations. So, the next time you're gearing up to add garlic to your masterpiece, ditch the knife and reach for that box grater. It's the kitchen hack you never knew you needed, making your cooking adventures a whole lot easier and more flavorful.
Washing them in the dishwasher
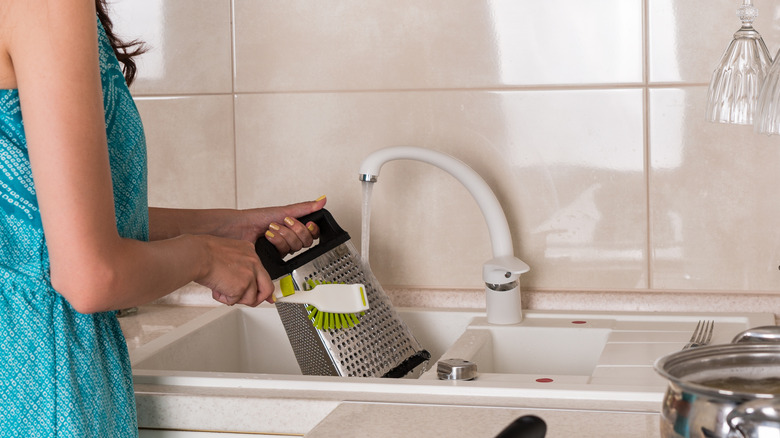
It's time to talk about cleaning your grater after use and how you may be doing it wrong. Now, you might have noticed that little claim on the packaging saying it's dishwasher-safe. Seems like a time-saving dream, right? Well, despite what the packaging might say, cleaning your box grater in the dishwasher isn't the way to go.
Sure, the convenience of tossing it in with the dinner aftermath is tempting, but there's a catch: it can dull those blades faster than you can say "chef's kiss." You see, the dishwasher is like the heavy-duty boot camp for your kitchen gear, and box graters are no exception. The abrasive action and high water pressure inside the dishwasher may give your grater a shiny appearance, but it can also cause the blades to lose their sharpness quicker than you'd want. That means less efficiency and more frustration when you're prepping meals.
Instead of throwing your box grater in the dishwasher, take a minute to show it some handwashing love. Grab a sponge and some soapy water, and gently scrub away the remnants of your kitchen conquests. It's a small investment in time that pays off big in the long run, letting you keep those blades sharp and ready for action.
Not using them to strip herbs from their stems
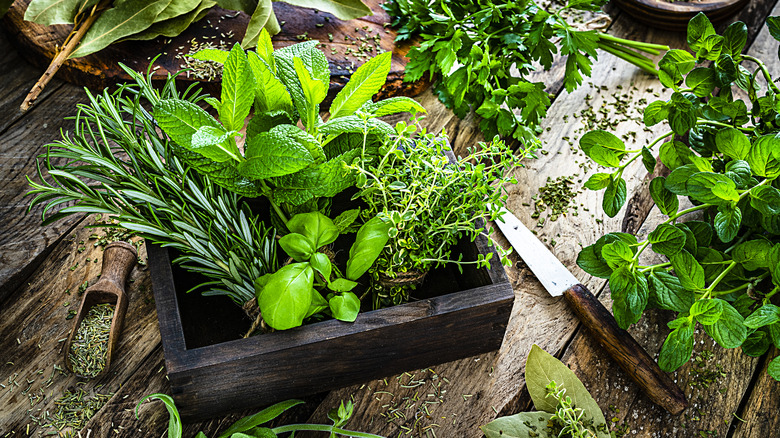
You've got a bunch of fresh herbs, all fragrant and ready to jazz up your dish. But first, you need to part ways with those stubborn stems. The traditional method involves plucking each leaf individually, a painstaking process that can turn your peaceful kitchen into a full-on frustration zone. There's got to be an alternative and — you guessed it — it's your box grater.
Here's how it works. Take that bunch of herbs and locate the side with the large holes on your grater. Poke the tip or the stem end of your herbs through those holes (the best end to use depends on the type of herb), pull it through, and watch the magic happen. The leaves effortlessly separate from the stems, cascading down like flavorful confetti. Not only does this method save you precious time, but it also ensures you're making the most of those aromatic leaves without the stems tagging along.
This started out life as a TikTok hack, so you might be wondering how well it really works. The folks at Better Homes and Gardens tried it out and found it worked better with woody herbs than soft herbs (although it still worked with soft herbs, it just left some small leaves behind). I've personally tried it with cilantro and found it worked well, saving me time when I need to strip a large amount of leaves from their stems.
Injuring themselves with their box graters
It's time to get real about a kitchen nemesis we've all faced at some point — the seemingly harmless box grater. Yes, it's a handy tool but it has the potential to turn a cozy cooking session into a battlefield of scraped knuckles and grazed fingers. Here's the lowdown on avoiding those accidental encounters with sharp edges.
First off, respect the grater. It might look innocent, but those blades mean business. When you're using it, make sure it's on a stable surface. Trying to grate cheese mid-air is a recipe for disaster. Secure the grater on a cutting board or a stable countertop to prevent it from slipping and sliding. Next, keep your fingers at a safe distance. It's tempting to get that last bit of carrot or cheese, but your fingertips will thank you for giving them some space. If you're particularly concerned about cutting yourself, use a pair of cut-resistant gloves. They provide a layer of protection against unintended encounters with the sharp edges of the blades in your grater.
When you're grating, use a controlled, rhythmic motion. Don't go at it like you're in a cheese-grating Olympics sprint. Slow and steady wins the race, and it reduces the chances of a slip-up. So, there you have it: a crash course in avoiding those not-so-friendly encounters with your box grater. Keep it steady, keep it safe, and let the grating games begin without the battle scars.
Not using them for hash browns

You're seriously missing out if you aren't using your box grater to craft the perfect hash browns that'll make you the brunch champion. Whether you're whipping up a lazy Sunday morning feast or just craving some crispy goodness, a grater should be your go-to kitchen tool.
Want to make hash browns? First, grab a couple of potatoes. Russets work like a charm, but you can get creative with your spud selection. Peel them and grab that trusty box grater. The side with the larger holes is your ticket to hash brown heaven. The magic of the box grater is that it effortlessly transforms your potatoes into perfect little shreds, just the right size for the crispiest hash browns. If you're feeling a bit daring, throw in some onions into the mix for that extra flavor kick. The box grater handles onions like a pro, turning them into finely minced bits.
Once your potatoes (and onions, if you're feeling fancy) are grated, squeeze out any excess moisture. Nobody likes a soggy hash brown, right? Heat up a skillet with a bit of oil, drop those grated goodies in, and let the box grater's handiwork sizzle to perfection. Season to taste, flip when needed, and voilà: you've just created a plate of crispy, golden hash browns that'll make you the breakfast MVP. A box grater is also the best tool for shredding potatoes for latkes and potato pancakes.
Attempting to grate soft cheeses
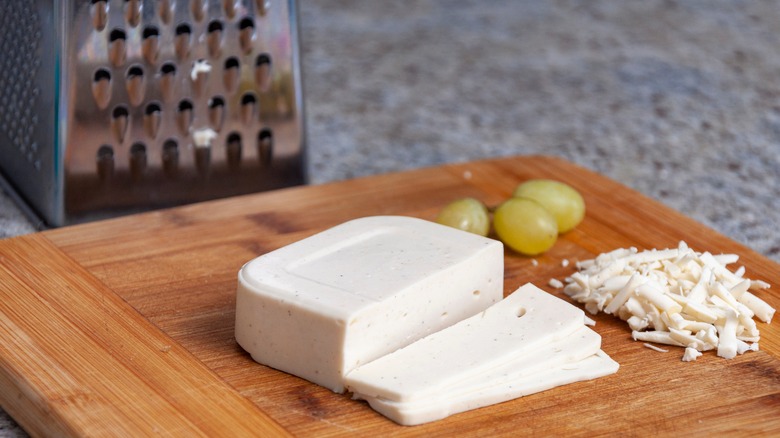
We've all been there, eager to whip up a gooey masterpiece, only to realize that our beloved box grater might not be up for the challenge when it comes to softer cheeses. It can be a bit of a grating experience — pun intended. You see, the thing about softer cheeses like mozzarella, fontina, or young Gouda is that they don't grate well. Rather than those perfect shreds you're aiming for, you get uneven chunks or a smushed mess that sticks in the holes of your grater.
But there's a workaround that makes this problem go away— just toss those soft cheeses in the freezer for a short stint. Yep, you heard right. Freezing the cheese for about 15 to 30 minutes works like a charm. It firms up the texture, making it much more manageable for the grater. Here's the game plan: pop that ball of mozzarella or wheel of fontina into the freezer, set a timer, and use that brief intermission to prep other ingredients — or just dance around the kitchen, it's your call. Once the cheese has chilled, grab your box grater, and start shredding as you normally would. You'll find the process smoother, and those soft cheese shreds will be much more cooperative.
Not using them to grate butter
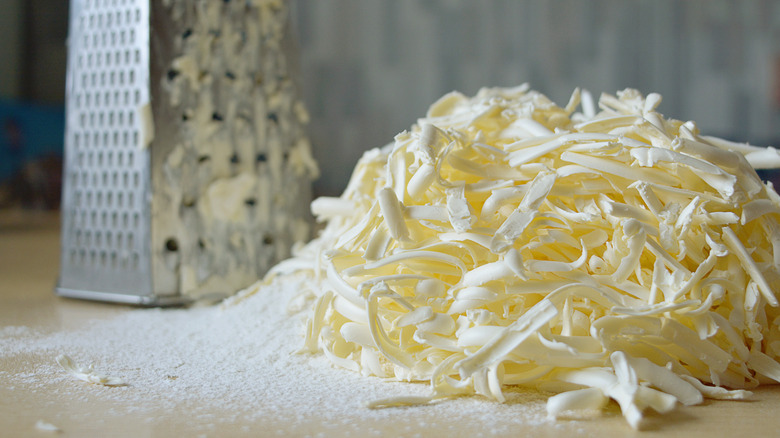
There's a game-changing trick that'll have your cookies, cakes, and pastries reaching new levels of buttery perfection. Since you're here reading an article about graters, it should come as no surprise that the tool you need is a box grater. This simple kitchen tool is useful for two things: softening butter quickly and ensuring butter is evenly incorporated.
Imagine you're all set to bake up a storm, and the recipe casually asks for softened butter. But oh no, your butter is in the fridge, and you're left with the dilemma of impatiently waiting or resorting to a battle with the microwave. There's another solution, however. Grab that chilled stick of butter, retrieve your trusty grater, and go to town. The large holes on the grater make quick work of the cold butter, turning it into delicate shreds. This speeds up the softening process so that you don't have to wait long. In just a couple of minutes, it'll be ready to use as normal in your recipe.
Then you have recipes that call for cold butter, such as biscuits or some pie crust doughs. The cold butter releases steam in the oven, resulting in those desirable flakes. Usually, you use a pastry cutter — or even your fingers — to mix the cold butter and flour in these recipes. But instead, you can use grated butter straight from the fridge. This ensures that the butter is incorporated evenly into the dough, and it's ridiculously easy, too.
Ignoring their abilities to grate tomatoes
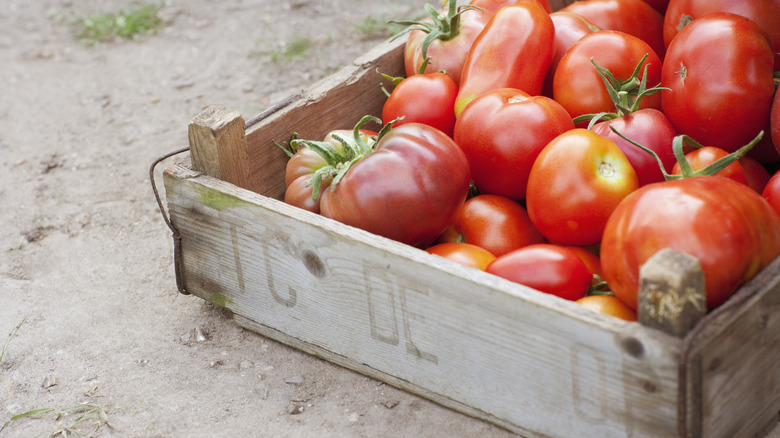
If you're looking to elevate your tomato game, the box grater is your ticket to DIY crushed tomatoes that are fresh, flavorful, and way tastier than the canned stuff. Brace yourselves for a saucy revelation. Those sharp little blades effortlessly cut through tomato skin, turning your average garden tomato into a mound of vibrant, pulpy goodness.
Grab your ripe tomatoes, give them a quick wash, and shred them using the large holes on the grater. The small, grated pieces it produces not only save you time when cooking sauces, but also maintain the integrity of the tomato's flavor and texture. What sets the box grater apart is its finesse. Unlike other methods that might smash the tomatoes into a messy pulp, the grater delicately shreds them, keeping that fresh, just-picked taste intact. It's the kind of sauce that makes you question why you ever settled for the canned variety.
And then there's the matter of speed. A box grater turns your tomato into shreds that cook down into sauce in no time. Those tiny bits are much faster to simmer into a cohesive sauce than larger chunks of tomatoes. Next time you're craving a tomato-based dish, don't reach for the can, reach for your box grater. It's the secret weapon for a sauce that's not just homemade but bursting with the essence of fresh tomatoes.
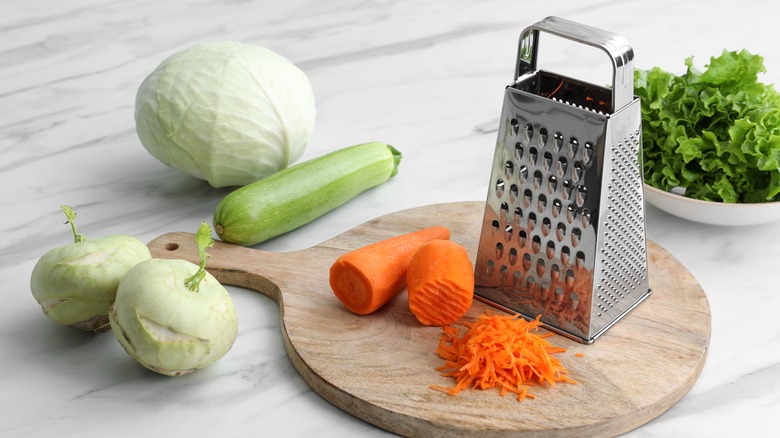
Failing to use box graters to make coleslaw
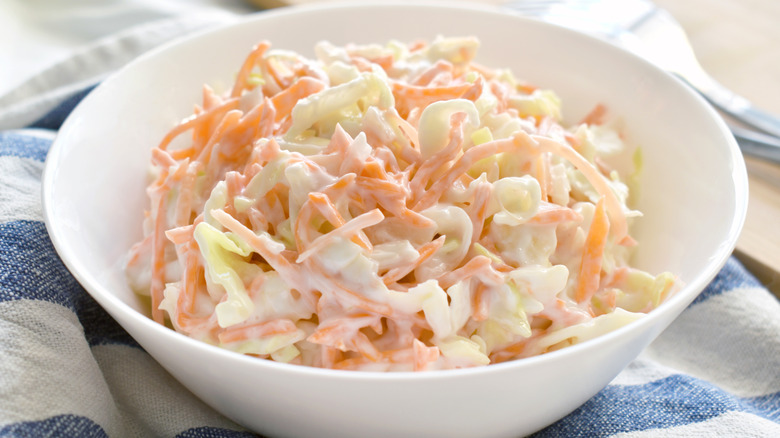
Coleslaw is delicious, but it can be a real pain to make. You can say goodbye to laborious chopping or the hassle of setting up a food processor because the box grater is here to make your coleslaw dreams a reality. We all know the struggle of attempting to finely chop cabbage, carrots, and other slaw components with a knife. It's a time-consuming task that often leaves you with uneven bits and a kitchen that looks like a veggie battlefield. But a box grater can help you prep your ingredients quickly and evenly. The sharp blades effortlessly turn the veggies into perfect, uniform shreds, saving you time and ensuring an even distribution of textures in your slaw. It's a kitchen hack that feels like a shortcut without sacrificing the quality of your dish.
And here's the real beauty: a box grater is a quick fix with minimal setup and cleanup. No need to lug out the food processor, deal with multiple attachments, and then face the inevitable post-chopping cleanup. With the box grater, it's a grab-and-go situation — less fuss, more slaw. So, next time you're craving that crisp, fresh coleslaw, ditch the knife and skip the processor. Grab your box grater, let it do the heavy lifting, and revel in the glory of quick, even, and hassle-free coleslaw prep.