Bread Baking Myths Debunked
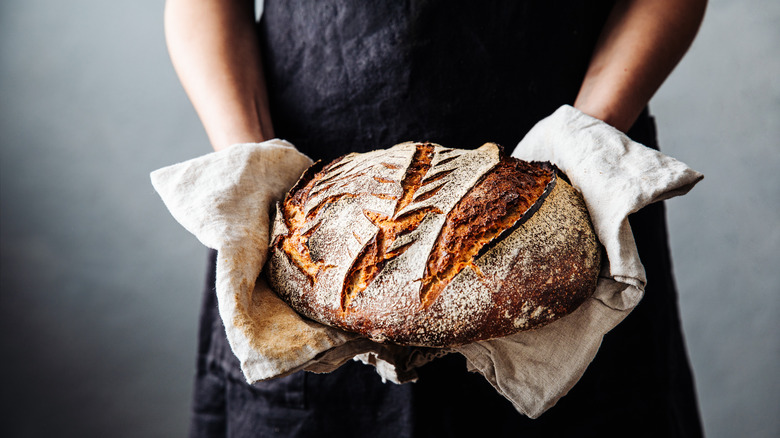
Bread baking has been around for many millennia. The first evidence of the starchy staple can be traced to around 10,000 B.C., making it about 4,000 years older than the wheel and nearly 7,000 years older than the written word. Bread-making is an intrinsic part of humanity at this point, so it's no wonder people are still eager to try it out for themselves. Yeast bread relies on a series of wondrous feats of chemistry that can almost seem like magic. When yeast is activated by warm water, it begins feasting on sugar and releasing carbon dioxide. The carbon dioxide produces pockets of air that lift the dough until it transforms from being dense and heavy to light and puffy. Gluten-based flour is the best option for this process because, when combined with water, it becomes stretchy, meaning that the pockets of air expand it like bubble gum instead of bursting it and causing the dough to collapse.
Even beyond the chemistry of baking bread, there are many misconceptions out there that might make it seem too advanced for amateur bakers to tackle. But if humans have been making bread since before there was writing or efficient man-made transportation, we are certainly still capable of facilitating this ancient and delicious chain reaction of chemistry today. So let's demystify some of the biggest myths about bread-making so you can jump into your next recipe with the confidence you need to make the airy, golden loaf of your dreams.
Myth: 100% whole wheat flour leads to dense loaves
Reading the ingredients list in recipes for whole wheat bread can be baffling. Sure, there's whole wheat in there somewhere, but more often than not, there's at least as much (if not more) white flour. The conventional wisdom goes that the germ and bran present in whole wheat flour soak up moisture, weigh down the dough, and hinder gluten development, leaving you with dense, dry loaves. Though this is partially true, it does not mean that whole wheat bread is doomed to be tough and flat.
The main thing to ensure when making bread from 100% whole wheat flour is to use a recipe that is specifically created for it. Following a recipe for white bread and simply swapping whole wheat flour for white flour will yield predictably dense and unappetizing results. Recipes for whole wheat bread will have more water, guaranteeing that the resulting loaf is soft and fluffy. Another common modification is the use of a food processor to quickly and aggressively develop the gluten without overworking the dough. Lastly, dough made with whole wheat flour needs more proofing time, though there is a tipping point after which the dough will deflate beyond repair. If you've been stymied by whole wheat in the past, you'll be surprised by how much a few careful alterations can turn it all around.
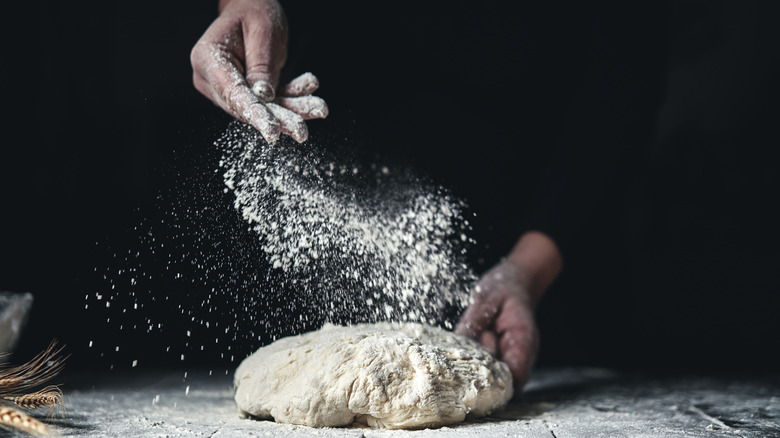
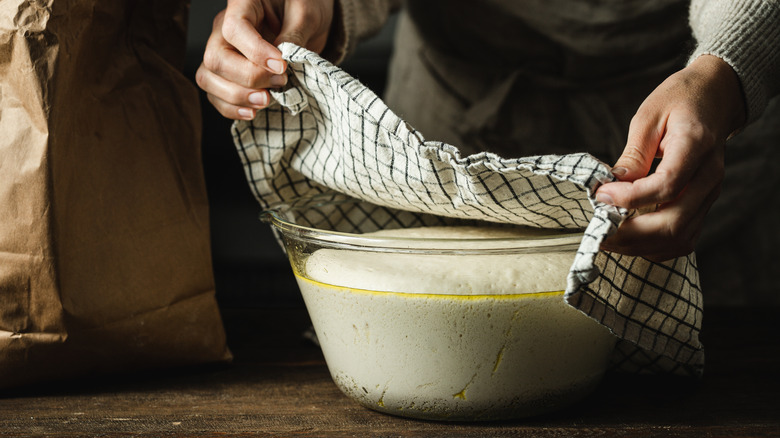
Myth: You have to knead the dough
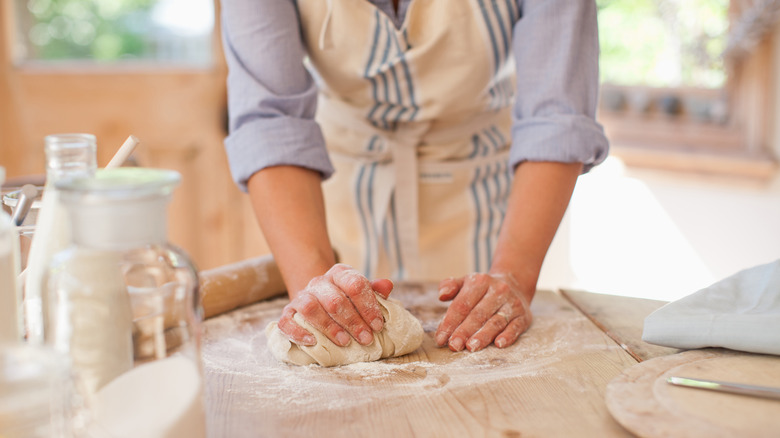
There are two stages to kneading dough. The first is excited anticipation. It's just like punching a cushion. What a great way to relieve stress and build some muscle. The second is helplessness. You can knead the dough for five, 10, or an ill-advised 15 minutes, but unless you're a professional baker, you will likely struggle to figure out whether you've done enough. Bread can be ruined by having insufficient gluten development. It can also be ruined by being overworked. The sweet spot, we're told, is springiness in the dough when you poke it. But it can be hard to decide whether it's actually springing back and how much of a spring you should look for. It is not an objective science, no matter what Paul Hollywood says, and some bakers may find themselves on the brink of scrapping the whole thing before the first rise.
Luckily, kneading is not a necessity, not even with a food processor or a bread machine. You can make no-knead bread at home, and no one will know the difference. All you need is patience. We're talking 24 hours of patience. Letting the unworked dough rest for that period allows enzymes in the flour to break down the proteins the way your hands would if you were kneading. Meanwhile, the yeast has plenty of time to munch on the sugar in the dough and release the carbon dioxide that causes pockets of air to make it rise.
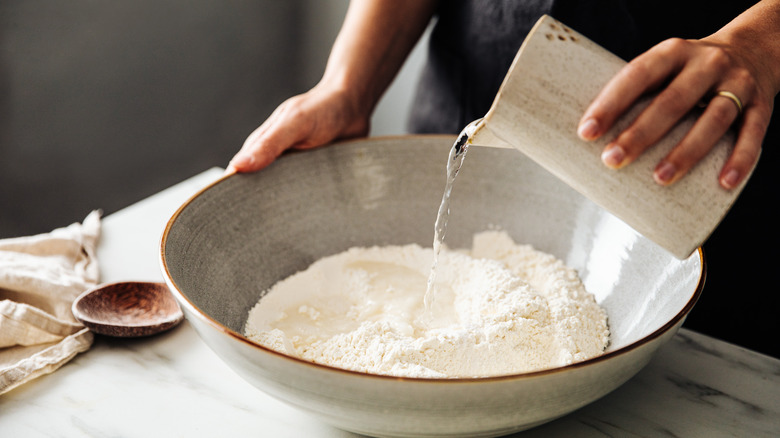
Myth: You should precisely measure the ingredients with measuring cups
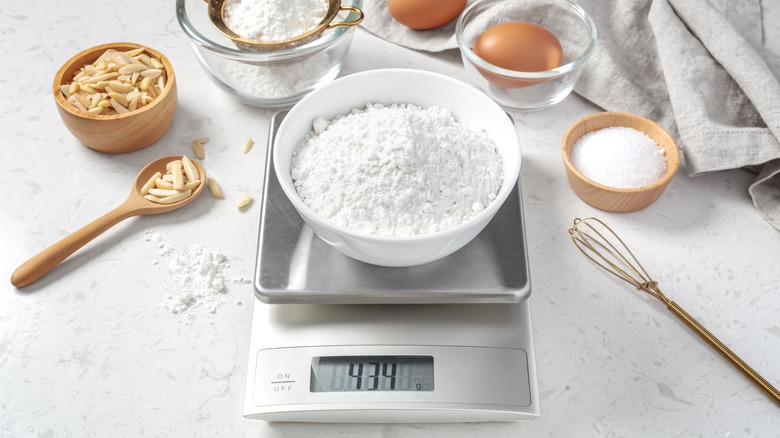
Using measuring cups is second nature for most bakers. Unless you completely freestyle your recipes, taking the time to scoop the designated amount of flour and maybe even pausing to level it off with a knife just feels like due diligence. But believe it or not, this painstaking attention to detail is more of a waste of time than a slam dunk when it comes to perfecting a recipe. The truth is, the most accurate way to measure ingredients is by weight, not volume.
This fact is particularly confusing, given that most American cookbooks use cups, tablespoons, and teaspoons rather than ounces or grams. You can get away with this when making most muffin and cookie recipes, but when it comes to bread, precision can make or break the outcome. Depending on how tightly you pack a measuring cup, the amount of flour or sugar will vary greatly. This is why, when a recipe calls for brown sugar, it will often specify that it be tightly packed. It is strange that they rarely provide the same level of detail for other ingredients.
Myth: You should mix all the ingredients at once
When baking cookies and quick breads, it's generally accepted that the ingredients need to be added in a particular order. You need to cream the butter and sugar before adding the eggs, and all the wet ingredients should be incorporated before adding the dry. But in bread making, there is rarely an emphasis on timing and the order of ingredients. Many bakers simply mix everything all together and dump the dough onto a work surface to start kneading. This method might yield tasty results, but it's a lost opportunity. Letting all the ingredients except salt sit for a while before kneading the dough will work wonders on the texture and loftiness of the loaf.
The method is called autolyzing and works by allowing the enzymes in the flour to activate and let the gluten form before being developed. Fifteen minutes is the minimum period you should set aside for the process. It is the same principle that allows no-knead bread to rise, but instead of letting the autolyze do all the heavy lifting, you're splitting the work. As a result, you'll knead the dough less and therefore be less likely to overwork it. The dough will also retain more moisture and have a sharper flavor. An autolyze is particularly useful for whole wheat flour because it allows the bran and germ to absorb more water, leading to a softer loaf.
Myth: You can use yeasts interchangeably
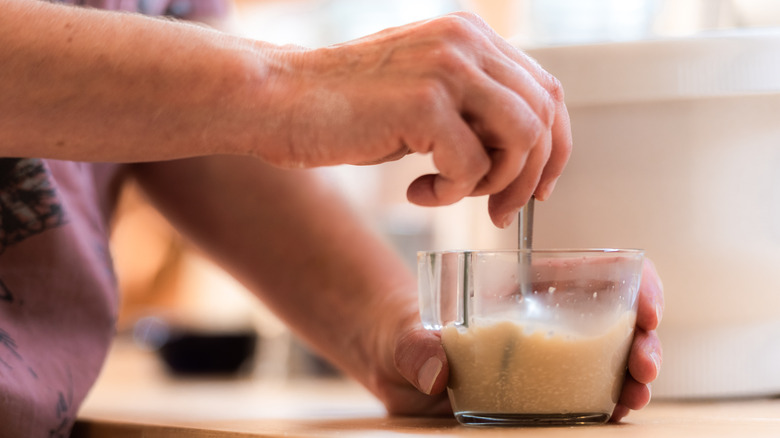
Instant, rapid rise, active dry, fast-acting –- it's all the same, right? Sadly, no. There is a dizzying number of yeasts for bread making, and they yield different results. If you have active dry yeast and a recipe that calls for instant yeast, you'll need to either head to the grocery store or find a different recipe.
The first thing to note is that everyone (yes, even professional bakers) can be confused by all the options. It's an unregulated industry, meaning that brands can come up with snappy new names to differentiate themselves without having to worry about whether customers will actually understand what they're buying. When it comes down to the nuts and bolts, though, there are only two categories –- instant and active. Instant yeast is exactly what it sounds like; it's ready to be used instantly. All you have to do is dump it into the mixing bowl with the other ingredients and carry on with the recipe. Active yeast needs to be activated with lukewarm water before being added.
Because there are no strict industry standards for what constitutes instant and active yeast, however, the results can vary. Just because two products are described as "instant" doesn't mean they will produce the same results, and the same is true of active yeast. If you want predictability, find a specific product from a specific brand, and stick with it. That way, you'll know what to expect each time.
Myth: Yeast doesn't work with gluten-free flour
Gluten development is what gives bread its structure. As the yeast chews through the sugars in the flour, it releases carbon dioxide, forming little pockets of air in the dough. Gluten makes the dough strong and elastic, allowing those air pockets to stretch and expand without bursting. You might think, therefore, that bread without gluten would struggle to rise. If the dough isn't stretchy, won't the air bubbles just tear and deflate it?
Fortunately for those who do not eat gluten, manufacturers have engineered gluten-free flours that provide the necessary strength and stretch. The key is a good binding agent, something that will strengthen the flour and give it the flexibility to expand. The most common is xanthan gum, a stabilizer and thickener used in everything from ice cream to body lotion. It acts like putty, holding the dough together and stretching with the growing bubbles of carbon dioxide. Most gluten-free all-purpose flours will have xanthan gum or other popular binders such as guar gum and psyllium husk, but if you aren't pleased with the results, you can always purchase the binders separately and add some to your dough. This is particularly useful given that bread needs a higher ratio of binders than more delicate baked goods like cookies and cakes.
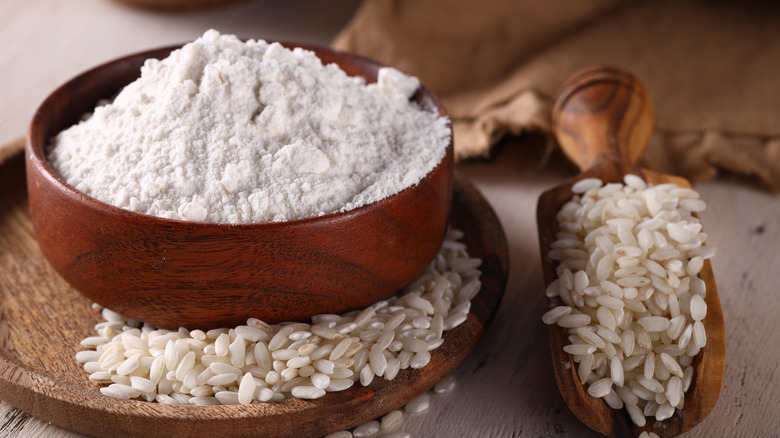
Myth: You should only use bread flour
In a world of all-purpose, extra fine, pastry, cake, and 00 flour, seeing the words "bread flour" on a package can feel like spotting a friend in a sea of strangers. It's a relief to see something that does not require a comprehensive baking glossary to identify. The decision is clear. If you're baking bread, you should use bread flour. Easy. Right? Well, kind of. Bread flour is indeed intended for making bread, but there are many different kinds of bread, and it stands to reason that they would benefit from different kinds of flour.
Bread flour is made with between 12% and 13% protein compared with about 10.5% in all-purpose flour. This makes the dough stronger and more elastic, but it isn't necessarily the best choice for softer breads. If you're making sandwich bread, for example, all-purpose flour will provide the most tender texture. If you're making a crusty country loaf, on the other hand, bread flour will give you the chewiness you're after. For something in the middle, you can always use a 50/50 split.
Bread should rise in a warm environment
Most recipes will tell you to let your bread rise in a warm place. Because of this, proofing boxes and the proofing setting on ovens are usually set to around 80 or 90 degrees Fahrenheit. Yeast releases gas more quickly in a warm environment, which is why most of us automatically let our dough rise on the counter in a warm kitchen or in a proofing drawer if you have one. Baking bread already takes multiple hours to make, so why wouldn't you speed the process wherever you can?
The answer is flavor. Slowing the rising process can transform your bread, making it taste like sourdough without any of the hassle associated with it. As yeast consumes sugar, it not only releases carbon dioxide, but also flavor molecules. If it only has an hour or two to scarf down the sugars in the flour, it will only release a limited amount of flavor. If, however, it's slowed down by a cold environment (a process called cold fermentation), it will provide layer upon layer of flavor compounds that will turn a humble pizza crust or country loaf into professional-level bread. Be forewarned, however, that if you want to try cold fermentation, you'll need to set aside multiple days. Letting it rise in the fridge for up to 72 hours is what it takes. Luckily, that time is all hands-off.
Myth: More yeast equals more rise
Yeast releases the air into dough that makes it rise, so it stands to reason that more yeast would equal more air, which would, in turn, equal a lighter, airier loaf. While it's difficult to argue with this logic, it is also impossible to ignore the reality, especially if you experiment with doubling up on the yeast and discover for yourself that sometimes chemistry does not follow simple addition.
When yeast is working its magic on bread, it isn't simply releasing carbon dioxide. It is also releasing acids, which can degrade the gluten. If there is too much yeast, not only will it rise quickly, but the structure of the dough will also begin to break down. Instead of stretching to accommodate the air, it will simply break, leaving you with a flat, airless loaf instead of a supersized one. Another reason that too much yeast causes the air bubbles to burst is that it releases carbon dioxide faster than it takes the gluten to stretch and expand. If you don't think your bread is rising enough, there are many other things that could be causing it that have nothing to do with the volume of yeast. The yeast might be too old, for example, or you might be activating it with water that is too warm. If you're following the recipe to the decimal point and you've checked the expiration date, you're better off finding a new recipe rather than adding more yeast.
Myth: Baking bread is more hassle than it's worth
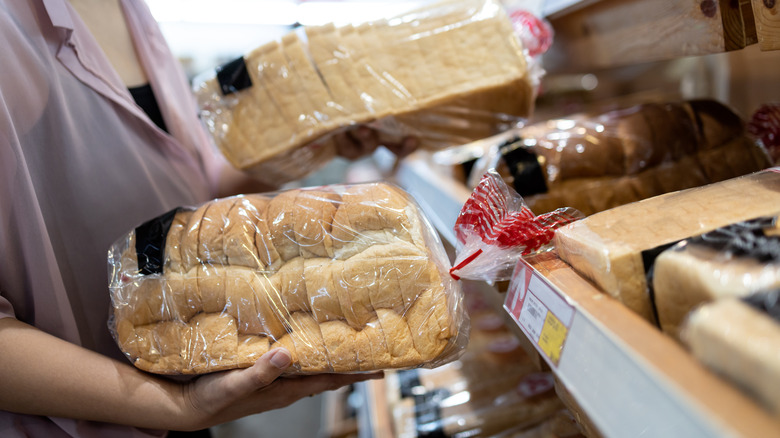
There is nothing misleading about how time-consuming bread baking is. If you have a speedy recipe, you could have a freshly baked loaf on the table in three or four hours, but other recipes can take multiple days to complete. So why bother? There are whole sections of the grocery store covered top to bottom with every kind of bread you can imagine.
For busy parents or those who work outside the house most of the day, it can be tricky to fit bread baking into the schedule. But once you start, you'll realize that not only is the process largely hands-off, but the results are also worth the extra effort. From a health standpoint, home-baked bread is tough to beat. A standard recipe for white bread might only contain four or five ingredients. Compare this to a typical loaf of bread from the grocery store that has a block of text full of unpronounceable additives, and it's easy to pick which one is healthier. If you prefer to buy bread with fewer ingredients, you will likely spend more on a fancy loaf from a bakery. In this case, making the same type of loaf at home will be cheaper and fresher. Lastly, you can tailor homemade bread to your tastes. Add more salt, toss in some walnuts and raisins, or cover the crust with cheese before popping it into the oven.
Myth: The same recipe works everywhere

If you have a favorite recipe for sandwich bread, you probably wouldn't hesitate to bring it with you on a seaside vacation or holiday to the Rockies. As long as there's a kitchen at your destination, you'll be able to recreate your favorite loaf just like you're still at home. But if you've ever tried this scenario only to end up with an overcooked block of starch instead of an airy loaf of bread, do not blame your baking prowess –- it's probably the altitude.
Starting at about 3,500 feet above sea level, baking gets a little wonky. The decrease in atmospheric pressure makes dough rise too quickly, overstretching the gluten and leading to irrevocable collapse. There is also less moisture in the air at high altitudes, which can make the bread leech its water content and end up with a texture more akin to sawdust than food. So, if you're traveling from Miami to Reno or Denver to San Diego, your bread is not going to be the same as it is when you bake it at home. If you're traveling to a high altitude, decrease the amount of yeast in the recipe, add water, and consider slowing the first rise by doing it in the fridge. Setting your oven temperature higher than prescribed and cutting the baking time may also help set the structure of the loaf quickly before it can collapse.
Myth: You should store bread in the refrigerator
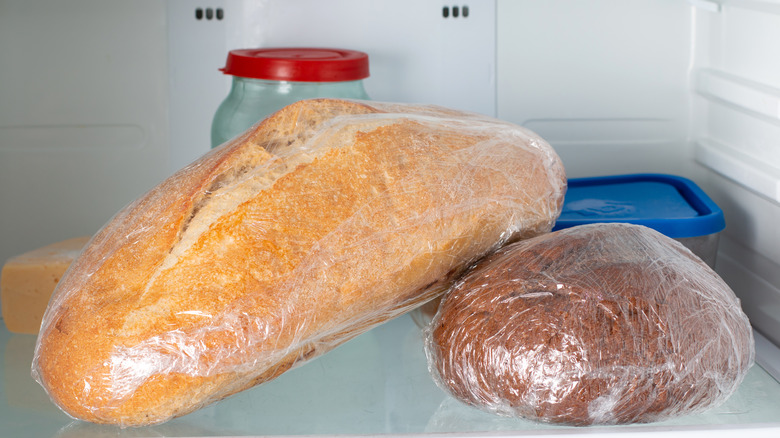
Mold is the bane of any bread baker's existence. After spending hours crafting the perfect loaf, mold spores can creep in and ruin everything after only a day or two. As with store-bought bread, the obvious answer would seem to be refrigeration. Cold environments slow the growth of mold, giving you more time to enjoy your bready masterpiece. But not so fast. Putting that freshly baked loaf into the fridge might ruin its flavor and texture even more quickly than mold can. We're not trying to sully the good name of refrigerators. It is just a fact that their specific temperature is worse for bread than either the countertop or the freezer.
The reason is found at the granular level. Flour consists of starch granules, which are each arranged into discrete structures. Through the addition of water and the heat of baking, these structures relax into each other, creating a soft, smooth loaf of bread. The more it cools, however, the faster the starch granules return to their individual structures, which makes the bread appear dried out. Even if you spritz the loaf with water, it will still eventually become stale. If you can't eat the loaf fast enough to avoid mold at room temperature, bypass the fridge and go straight to the freezer. It's so cold that the starch struggles to reshape itself.