You've Been Grilling Corn On The Cob All Wrong
There's surely nothing better than a delicious grilled ear of corn, especially if you manage to snag some super fresh and incredibly delicious ears of the stuff from your favorite farmers market or farm stand. However, while grilling corn on the cob can seem pretty straightforward, let's pause for a moment and reconsider. If you've actually grilled corn before, then you likely already know how easy it is to mess up the process.
Much like when grilling anything, really, there's a fair amount that can go wrong when you grill an ear of corn. Those pitfalls come in at the prep stage and can keep tripping you up until the final presentation. And don't get us started on all of the suspiciously many "best" ways to cook your corn. Whether the received wisdom demands that the corn is wrapped in aluminum foil, is cooked just in the husk, boiled then grilled, or pristinely cleaned and then roasted right over an open flame, the list goes on and on.
It can all be pretty dizzying, so what's the right way to go about things? Luckily for you, we've put together some of the top mistakes that you could very well be making when grilling your next ear of corn. This way, you can avoid them and achieve grilled corn on the cob glory.
Soaking your corn before it hits the grill
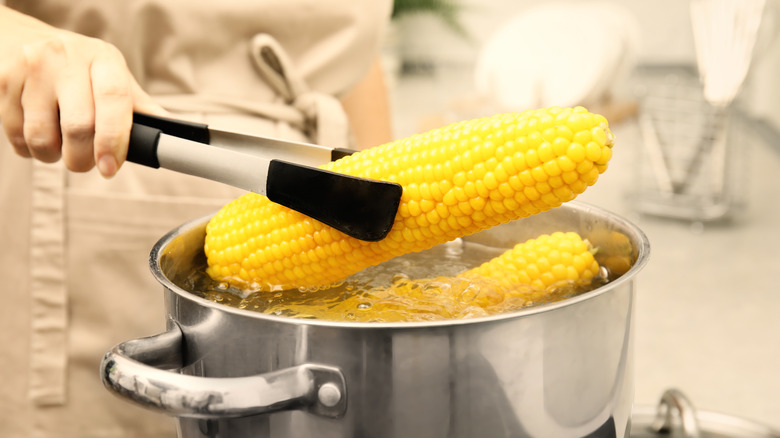
Quite a few grilled corn on the cob recipes will advise you to soak or even parboil your corn on the cob before the vegetable hits the grate on your grill. Some say that this helps to keep your corn from burning or drying out too quickly. But is that true? Epicurious took on various corn on the cob grilling methods in its test kitchen and found that most of the time, soaking and boiling does little to help you achieve that perfect grilled ear of corn.
When it came to soaking the ear of corn before grilling, the testers found that soaking an unhusked ear for even as long as 10 minutes didn't really do anything to help prevent burning or charring. So, if you're grilling your corn unhusked and uncleaned, why bother? To achieve that smoky grilled flavor, you can just skip the soak, save your time, and plop those ears right on the grill grate.
As for boiling, the testers tried both blanching ears of corn in a mixture of milk and water, as well as boiling the ears in plain, unadulterated water. The result? Corn that tasted like, well, boiled corn. Even after some time on the grill, that bland flavor profile remained.
So, put that stock pot away, at least at this point in the process. Instead, skip the soaking and pre-boiling and just grill your corn. It'll save you both time and disappointment.
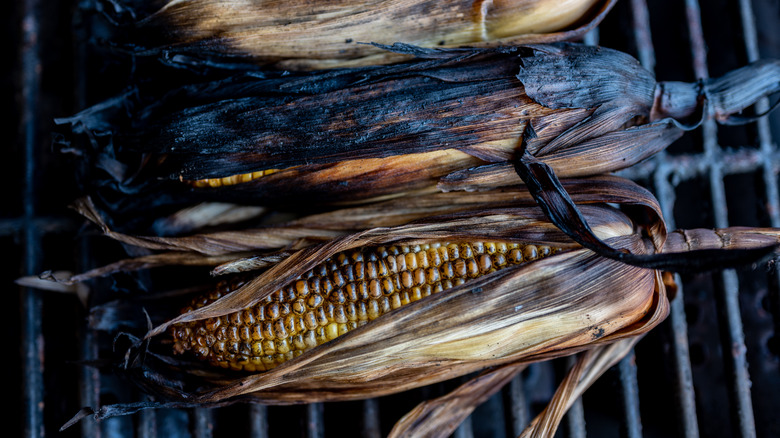
Completely removing the husk before grilling or leaving it all on
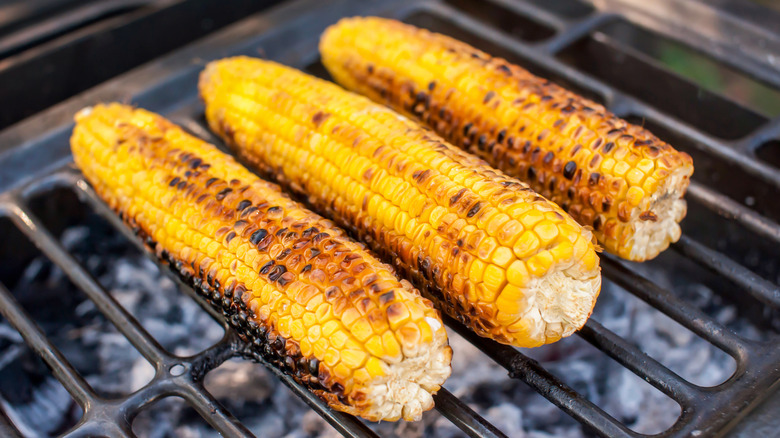
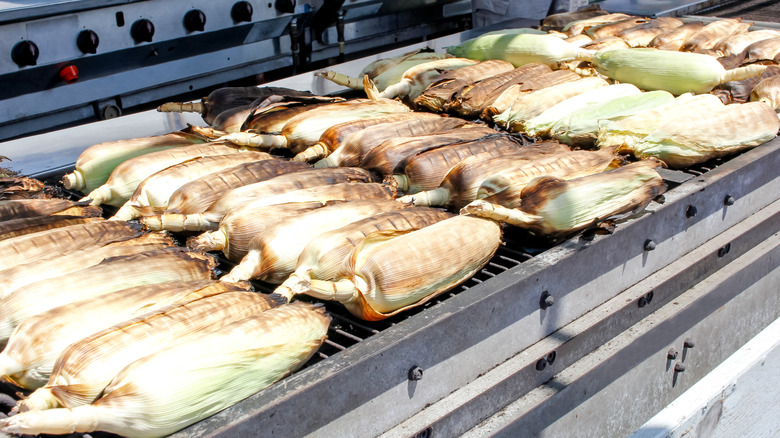
Many grilled corn on the cob recipes will tell you to completely shuck and clean your corn before grilling. Or you may encounter other tips that say to leave the husk completely on, no cleaning required. Yet, according to Epicurious, there is a better way. As it turns out, there's no need to completely husk your corn. Neither is there any good reason to leave the husk completely on the cob.
What's going on? The Epicurious test kitchen found that removing all of the husk and silks led to over-charring and easy burning, making for some seriously nasty flavors. Meanwhile, leaving the husk and silks completely on led to a lackluster flavor, as that smoky grill goodness couldn't really reach the corn kernels.
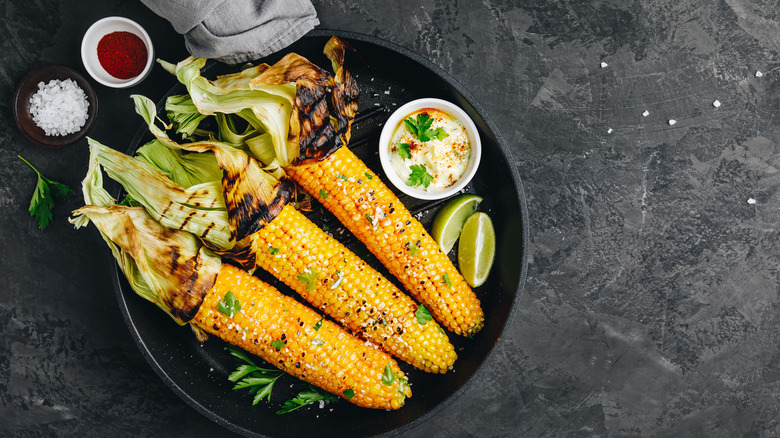
The best option for perfectly flavored grilled corn was to pull back the husk on each cob, remove all the silks, push the husk back in place, and then grill away. This allowed for just enough protection from the grill heat to keep the corn kernels themselves safe. At the same time, it allowed for enough exposure to imbue each kernel with that delicious grilled flavor profile.
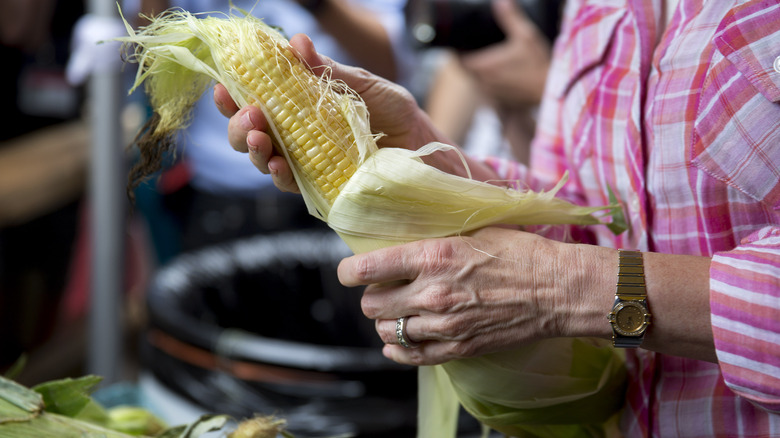
Not fully removing all of the corn silk
Imagine this scene: You sit down to your dinner, grab a fresh-grilled ear of corn, slather on some butter, and watch it melt down onto your plate. You take a bite, expecting some late summer or early autumn glory, but then you're immediately greeted by a mouthful of hair-like corn silk. You spend the rest of the meal picking the bits out of your teeth. Who wants that?
If you intend to partially remove the husk before grilling, avoiding this culinary mistake means that you'll want to be extra careful when all of those corn silk fibers. There are just as many ways to remove corn silk as there are ways to grill corn, but Kitchn did all the hard work for you by testing out some of the most popular methods. They found that the easiest way to remove the silks is by cooking the corn with them on, either in boiling water or in the microwave, then removing them before eating.
If you're grilling your corn, though, this isn't exactly an option. So, go with the next-best method by using some rubber gloves. Use a latex-free glove (the kind you can purchase in a pharmacy or big box store) to rub all up and down each ear of corn. The friction of the rubbery glove material will remove the silks with ease.
Not pairing a grilling method with your flavor profile
Now, as with most cooking recommendations, not every cooking method is going to work for every palate. That said, the partially-husked method is ideal for most grill masters, as it allows you to achieve a grilled flavor profile without risking a lot of burnt kernels. But don't use that as an excuse to rest on your culinary laurels. This method, easy as it is, isn't going to be ideal for every single person and individual taste. Let's face it: some people just like that slightly burned and charred taste that comes from cooking something over an open flame.
When it comes to grilling, one size doesn't fit absolutely everyone. In other words, it's always important to keep your favorite flavors in mind before you pick your grilling method. As Serious Eats points out, if you want a fresh, non-charred, slightly grassy flavor profile, you'd do best to cook your ears of corn over an open flame with little to no prep needed. If you like corn that's got more of that charred flavor, on the other hand, you'll want to go with grilling your corn completely shucked and cleaned.
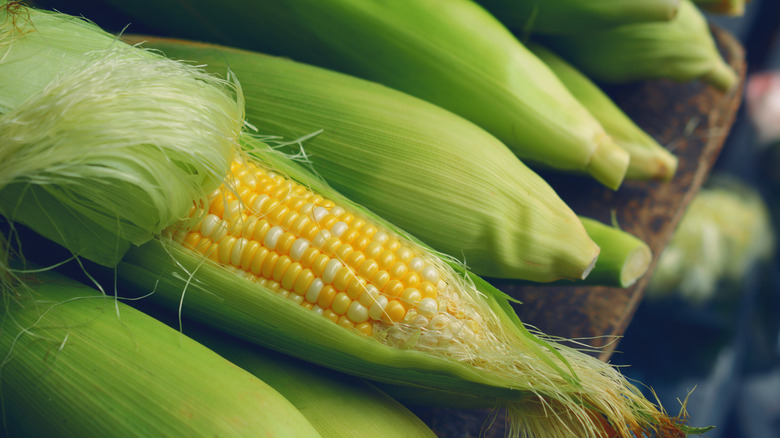
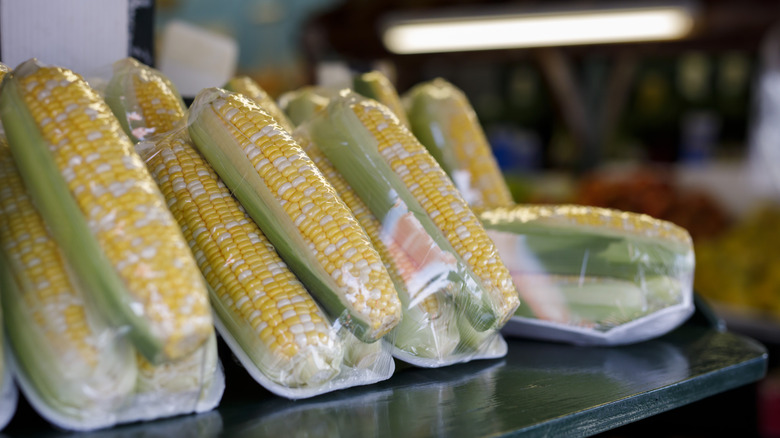
Not buying the freshest corn possible
We get that planning ahead can be tough and, oftentimes, it seems pretty sensible to get some ingredients days in advance and store them in the fridge or freezer until you're ready. Not so with grilled corn, however.
Whichever method you plan to use when grilling your corn, there's one area where you won't want to deviate from our advice: picking out the best, freshest corn possible. According to AllRecipes, fresh corn is typically in season between May and September. What's more, you'd ideally be eating your corn within eight hours of it coming from the field.
We recognize that, in the real world, this is not always possible unless you live pretty close to a cornfield. So, if you're shopping around your local grocery store for some corn on the cob, there are a few things to look for.
Firstly, look for ears of corn that have a bit of 'oomph' to them. That means they should feel a little weighty when you pick them up. The silks at the top should be fresh and green, not dry and yellow (if they're brown, stay far away). The husks should feel tight, too. And while you may feel the temptation to pull back those husks to get a glimpse of the kernels, restrain yourself. Instead, squeeze the outside of the husk around the end of the corn to check for plumpness.
Letting your corn sit in your kitchen too long before grilling
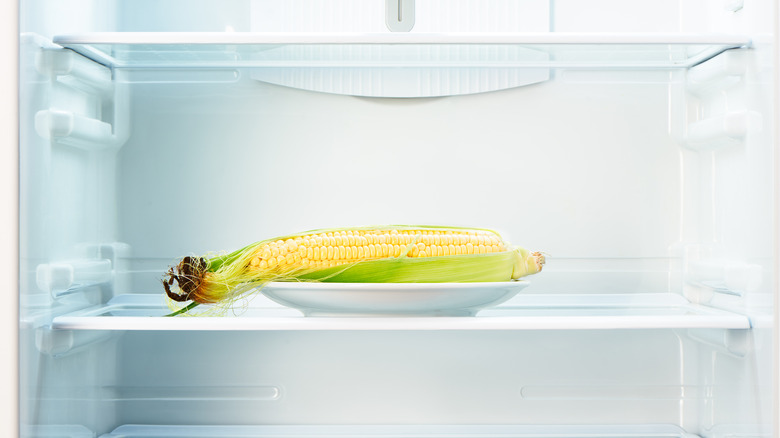
But buying the freshest, best-looking corn possible is a little useless if you're going to allow that corn to linger in your kitchen for a week after your shopping trip. Bon Appétit recommends that you enjoy your corn the same day that you bought it. Otherwise, you risk that corn decreasing in quality and sweetness the longer you allow it to sit in the cold, dry environment of your refrigerator.
If you absolutely must store your corn for a few days before finally chowing down, be sure to keep the husks intact and store the corn in your fridge's produce drawer. To further protect those fresh kernels, Epicurious recommends plopping the ears into a tightly wrapped plastic bag.
And if you can't get to the ears within three days, you can always freeze the corn for up to a year. However, you likely won't be able to enjoy your corn on the cob grilled if you freeze it, given that the ice crystals formed during the freezing process will change the texture of the water-heavy corn kernels. You can try to stack the odds in your favor, though. For the best chances at retaining your fresh corn's quality, blanch the corn, cut the kernels from the cob, and then freeze them for use in other recipes throughout the year. May we suggest some corn chowder for those colder months ahead?
Rushing the grilling process
An accomplished home cook or professional chef will tell you that a fantastic dish starts with careful attention to detail and an acceptance of the time necessary to make some really good food. All told, you can't just rush through a recipe and expect greatness. The same holds true for grilling your corn on the cob.
When Mashed interviewed Publix's corporate chef, Tim Donnelly, on grilling corn on the cob, he advised home cooks not to rush their corn. Instead, you should handle each step of the process with attention and care, all in the name of a better end product. In other words, this means thinking carefully about each choice you make.
For instance, if you go with shucked corn straight on the grill grate, you'll have to cook your corn at a lower temperature to avoid burning (if you do indeed want to avoid a lot of char). If you go with corn cooked fully in the husk and its silks, you'll want a plan for properly removing that corn silk after the cooking process.
Overcooking the corn
Of course, it follows that, without that careful attention to detail, it's all too easy to overcook your grilled corn on the cob. And we're not just talking about overcooked to the point that your corn kernels are visibly blackened and charred. The sad truth is that corn can be entirely overcooked and not even show it, making that strict attention to your cooking process all the more necessary.
According to Betty Fussell, who spoke to the Chicago Tribune about all things corn, some varieties of sweet corn can actually be eaten raw. This means that there's no need to worry about cooking your corn into oblivion. Plus, the longer you cook your corn, the more the sugars inside the kernels will break down and the less sweet it will be when you eat it.
Heat quickens the process of sugar converting into starch, so more time on the grill results in less of that flavorful sugar. Fussell says that, usually, you just need to cook your corn until it's warmed through. Or, in the case of grilling, that would be until you reach your desired level, if any, of char.
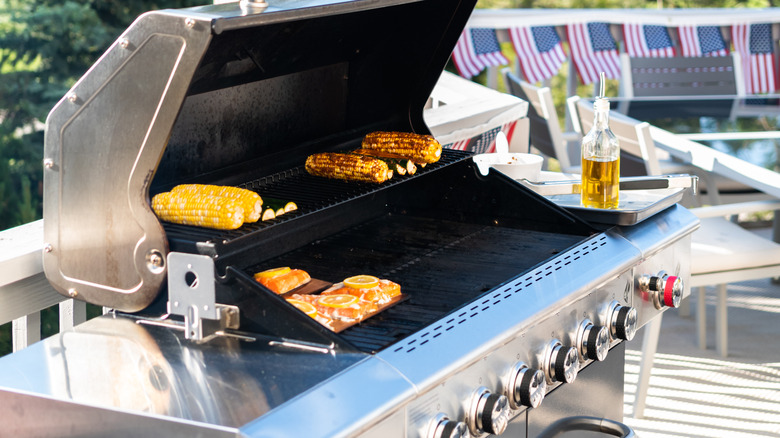
Cooking your corn over too high a flame
As you could likely guess, you also don't want to cook your corn at too high a heat. Not only does it increase the chances of overcooking the corn and breaking down the sugars within the kernels, but it can quickly lead to an ear of corn that's just not as tasty.
The Spruce Eats advises cooking your corn on the cob over indirect heat, as opposed to a full flame. You can even potentially cook your corn on your grill's warming rack. Remember, you really only need to warm the corn through, not necessarily cook it until it's "done," so a relatively gentle process may be all that you want or need.
If you cook your corn over indirect heat on a grill, the process should only take about 10 minutes for shucked corn on a medium-heat grill. If you're simply warming your corn through on your grill's warming rack, you can typically double the amount of time. And if you're cooking your corn in the husk, you'll likely want to skip the warming rack, but should still go for about a 20-minute cook time and watch carefully to make sure that there isn't a ton of direct flames striking the corn cobs.
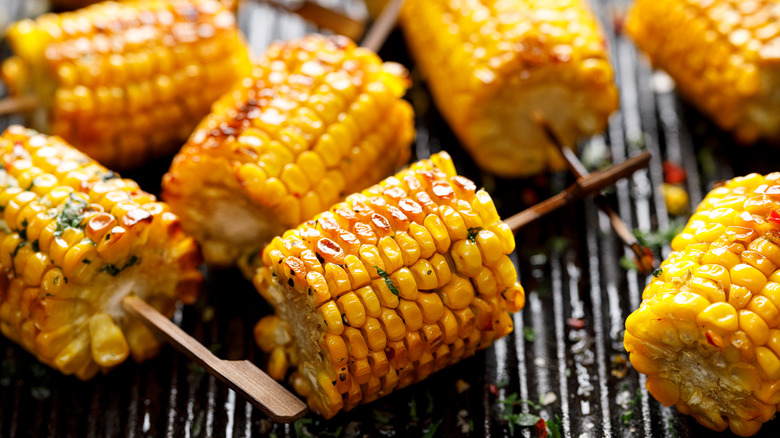
Not giving your corn that smoky grilled flavor
Okay, by now, we probably know what you're thinking. You may be wondering how, if you don't leave your corn on the grill for that long in the interests of preserving the flavor, how is it going to get all smoky and delicious? Isn't that the whole point of grilling corn on the cob for most people?
There are some tips here to still achieve that uniquely grilled flavor. If you're willing to sacrifice some of your corn's sweetness, you can go ahead and leave it on the grill longer, allowing more smoke to infuse itself into the kernels. However, there's another way. If you want the best of both worlds, you can cheat your way to smokiness with a spice rub.
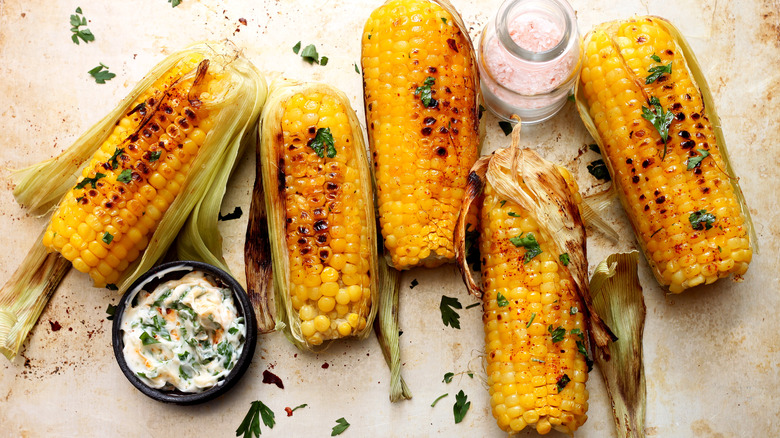
To achieve that trick, Cooking Light recommends using a mixture of salt, chili powder, paprika, cumin, and pepper. Blend those spices with some butter and slather it on each ear of corn before they hit the grill. Those spices will help you achieve a smoked flavor profile. You can either add the butter mixture to your half-shucked corn before folding the husks back, sealing the butter inside. Or, you can cook the butter-coated corn straight on your grill grate (remember to clean that grate later, though we're sure you were planning to do that in the first place). You can also wrap the buttered-up corn in aluminum foil if you want to keep them totally free of the flames.
Not deviating from the grill on occasion
Sure, we know that this is all about the biggest mistakes to avoid when cooking your corn on the cob on the grill, but one of the mistakes you could be making is simply sticking to the grill for the rest of your corn-cooking life. For instance, if you love the smoky flavor of grilled corn on the cob, why not try smoking your corn, too?
According to the Washington Post, when it's compared to grilled corn, smoked corn has a more multi-dimensional flavor. It also tends to hit the plate with plumper, juicier kernels. Because the smoking adds flavor, as does the caramelization that occurs during cooking, there's no need to further season your corn on the cob either. A little butter or olive oil and perhaps a few pinches of salt or pepper added at the table is all you need. You can smoke your corn using either a smoker or a grill outfitted with a smoker box and some hardwood chips.
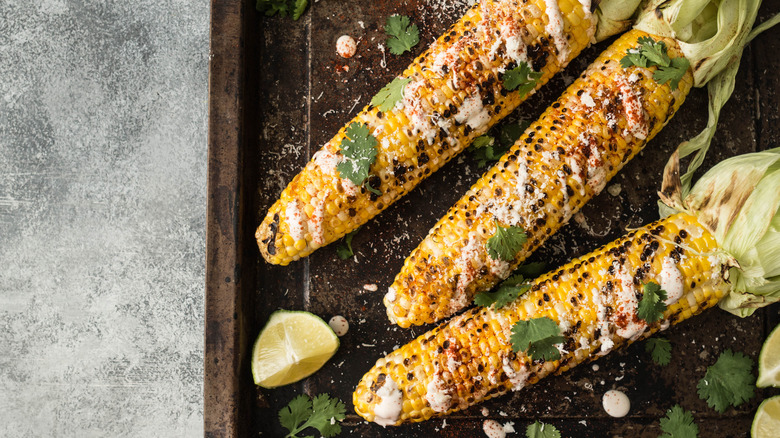
Not getting creative with your toppings
If you've avoided all of the above mistakes and followed recommendations to remedy them, then you may well have prepared a heaping pyramid of delicious, steaming, perfectly cooked corn on the cob. You're really close, but there's one thing left to do. While flavorings like butter, salt, and a bit of pepper are all well and good for topping off your corn on the cob, why stop there? Why not get a little creative with your toppings? You might just find a new favorite combo that takes your grilled corn to the next level.
We have a few suggestions for you that will really pump up that grilled corn experience. You might roll your ears of corn in lime juice, olive oil, chili powder, cumin, paprika, and sea salt both for a little Mexican-style chili-lime flair. Or you might lean into Italian flavorings with some parsley, red pepper flakes, garlic, and parmesan cheese for a savory, umami-rich experience.