How To Prepare A Whole Pumpkin For Your Recipes
Pumpkin season may as well be a national holiday in the United States. Once pumpkin time rolls around, lots of people go crazy for the warm, cozy, and often spiced flavors associated with the large orange squash. Many people encounter whole pumpkins to carve jack-o-lanterns, but when it comes to cooking with pumpkin, they just reach for a can of prepared purée. There is absolutely nothing wrong with canned pumpkin, but preparing a whole squash from scratch can be rewarding and surprisingly easy. We will detail three ways to prepare a pumpkin, two for purée and one for slicing, so you feel confident going forth.
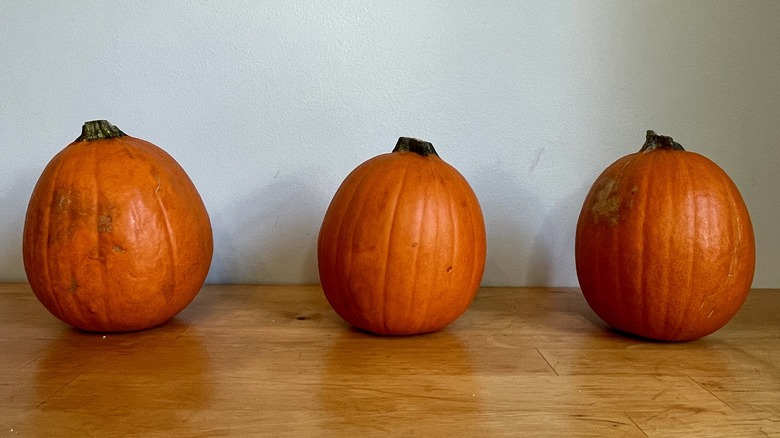
The first thing to understand is that many different kinds of pumpkins exist. The pumpkins you buy for Halloween decorations differ from those you want for cooking. Jack-o-lantern gourds are bred for size, are tough, and are considered inedible. Being categorized as a gourd simply means it is part of the Cucurbitaceae family, but that kind is not for eating. Squashes are the ones you should eat.
Pie pumpkins or sugar pumpkins are good options for baking, as they are sweet and creamy. These pumpkins are readily available during fall. Other pumpkin varieties are also suitable for cooking, but each type has different pros and cons, so do your research before selecting one to cook.
What tools you will need
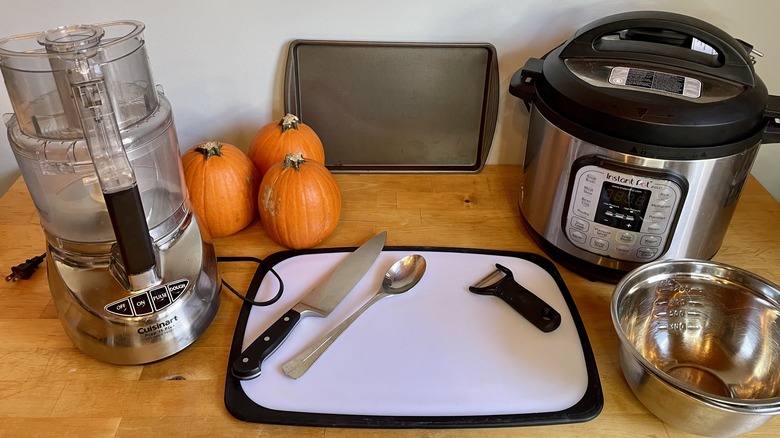
Most home cooks will already have all the tools in their kitchen to prepare a whole pumpkin. We will be focusing on three different preparation methods, which all have specific tools but include some overlap.
To make diced pumpkins for roasting or to have chunks for any dish, all you need is a cutting board, a paring knife or peeler, a large spoon, and a chef's knife. For peelers, we recommend using a Y peeler.
We are also detailing two different ways to make purée. Using the traditional roasting method, you will need a chef's knife, a large spoon, a baking sheet, and an oven to make pumpkin purée. For the Instant Pot method, instead of an oven and a chef's knife, you need an Instant Pot and an Instant Pot trivet. If you do not have a trivet, one can easily be acquired online for less than $20. With both of these methods, you will need a food processor or powerful blender to process your cooked pumpkin into smooth form. If you choose the additional step of removing excess liquid, you can either use a cheesecloth or cook down the purée on a stove using a medium-sized pot.
How long does pumpkin last
Whole pumpkins can last a shockingly long time. Left on the counter, an uncut pumpkin can last two to three months. This time frame is extended if they are kept in a cool place such as the refrigerator. There, they can last for up to five months. This is a good thing because, as people who have grown squash of any kind have discovered, you are quickly overtaken by them.
Cut or diced pumpkin is a different story, though. Fresh diced pumpkin will only last a few days in the refrigerator. Cooked pumpkin, such as pumpkin purée, can last up to a week in the refrigerator. When frozen, both diced and puréed pumpkin can last for six to eight months. If you decide you would rather prepare all your pumpkins at once for future use, just make sure you have room in your freezer. Then you can take them out to thaw as needed. Just be sure to drain off any excess water after thawing but before using in your recipe.
Prepping your pumpkin for baking
Baked pumpkin is one of the most common methods for making homemade pumpkin purée, which can be used in a number of dishes, from soups and curries to pies and cakes.
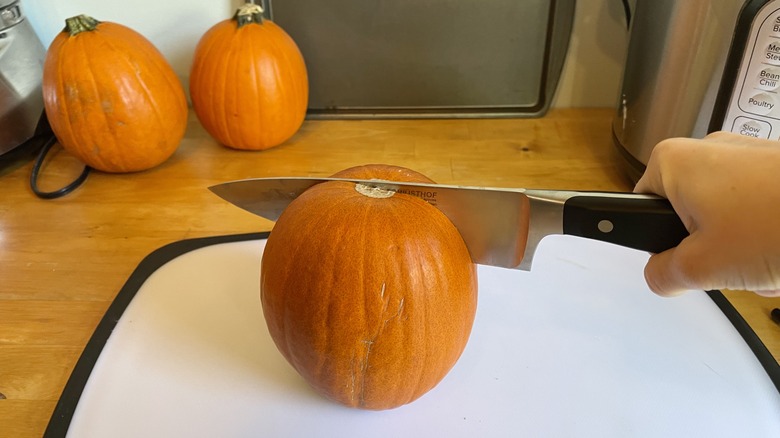
First, start by removing the stem of the pumpkin. To do this, place the pumpkin sideways on your cutting board. Holding the pumpkin in your non-dominant hand, use a chef's knife in your dominant hand to slice off the top of the pumpkin with the stem. Discard the stem. Now place the pumpkin on the cutting board cut side down, and using your chef's knife, cut your pumpkin vertically, straight down the middle, creating two halves.
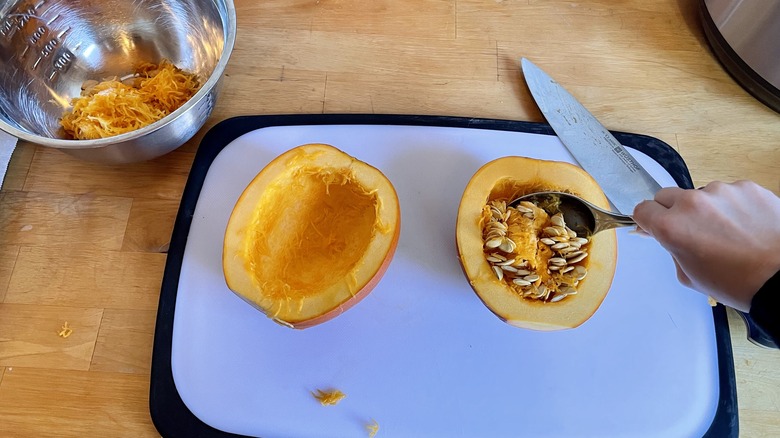
Next, take your spoon, and scoop out the seeds and string from the inside. For this, a larger spoon is ideal, and it works even better if you have a serrated one. However, a regular tablespoon will suffice. Hold the spoon close to its base for the best leverage and to make removing the insides easier and speed up the process. You may discard the strings and seeds or compost the strings and save the seeds to use later.
How to bake your pumpkin
While you're prepping your pumpkin for baking, preheat your oven to 350 degrees Fahrenheit.
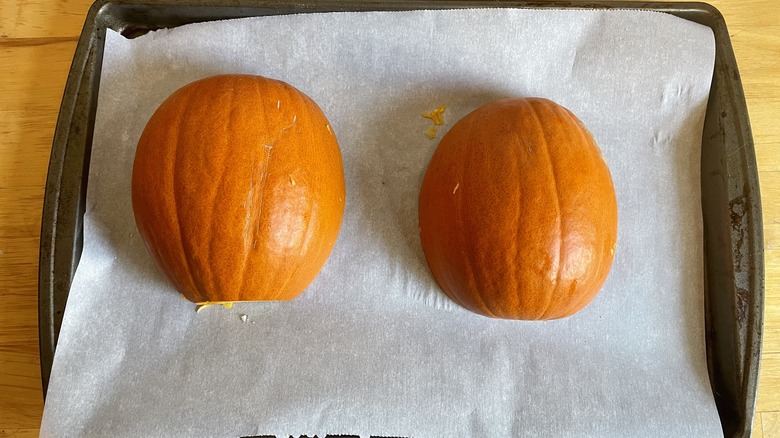
You need to use a baking sheet that is large enough to comfortably fit both halves of the pumpkin. For easier cleanup, line the bottom of the baking sheet with parchment paper. Once your baking sheet is ready and your pumpkin is cleaned, place the pumpkin halves, cut side down, on the baking sheet.
Place the baking sheet with the two humps of pumpkin in your preheated oven and bake for 45 minutes. At the 45-minute mark, poke the pumpkin with a knife or a fork. If the pumpkin is done cooking, its exterior should be soft, and the knife or fork should cut easily into it. There should not be any resistance. Once your pumpkin reaches this stage, remove it from the oven and place it on top of the stove or in another heat-resistant space. Allow the pumpkin to cool to the point that it can be handled easily before moving on to the next step.
Turn your baked pumpkin into purée
Once your baked pumpkin has cooled enough to handle, turn your pumpkin halves over so the flesh side is up. You can either do this on the baking sheet or return the pumpkins to the cutting board.
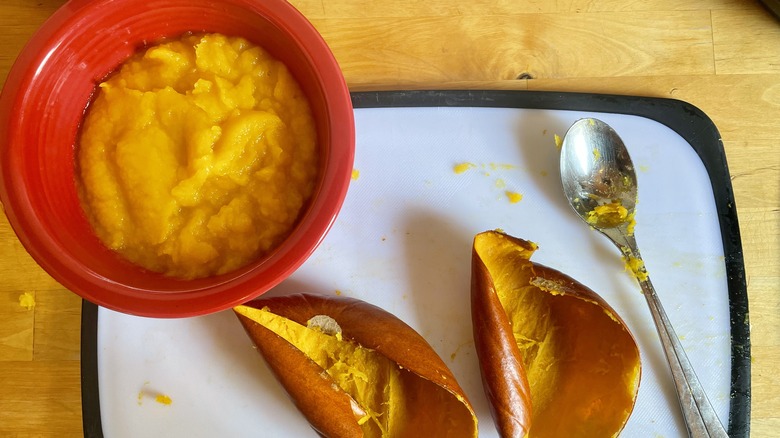
Once again, you will need a handy dandy spoon. Use a new spoon or thoroughly clean the spoon you previously used on the raw pumpkin. With your spoon, carefully scoop out the innards from your pumpkin, separating the flesh from the skin. The pumpkin should be cooked enough that scooping out the flesh should not be difficult. Treating the skins as a sort of bowl, scrape out as much of the flesh as possible.
As you scoop out the cooked pumpkin flesh, place it either in a clean bowl or directly into your food processor or blender. Once all flesh has been scooped, discard the skin. If your pumpkin is not already in a food processor or blender, place it there now. Turn on your food processor or blender, and watch as the pumpkin transforms into a smooth, creamy consistency. Pour your completed pumpkin purée into a bowl or storage container.
Use an Instant Pot to cook your pumpkin instead
Pressure cookers are great for so many things, but some people do not realize that they can make cooking your own pumpkin to create purée incredibly easy. What we love about this method is that it is great for people who would otherwise have difficulty cutting a large pumpkin. That is because for this method, the entire pumpkin gets placed into the pressure cooker, and when it comes out, it will be as easy as butter to cut and prepare.
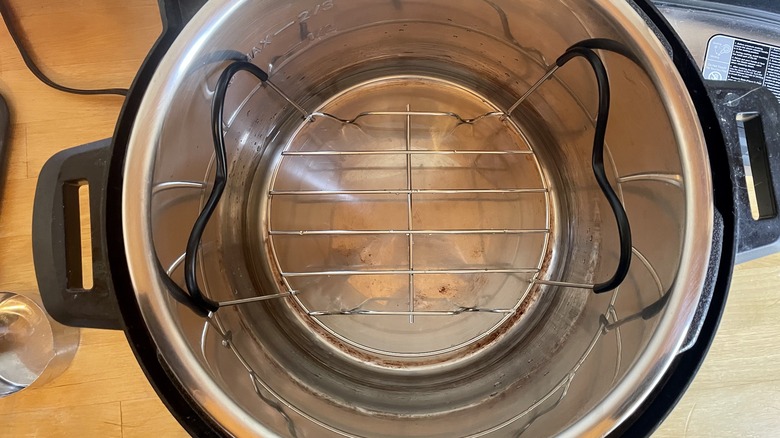
The first step is to prepare your pressure cooker. To do this, place your trivet in the bottom of your Instant Pot. Ideally, use a trivet that has handles on either side, as this will make removing the soft, cooked pumpkin much easier.
Next, pour one to one and a half cups of water into the base of your Instant Pot. This will help steam and cook your pumpkin to perfection.
Prepping your pumpkin for your Instant Pot
Preparing your pumpkin for pressure cooking is easy. While baking requires cutting the pumpkin up and removing the seeds and strings, with the Instant Pot there is no need for that. When we say the whole pumpkin is going in, we mean the entire pumpkin, stem and all.
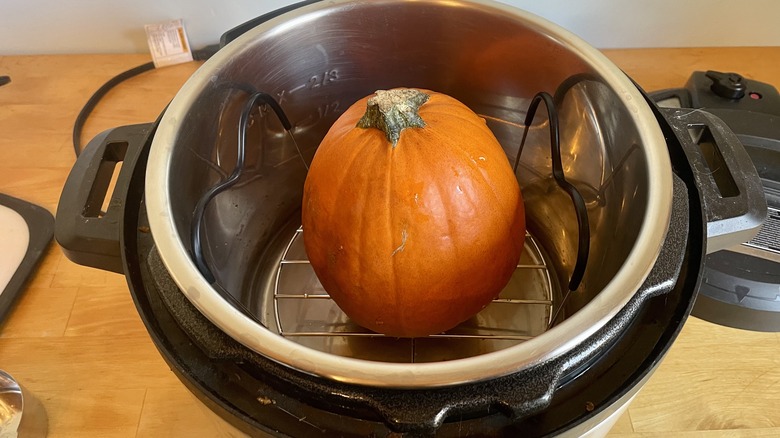
One of the crucial steps when using the Instant Pot method is to ensure your pumpkin does fit entirely into the Instant Pot. We used an eight-quart Instant Pot and an average sized sugar pumpkin purchased from Trader Joe's, and we had no issues with fit. But if you have a smaller Instant Pot or larger pumpkin, you may need to cut your pumpkin into pieces to fit entirely in the Instant Pot.
Using a fork, pierce the skin of the whole pumpkin several times. This creates some vents that will prevent your pumpkin from exploding in your Instant Pot. It is unlikely that will happen, but there is no harm in taking extra precautions. Place your pierced pumpkin, whole, into the Instant Pot. Close the lid and seal. Set the appliance to pressure cook on high for 10 minutes.
Finishing your pumpkin once it's cooked in the Instant Pot
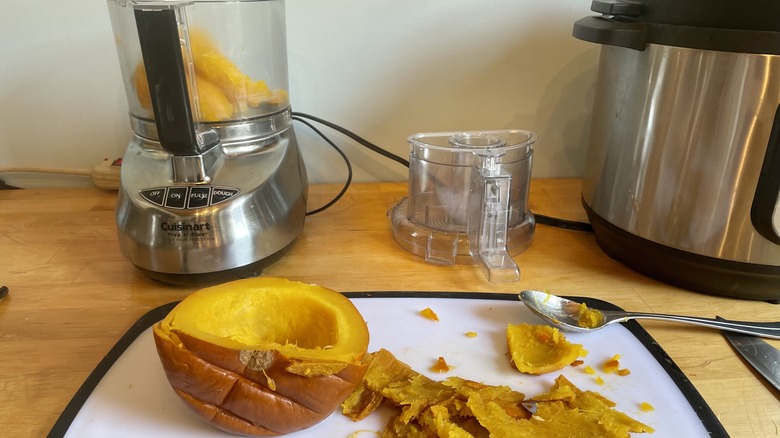
After your pumpkin is done cooking in the Instant Pot, allow the pressure to release naturally. This can take about 20 minutes. Once pressure is released, carefully remove your pumpkin. This is where having a trivet with handles can come in handy.
Now that your pumpkin is fully cooked, place it on your cutting board. The skin is likely to peel straight off at this point. If it does, remove all the skin and discard. If it does not, that's okay. You can remove the skin after a few more steps.
Next, use your chef's knife to cut your pumpkin in half. Carefully scoop out and discard the seeds and strings. Since the pumpkin is cooked, you do not need to be aggressive with the scooping, as aggressive scooping will remove not only the seeds and strings but also the pumpkin flesh. If your pumpkin skin did not come off, use your spoon to scoop out the flesh from the cut halves as you would with a baked pumpkin. Place your clean chunks of pumpkin flesh into a blender or food processor, cutting pieces smaller to fit when necessary. Purée your pumpkin until a smooth consistency is reached.
Optional step: Thicken your purée
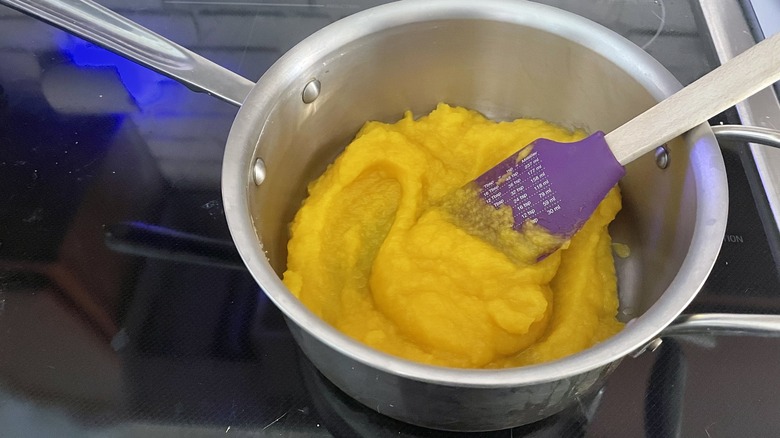
Before storing your purée or using it in a recipe, you may want to thicken it first. That's because pumpkin is a watery food. Oftentimes puréed pumpkin is used in baked goods such as pies or muffins. Most of the time, these recipes are tested with canned pumpkin, which tends to be thicker and less watery than homemade pumpkin purée. This can have a big effect on your final product.
There are two ways to get rid of excess water and thicken your pumpkin purée. One is to use a thin cloth or cheesecloth. Place the purée into the cloth, and squeeze out as much excess liquid as you can. Another way to thicken your pumpkin purée is to place it in a medium pan on the stove. Cook it on medium heat for about 10 minutes. Keep stirring to ensure the purée cooks evenly and doesn't burn. Once you have the consistency you want, turn off the stove. You can either leave your purée in the pan to cool or transfer it to a heatproof bowl. Allow it to cool completely before storing it in the refrigerator or freezer.
Prepping your pumpkin to be diced instead of puréed
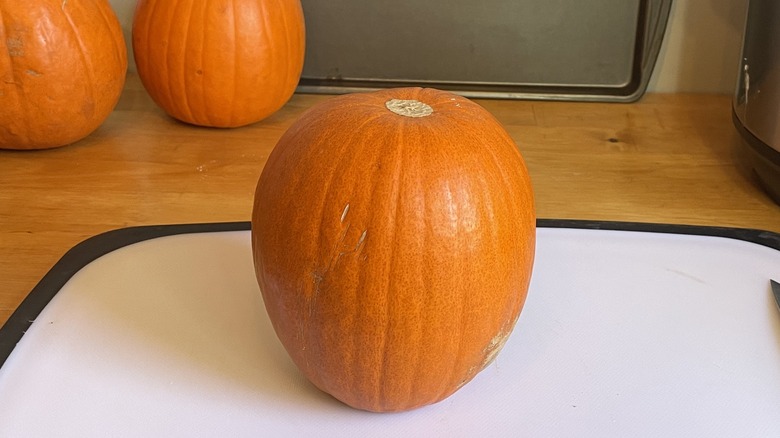
If you're looking for diced or sliced pumpkin instead of purée, start with a whole fresh pumpkin. Cut and remove the stem using a chef's knife on a cutting board, and discard the stem. For this and the following steps, having a bowl ready to hold the scraps can be helpful while preparing your pumpkin. Also, make sure your knife is sharp before starting to slice your pumpkin, which takes a lot of effort.
With the stem removed, you have a flat, stable surface to place on the cutting board so that your pumpkin does not move. Place your pumpkin cut side down, ensuring that it is stable and not wobbling or slipping. Then, using your chef's knife, carefully cut the pumpkin in half vertically. This will require some effort. If your pumpkin is particularly hard, or you are simply having trouble cutting the pumpkin in half, you can soften it by microwaving it for one to two minutes. After that, resume cutting the pumpkin in half.
Scoop out seeds and string
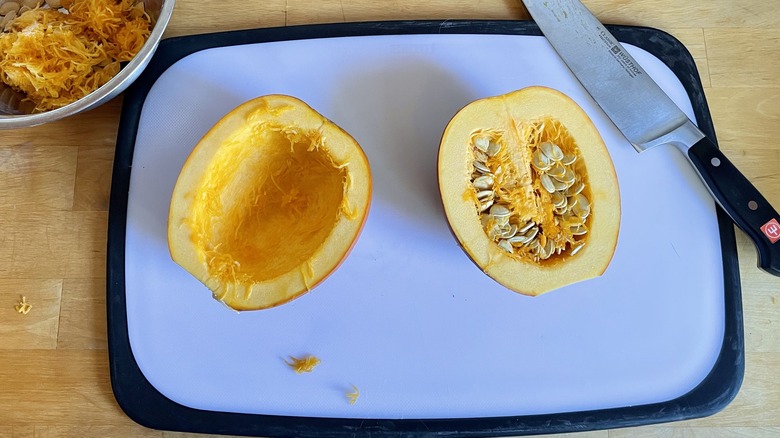
Once your pumpkin is cut in half, use a spoon to scoop out as much of the strings and seeds as possible. Any remaining strings will affect the texture of your pumpkin and any recipes you make with it. But do not get overanxious. A few small strings are not going to hurt anyone.
For this step, using a slightly serrated spoon, if you have one, can be helpful. Even the spoons that come in jack-o-lantern kits around Halloween are useful. However, they are not necessary, and any spoon will be sufficient. If possible, use a large spoon because the smaller the spoon, the longer the process will take, and the harder it will be. Discard strings and seeds into a bowl. You can save the seeds for later, either to grow your own pumpkin or to roast into a delicious snack. Or they can simply be discarded.
How to peel the skin from your uncooked pumpkin
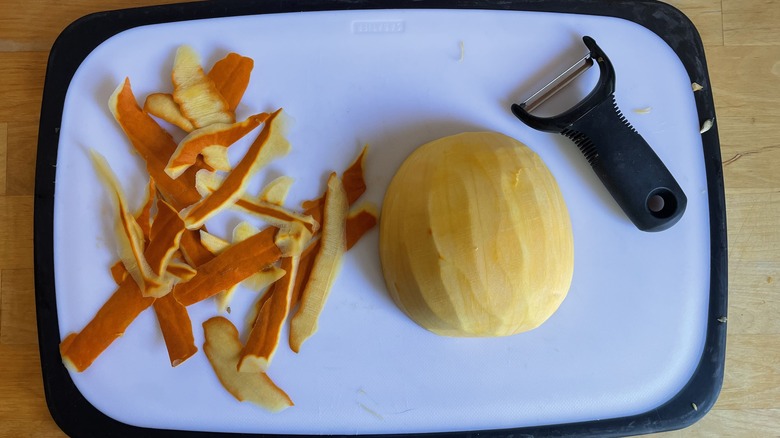
Now that you have your clean, scooped-out pumpkin halves, it is time to peel the skin off. This can be done either with a paring knife or a peeler. We recommend using a Y peeler, as this will be the quickest and easiest way of removing the skin. It will also leave you with the most flesh. Starting from the top of one half, run your peeler down the length of the pumpkin, removing the strips as you go. If you miss a spot, go back over it to remove any residual skin. Repeat on the other half of the pumpkin until all skin is removed.
If you cut the halves of the pumpkin into quarters, it may be easier to use a paring knife to get rid of the skin. Holding firmly onto a pumpkin quarter, run your paring knife along the length of the pumpkin, away from you or your fingers. Remove the skin in strips until the pumpkin is entirely peeled. This method takes a bit more skill and may remove some additional flesh, but it is effective if you do not have a Y peeler available. Discard the peeled skin.
Cutting up your peeled pumpkin
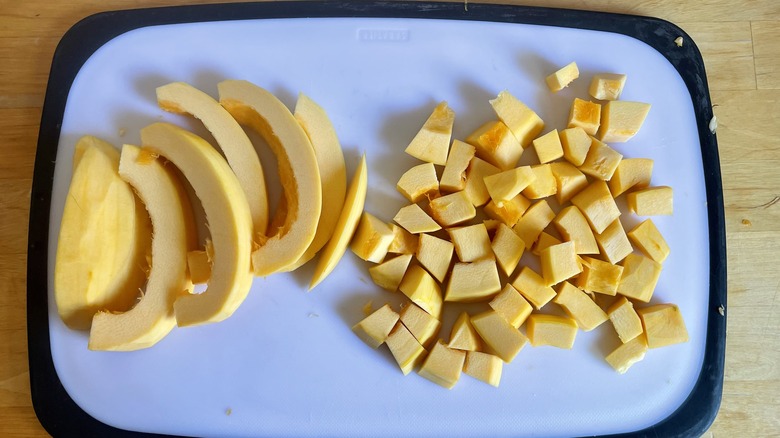
There are lots of different shapes people like to use when they cook with pumpkins. Some enjoy them cut into strips, while other recipes call for cubes. Once you have your pumpkin halved or quartered, cut the flesh into strips according to the recipe dimensions. If your recipe does not specify, start with one-inch strips, and go from there. If you are roasting the whole strips, congratulations! You are done. However, if you want cubed pumpkins, take the strips, one to two at a time, and dice them into the desired size.
If you notice that any pumpkin pieces have residual strings, feel free to cut the strings off and discard them. Small amounts of string, though, are unlikely to have a big impact on your final dish. You can now use your diced pumpkin however you wish or store it in the fridge or freezer to use later.