Mistakes Everyone Makes When Whipping Cream
Whipped cream is one of the most versatile embellishments for desserts. Light, fluffy, and with a subtle buttery sweet flavor, it complements just about any sweet dish, from brownies to milkshakes to pumpkin pie. It even tastes good with pancakes and French toast. If you've ever tried the stuff you get in aerosolized cans, you'll know that there is no comparison to homemade whipped cream. Sure, the canned version is convenient and might even be comparable in price, but with all the corn syrup and additives, it often tastes artificial and a bit hollow — like biting into a cloud of chemically sweetened air. In comparison, homemade whipped cream is rich, velvety, and full of subtle, layered flavors. There is a hint of savoriness to it that reins in the sweetness of sugary desserts and syrups, while its smooth, rich texture cannot be beaten by ice cream, custard, or milkshakes.
It's clear that making whipped cream in your own kitchen yields the best results, but it isn't always an easy task. Even though you only need one ingredient and a stand mixer, there are many pitfalls that can lead to irretrievably disappointing results. We talked to two experts to figure out the most common mistakes people make when whipping cream at home and how they can be avoided.
Using the wrong type of cream

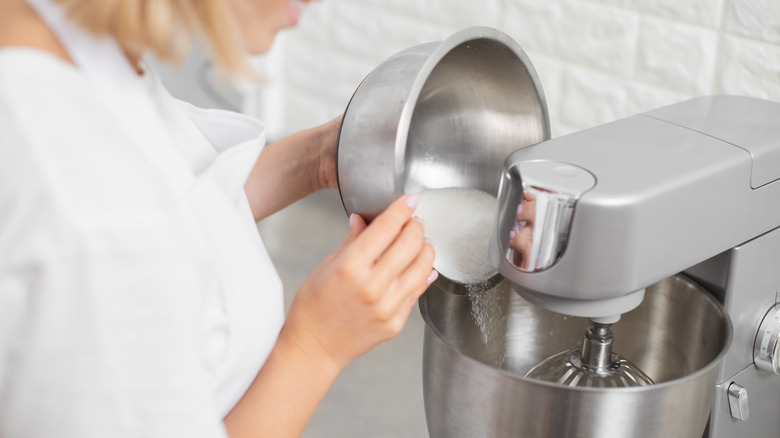
Making delicious whipped cream starts at the grocery store. When you're standing in the dairy aisle, don't just snag the first product you see that's labeled as "cream." As pastry chef and recipe developer Emily Laurae Carter explained, the type of cream you choose really does make a difference to the final product. "Heavy cream or heavy whipping cream is your best bet," she said, "because it has a higher fat content, around 36-40%, which not only makes it easier to whip to those perfect peaks but also ensures a richer taste and more stable structure."
In contrast, products labeled as "light whipping cream" or simply "whipping cream" only contain between 30% and 36% milkfat, while products labeled "light cream" only have between 18% and 30% milkfat. You can still whip these products, but their peaks will not be nearly as stiff, nor will they hold their shape for very long. If you're making a recipe that requires structured cream, choose the one with the highest fat content.
Not chilling the cream first

One of the cardinal rules of whipping cream is to always, always start with cold cream. Jessica Gavin, a certified culinary scientist, food scientist, and recipe developer, explained that the reason comes down to how much aeration the cream can handle. "The colder the fat molecules in the cream," she explained, "the more stable the whipped cream [will be] when aerated. Chilled cream also allows for more air to be trapped in it, thereby increasing the volume for the fluffiest texture. If you want the whipped cream to hold its shape longer when added to baked goods or used as toppings, keep it cool!"
This doesn't mean that you should be keeping the cream as cold as possible, though. Frozen cream has the potential to separate when thawed, leaving you with unworkable liquid. The refrigerator is an ideal temperature for the task. Anything around 40 degrees Fahrenheit will yield fluffy, stable peaks. If you want to go the extra mile, you can chill your equipment by putting the bowl and whisk attachment into the fridge 15 minutes before whipping. This step is not required for thick, pillowy cream, but it will produce even better results since it helps keep the cream colder for longer.
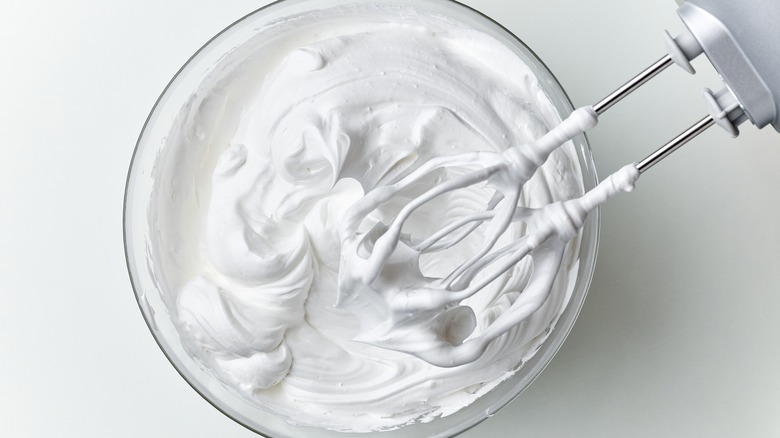
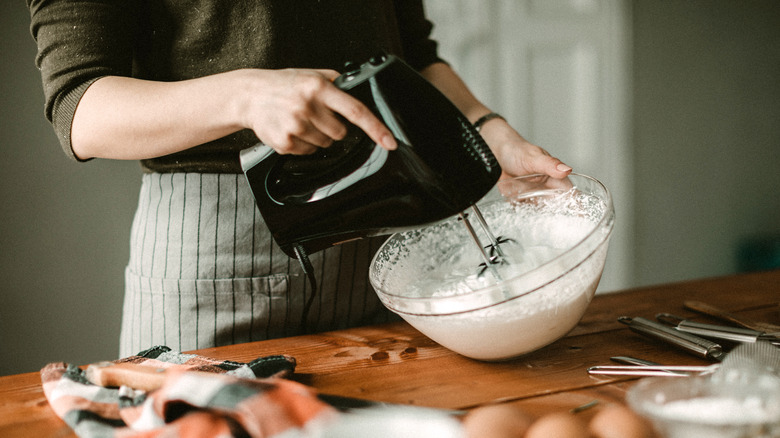
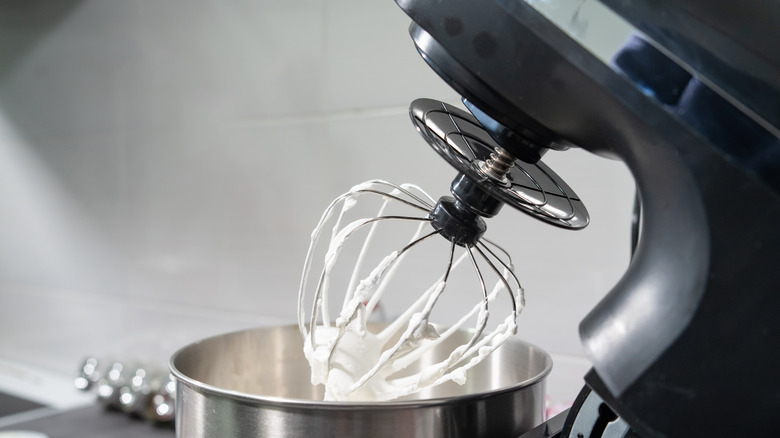
Not using the whisk attachment
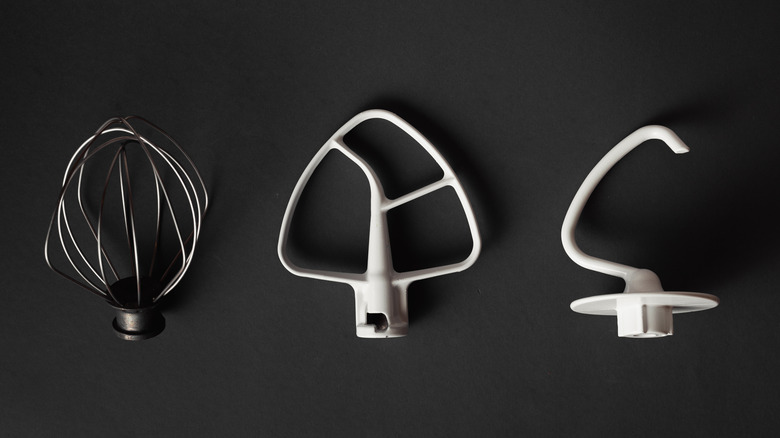
A common mistake to avoid when using a stand mixer is using the wrong attachment. There is the flat beater (also known as the paddle attachment) which, as its name suggests, is flat, with a metal bar in the center that splits into a crooked "Y" shape. Then, there is the dough hook, a heavy "C" or spiral-shaped claw that looks more like a medieval weapon than a cooking tool. Lastly, there is the whisk attachment, which looks like a supersized, extra sturdy hand whisk.
You might not think that these attachments produce wildly different results and that you can use them interchangeably. They're all blending whatever mixture is in the bowl, after all. But each is specifically designed for different purposes, and using the right one at the right time will get you more consistent results much faster. When making cookies, cake batter, and frostings, the flat beater is the best option. The dough hook is designed specifically for kneading bread. Depending on its shape, it either kneads the dough by pushing it against the sides or by forcing it to the bottom of the bowl. The whisk attachment is for whipping air into a mixture. According to Jessica Gavin, it is the one you'll want to use for whipped cream because it "is specifically designed with multiple loops to effectively aerate liquid ingredients like whipping cream, creating a light and airy texture."
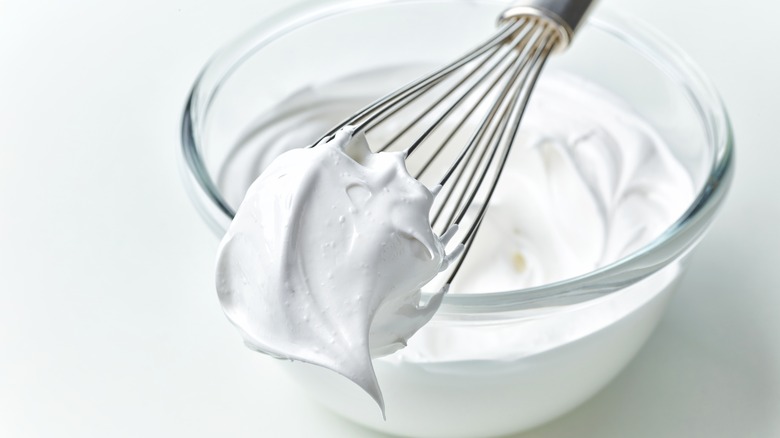
Overbeating the cream
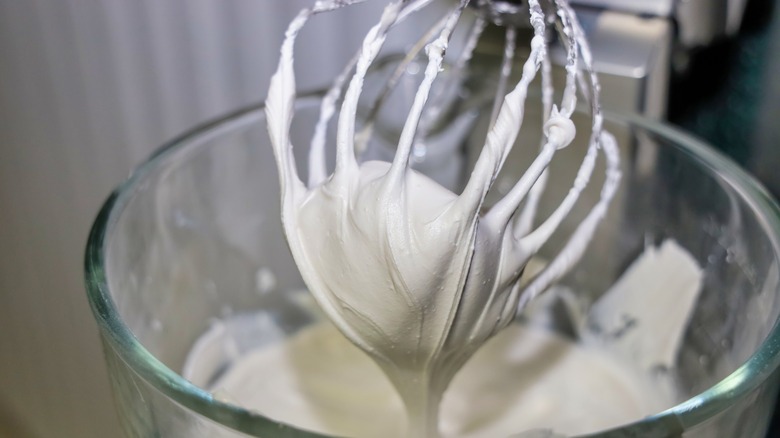
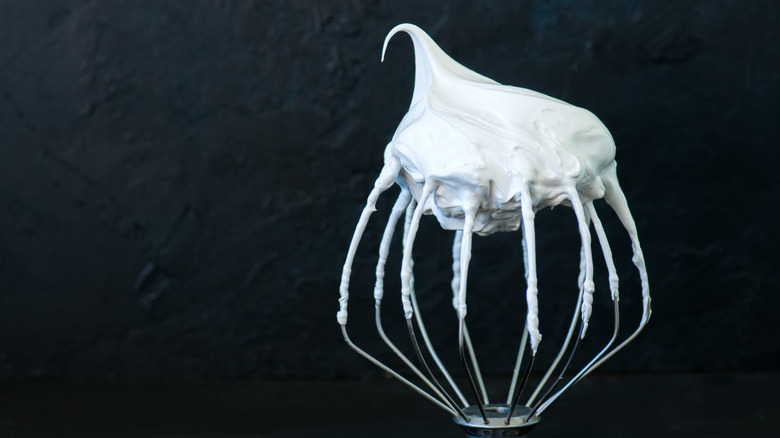
One of the most common and irrevocable mistakes when making whipped cream is overbeating it. "Heavy whipping cream contains at least 36% milkfat," Jessica Gavin explained, "which creates a rich and luxurious mouthfeel when aerated. However, if you overbeat the cream by adding too much air, the smooth texture starts to become clumpy and grainy. This is due to the agitation, causing the fat molecules to destabilize, clump together, and separate from the liquid in the cream. If the whipping is taken too far, you'll end up with solid butter and liquid buttermilk."
Emily Laurae Carter provided some advice on how to avoid accidentally making butter, which is easier than it sounds. "The trick ... is to keep a close eye on your cream as it thickens and stop right as it reaches stiff peaks," she said, adding, "this means the cream will stand up on its own but still looks glossy and smooth before it looks curdled and overworked." Unfortunately, using a timer is not a failsafe option since the rate at which the cream aerates depends on a range of factors, including the temperature of the cream and equipment, the speed setting, and the type of mixer. Using your eyes is the best way to judge when it's done.
Underbeating the cream
Frustratingly, underbeating the cream is also a potential pitfall. In the process of trying not to overbeat the mixture and end up with butter, you might play it safe and stop too early, only to realize your mistake after you've put the mixer away and started spooning the cream onto slices of pie or spreading it over layers of cake. Instead of holding its shape and forming decorative peaks, it will sag, deflate, and even start looking more like liquid than whipped cream. It will still taste delicious, but it won't have the luxurious texture that you're aiming for.
As Emily Laurae Carter suggested, keeping a close eye on the whipping process is key. Stop the mixer intermittently to check how the cream behaves when you lift the whisk attachment. It should form a stiff peak that doesn't sink or flop to one side. As soon as it reaches this point, step away from the mixer. The only instances when you might want to intentionally underbeat your cream is when it will undergo more aeration at another stage of the recipe, such as when you're folding it into batter.
Adding sugar too late
Sometimes, you can watch the cream like a hawk, stop the mixer exactly when stiff peaks form, and still end up with grainy, overwhipped results. According to Jessica Gavin, this happens when you wait to add the sweetener and flavorings until the very end. By that point, you've whipped the cream fully, but still have to incorporate the remaining ingredients. There is no way to do the latter without overwhipping the cream. You'll either have to settle for under-whipping or settle for no flavorings. Gavin also noted that waiting to add the sugar until the end is risky in its own right because, if you're using granulated sugar, it won't have a chance to dissolve and will leave a grainy texture.
Add the sugar at the beginning if you want to make absolutely certain that it dissolves and incorporates fully. If you're using confectioner's sugar, you can wait until soft peaks form. This option might be preferable if you're unsure of how much volume you'll end up with and you want to make sure you get the amount of sweetness just right.
Using the wrong amount of cream
Whipping cream is the inverse of cooking fresh greens. Instead of starting with a large amount and ending up with a disappointingly tiny portion, you start with a scant amount and end up with an unexpectedly large portion. In both cases, the outcome is difficult to predict. But if you're trying to cover a whole cake or want to have enough to give each of your dinner guests a generous dollop, you'll need to know exactly how much whipped cream you'll get out of fresh cream.
Roughly speaking, cream doubles in size when it's whipped. If you want 2 cups of whipped cream, start with approximately 1 cup of fresh cream. Keep in mind, however, that a little goes a long way — 2 cups will yield 8-10 large dollops, enough for a dinner party. You'll also need to make sure the bowl you're using can accommodate the expansion since it's tricky to transfer whipped cream between containers without knocking out some of its air. Opt for one that is several times the volume of the final product.
Not using a stabilizer
You can do everything right with whipping cream and still end up with deflated, sponge-like results. Unless you plan to serve it the moment you switch off the mixer, the cream will inevitably lose some of its air, and if you're planning to pipe it on top of a dessert, the elegantly defined peak you achieved will wilt like a dying flower with every passing moment. But as Emily Laurae Carter told us, there is no need to despair, because one simple addition can turn those prospects around.
"Incorporating a stabilizer into your whipped cream can be a game-changer," the pastry chef said, "especially if you're looking to maintain that whipped texture for a longer period or when you're in warmer conditions. Options like gelatin (powdered or sheets) or powdered sugar will not only help your whipped cream hold its shape but also can add a slight sweetness that complements most desserts. It's a great trick for when you want your creations to look as fresh and stable hours after you piped the cream if you're in the midst of prepping a number of items!"
If you want to add flavor as well as stability, your whipped cream will never be the same with one simple ingredient: instant pudding mix. The emulsifiers in it will keep the cream stiff and fluffy and add a range of flavors. Butterscotch, pistachio, and strawberry-flavored whipped cream are all just one packet of pudding mix away.
Whipping at one speed
Once you've chilled the cream and fitted your mixer with the whisk attachment, you might assume that the speed setting you choose is arbitrary and only determines how quickly the cream will be completed. But if you want to achieve just the right consistency, you'll need to cycle through multiple speeds throughout the process.
If you're adding sugar at the beginning, start on low to medium speed to thoroughly incorporate it into the cream. Starting on high speed may cause the mixture to splash onto the sides of the bowl and lead to uneven distribution of the sugar. The lower speed will also give the sugar more time to dissolve into the liquid before it thickens.
Once the sugar is incorporated, you can increase the speed to medium or medium-high. If you're feeling bold, high speed will be faster, but it also increases the likelihood that you'll overwhip the cream. As soon as the mixture forms soft peaks, ease back on the speed to medium or medium-low. There is a gossamer-thin line between glossy, stiff peaks and grainy peaks, so take your time during this step. Your patience will pay off.
Ignoring other kitchen appliances
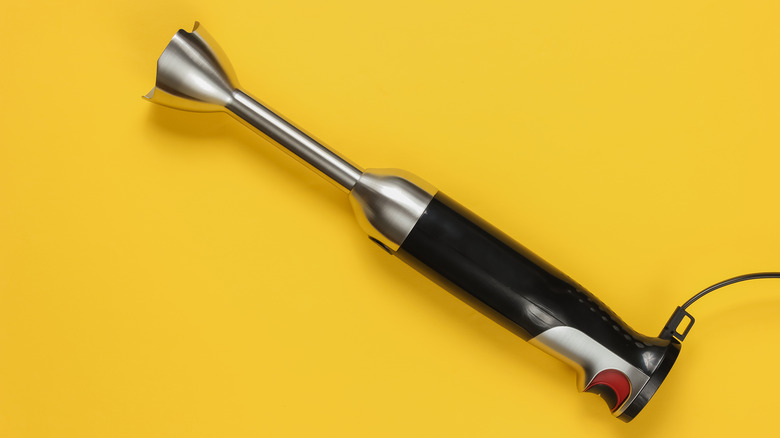
A stand or hand mixer is the default tool for making whipped cream, but there are plenty of other pieces of kitchen equipment that can get the job done. Tasting Table tried almost every method to make whipped cream at home, and they came away with good news: There are many ways to create silky smooth whipped cream, even if you don't have state-of-the-art equipment. In addition to a mixer, you can use a food processor, a blender, an immersion blender, and even a mason jar.
Of these options, the last one is, not surprisingly, the most challenging, given that you'll have to spend about 15 minutes shaking the jar. If you need a workout, though, it hits two birds with one stone. Using a food processor or classic blender can be challenging because their lids make it difficult to see when the cream forms soft or stiff peaks, increasing the likelihood that you overshoot the mark. Of all the options, the immersion blender is the easiest. Without a lid, you're able to gauge exactly how quickly the cream is developing, and the blender is powerful enough to get the job done in only a few minutes. Just make sure to use a tall container such as a wide-mouth mason jar to avoid the contents splashing onto your counter.
Not whipping it by hand
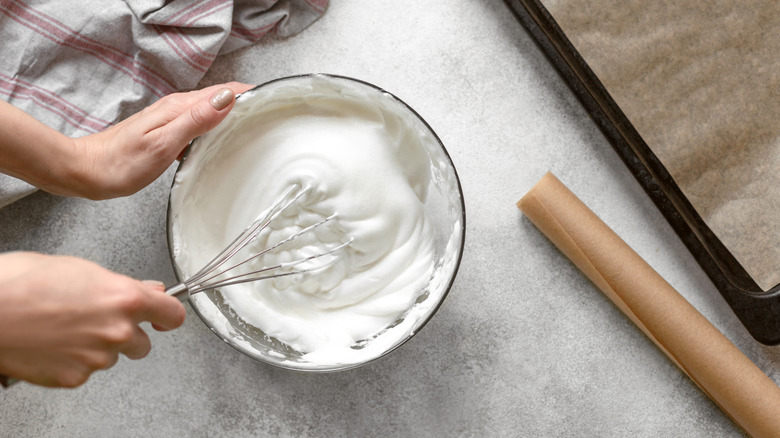
If you don't have a mixer, food processor, or any type of blender, do not despair. Making whipped cream with nothing but a whisk, a bowl, and some elbow grease is not only doable, but deeply satisfying. You probably won't even notice a difference between hand-whipped results and mixer-whipped results. The keys to success are patience and temperature. Since whipping by hand will take longer than doing it with a blender, you might want to transfer the bowl to the refrigerator (or freezer) for a minute or two throughout the process to keep the cream chilled. This also gives you a much-deserved opportunity to rest. For good measure, choose a glass or stainless steel bowl since they retain cold better than plastic.
Another factor to consider is the size of your bowl. Stand mixers have a precise, contained range of motion, but when you whisk by hand, you'll want all the room you can get. Choose a bowl that is not only significantly bigger than the fresh cream, but significantly bigger than the eventual whipped cream. This will ensure that you can whisk freely and wildly without losing half the mixture through splashing and sloshing. Lastly, instead of beating the cream in circular motions, whisk it back and forth or from side to side as it creates more aeration.
Whipping it too early
One of the most deflating (pun intended) mistakes you can make with whipped cream is whipping it too early. If you're making a cake with a whipped cream topping and you make the whipped cream while the cake is still in the oven, it will be left to sit for at least an hour while the cakes finish baking and cooling. The disappointment of creating glossy, perfectly formed peaks only to have them become droopy and weepy as they sit waiting for you to finish the rest of the recipe is truly maddening, as Emily Laurae Carter can attest. "Timing is everything when it comes to whipping cream for your recipes," she said. "Ideally, you want to whip the cream as close to serving time as possible to ensure it maintains its volume and texture. If you whip the cream too early, it may start to lose its air and deflate, leaving you with a less than perfect topping."
It's better to let other parts of the recipe wait for the whipped cream than the other way around. If you're using a stand mixer or immersion blender, the process only takes a few minutes and is ready to go immediately. Wait until the cake or pie is completely cool before whipping the cream. If, despite all your best efforts, you do end up leaving your cream to sit for a little too long, Laurae Carter noted that gently re-whipping it can sometimes help.
Not adding other flavors
You don't have to add any ingredients to make whipped cream delicious. The rich, savory notes of dairy combined with the heavenly soft texture of the aeration make for the perfect embellishment on any sweet recipe. You don't even need sugar. But if you want to take things to the next level, there are many more options than a simple tablespoon of confectioner's sugar or a dash of vanilla.
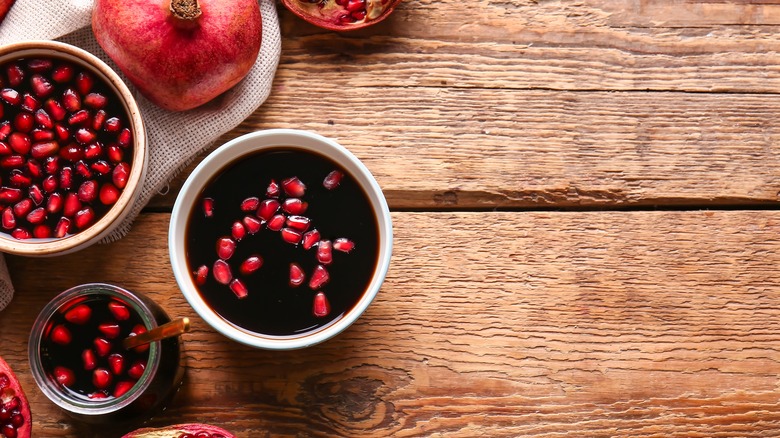
When it comes to sweetness, white sugar is not the only option. Brown sugar will add depth, with a light bitterness and caramel flavor along with a subtle tan color. Maple syrup is another option that will give the cream a distinctive yet subtle flavor upgrade, while using pomegranate molasses, lemon, and elderflower syrup will brighten and acidify the flavor. Then, there is the wide world of extracts. Aside from vanilla, there is orange, almond, and peppermint along with orange blossom water and rosewater. Tread lightly with this category: Whipped cream is mostly air, and any additional flavor will be much stronger than the volume of the cream would suggest. You can also add dry ingredients such as cocoa powder and spices. Just make sure to add scant amounts to avoid changing the texture of the cream.