This Is How Lard Is Really Made
Over the years, America's love affair with lard has run from hot to cold to hot again. It was the cooking fat of choice for most of the country's early history, since many people raised pigs at home and could easily make their own lard. And as the cities grew and large-scale industrial meat processing became more common, so did store-bought lard. It wasn't used just for frying either -– it made regular appearances in sweets such as cakes and pies. Many bakers even today argue that lard makes the flakiest pie crusts.
But in 1911, a rival to lard appeared on the market: Crisco. Unlike lard, the vegetable shortening was completely flavorless and shelf-stable, making it popular with cooks. It was entirely plant-based, which made it popular with Jewish cooks, whose faith prohibits the consumption of pork. As concerns about the unhealthiness of animal fats grew, lard earned a reputation as not only unfashionable, but also an artery-clogging menace. Modern nutritionists, however, point out this judgment is unfair: In reality, lard has less saturated fat than butter, and unlike shortening, artisanal and homemade lard has no trans fats (some processed industrial lard does –- so check labels carefully). For these reasons, the pendulum is starting to swing back, and health-conscious eaters, especially those following keto or paleo diets, are embracing lard again. If you're curious to try it -– but distrust processed lard from the supermarket –- we'll tell you what you need to know to make your own.
There are two basic types of lard
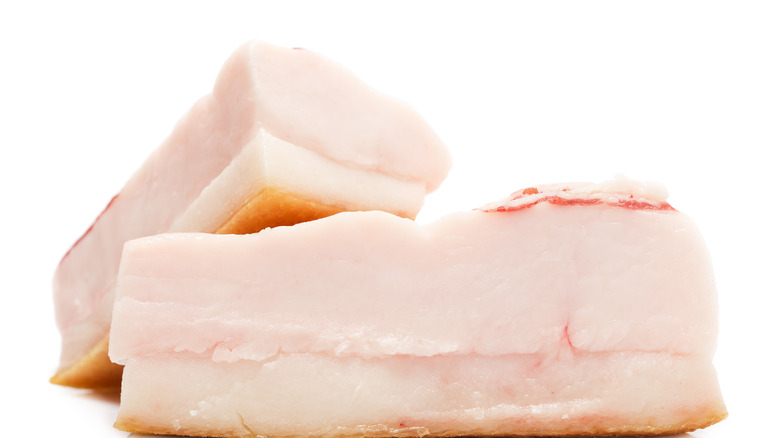
Lard is simply pork fat. But pigs have lots of fat, and fat from different areas will yield lard with slightly different qualities. In general, lard is made from one of two kinds of fat: back fat and fat from around the pig's kidneys, which is known as leaf lard. Leaf lard has a milder, more neutral flavor and a paler color, so it is often preferred by bakers for sweets such as pies and pastries, while back fat yields lard with a more distinctly porky taste. This is not necessarily a bad thing, and in fact can be a plus, depending on how you plan to use your lard.
Be aware, however, that leaf lard is also much more expensive that back fat, since there's a lot less of it. This is why most mass-produced lard contains not just leaf lard, but back fat as well as random fat from all over the pig. So if you've made or purchased a batch of pure leaf lard, it is wise to save it for preparations that showcase its clean flavor and pale color. Besides its use as a baking fat, lard is also a good frying fat to make your foods crispy, but not taste porky. In addition, some leaf lard super fans even spread it on bread and sprinkle it with salt for a tasty snack.
Different rendering methods yield lard with different flavors

To turn raw pig fat into lard, you need to melt the fat and separate out any impurities. The process is called rendering. There are two basic ways of rendering fat -– dry rendering and wet rendering. Both can be used to make lard. Dry rendering, as its name implies, involves melting the fat directly in a container with no added liquid. Wet rendering, on the other hand, involves melting the fat by steaming it or cooking it in water. In industrial settings, the melted fat generated by wet rendering is skimmed off the top of the water or separated from it with a centrifuge; home cooks making lard by wet rendering can simply refrigerate the melted fat until it hardens, then drain off any remaining water that hasn't evaporated during rendering.
Both methods have their advantages and disadvantages. Dry rendering introduces a slightly higher chance of burning the fat before it's fully rendered, since it's directly exposed to heat, while wet rendering requires the additional step of separating the residual liquid after the fat has melted. In addition, each method generates a different flavor profile: Wet rendering creates lard with a lighter color, milder flavor, and higher smoking point, while dry rendering creates lard with a toastier color and lower smoking point.
Lard can go bad if not stored properly
If you're going to all the trouble to make your own lard, you want something you'll be proud to cook with and eat. So to avoid having all your hard work go to waste, be sure to treat your lard with care after you make it. Like any meat-based product, lard can go bad if not properly protected and stored.
A few basic steps will help prevent your lard from going rancid, according to information posted by the American Meat Science Association. First, ensure all impurities (such as browned bits of pork skin) are removed from the lard before it's stored. Second, it's a good idea to cool your lard as quickly as possible after it's rendered. Stir your lard frequently as it cools, but avoid whipping it -– incorporating air into lard will shorten its shelf life. Once the lard is cool, transfer it to small containers for storage. To minimize air exposure, fill storage containers completely and seal them tightly. Store the containers in a cool, dark space -– light and heat will degrade the quality of your lard, according to Soulful Prepper. Filtered lard will keep in the fridge for about a year or in the freezer for about two years.
If you want to make lard at home, here's how to get the right fat
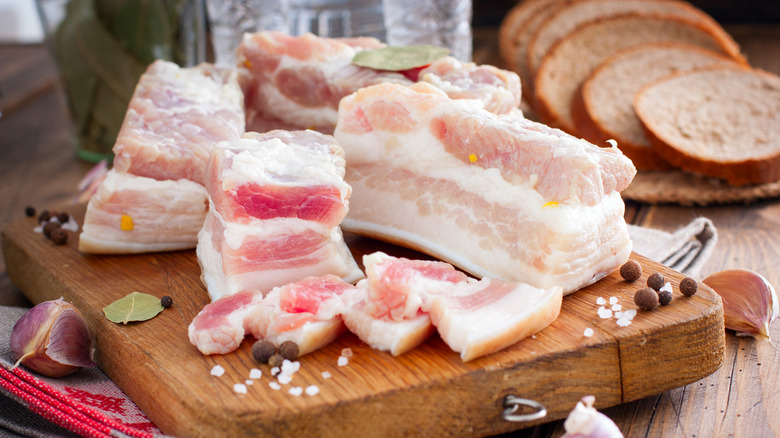
To make good-quality lard, you need to start with good-quality pork fat. Most importantly, you should ensure the fat you use is fresh, since the fresher the fat, the fresher and cleaner your lard will taste. Ideally, you should use fat from an animal slaughtered within the past five days -– fat any older than that will render into lard with inferior keeping qualities and a lower smoke point. Once you have your fat, remove as much of the rind as possible as well as any bits of lean meat that may be attached since they can darken the finished lard if rendered with the rest of the fat.
While fat for lard-making can be purchased online or from a butcher (most butchers will have pork fat on hand, even if it's not on display), some serious cooks recommend seeking out farms that pasture-raise their pigs to obtain the freshest, highest-quality fat. Opting for fat from pasture-raised pigs offers health benefits as well as culinary benefits: Animals store residue from food additives and chemicals used in conventional commercial farming in their fat, so using fat from animals that have been raised without these chemicals ensures you won't be consuming them either.
Processed lard is blander – and less healthful – than handmade lard
Fans of homemade lard can go on forever about how much better it than that random boxed stuff from the supermarket. Besides being tastier and fresher, homemade lard is free from the preservatives and stabilizers commonly added to industrial lard. In addition, if you choose to make your lard with fat from a pasture-raised pig, it'll more likely be free from any potentially harmful chemicals found in conventionally raised pork.
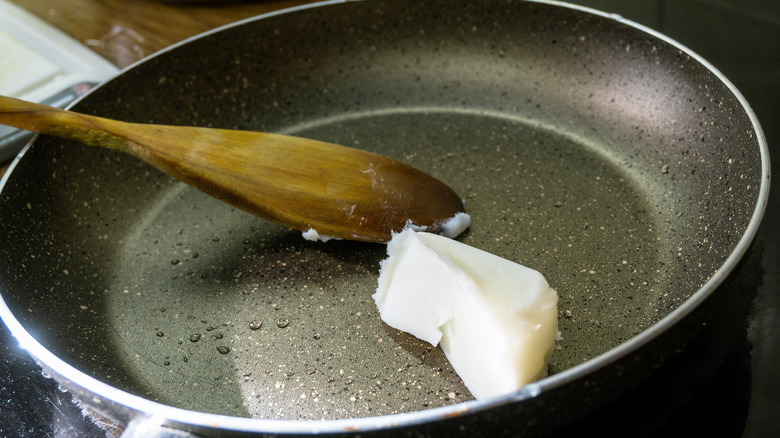
In addition, lard apologists will be quick to tell you that unlike solid vegetable shortening, lard is free from unhealthy trans fats. And while this is true for homemade lard and the small-batch artisanal lard you can sometimes find at butcher shops and farmers' markets, this is not the case for all industrial lard. Some brands of shelf-stable lard are produced using hydrogenation, resulting in the presence of trans fats, so you'd be getting a double whammy of both saturated animal fats and trans fats. If you're pressed for time and go with the store-bought option (and there's no need to apologize for this), choose lard from the refrigerator case.
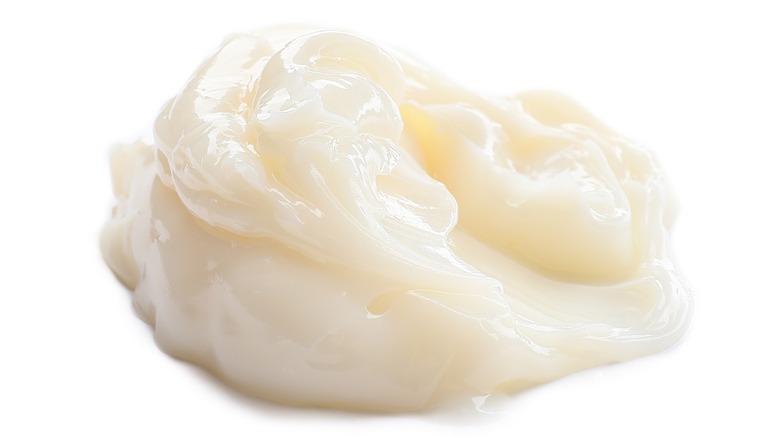
A few simple techniques can keep lard white and odorless
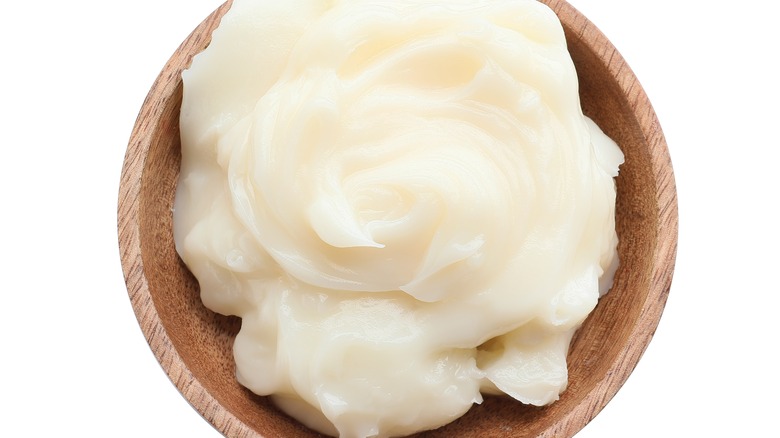
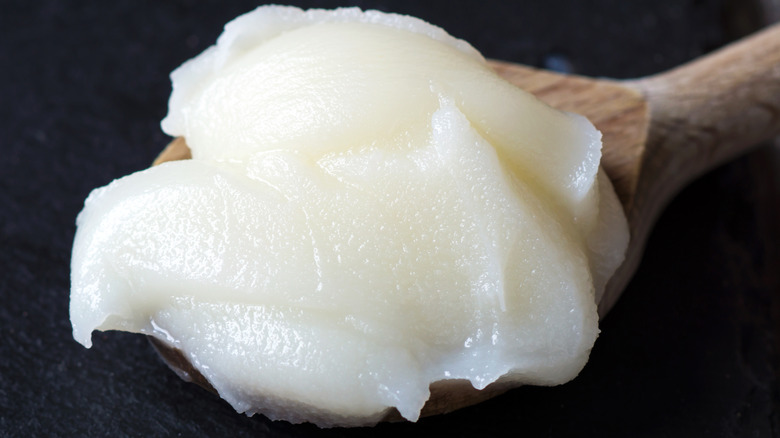
Well-made lard can range in flavor from completely neutral to faintly porky, and both types are acceptable. Some fans prefer their lard with a more distinctive flavor. However, gamy, brown lard is not what anyone wants. Ideally, your lard should turn out pure white when cooled and hardened. And to achieve this requires a few simple steps, according to The Prairie Homestead.
First, remove any rind or bits of lean meat from the fat you plan to use before rendering it. Cut the fat into small pieces. This will not only speed up the rendering process but also ensure any impurities -– such as bits of skin -– render out fully. Next, be sure to render your fat over low heat –- higher heat can brown or worse, burn the fat, which is definitely not what you want. Also, stir the fat regularly as it renders to prevent it from sticking to the sides or bottom of your cooking pan, which can also result in browning. Finally, don't overdo it –- take your lard off the heat as soon as it's fully rendered. You'll know it's ready when the cracklings (crispy bits of fatty residue) turn amber and steam stops rising from the hot fat, meaning all the water has been cooked out of the fat.
Lard can be made with different flavorings
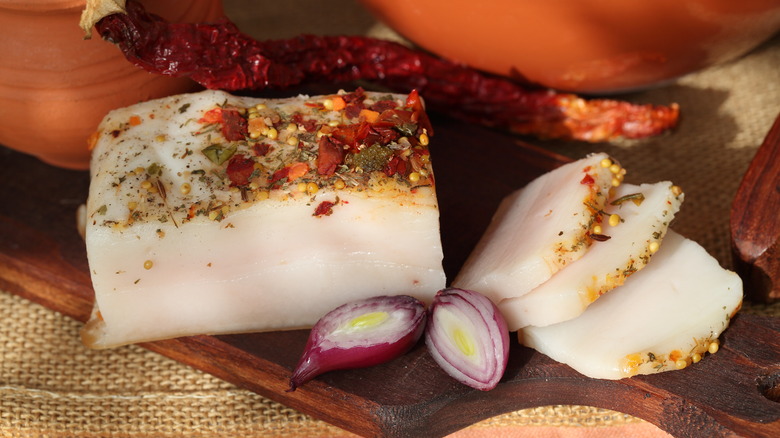
Lard is valued by cooks around the world for its mechanical properties — its great frying qualities and the tender, flaky quality it lends to baked goods. It's also valued for its relatively neutral flavor. Well-rendered lard will be mildly flavored enough not to overwhelm the other ingredients in a dish. In some cases, it's even better than butter. Some lard fans love it enough in its own right to spread it on bread as a snack. If you count yourself among these fans, you might want to try a relatively little known, but super-rich, Italian specialty: lardo, or cured, flavored pig fat. Traditionally, it's treated like a cold cut and served in ultra-thin, melt-in-your-mouth slices on toasted bread or used in pastas.
While it sounds fancy and exotic, in reality it requires far less hands-on work than regular rendered lard. All you need to do is procure a good-quality piece of pork back fat, rub it with salt, curing salt, and flavorings (traditional flavorings include rosemary, bay leaves, and pepper), seal in an airtight plastic bag, and set it in the refrigerator for at least three months to cure. At the end of the curing period, the fat will have hardened and lost some of its volume, and the flavoring will have permeated the fat. Cut into thin slices to serve. It will keep in the fridge for about four months.
Making lard can be dangerous if you're not careful
While making lard is perfectly safe for those who know their way around the kitchen, it can be risky for careless or inexperienced cooks. Even though lard is rendered at low heat, melting fat can seriously burn your skin (as anyone who's been hit by a splatter of frying oil or bacon grease can attest). And the risk of a grease fire is real, especially if you get distracted and walk away from the stove. So keep a close eye on your lard, and don't let it overheat. If your lard does catch fire, do not pour water on it! The burning lard will just float on top of the water and might spill out of your pot, spreading the fire. To put out the fire, use a fire extinguisher if you have one, or quickly cover the pot with a lid and remove it from the heat to smother the flames. For small fires, pour on some baking soda.
Also remember, your finished lard will be hotter than it looks. It won't bubble like boiling water, but it will be seriously hot. So if you plan to store your lard in plastic containers, ensure the lard is below 212 degrees Fahrenheit before filling the containers to keep them from melting. And if you're using glass containers, use only those designed for canning (and thus are heat tolerant) and pre-warm them so they won't shatter when filled with hot lard.
Rendering lard leaves behind a tasty byproduct
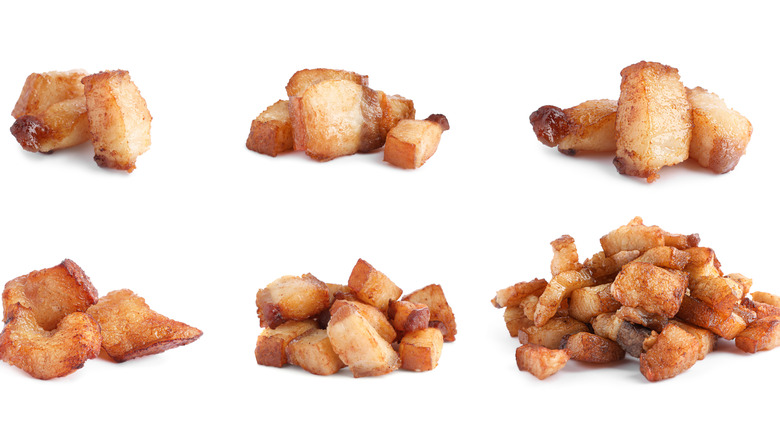
As you render your lard, you'll notice the cut-up pieces of pork fat gradually shrinking as they start to liquify. As the rendering progresses, some of the pieces stubbornly refuse to melt any further. Instead, they'll stay intact and at some point will start to fry and brown in the liquified fat. Don't be alarmed by this. These fatty bits, or cracklings, are not only a totally normal byproduct of lard rendering, but to many are the best part of the long process because they're a rich, crunchy, and utterly delicious little treat. If you enjoy pork rinds, these cracklings will also make you very happy.
Once you've separated the cracklings from your rendered lard (they should be amber in color, no darker), drain them and store for snacking or other uses. You can always just salt them and snack on them (they're super-rich, so eat slowly and indulge in moderation), but creative cooks have found numerous other ways to use them. They are a great substitute for bacon bits, for instance, and make a tasty topper for soups or salads. They can also be tossed with stir-fried or sautéed veggies for an extra burst of crunch and flavor.
To simplify your lard-making, use a slow cooker
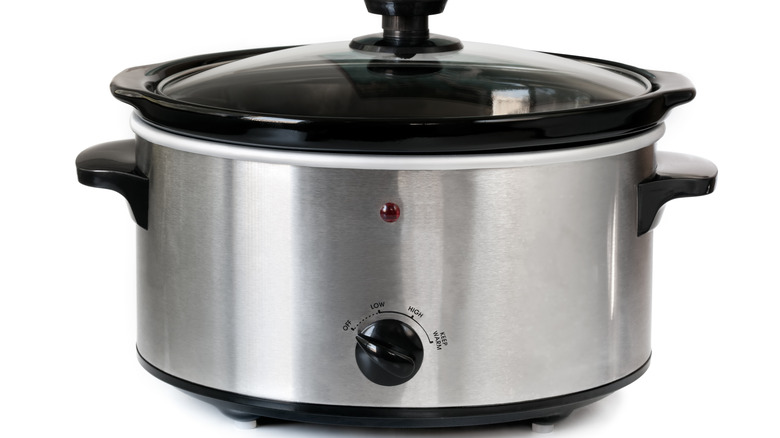
There's no getting around it: Making lard is a long, hot process that requires patience and a vigilant watch on the cooking pot to avoid overcooking, burning, or risking a grease fire. If you want good-quality lard, you can't rush this process. But you can make it a little easier on yourself -– and less dangerous –- by making your lard in a slow cooker. Rendering your lard this way with even gentler heat than a stovetop will take longer, but because you don't need to stand by the stove and stir the mixture as often, you'll have a lot less work to do. And of course, it will free you from a lot of potential danger of overheated fat.
The process is pretty much like rendering lard on a stovetop: Put your trimmed, finely chopped pork fat in the cooker with some water and cook on low without a lid for several hours. The water will evaporate as the lard cooks. Stir about once an hour. Be aware, though, that the cracklings left behind after slow cooker rendering will be soft, rather than crisp — but you can always crisp them up later in a frying pan.
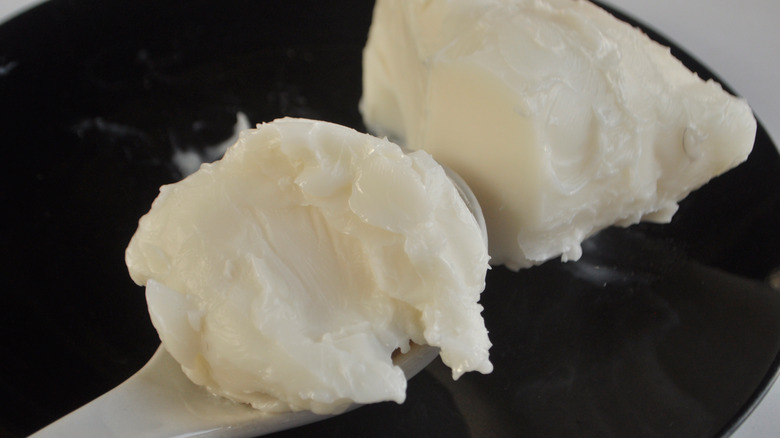
Lard should be carefully strained to ensure the best flavor and appearance
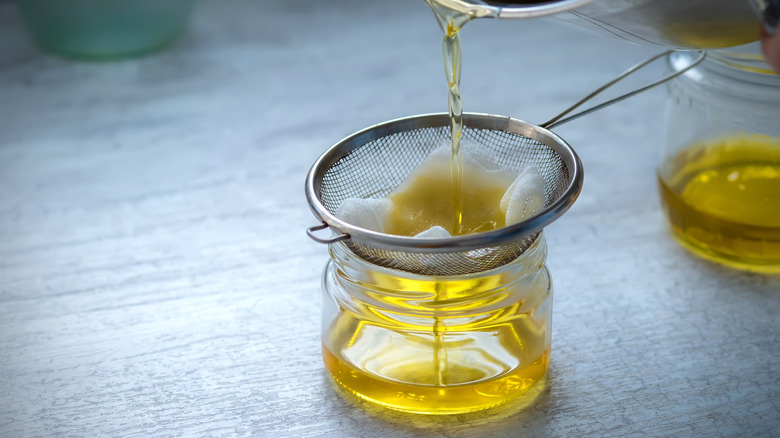
One of the benchmarks of good-quality lard is a clean, white appearance, with no suspicious little bits suspended in it. This is not only for aesthetic purposes, but also to improve the shelf life of the lard. Bits of meat or skin left in the mixture can cause it to go rancid or create a stronger-than-desired flavor. All of these should be concerns, especially if you're planning to use your lard in pie dough or some other delicately flavored preparation.
To ensure your lard is clean and clear, don't just trust your eyes. Instead, strain it carefully to ensure all impurities — including small bits — are removed. This means using a fine-mesh strainer, several layers of cheesecloth, or fine muslin. Make sure your strainer or any cloth you use is perfectly clean to ensure your lard doesn't pick up any off flavors. To prevent impurities from accumulating in the rendered lard, some cooks scoop it out and strain it as it renders, stirring the remaining fat solids to speed up rendering.