Foods You Are Cooking All Wrong
 Shutterstock
If you're tired of eating mushy pasta and rubbery mussels, you'll be happy to discover that it doesn't take much to perfect the nitpicky aspects of cooking some of your favorite dishes. Small technique tweaks can make a big difference when it comes to the way your final dish turns out. Many of the most common mistakes are easily avoidable. Check out these tips and you'll find yourself impressing your friends and family with your cooking chops in no time.
Risotto
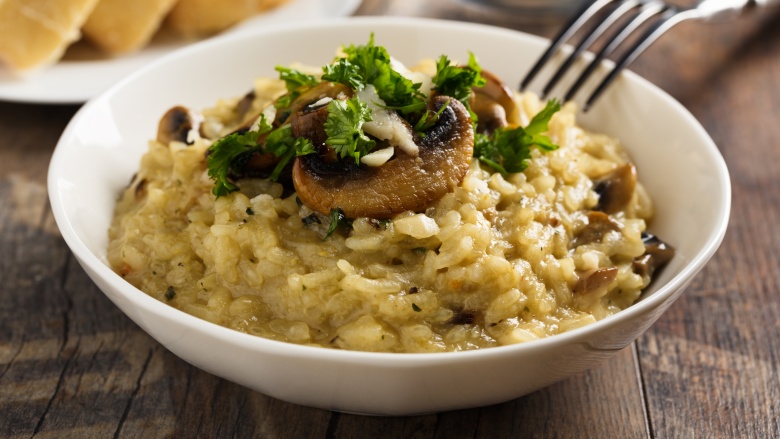
Risotto is a northern Italian rice dish that's as warm, comforting, and rustic as it is elegant and complex. While it is a simple and classic preparation, do not be fooled, as it requires utmost attention and care to perfect. When done correctly, risotto is creamy and decadent with a bite, and its layers of flavors meld together perfectly.
To give yourself a fighting chance, start your risotto off on the right foot by choosing the proper ingredients. Traditionally, this dish is made with onion, white wine, Arborio rice, stock, and Parmesan cheese. An earthier variation may call for shallots and red wine instead. While you should certainly experiment with adding extra ingredients — like mushrooms, peas, leeks, or even seafood — be sure they pair well with the harmonious base.
How to make risotto the right way
Toasting your rice is a crucial step in the process. Arborio is a type of rice that holds up well to absorbing liquid without breaking down completely. Even so, you want to be careful when you cook it. Make sure your rice is cooked to just a toasty golden color before adding the wine to the pot. Burning it during this step leaves a bitter taste in your finished dish. Not toasting it enough will yield grains that are too hard to bite.
And make sure you stir, stir, stir. Get your exercise in while you're cooking. Risotto requires elbow grease, meaning you'll need to stir continuously to produce creamy results that don't stick to the bottom and sides of the pot. Part of this dish's charm lies in its need for constant care. Since you're adding stock in increments until it's absorbed into the rice, it's important to roll up those shirtsleeves and stir after each addition.
Lastly, be patient with your risotto and you will be rewarded tenfold. Ingredients are incorporated in stages to build flavor and to give the rice enough time to achieve its ultra desirable consistency. Follow your recipe closely and cook ingredients in order. Timing is everything. And even if you feel like you just can't stir anymore, don't dump all the stock in at once. Give your risotto the time it requires.
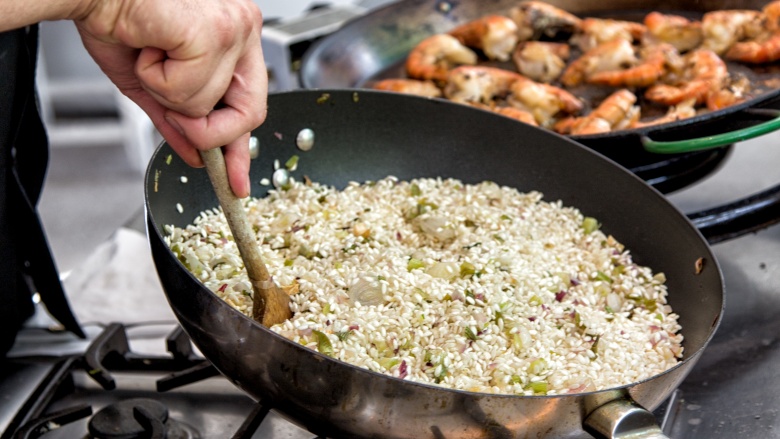
Paella
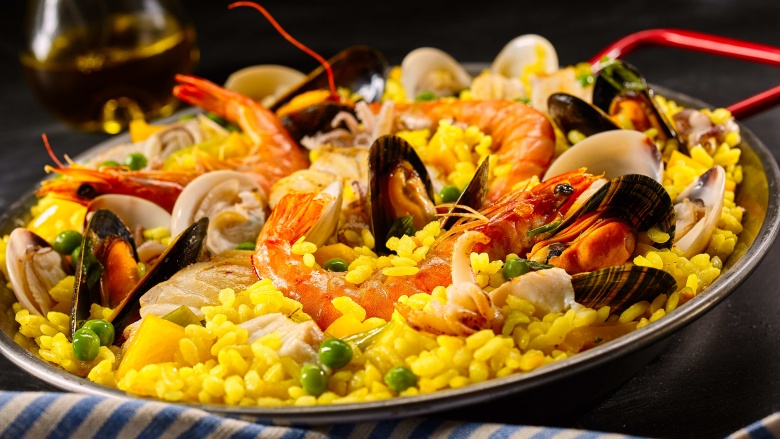
Paella is a traditional rice dish from the city of Valencia in Spain. Whether it contains meat, vegetables, or seafood, this specialty is beloved for its beautiful saffron color, crisp layer of toasted rice at the bottom, and deep smoky flavors. In Spain, it is cooked in a wide, shallow pan over an open fire or burner, then set aside to absorb all the broth and finish cooking. Avoid these common mistakes, and you'll be on your way to authentic-tasting paella.
Be sure to use the right kind of rice. Paella is best when made with bomba rice, a short-grain variety grown in Spain. It's the ideal choice for this particular dish because of its amazing ability to absorb a large amount of broth without losing its form, remaining perfectly firm and delicious throughout cooking. It's kind of a super rice. On top of that, try to obtain a true-blue paella pan, if possible. This special pan is wide and shallow with slightly slanted sides. This unique shape is meant for making paella because it is ideal for cooking a thin layer of rice. The secret to this dish's allure lies in the crispy rice crust that forms at the bottom of the pan. As such, you want to be able to spread out the rice as much as possible instead of cooking it in large clumps. A regular pan simply isn't wide and shallow enough.
Making proper paella
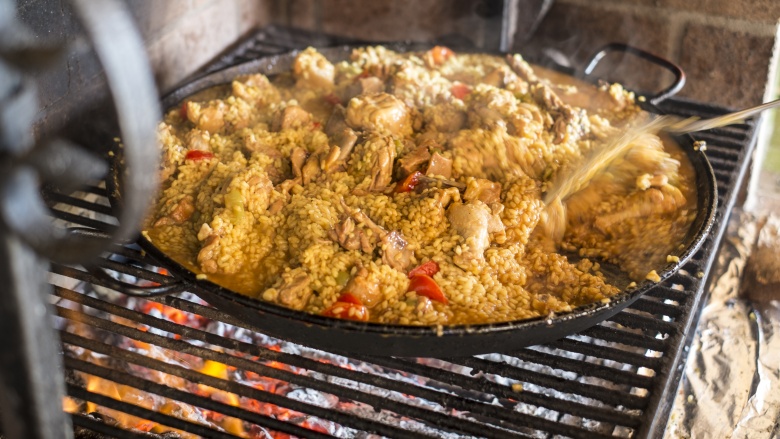
If you aren't cooking your paella on top of a large outdoor grill, you'll need to be sure that the pan is strategically placed to maximize even cooking. This means you may need to straddle it across two burners on a conventional stovetop and rotate often! And make sure to give your paella a fragrant start. The sofrito is the sauteed aromatics that form the base of your paella. Typical ingredients include but are not limited to tomato, onion, and garlic. When cooked until tender, they provide a thick, flavorful base for the rest of the dish. A must.
Saffron is key to a beautiful paella. The liquid added to your paella is important to consider as it is the ingredient that cooks your rice. Whether you use homemade stock, a low-sodium store-bought variety, or water, remember to infuse it with saffron to get the warm traditional color that this special dish is recognized for.
While it may be tempting to load your paella pan with everything and the kitchen sink, remember that less is more. Keep in mind that at the end of the day, this is a rice dish. Let the rice shine! The most classic paellas keep the ingredient list sparse. This not only prevents your dish from becoming cluttered by unnecessary ingredients, it also helps the rice to cook evenly.
Lastly, have fun and eat paella the way it's meant to be eaten. That is, skip the plates and share it with the people you like directly from the pan. Partaking in paella thus becomes a communal activity that brings people together.
Mussels
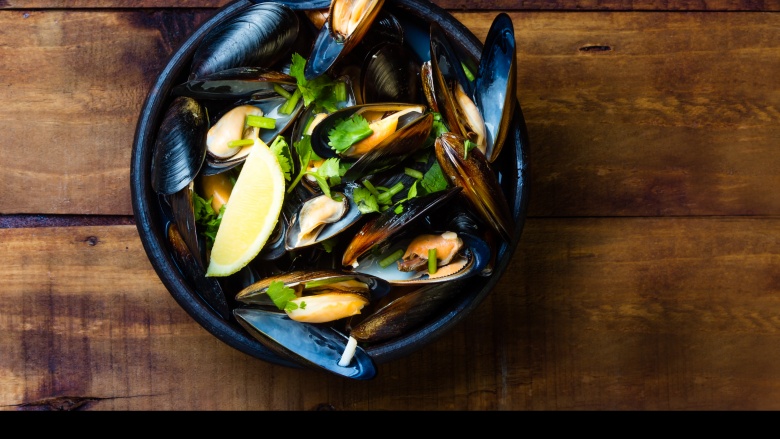
For your next gathering, serve up some steamy mussels and I guarantee there will be oohs and aahs. This fancy-looking yet relatively inexpensive seafood option is the ideal party food. These delectable bivalves invariably make you look like a pro chef, which is always a great feeling. And once you know what to avoid doing, they are a cinch to whip up. You may not be having a French-themed dinner party, but you can pretend you are.
As with any seafood, be sure to clean your mussels with great care. The last thing you want to taste is any grit. Throw them into a colander or other strainer and rinse with cold water, shaking as you go to really knock the dirt out of the shells. If you notice any fuzzy beards or barnacles in the shells, be sure to remove those with a sharp knife as well.
Tips for cooking good mussels
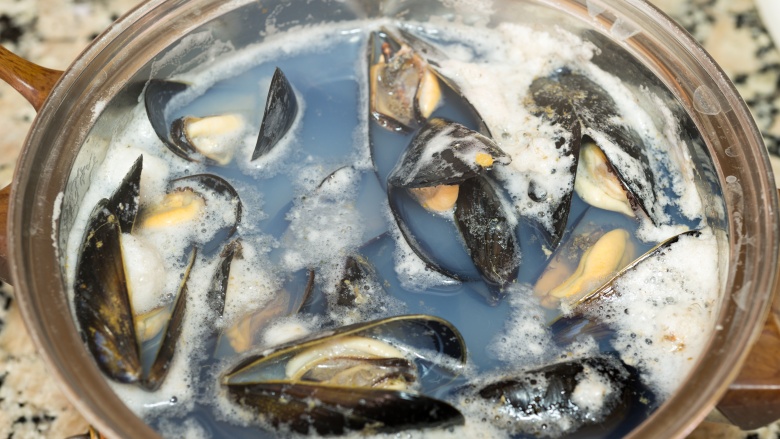
Don't forget the aromatics. The natural flavors of mussels are greatly enhanced by infusing your cooking liquid with some choice aromatics gently sauteed. Think onion, garlic, ginger, and the like. These will help to build a sauce base once you add your mussels to cook.
Mussels are little things that tend to cook pretty quickly. That said, be sure you turn down the heat to a gentle simmer once the water starts to boil initially. Related, arranging them in a single layer to cook allows for more even cooking, so grab a pan that's wide enough! But remember to put a lid on it. Your mussels benefit from the fragrant steam created when you cover the pan, so a fitting lid is important. Give it three or four minutes without any worry, then check to see if all the shells have opened up.
Since your pan is covered while you're cooking the mussels, feel free to shake it a little to stir things up in there without letting any steam escape. Doing so will help them each get a fair shake at the heat and cook evenly.
Pasta
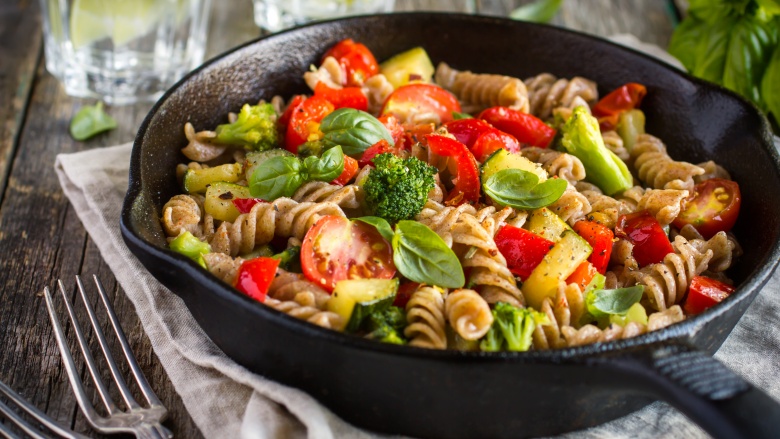
Pasta is a deceptively tricky food to cook. We make it all the time, but this dinnertime favorite still ends up being cooked in ways that are all kinds of wrong. My theory? Pasta is so simple that we take it for granted and start to cut corners, growing gradually more and more accepting of lumpy, mushy noodles. Trust me. I've been in a hurry before, skipped a few steps, and paid the price of eating sad pasta. Heed these simple rules, and you'll never go wrong.
Start by using a pot that's big enough. In fact, err on the side of too big. When you stuff too much pasta into a pot that's the wrong size, the heat level decreases significantly as soon as you add the pasta to the water. As a result, you end up waiting longer for the water to come back to a boil. Meanwhile, your noodles are starting to clump like crazy. It's a big, sorry mess!
How to make perfect pasta

Please salt your cooking water out of respect for the institution of pasta. Any experienced chef will tell you that this step takes two seconds but is key to pasta success. I'm talking about two or three good pinches of salt, at least. The salt helps to season your noodles as well as create a slight texture on the surface, preventing that slimy mouth feel.
Give your pasta a few stirs during cooking to prevent everything from clumping together. When you're dealing with starchy foods, you want to be sure they don't get sticky. I find that I can get away with one stir for noodles like spaghetti or linguine, but short pasta shapes like rigatoni or fusilli like to band together into one big, gooey mountain.
I am including this last item even though it's slightly inexplicable to me. You don't need to rinse your pasta after it finishes cooking. I say this only because I observed a close friend straight up wash her pasta like she was cleaning a piece of fruit. Needless to say, I was horrified. The starchiness in pasta helps it cling to the sauce, so you want to keep that residual texture.
Gravy
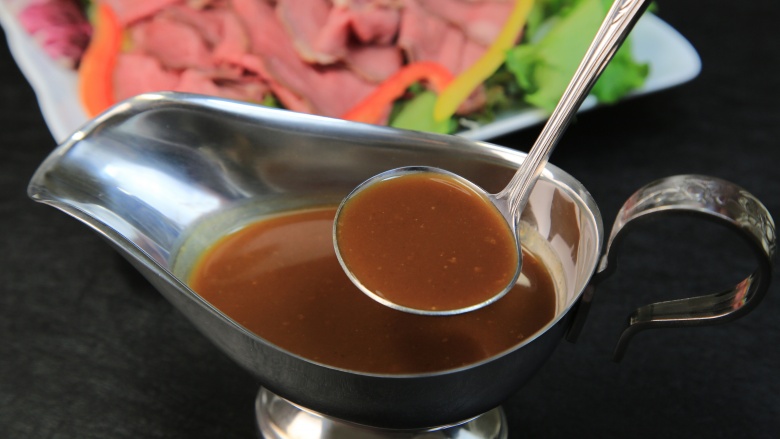
I am famous among my friends and family for being the diner who uses up all the gravy. If you want to know the truth, I'm perfectly okay with this distinction. As a gravy lover, I can say that it should ideally be luxuriously smooth and richly flavored. No lumps, of course. Keep these tips in mind to ensure you achieve your own gravy nirvana.
Making good gravy
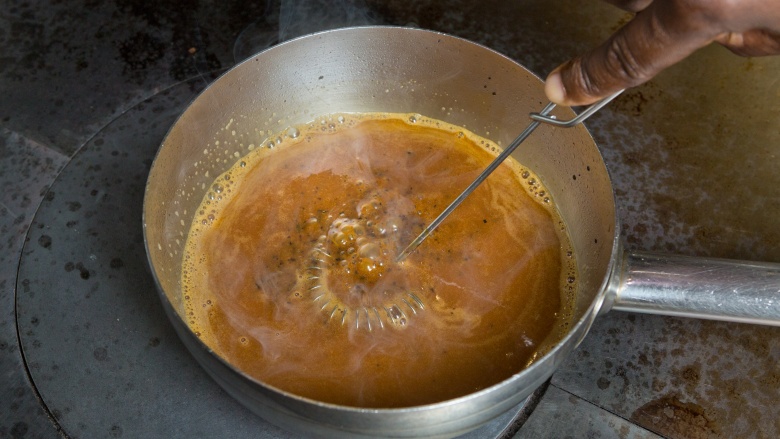
Be sure to start off your gravy with a roux. It's not only fancy and fun to say, it is the thing that helps to thicken your gravy. What is it? It is a mixture of flour and fat. And the latter can be butter, oil, or animal fat (yum). This simple paste binds your sauce together, making it smooth and alluringly thick. Since gravy requires combining stock with a roux, it's crucial that you whisk continuously, as flour tends to clump up. Any kind of gravy with a texture that approximates lumpy is deemed depressing. Grab your wire whisk and stave off the Thanksgiving sadness.
I don't know about you, but I like my gravy thick, smooth, and richly flavored. Thin and runny are out. To avoid watery gravy, try not to add more stock than you need during cooking. Add it gradually so you can gauge how thick you want your sauce to be, keeping it balanced with the amount of roux you began with.
Finally, make sure you don't jump the gun on seasoning your gravy. As with soup, the salt tends to intensify as the mixture cooks. If you add salt to the gravy too early, you may find that it gets too salty by the time you're finished. You're better off waiting until the very end to season.
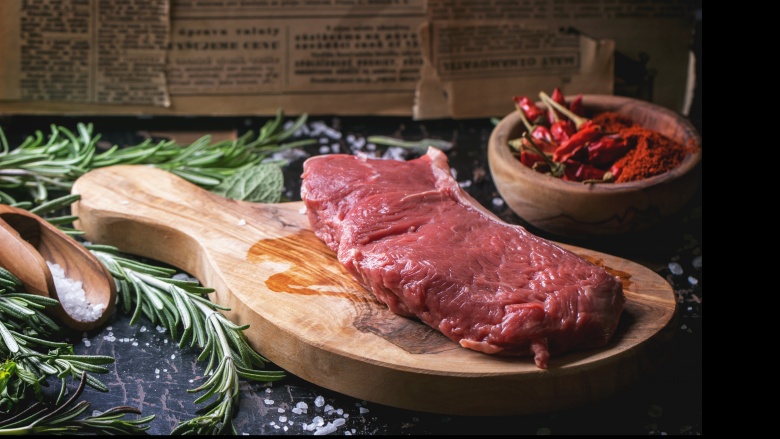
Steak
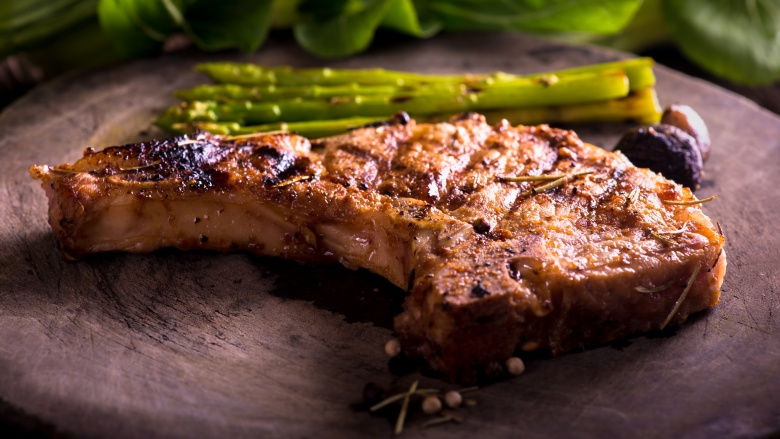
A juicy steak that's impeccably seasoned, perfectly browned, and cooked to medium rare or medium is my ideal last meal. The truth is that when you are working with a quality piece of beef, you can keep things simple and everything will work out beautifully. Even with streamlined preparations, you are better off avoiding the common pitfalls of steak so as not to eat overcooked, gray, and flavorless meat. Oh no.
Steak needs to come to room temperature before cooking, so going from the refrigerator to the pan is a major no-no. Searing a stone-cold steak will surely result in overcooking the outside and undercooking the inside, which will remain disturbingly cold and raw. You don't want this to happen to you. And before you season or cook your steak, be sure to dry as thoroughly as possible. Use a paper towel to blot away any moisture to avoid steaming instead of browning. You want the meat to have a gorgeous brown crust.
Nailing the perfect steak
Be generous with the salt when you're seasoning your steak. Using enough will help your meat build an irresistible crust and infuse it with tons of flavor. For seasoning steak and really for all general cooking, I like the slightly larger, coarser grains of kosher salt as opposed to fine table salt. It lends flavor and texture without running the risk of over salting.
The pan should be very, very hot before you even think about letting your steak make contact with it. Be sure to heat it over medium-high heat until it's just sizzling. The pan should feel hot when you hover your hand above it. A hot pan helps brown the outside of the steak to lock in flavor. If you're cooking your steak in fat, choose one with a high smoke point, naturally.
Your steak will continue to cook a little after you remove it from the pan. Be sure to set it aside to rest for at least five minutes before serving. Doing so allows it to finish cooking. Moreover, any juices released during cooking require the resting time to incorporate back into the meat.
Whether you cook every day or only on special occasions, optimize your time in the kitchen by avoiding common, everyday mistakes. You'll get way more out of your time in the kitchen and have a blast the whole time. Conquer these tricky foods, and you'll never go hungry.