Native American Fry Bread Recipe
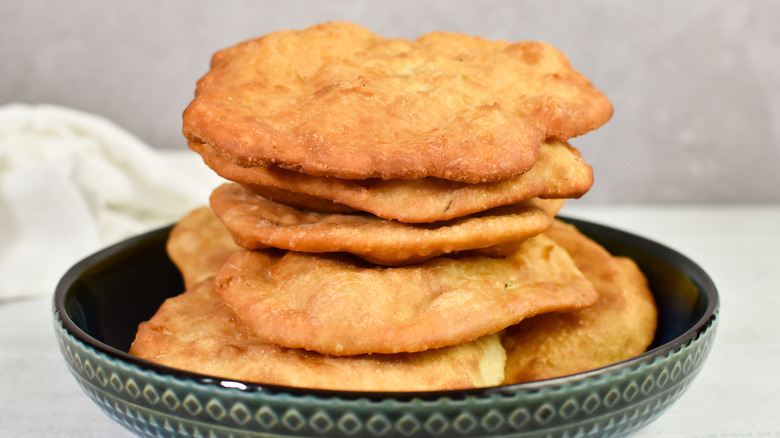
With just five basic ingredients you can make a foodstuff so tasty you'll want to prepare a batch weekly — though your arteries may wish otherwise. That food is Native American Fry Bread. Recipe developer Stephanie Rapone of Pantry to Plate Meals has put together this simple recipe, and it's one that (by design) uses ingredients you most assuredly have in your house already, so you may be able to get to work on a batch right now.
As you do, you should also take some time to reflect on the complicated history of this distinctly American food — and we don't mean that in the same way that hamburgers or hotdogs are American, for neither of those even are, in terms of origin. This starchy concoction does not predate English colonization, but it was indeed a staple of many native populations that had been forced off their traditional lands and largely relegated to consuming foods made with government ingredients. This bread is the taste of their history, and though much of the history that led to it is grim, the taste is anything but.
As for how best to consume this fry bread? Rapone prefers it savory. "My favorite way to enjoy this fry bread is topped with warm chili, shredded lettuce, black olives, sour cream, and shredded cheese," she says. "You can also brush melted butter on the top and sprinkle it with cinnamon-sugar, or drizzle [it] with honey."
Gather your ingredients for Native American fry bread
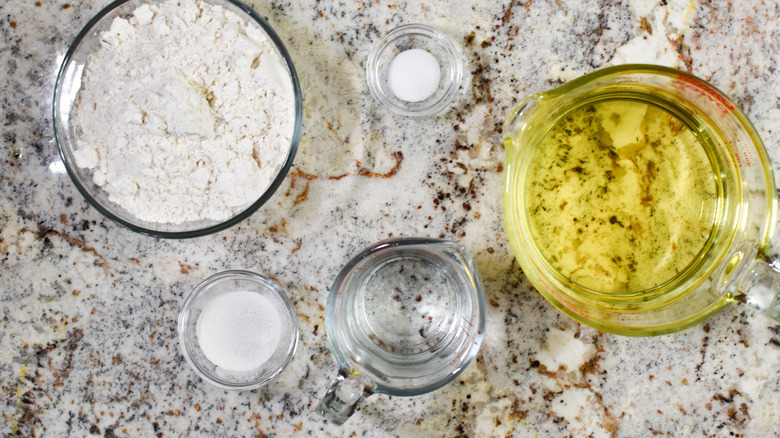
As noted, it takes just five common ingredients to create the dough for this delectable dish. They include all-purpose flour, salt, baking powder, water, and vegetable oil. Yep, that's it.
Asked which ingredient stands out the most, Rapone says: "The salt makes it have flavor, but it doesn't taste salty. The flavor is really that fried part: think about when you dredge chicken in seasoned flour and fry it. The crunchy coating has its own flavor even if you don't add a bunch of seasonings to it. [It's] like with an 'elephant ear' that you might get from the fair — that crunchy outer layer has that sort of flavor."
Form the dough, then wait
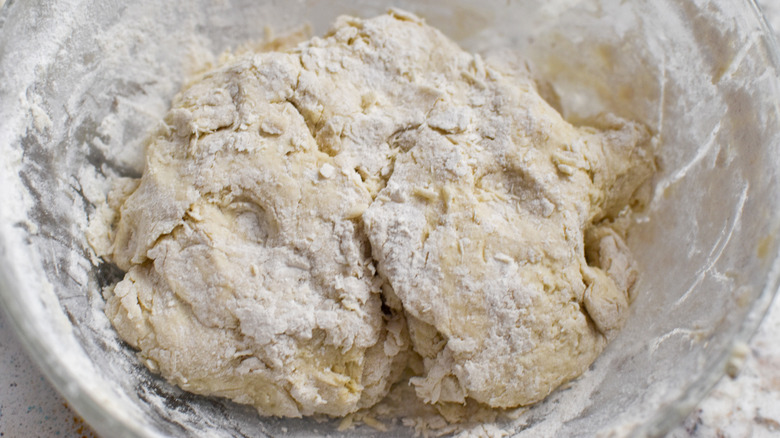
In a medium bowl, combine the flour, salt, and baking powder. Use a whisk to ensure the ingredients are all evenly mixed and that there are no clumps as you combine these dry ingredients.
Next, heat the water in the microwave for 1 minute, then slowly pour the hot water into the blended dry ingredients while mixing steadily with a wooden spoon. If the dough gets too difficult to mix with a spoon, you can use your fingers. Either way, once all the water has been added, bring the dough together into a loose ball and place it in a bowl.
Now, drizzle 1 tablespoon vegetable oil over the top of the dough so that it doesn't dry out, then cover the bowl with plastic wrap and rest the dough for an hour. It won't rise, but the water needs time to fully absorb into the flour.
Prepare discs of dough and heat the oil
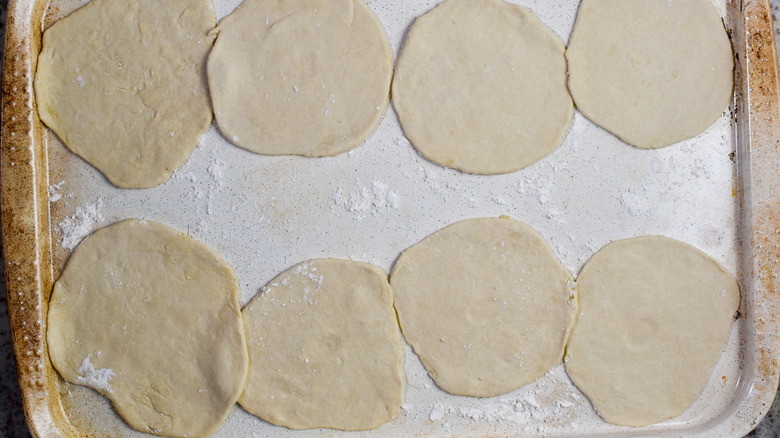
As you wait for the dough to finish resting, line a plate or baking sheet with paper towels. After the hour has passed, add the 3 cups vegetable oil to a high-sided 10-inch skillet or a pot and begin to heat it. The oil needs to be between 1-1 ½ inches deep and heated to 375 F.
While the oil is heating, divide the dough into eight equal pieces. Lightly dust a baking sheet with flour, then stretch or roll the dough into discs about 7 inches across. "You might need a little flour to keep the dough from sticking to your hands or the counter," says Rapone.
Fry the dough, then enjoy
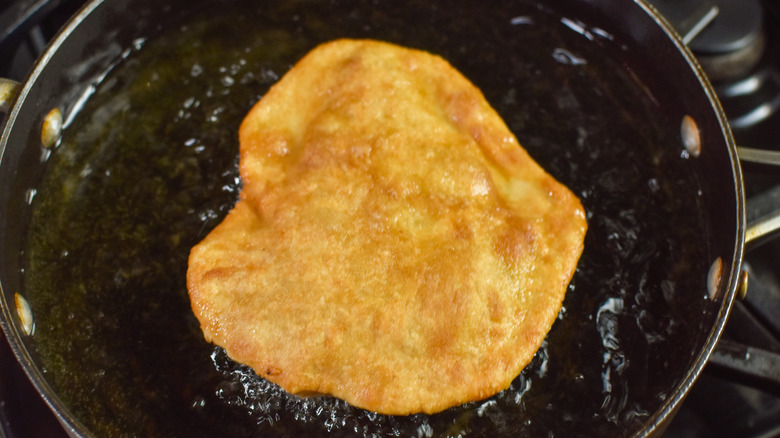
Once the oil reaches 375 F, carefully add the first disc to the pan (or pot) and fry it until it's golden brown on one side. This should take about 1 minute. Then, flip it over and fry the other side until it's golden brown, too.
Remove the cooked bread disc to the paper towel-lined plate or baking sheet so the excess oil can drop off. "I prefer to layer the bread with paper towels on a plate so they stay warm," Rapone says.
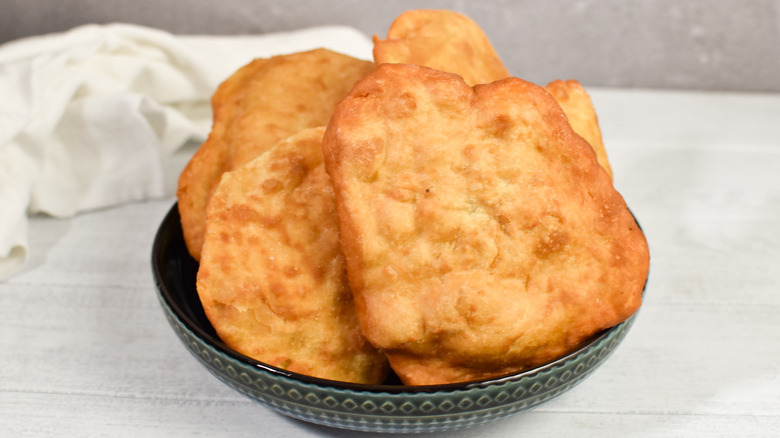
Repeat the frying process with the remaining dough discs, then enjoy!
Native American Fry Bread Recipe
When you want a delicious, fried treat to enjoy in a sweet or savory dish, you might want to whip up a batch of this Native American fry bread.
Ingredients
- 2 cups all-purpose flour, plus more for dusting
- ½ teaspoon table salt
- 1 tablespoon baking powder
- ⅔ cup water
- 3 cups plus 1 tablespoon vegetable oil, divided
Directions
- In a medium bowl, combine the flour, salt, and baking powder using a whisk to ensure it's evenly mixed and there are no clumps.
- Heat the water in the microwave for 1 minute, then slowly pour it into the dry ingredients while mixing with a wooden spoon. If it gets too difficult to mix with a spoon, you can use your fingers. Bring it together into a loose ball.
- Drizzle 1 tablespoon vegetable oil over the top of the dough so it doesn't dry out, then cover it with plastic wrap and rest for 1 hour. It won't rise, but the water needs time to fully absorb into the flour.
- Line a plate or baking sheet with paper towels, then after 1 hour, add the 3 cups vegetable oil to a high-sided 10-inch skillet or pot. The oil needs to be 1-1½ inches deep and heated to 375 F.
- While the oil is heating, divide the dough into eight equal pieces. Lightly dust a baking sheet with flour. Stretch or roll the dough balls into discs about 7-inches around. You might need a little flour to keep the dough from sticking to your hands or the counter.
- Once the oil reaches 375 F, add the first disk to the skillet and fry it until it's golden brown on one side, about 1 minute. Flip the dough and fry until golden brown on the other side. Remove it to the paper towel-lined plate or baking sheet so the excess oil can drop off. Repeat with all the remaining discs of dough.
Nutrition
| Calories per Serving | 174 |
| Total Fat | 7.1 g |
| Saturated Fat | 0.5 g |
| Trans Fat | 0.1 g |
| Cholesterol | 0.0 mg |
| Total Carbohydrates | 24.3 g |
| Dietary Fiber | 0.8 g |
| Total Sugars | 0.1 g |
| Sodium | 138.3 mg |
| Protein | 3.2 g |