Tips To Make Your Cookies Look Like They Came Straight Out Of A Bakery
Cookies are one of those universally loved baked treats that everyone enjoys nibbling on, no matter what time of the day it is. Whether you're making them for a party, your family, or just yourself, a baker of just about any skill level can really create something special and memorable.
But as simple as they may be, not all cookies are created equal. Sometimes, cookies can come out hard, crumbly, flat, or dry when you really want them to come out gooey, soft, and beautiful.
Thankfully, there are plenty of tricks that home cooks can adopt that can seriously improve their cookie game. We've reached out to several professional bakers to give us their best tips to help your cookies taste like they came fresh from the bakery. Strap on your apron, and get your notebook out. Here are some tips for getting your cookies to taste better than your grandma's did.
Chill your dough in the fridge
When asked about their top tips for baking the best cookies, just about every professional baker we interviewed started with this one: Chill your dough. "When it comes to preparing the dough, a crucial step is to chill it before baking," says Nikola Galang, owner and baker of Cake Indulge Manila. "By refrigerating the dough for a minimum of 30 minutes, you ensure that the cookies maintain their shape and acquire a delightful, chewy texture, rather than spreading excessively during baking."
Too much spreading can result in a flat cookie with a texture you don't want. By chilling the dough, you'll get a thicker, richer, and more solid product. If you find your dough is still spreading too much, you can pop it in the freezer for 15 minutes to slow down the spread.
But refrigerating the dough isn't just about texture — it's critical to getting the best flavor. Taylor Tate, pastry chef of peasants Feast in California, says, "The longer you refrigerate, the better the flavor will be — at least overnight, preferably 24 to 48 hours for maximum flavor. It lets the flavor develop, and you'll have a cookie that spreads less and has a better all-around flavor." As the cookie dough chills, the ingredients tend to concentrate more while the dough becomes more hydrated by soaking up the moisture from the wet ingredients. Who knew letting your dough sit around and do nothing was such an important step for top-tier cookies?
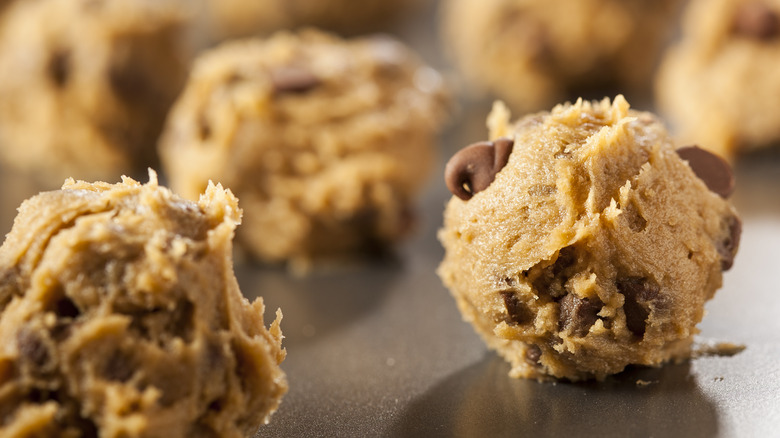
Use a cookie scoop for perfect-sized balls every time
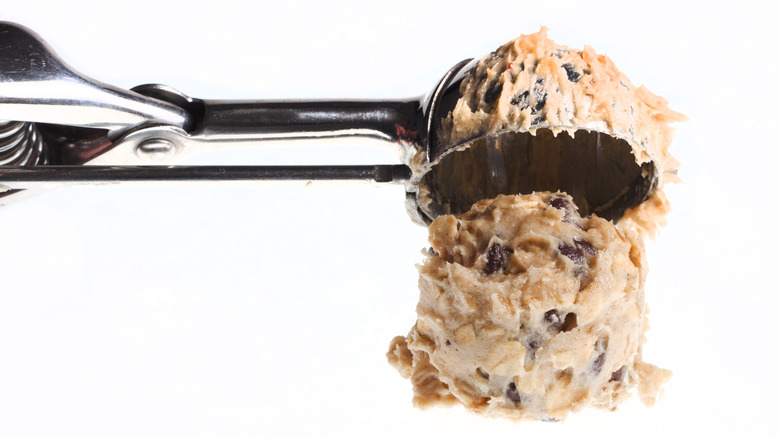
How do bakeries get the perfect-sized cookies every single time? It's simpler than you think. Katie Chaney, who is the owner, head pastry chef, and chief culinary creator at Hester General Store in South Carolina, says this: "Instead of using your hands to 'ball' cookie dough, use a cookie scoop! This is how we portion cookie dough in our bakery, and it helps ensure consistency throughout baking."
Using a scoop to measure out your dough means every single cookie will have the exact same shape, size, and diameter. This makes your cookies look attractive and professional in the end, while also ensuring they all cook evenly at the same time. Not to mention it's faster to use, and you won't need to deal with annoyingly sticky hands.
Cookie scoops range from a No. 70 (which gives you about 2 teaspoons of dough) to a No. 20 (which holds about 3.2 tablespoons). Anything between a size No. 20 to a No. 24 will create a pretty big cookie. For most home bakers, a cookie scoop at a No. 30 or No. 40 will give you a perfect medium cookie.
The temperature of your ingredients is key
When the craving for cookies hits, it can be tempting to snag all of the ingredients you need from the fridge and immediately get to work. However, rushing in without making sure your ingredients are at the right temperature will result in less-than-ideal cookies. "Temperature (of everything) is king," says Laura Kasavan, professional baker and founder of popular baking and desserts blog Tutti Dolci. "Butter should be at room temperature (slightly cool to the touch, and your finger will make a shallow impression) so that it creams together easily."
While some cookie recipes call for melted butter, Kasavan doesn't recommend that, either. "If butter is too warm, it won't retain any air during the creaming process, and this can cause your cookies to collapse." The more air the butter holds onto during the creaming process, the thicker and puffier your cookies will be — so it's best to aim for room-temperature butter that isn't totally melted yet.
While you're waiting for butter to come to temperature, take your eggs out of the fridge as well. If you use room-temperature eggs for your cookies, they'll mix together more easily with your softened butter, which will ultimately yield a smoother batter.
Cream the butter and sugar for a long time
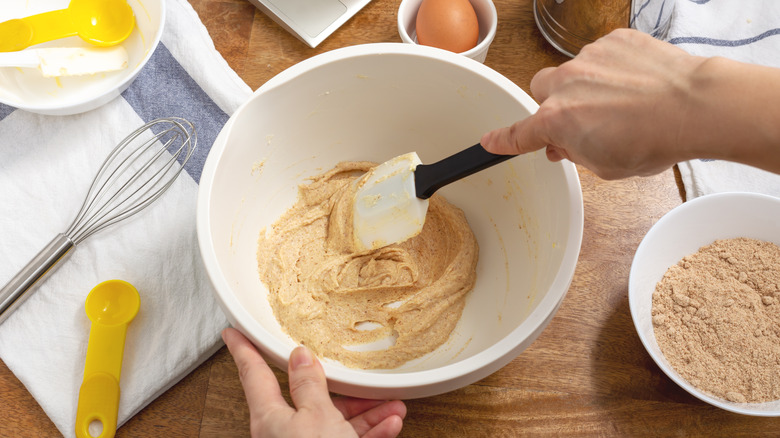
When it comes to creaming butter and sugar together, chances are you're not doing it for long enough. Most people will just cream the ingredients until they look a bit fluffy, but professional baker Laura Kasavan says to keep going: "Cream butter and sugar (or sugars) for about three minutes at medium speed, until light and fluffy, before adding the egg and vanilla."
Head pastry chef Katie Chaney goes even further. "I am a true believer in mixing your butter and sugar for a much longer time than you expect. The coloring of the mixture should move from butter yellow to pale yellow to white and fluffy. This generally takes five to eight minutes in a conventional home KitchenAid mixer!"
There are a couple of reasons why allowing the butter and sugar to properly cream is so important. First, creaming allows all of the sugar to evenly disperse throughout the batter and completely dissolve. Second, the process helps incorporate more air into the batter, which increases volume and results in super lightly textured cookies. You actually want to create air bubbles in the dough, which allows steam to trap when baking the cookies, giving you an amazing texture by the end.
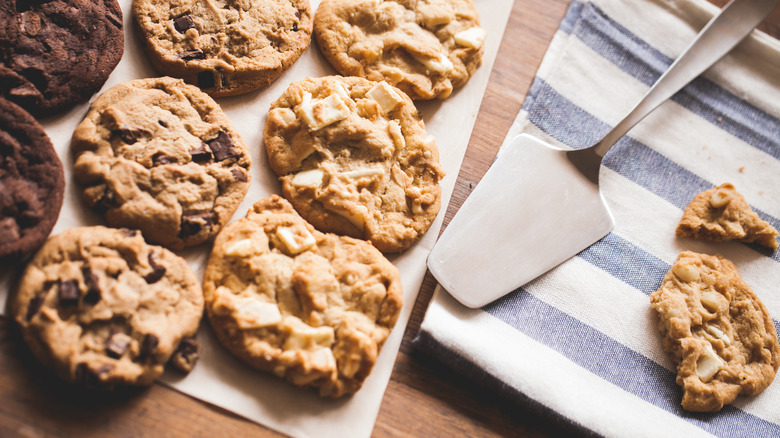
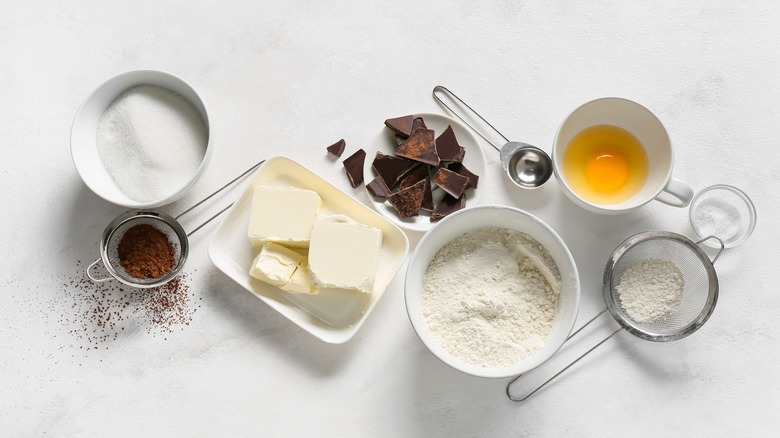
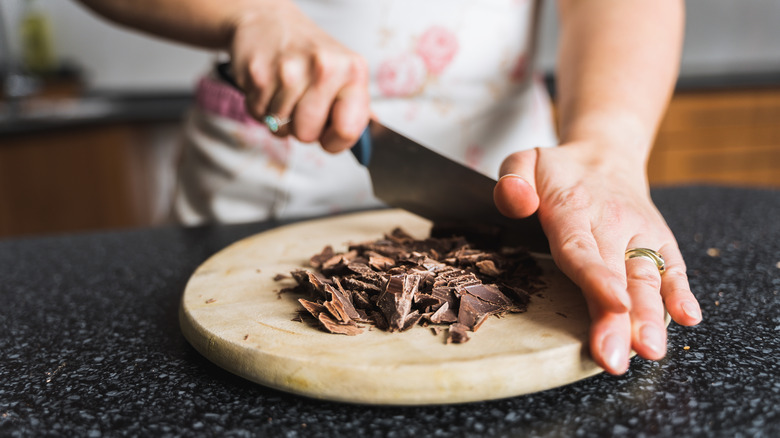
Use chopped chocolate (not chocolate chips)
When most people think of chocolate chip cookies, they typically imagine those teardrop-shaped bits of sweetness dotting the surface of the cookie. However, those aren't actually the best choice for your cookies.
"For gooey chocolate in every bite, chopped chocolate is the way to go," chef Laura Kasavan says. "Use high-quality chocolate baking bars, and chop them up (a serrated knife works especially well). Chocolate chips contain stabilizers, so cookies baked with chocolate chips will not spread as much as cookies with chopped chocolate."
That's right — if you want that melty chocolate pull when you break apart a cookie, chocolate chips won't do the trick. They're designed to keep their shape at even the highest temperatures, so chopping up chocolate or even using chocolate discs is a better choice for bakery-style cookies. Don't just use any chocolate, though. "Invest in good-quality chocolate to elevate your cookies," pastry chef Taylor Tate says. "Bakeries use the best they can buy, and that's why the flavor seems better than those store-bought chocolate chips."
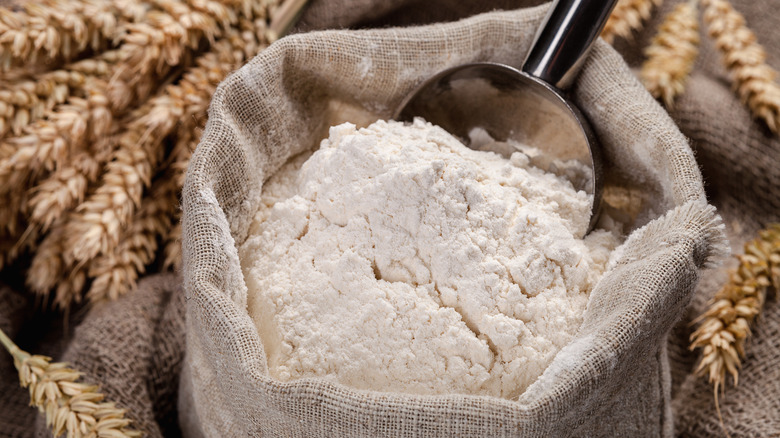
Use bread flour for chewy cookies
Another pro tip for getting that bakery-like chewy texture: Switch up the flour you use in your cookies.
"Bread flour has a higher protein content (12% to 14%) than all-purpose flour (around 11% to 12%), and that extra protein leads to super chewy cookies," baker Laura Kasavan says. But she also says you should fine-tune your recipe if you are going to use bread flour. "The additional protein can also dry out cookie dough a bit, so plan to add one additional egg yolk per whole egg to bump up the moisture."
Baker Nikola Galang tells us a bit more about how to keep bread flour cookies moist: "You may need to adjust the amount of liquid used in your recipe if you're using bread flour. Additionally, because it has more gluten, you'll want to mix the dough only until it comes together and avoid over-mixing. Doing so will keep the cookies soft and chewy instead of tough and dry. With all that said, adding just a little bit of bread flour to an [all-purpose flour] cookie recipe can give you the chewiness you're looking for, so don't be afraid to experiment!"
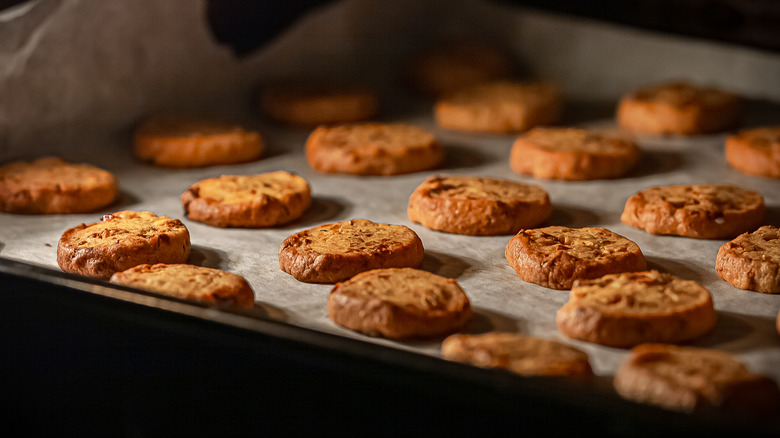
Don't grease your baking sheet
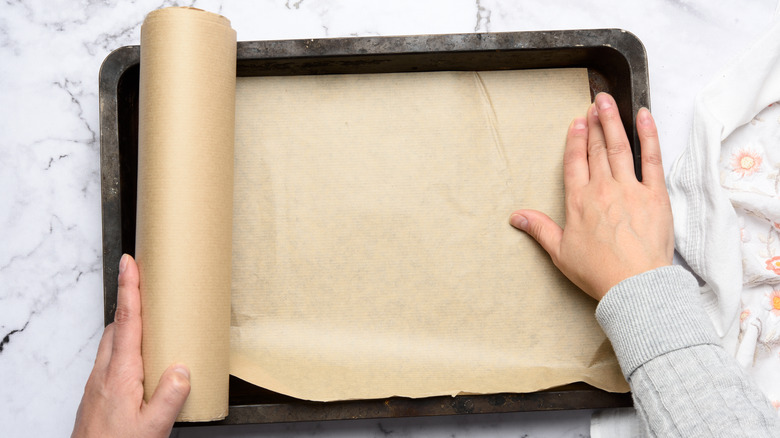
The vessel that holds your delicious cookies while baking is important as well. No matter what the recipe that you're following says, resist the temptation to grease your cookie sheet. This will likely lead to your cookie dough (which already has plenty of fat) spreading way more than you want it to.
"To prevent any sticking issues and achieve even browning," baker Nikola Galang says, "I would recommend using parchment paper or silicone baking mats to line your baking trays. These protective measures contribute to a consistent and appealing appearance of the cookies."
Baker Laura Kasavan agrees with that assessment for the best results. "Lining with parchment makes for easy cleanup and helps prevent cookies from over-spreading in the oven," she says. Not only could greasing your baking sheet make the cookies spread too much, but it could actually make them pool butter, which is one of the last things you want for your precious cookies.
Let your baking sheet cool completely before the next batch
We get it — you're hungry, your kids are begging for more cookies, and the house smells like a wonderland. But before you throw your next batch of cookies into the oven, take a break for a few minutes. It's important to let your baking sheet cool down before you load it up with more raw cookie dough.
"This is a must," Laura Kasavan says. "Baking cookies on warm baking sheets causes the butter to warm up prematurely and can lead to the cookies overspreading." At best, your cookies will come out flat and dry with crispy edges. At worst, you'll end up with one huge, cookie blob with terrible texture.
Luckily, the solution here is simple: Just let your baking sheet cool down before you get started on the next set of cookies. The best way to do this is by placing it on a cooling rack or somewhere where airflow will reach both the bottom and top. Of course, if you have a second baking sheet, you can jump right back in while the first one cools. If you've ever baked a single batch of cookies that came out great, followed by a second batch that was super disappointing, the warm baking sheet might be the culprit.
Keep a freezer stash of homemade cookie dough for when the mood strikes
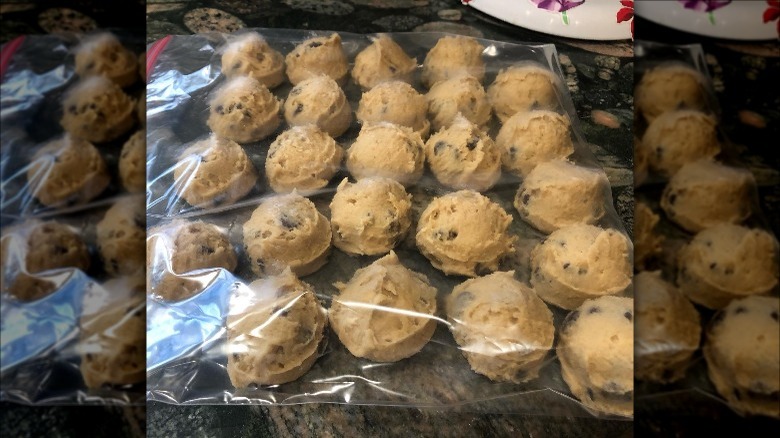
Let's be honest — there's never a bad time to have freshly baked cookies on hand. But putting together the perfect cookie dough every single time the mood strikes is a lot of work. That's why pastry chef and influencer Emily Laurae Carter always keeps pre-made dough ready to go in the freezer.
"I would highly recommend creating a freezer stash of homemade cookie dough to bake and enjoy at your leisure! To make your own frozen cookie stash, place your chilled homemade cookie dough balls on a parchment-lined baking sheet after mixing, and freeze until firm. Transfer the balls to a freezer-safe bag, then the next time you crave freshly baked cookies, grab what you need from the freezer bag and bake! The frozen cookie dough will need a few extra minutes in the oven, so keep an eye on them."
Renowned pastry chef and content creator Amber Spiegel agrees that the freezer is her "favorite assistant" when it comes to cookies. "As a pastry chef and cookie-decorating instructor, I regularly freeze raw cookie dough to get a head start on big projects. You can freeze it for up to three months to have it ready to go when it's time to bake and decorate cookies." Maximum sweet-tooth satisfaction, minimal effort.
Use both white sugar and brown sugar
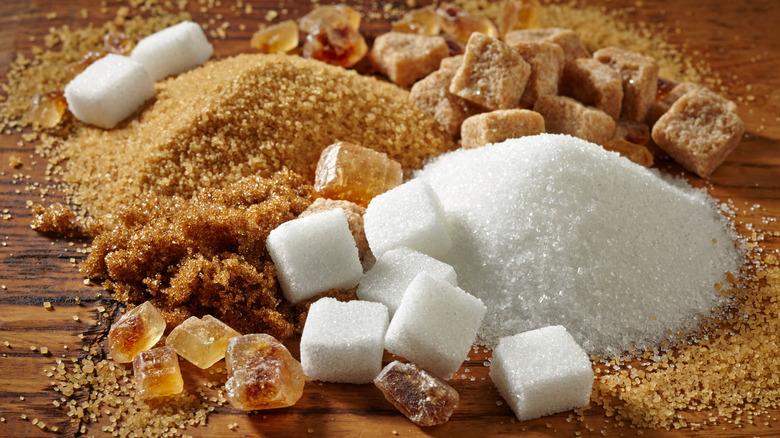
When putting together the perfect cookie, you want to aim for just the right balance when it comes to texture — specifically crispiness and chewiness.
Baker Nikola Galang tells us why she uses both white and brown sugar for her cookies: "White sugar creates a crispier cookie, while brown sugar, which contains molasses, adds moisture and results in a chewier cookie. The color of your cookies will also be a nice golden brown rather than a pale color as would be the case with only white sugar. Additionally, using both sugars will give you a better flavor balance in your cookies. A combination of both is often considered the perfect way to get that sweet, caramelized flavor."
Pastry chef Emily Laurae Carter breaks it down further for us: "Granulated white sugar aerates the dough while dark brown sugar adds a dynamic caramelized flavor. The combination achieves a cookie that is so soft and tender that it almost tastes creamy when you bite into it, with a perfectly crispy edge — perfection." So the next time you put together your cookie dough, don't settle for just one type of sugar — use both!
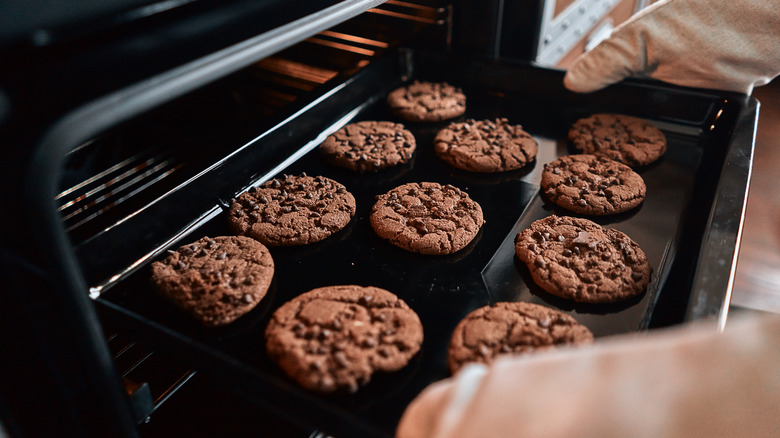
Don't rely on baking times — use your eyes instead

When you decide to put together a batch of cookies, chances are you'll find a recipe online and simply follow the directions down to the last degree. But the truth is, if you want bakery-level cookies, you'll need to keep a careful eye on your oven. "Baking times are guidelines, but you should always keep an eye on your baked goods, especially with cookies as they can easily get over-baked," pastry chef Amber Spiegel says. "I always give a range of baking times in my cookie recipes, but light golden edges are the way to know when the cookies are ready to come out of the oven."
It's always important to keep in mind that your oven might run a bit hotter or cooler than the temperature that is actually displayed. There might also be hot and cold spots throughout the oven. As much as some people might not like to hear it — creating the perfect cookies often comes down to a learned gut feeling after baking them a few times.
Of course, everyone has their preferences when it comes to temperatures and times. Chef Katie Chaney says the way to go is "low and slow! Usually, cookies bake for a short amount of time, but we like to use a colder oven temperature to bake. High heat equals drying out and tougher cookie crumbs throughout!"
Under-baking is better than over-baking
When it comes to baking delicious cookies, it's always better to err on the side of under-baking them rather than over-baking them. "Bake cookies just until tops and edges are set, then let cool for five to 10 minutes on baking sheets. As the cookies cool on the sheets, the residual heat from the baking sheet will continue to cook the cookies, so it's best to slightly under-bake for softer cookies," baker Laura Kasavan says.
Although it's important to remember that your cookies will keep cooking after you take them out of the oven, baking times are all about preference, as that will affect the final texture of the cookie. Taylor Tate elaborates: "I love to slightly under-bake my cookies so you get a soft, gooey middle and crisp edges, but if you prefer a crisper cookie, just bake your cookies a couple extra minutes. When baking cookies, I like to use my eyes and hands to see when they're done — instead of a timer — because some ovens tend to have hot spots. When baking, I look for brown edges that are set to the touch and dough that is no longer glossy."
Find that perfect texture that you and your family love — then remember the time and temperature that it takes your oven to get there.
Top your cookies like an expert
You've probably heard the nearly cliché saying: "You eat with your eyes." When you bite into a delicious, perfectly textured cookie, the only thing that makes it better is seeing the eye-popping toppings scattered across the cookie. However, if you simply roll all of the extras into the dough, you likely won't be able to get a good view of them from the top. "Add bits of chocolate (or any other of your mix-ins like toffee bits or chopped nuts) to the top of the unbaked dough for pretty cookies," baker Laura Kasavan says. "A gooey chocolate topping makes for a bakery-worthy cookie."
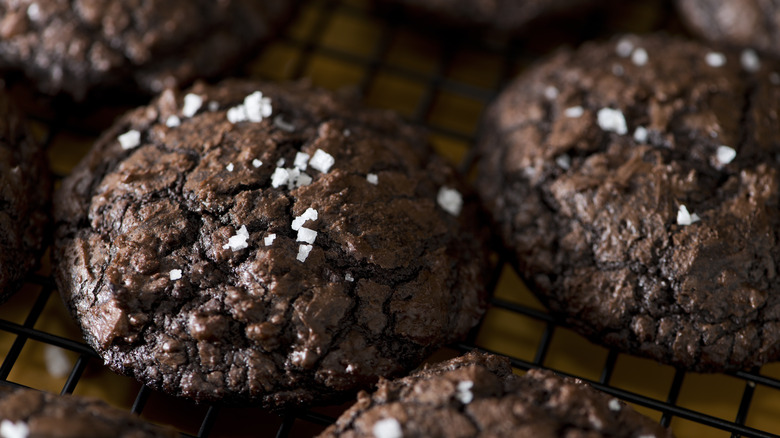
Speaking of topping your cookies, another garnish that professional bakers use that might seem contradictory to some is salt. "Adding salt to your cookies right when they come out of the oven, before they cool, is a great way to enhance their flavor and level out their sweetness," chef Taylor Tate says. "Get creative and use different kinds of salt like Maldon salt, gray sea salt, or even volcanic black salt, to achieve interesting layers of flavor."
Pastry chef Emily Laurae Carter agrees. "Flaky sea salt livens the caramelized dark chocolate flavors of the baked cookie dough and helps to balance every rich and delicious bite," she says. "Take a bite of a cookie topped with flaky salt, then try one without — your taste buds will tell you all you need to know!"