13 Mistakes Everyone Makes When Cooking Pierogi
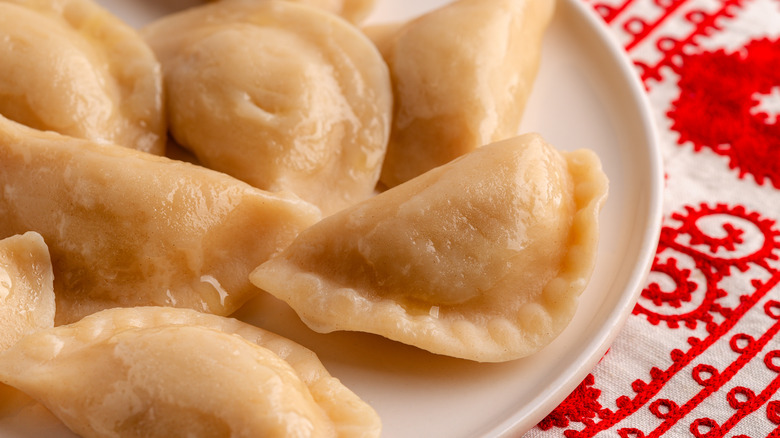
You've certainly picked up a pack or two of frozen pierogi at the supermarket when you're on a time crunch and needed something quick for dinner. They cook fast in the oven or a pan, and they are great for a tasty dinner to feed the family. But they're certainly not anything like authentic handmade pierogi — especially not if you're of Polish descent, and have had the opportunity to try the real thing from a recipe passed down through generations. These small, filled dumplings trace back centuries to Poland, and have since developed cultural sweet spots in the United States, where people of all backgrounds enjoy them at local restaurants and festivals.
But if you've ever tried to make handmade pierogi, you know it's not an easy process. Unless you have a skilled pierogi maker in the family who can help you out, doing it alone can be overwhelming. There's the dough that needs to have the right consistency and thickness, the filling that needs to taste right and have a perfect texture, and so many other variables that can make or break authentic pierogi. That's why we're breaking down the top mistakes everyone makes when cooking pierogi, so that you can avoid disappointing your Polish grandma with your pierogi-making skills, or lack thereof.
Not leaving ample time for pierogi making
It's unusual for people making pierogi to just make a small batch to feed one or two people. Instead, pierogi make more sense as a big-batch food, simply because they're so time-consuming. If you make more than you need, you can always freeze the extras for a couple of months.
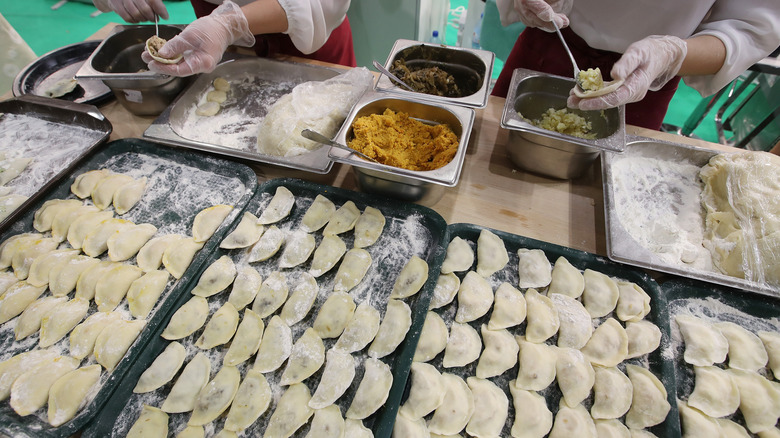
And trust us, you'll always stick with large batches after attempting your first pierogi-making spree. Handmade pierogi can easily take hours to make, with the hand-sealing of pierogi taking the most time. In fact, one of the most important parts of making pierogi is getting each one appropriately sealed to avoid burst dumplings. Between making the dough, cutting portions of dough to fill, sealing each pierogi individually, boiling, and frying, you'll easily consume a few hours of your day. Set aside at least three to four hours, depending on how quick your sealing skills are.
Even expert pierogi makers admit the process is tedious. For example, the Ukrainian restaurant Veselka in New York City uses a team of six professional chefs to produce 3,000 to 5,000 pierogi every day, but even those professional chefs begin their workday at 8 a.m. to ensure they can complete the entire batch.
Going overboard with eggs
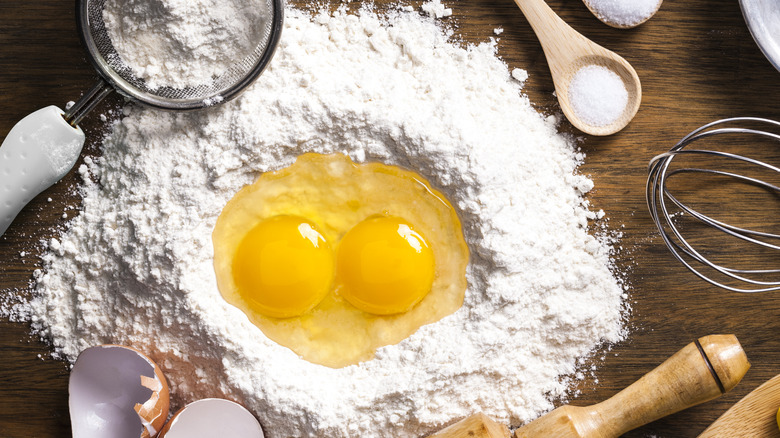
The most basic dough is usually made from flour, water, and salt. Some recipes also use eggs, butter, shortening, and similar creamy ingredients to vary the texture of the dough. Many of the best pierogi recipes call for an egg, usually substituting a little of the dough's water for a whole egg or egg yolk. This can help bind the dough together, ensuring it's firm and strong enough to hold all that yummy pierogi filling in.
However, it's crucial to only stick with an egg or two, depending on how much dough you make at one time. Adding too much egg can cause the dough to become firmer than expected, which can make pierogi turn out tough rather than the delicate, pillowy dumplings they're intended to be. Alternatively, you can skip the eggs in a recipe altogether, and add a little more water to give the dough a lighter, airier texture.
Not adding a little dairy to the dough
Pierogis can be made with the most basic dough with just some flour, salt, and water. However, authentic pierogi dough typically has a little more pizazz than you're standard dough. Often, that's because there's some dairy added, usually taking the place of some of the water. While water does a great job at combining the flour and salt together to form a dough that's easy to knead and roll out, it doesn't add any flavor. It won't hurt the final product to just use water, but you might find that adding some flavor with dairy makes your pierogi taste more like the way you want them to.
Sour cream is a popular addition for that reason. It takes just two or three tablespoons of sour cream in a batch of pierogi dough to add that slight, savory flavor while also making the dough a little springier. Some people choose to add a small amount of milk instead of sour cream, which is a good choice if you prefer rich dough. Butter is another option that creates a buttery-flavored dough that really shines when pierogi are seared after boiling.
Kneading the dough too much
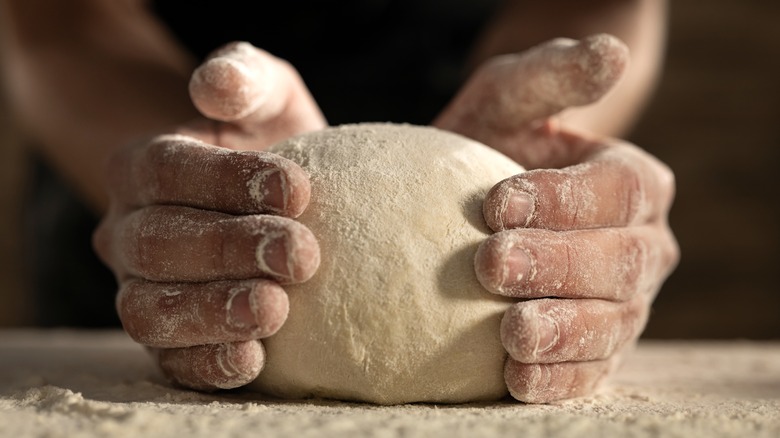
Pierogi dough must be strong enough to hold filling in well and maintain its shape while boiling, yet soft enough to remain tender and pillowy in every bite. That's a difficult balance to strike, which you know all too well if you've ever attempted to make a batch of homemade pierogi.
If you want to replicate the magical hands of all the great pierogi makers of generations past, there's one important tip to remember: do not overwork the dough. In other words, avoid kneading pierogi dough too much. Kneading helps combine all the ingredients to make the dough solid enough to work with. However, when you knead for too long, you'll risk making the dough too firm.
Ideally, pierogi dough is soft and pliable, with a little springiness when you touch it. If your dough doesn't spring back at you, and is difficult to stretch or roll, there's a good chance you've overworked it. If you find it challenging to combine the ingredients without kneading the dough too much, consider first mixing everything together in a food processor or stand mixer. Then, use your hands to knead the dough a few times, adding small amounts of flour at a time until it's no longer sticky.
Overfixing sticky dough with flour
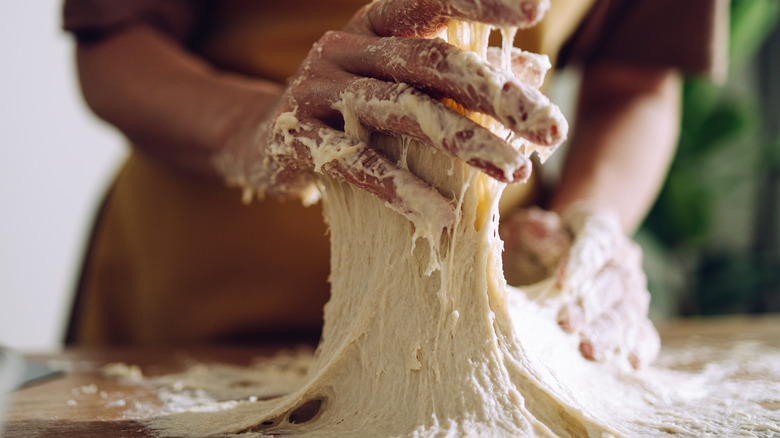
While some people run into the problem of over-kneading pierogi dough, making it almost impossible to stretch and roll out, other people run into an entirely different issue — not getting the dough to firm up enough. Often, this problem makes for sticky pierogi dough, which can be even more challenging to work with than an over-kneaded dough.
Your first thought to fix sticky dough is probably to add more flour, in which case you're not wrong. Adding small amounts of flour at a time to your dough is the right move as you continue to work the dough with your hands to combine everything together. Still, it can be easy to add too much flour if you're not careful, which dries out the dough and, again, makes it difficult to roll out and shape into pierogi. If you do go a little overboard, try adding a little bit of water as you knead it. An alternative trick that might fix sticky dough is to let it rest for about 10-20 minutes at room temperature. Sometimes, this is all that's needed to firm it up just enough to work with.
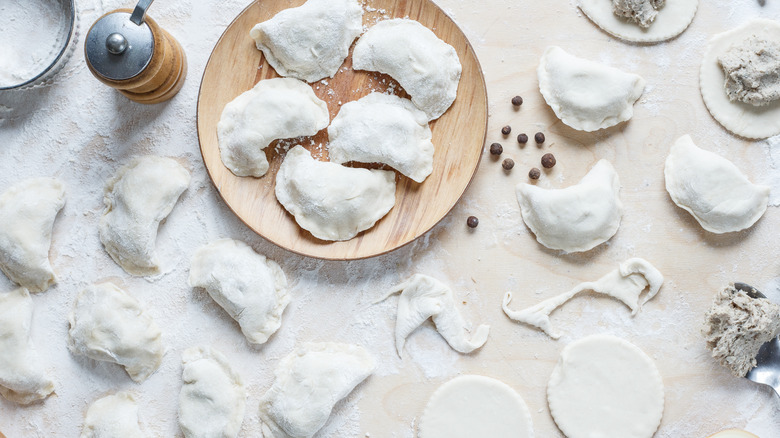
Not rolling the dough thin enough
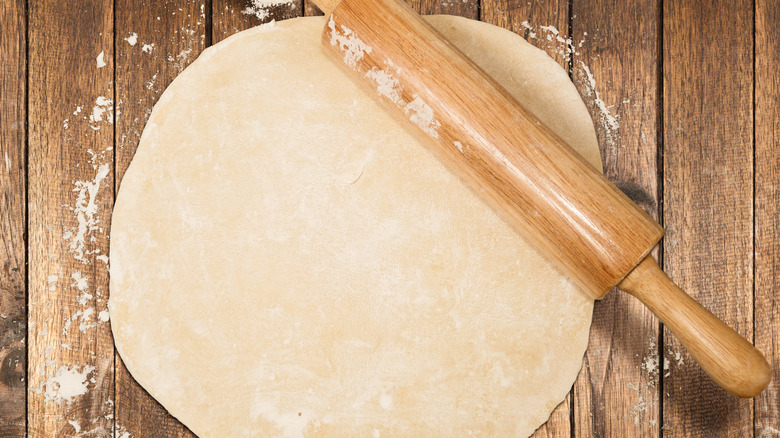
There's one thing we absolutely can't stress enough about pierogi making, which is that the thickness of your dough can make a world of difference in the final product. Keep it too thick, and the dough will likely overpower the taste of your filling. On the flip side, rolling the dough too thin could lead to pierogi that fall apart when sealing or boiling them. Getting the right thickness takes some practice, so don't feel discouraged if you don't master it the first, second, or even fifth time you attempt handmade pierogi.
For instance, a YouTube video from MakingPierogi shows the step-by-step process of rolling out pierogi dough properly, reminding viewers that, "People eat pierogi for the filling and not the dough." The video shares the technique of starting the rolling pin in the middle of the ball of dough, and rolling it out to the edge, forming a thin circle. When it's thin enough, you should be able to hold it up to the light to see some light shine through while the dough still maintains its strength and shape.
Cutting uneven portions of dough
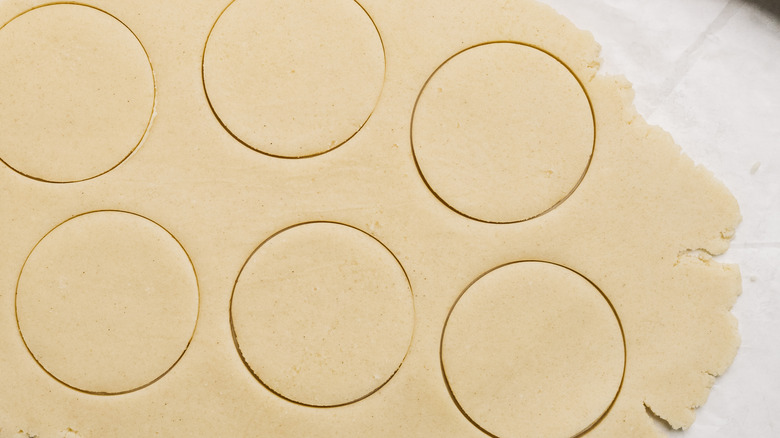
Authentic handmade pierogi have something very noticeable in common: they're all strikingly similar in appearance with the same size and shape. This results from the time and care put into making pierogi, whether creating a small batch for a couple of people, or a massive batch for a family gathering. And that consistency stems from the dough-cutting technique.
It's best not to eyeball your dough cuts for each pierogi. Instead, use a two-inch circular cookie cutter to do the job. If you don't have one, use the rim of a glass that's a similar size. This way, you'll get consistent dough cuts to keep all of your pierogi sized properly. Using this technique makes the final batch of pierogi look amazing, and makes you look like a true pierogi-making expert. More importantly, it also leads to more accurate cooking times for each batch you boil.
Making filling that's too runny
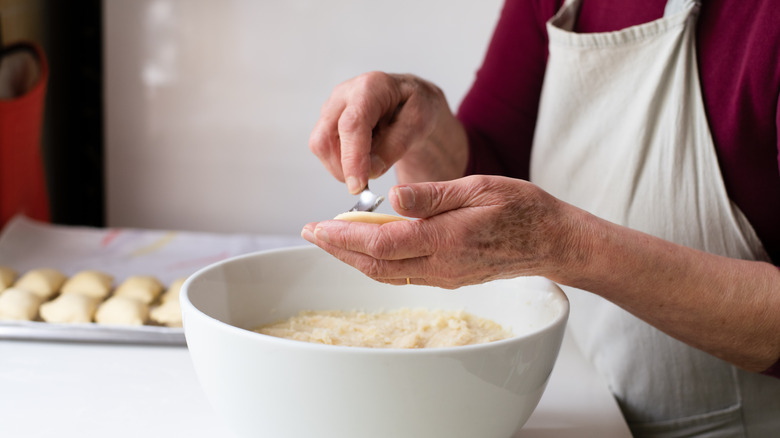
The most common homemade pierogi filling is a mixture of potatoes and cheese, although there are numerous variations pierogi-making families and enthusiasts experiment with. For instance, some people prefer a potato and onion mix, while others like to fill their pierogi with cabbage. There really isn't any wrong way to fill a pierogi, but whatever you decide to add to the middle, make sure it isn't runny. Leaky fillings and pierogi dough don't mix well.
Because pierogi dough is very thin, it's not super strong. However, it needs to hold in filling well to keep everything together when boiling. Therefore, your filling must be firm enough to not interfere with the dough's job as the filling's supporter. If you're using mashed potatoes for the filling, for example, a spoonful of them should sit firmly on their own in the middle of the dough circle without puddling anywhere else. Similarly, a cabbage filling should be drained of liquid to prevent it from seeping into the dough, and interfering with its strength.
Failing to seal them properly
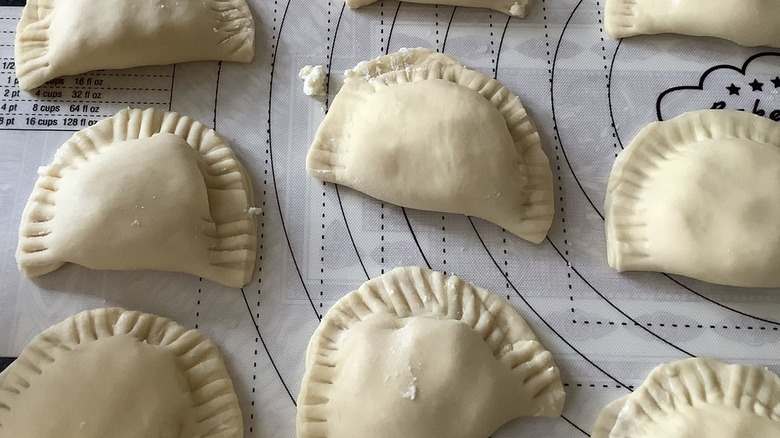
After the dough-making and filling process, the next step in pierogi making is boiling each pierogi to actually cook them and make them edible, similar to cooking homemade pasta. Are you having trouble keeping your pierogi together when you boil them? If so, you're not alone. This is one of the most difficult parts of making pierogi, and it usually stems from not sealing pierogi properly before boiling them.
The first thing to check is whether you're overfilling your pierogi, as this can make sealing them more challenging. How much filling you add depends on the size of each dough round. You should be able to place your filling directly in the center of the dough round, and have enough dough left over to allow the ends to touch when you fold the pierogi round in half.
Now, let's talk about the actual sealing technique. One of the most popular methods is the fork-press seal. For this technique, fold one side of a pierogi circle over the filling and to the other side, making the ends touch. Gently press the ends together in several spots using your fingertips. Then, place the pierogi on the table, and use a fork to press the ends together until the full half-circle is sealed. Alternatively, you can use your fingertips to pinch the ends together, moving along the half-circle until it's sealed all the way across.
Misjudging the boiling time
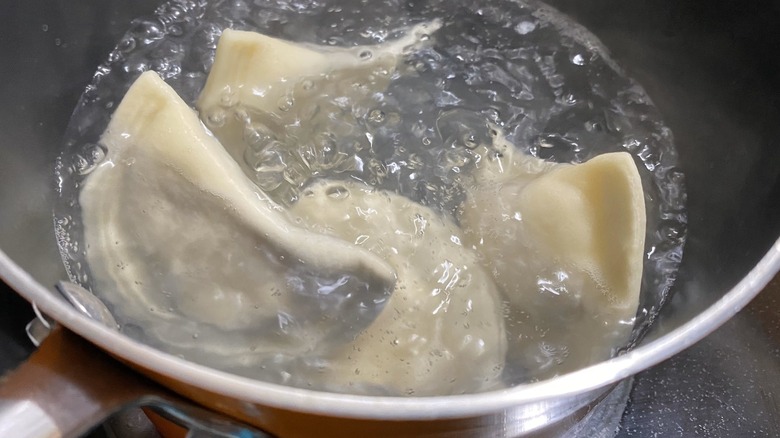
Boiling pierogi is a necessary step in the pierogi-making process before you do anything else with them, whether you prefer yours baked, air-fried, or pan-seared. Boiling cooks the dough itself, essentially turning it from dough into more of a pasta-like texture. Once pierogi is done boiling, they're technically ready to enjoy, unless you go a couple of steps further with additional toppings or cooking methods.
Like most homemade pasta, pierogi only take a short time in boiling water to cook. Not leaving them in long enough can result in tough, chewy pierogi. However, leaving them in too long will likely cause them to become too tender, usually leading to burst, leaky pierogi. The sweet spot is generally about 3 minutes once the water begins to boil. You'll notice the dough become less dough-like and more pasta-like, turning somewhat translucent and shiny. Also, remember this important tip that most seasoned pierogi-makers use when boiling pierogi: Pierogi that's ready to be removed from boiling water floats to the top, signaling the cooking process is complete.
Not crisping them up
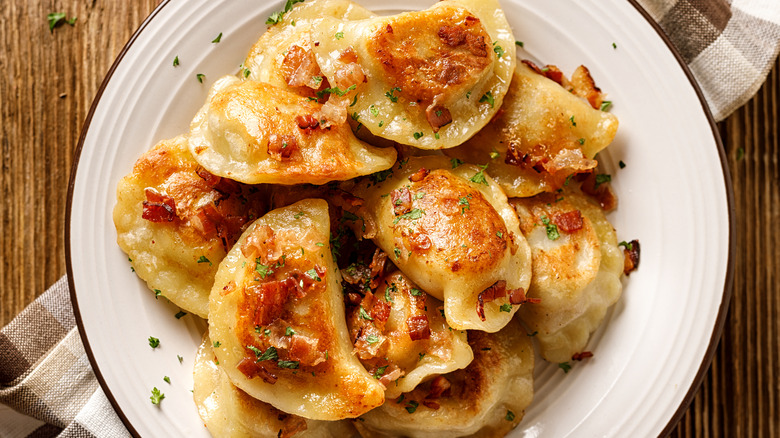
Some people prefer to eat pierogi straight out of a pot of boiling water. They're cooked at that point, so why not? Although we're also tempted to enjoy these pillowy, filled dumplings as quickly as possible, we also know that one extra step can take them from delicious to extraordinary. If you haven't yet tried pan-fried pierogi, you haven't yet experienced them at their ultimate flavor potential.
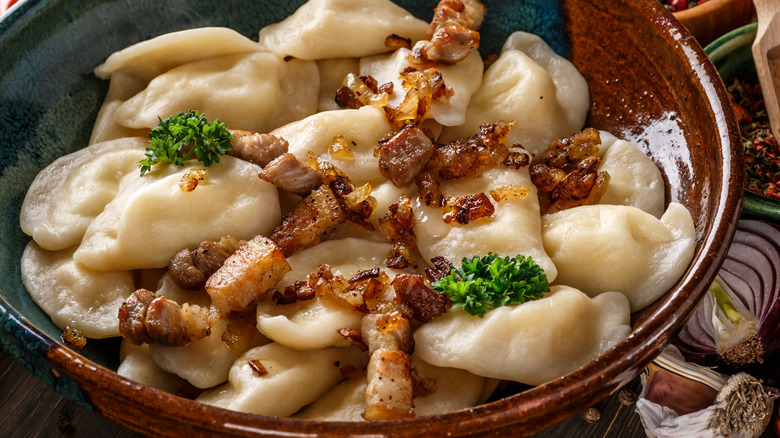
After boiling pierogi, fry them in a pan with butter over medium-high heat for just a couple of minutes on each side, until they reach a crisp golden brown. Be sure not to overcrowd the pan, giving the pierogi enough room to lay flat and get a good sear. Allow the pierogies to cool for a couple of minutes before serving. This simple step adds a slight crunch and a whole lot of flavor to pierogi. Chef's kiss! If you prefer, you can also bake or grill pierogi to crisp them. Just add melted butter to both sides of each pierogi, and add them to a tray covered with lightly greased aluminum foil. Bake for about 10 minutes on each side, or grill for 4-8 minutes on each side.
Trying to cook too many at once
We've touted the benefits of making large batches of pierogi rather than small batches because pierogi take a decent amount of time to make. Making more than you need and freezing the extras could save you time when you want homemade pierogi. Still, if you're doing a large batch, you'll want to break that batch down into smaller batches when you're ready to start boiling and searing them.
Pierogi needs ample space in a boiling pot of water for its dough to cook properly. Similarly, each pierogi needs enough room to lay flat to get a good sear in a frying pan. Therefore, it's helpful to form an assembly line process with a few pierogi at a time. For example, you might use a rotating batch of six pierogi. In other words, six pierogi fry in the pan, while a different six pierogi boil, and another six pierogi rest after boiling. As a result, you keep the pace of making a large batch while ensuring that each small batch of pierogi gets the right amount of attention.
Not getting creative with filling or toppings
Traditional Polish pierogi (compared to American pierogi) is usually stuffed with some variation of mashed potato, meat, or cabbage. But it's not against the rules to get creative. After all, they can hold all kinds of filling, whether you're craving something savory or sweet. And, don't forget about the pierogi's outside, which can be dressed up to add extra flavor.
If you want to go more savory, consider filling pierogi with sausage or ground beef and some ricotta cheese, topping them off with marinara sauce for an Italian-inspired dish. Or, fill pierogi with shredded chicken, and top them with a creamy alfredo sauce. Some pierogi lovers also experiment with other popular dips and sauces, like ranch, barbecue sauce, or hot sauce.
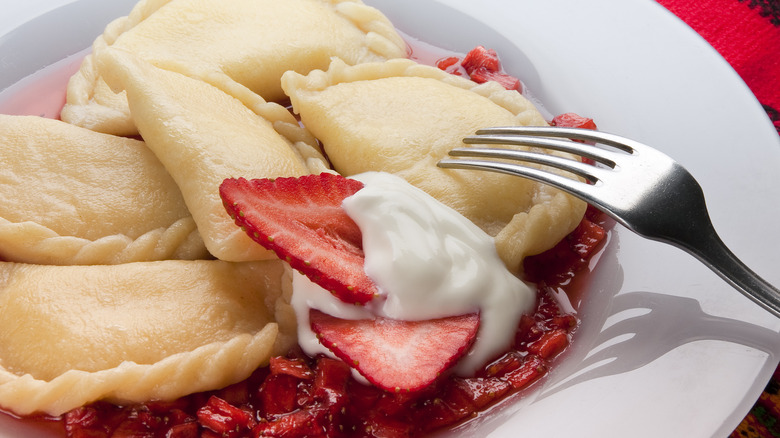
Pierogi can also go in the opposite direction as a sweet dessert. Fill them with creamy chocolate, and sprinkle with powdered sugar or drizzle honey on top. You can also turn pierogi into mini fruit-filled pies, using the same filling you'd use for apple, blueberry, strawberry, or your other favorite pies. Or, place some cottage cheese-filled pierogi in a bowl of yogurt with sliced strawberries to enjoy for brunch.