I Tried 7 Different Ways To Make Frozen Chicken Strips. Here's How They Ranked
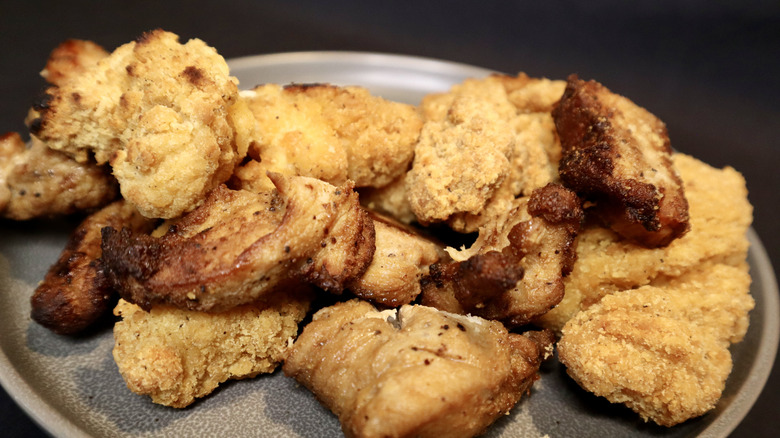
Everyone loves a good chicken tender, right? While most would agree that the tender and the nugget are different but closely related, the ridiculous amount of chicken nuggets McDonald's sells each year would back up the claim that people really enjoy dippable chicken. From fast food to the freezer, there are plenty of ways to enjoy a tender, but also plenty of ways to cook one, too.
Most breaded chicken tenders include cooking directions for the oven, air fryer, and microwave on their packaging, but the possibilities stretch beyond those three methods. What is the best way to cook a frozen chicken tender? To answer the question, I picked up two types of Tyson tenders — one breaded and one not — and put them through every reasonable cooking method I could think of. From the air fryer to the grill, the toaster oven to a deep fryer, I cooked both types of chicken seven different ways to find out which methods are worthy of the almighty tender and which you should definitely avoid.
Methodology
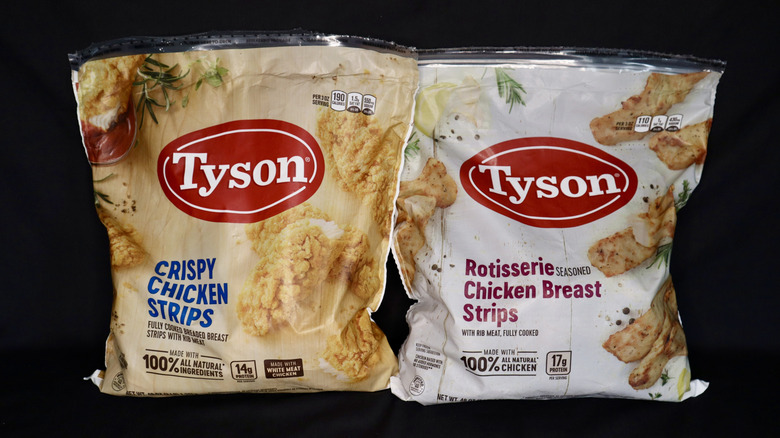
I purchased two bags of tenders for this experiment: Tyson Crispy Chicken Strips and Tyson Rotisserie Chicken Breast Strips. The Crispy Strips are heavily breaded, while the Rotisserie Strips are breading-free. For each cooking method, I did my best to select a similar-sized piece of chicken from the two bags to test. Since both varieties were pre-cooked, there was no specific internal temperature recommendation for cooking, so I aimed for between 155 degrees Fahrenheit and 160 degrees. (Remember, raw chicken should be cooked to at least 165 degrees.)
I snapped photos of the sets of tenders as they cooked. My final evaluations of each method took into account the taste and texture of both tender styles. I also factored in how much or little work a method required and the total time needed for prep and cooking.
7. Baked in the oven
That's right, one of the recommended cooking options for both breaded and non-breaded tenders is probably the most disappointing. Most of the methods are better for one style of chicken tender or the other, but shockingly, the oven simply wasn't great for either. The Rotisserie Strips called for a temperature of 375 degrees for 18 to 20 minutes. The Crispy Strips upped the temp to 400 for the same amount of time, with the added instruction to flip the chicken at the halfway mark.
Both styles are intended to be cooked from frozen, and while oven temps will vary slightly and the pan color can also have an impact, I found that both took a bit longer than the advertised time. In the end, the Rotisserie Strips came out drier than most other cooking methods, while the Crispy Tenders lost some of that all-important outer texture. They remained juicy enough, but given the time commitment of preheating the oven followed by cooking for close to 25 minutes, the oven results were simply too underwhelming to be worth the effort.
6. Microwaved
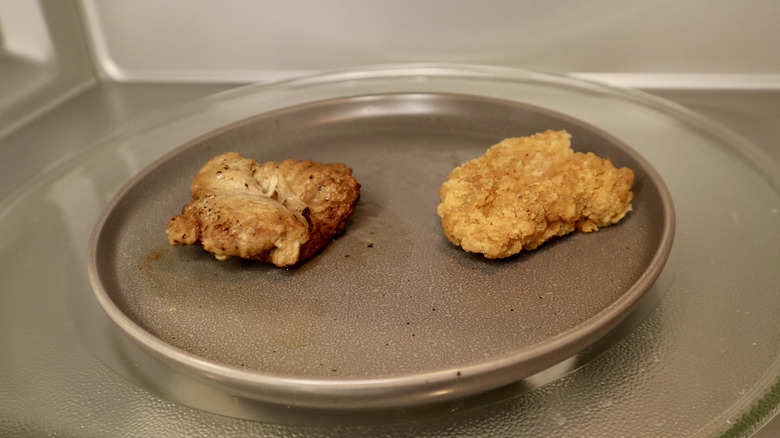
While the oven delivers serviceable, but lackluster results, the microwave is truly a tale of two tenders. First, it's important to understand how a microwave cooks your food. The short version is that water molecules in the food absorb electromagnetic radiation (microwaves). As those molecules absorb the radiation, they begin to vibrate faster and faster, emitting heat. In short, moisture is necessary for a microwave to work. Thankfully, chicken has plenty of moisture, which is why the Rotisserie Strips are perfect for this method.
The directions for the Rotisserie Strips call for two to four strips on a microwave-safe plate, covered with microwave-safe wrap, and heated on high for two to three minutes, with a minute or two to cool down after cooking. I, like most people, don't have microwave-safe wrap on hand, so I just cooked my tenders solo and the results were fantastic. The chicken came out extremely juicy and flavorful, with minimal cooking. Compared to the oven's time commitment, this is a no-brainer.
Unfortunately, the results of the Crispy Tenders were less positive. I was surprised to see microwave instructions for these — roughly one minute per strip on a plate — given that they're breaded. If you've ever tried to microwave any kind of breading, you know the end result is always soggy, and these tenders were no different. A puddle is the last thing you want surrounding a crispy tender, so while the microwave works for one style, it most definitely does not for the other.
5. Pan fried
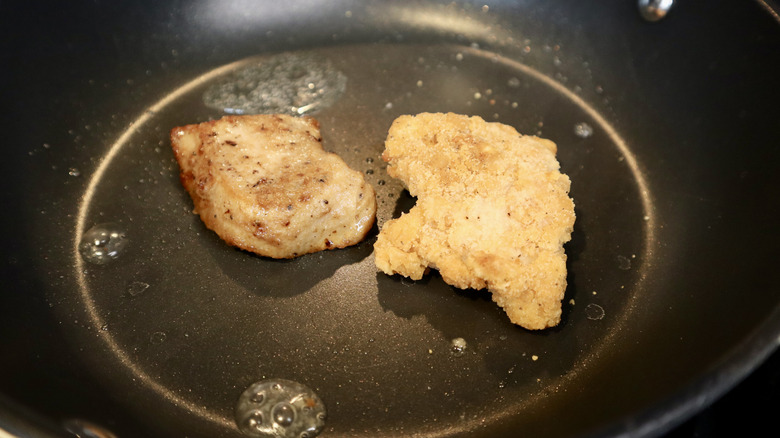
As instructed by the Rotisserie Strips packaging, I poured 1 tablespoon of cooking oil and 1 tablespoon of water into an unheated skillet, followed by my strips. (Given the lack of instructions for the breaded tenders, I did the same for them as well.) Over medium heat, I covered and cooked the chicken for about four minutes, then removed the cover and flipped them. I heated them for an additional six minutes, at which point, the centers of both pieces were still frozen.
Given that the pan was cold when this all started, it's hard to be surprised. Ten minutes in a pan warming on medium heat is hardly enough to cook anything, let alone frozen meat. I re-covered the pan, and after another four minutes, the Rotisserie Strips finally hit temp. The breaded ones, however, took much longer.
The end results were the very definition of fine, if not overly exciting. The Rotisserie Strips were fairly juicy with a little bit of additional color on the outside. The Crispy Tenders actually ended up even crispier, and the inside was juicy, but the process was hardly smooth. With no definitive directions, I spent a lot of time babysitting the Crispy Tenders to make sure they warmed through without burning. There's a reason breaded tenders don't come with instructions for stovetop cooking: It's not worth the effort.
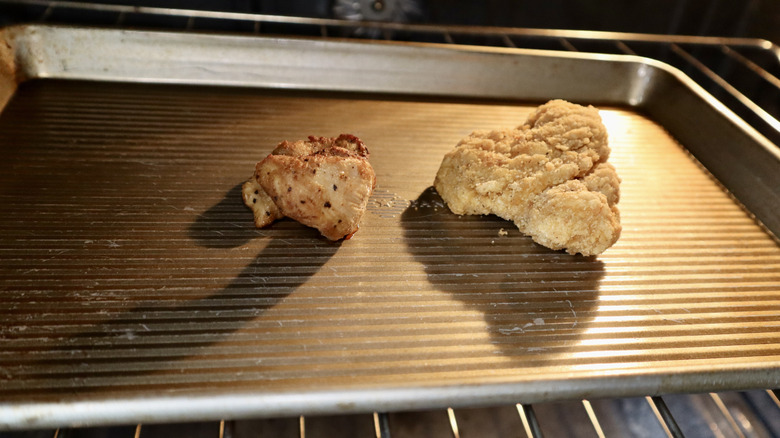
4. Cooked in the toaster oven

Consider the toaster oven the more efficient version of the real oven. It makes sense, given the difference in scale, that a toaster oven would heat up a lot faster than an oven, so any and all preheating time can be removed from the equation. Neither set of tenders had instructions for a toaster oven cook, so I opted for 375 on the conventional cook setting. Rather than utilizing the adorable little pan that comes with most toaster ovens, I cooked my tenders on the toasting rack, and overall, the results were worth repeating if you're low on other options.
While I thought both tenders began to dry out in the conventional oven, the toaster oven kept the chicken moister. The crispy breading still didn't turn out as crunchy as I would have hoped, but there was also no halftime flip needed since the meat was being cooked evenly from both sides on a rack rather than in a pan. If you're in a pinch and the toaster oven is your only option, you could do far worse to prepare a chicken tender.
3. Grilled
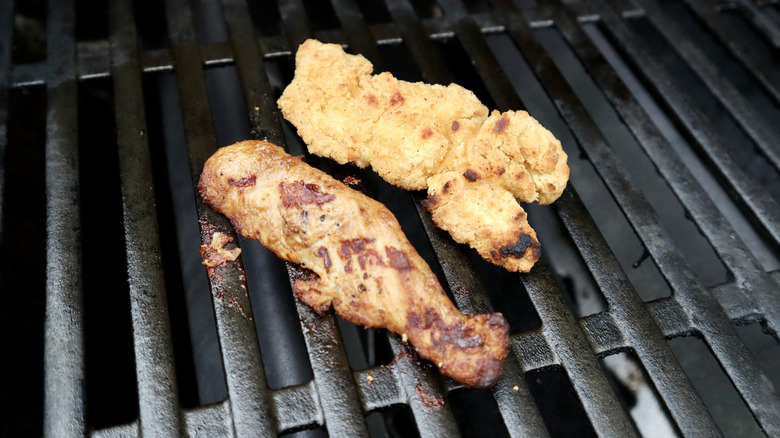
This is where we get creative. Grilled chicken is a barbecue staple, but I haven't seen many folks toss a pre-cooked, frozen chicken tender over the coals. I have a gas grill, so it was fairly easy to fire it up and set the temperature to 375. After oiling the grates to prevent sticking, I tossed each tender on and waited. In total, the cooking time was around 10 minutes with a few flips throughout to ensure even cooking. My grill is nothing special, so the temperature fluctuated between about 375 and 400 during the cook, depending on how long the lid was closed for between my check-ins.
The Rotisserie Strip is definitely better suited to being cooked over an open flame than its breaded counterpart. The added grill marks were fun and the chicken remained moist, making this a viable option if you're looking to placate a picky eater at a summer barbecue. The Crispy Strips were a little trickier to cook since the breading required more monitoring, but the final product was actually really good. The smoky grill flavors found a home in the breading, which became extra crunchy. There was a bit of char on one spot where the breading was thicker, but it added to the experience. I'm not sure I'd want to babysit a full meal's worth of breaded tenders at once, but as a one-off, the grill is a fun way to cook a tender.
2. Deep fried
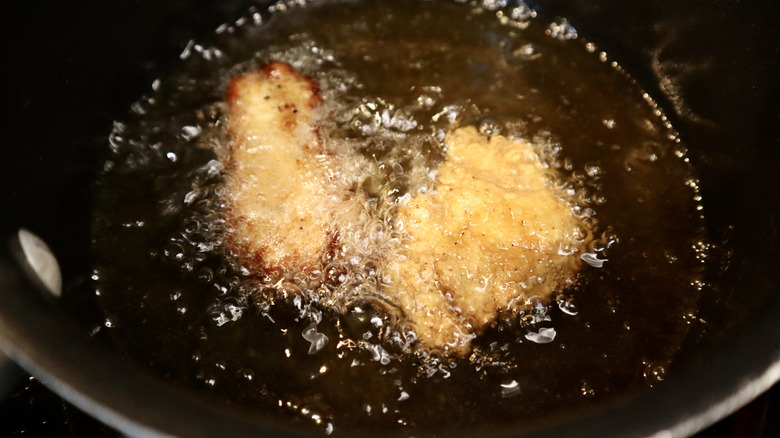
There really is no good reason to deep fry a breaded chicken tender, but science demands sacrifice. Once again, and unsurprisingly, neither tender offered instructions for this cooking method, so I turned to a Mashed recipe for copycat KFC chicken for instructions. After heating my vegetable oil to 350 degrees, I carefully dropped two tenders in and watched the show.
If you've ever fried anything in oil, it's a wonderful visual and audio experience as the oil pops and bubbles. Toss anything frozen into oil — and once again, do so very carefully — and that show gets turned up a few notches. Both pieces cooked hilariously fast, and in just under two minutes, I had two piping-hot pieces of chicken.
The Rotisserie Strips came out quite a bit darker with a pleasing crisp along the exterior, while the interior remained tender. Adding oil isn't the healthiest option, but it is tasty. As for the Crispy Strips, if you enjoy that first bite of Captain Crunch that absolutely destroys the roof of your mouth, this is the tender prep method for you. The crispiness more than doubled, but the meat inside was cooked to perfection. That much crunch is a lot to take in, but there's no denying how fun it was to hear the sound of each bite before reaching the juicy chicken center.
1. Cooked in the air fryer
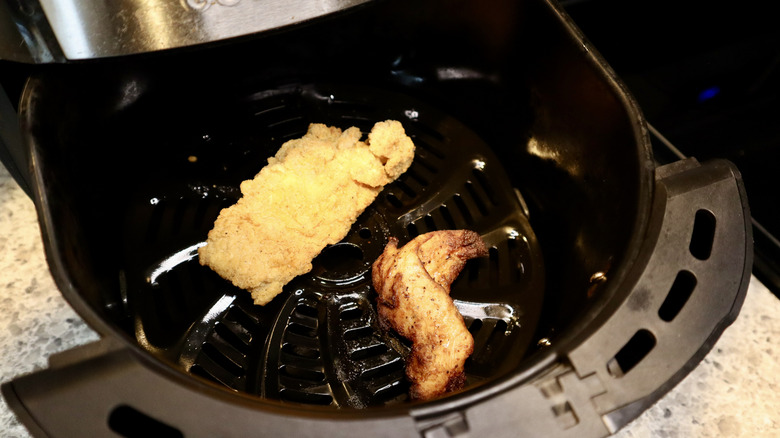
It's a bit anticlimactic, but the best method for cooking any type of chicken tender is the one many of us already use. The air fryer is a miracle appliance capable of cooking veggies to perfection and reviving leftover pizza like no other piece of kitchen equipment.
The instructions for the strips were similar, with only a 10-degree separation in cooking temperature. The Crispy Strips call for 360 while the Rotisserie Strips require 350. In order to cook my two strips together, I split the difference at 355. The Rotisserie Strips cook faster, with the bag identifying a seven to nine minute cook time, which was pretty close, as mine took an even 10 minutes. The Crispy Strips indicate a range of 11 to 12 minutes, and mine took 14 minutes to reach the desired temperature.
The final products were what I imagine a home-cooked chicken tender to be. The Rotisserie Strip was tender and juicy with just the slightest bit of crisp around the edges. Meanwhile, the Crispy Strip was crispy, crunchy, and tender throughout. When it comes to cooking a frozen chicken tender, no matter the style, the air fryer is unmatched in both efficiency and results.