This Is How You Make Tempered Chocolate

We may receive a commission on purchases made from links.
As any fan of the Bon Appétit series "Gourmet Makes" can tell you, tempering chocolate is much easier in theory than it is in practice, even for a professional pastry chef like Claire Saffitz (via Vulture). It's still important, however, to understand the theory before breaking down the steps and adding in tips to get a better outcome.
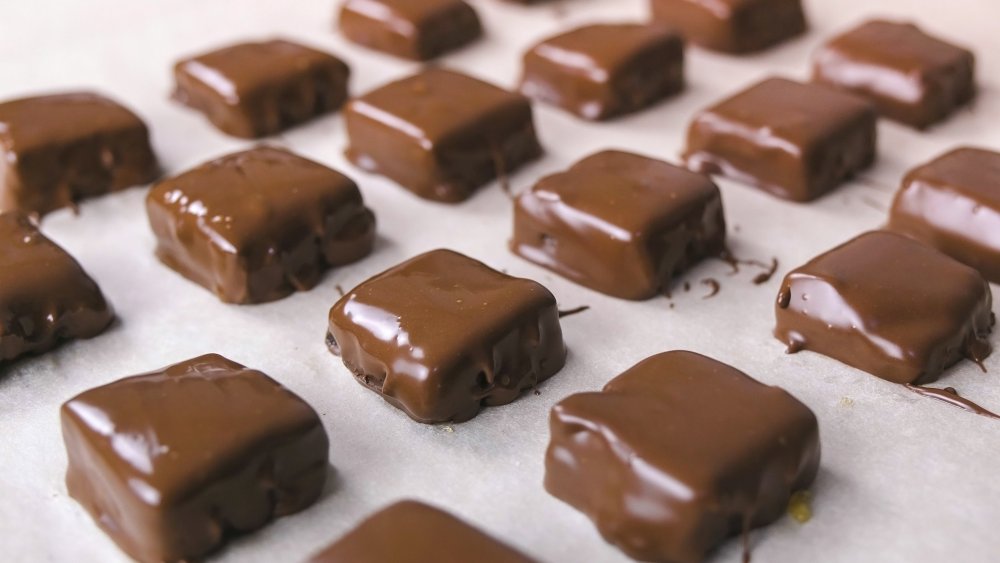
Tempering chocolate is the process of slowly heating and then cooling the chocolate to specific temperatures so that, when it sets, the chocolate becomes smooth, shiny, and has a nice snap when you break it apart (via epicurious). If you don't bother tempering the chocolate, the results could include a dull appearance peppered with white streaks of separated cocoa butter running through it, and a rough, or even chewy, final texture, rather than one that melts in your mouth. This difference can be enough to ruin a dish you spent all day preparing. It can also cause those treats to melt more easily and spoil sooner than if you had taken the time to temper, so here's how to do so without losing your temper.
How to temper chocolate perfectly every time
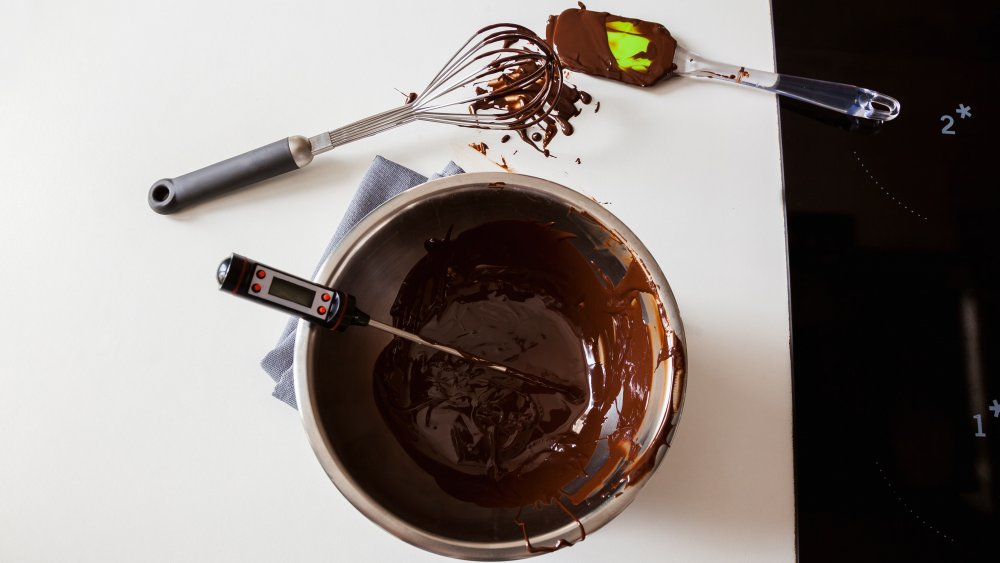
The first thing you should know about tempering chocolate is that the more chocolate you use, the easier it is to control the changes in temperature, so it's good to start with about one-and-a-half to two pounds of chocolate. First, melt two-thirds of the chocolate over a double boiler while stirring regularly and keeping an eye on the temperature with a candy thermometer; it shouldn't exceed 120F for dark chocolate or 105F for milk or white chocolate. Once it reaches this temperature, remove the bowl from the double boiler and add the remaining third of the chocolate, stirring vigorously until it has fully melted and the temperature cools to about 82F. Then, return the bowl to the double boiler, continue stirring, and heat the chocolate back to about 90F for dark chocolate or about 86F for milk or white chocolate before removing it from the heat once again.
To test your chocolate and make sure it's properly tempered, spread a small amount out thinly on a piece of wax paper. It should set quickly, appear smooth and glossy, and snap when you bend it. If it does, your chocolate is tempered and ready to use, but be sure you use it before it cools fully and sets.
If all of this sounds a little too complicated, there are a few ways to make it easier.
Shortcuts to tempered chocolate
After several videos where tempered chocolate proved her downfall, Bon Appétit's Claire Saffitz found a method that is simpler and more consistent for tempering chocolate. The downside? It involves some expensive equipment (via YouTube). First, you'll need a vacuum sealer to contain your chocolate while you submerge it in the water bath. Then, a sous-vide (French for "under vacuum") slowly brings the chocolate to the necessary temperatures and agitates the water, so all you need to do is submerge the vacuum-sealed chocolate and weigh it down so it doesn't float to the surfact. Unfortunately the sous-vide Saffitz uses costs between $129 and $199, depending on the model you buy (via Anova Culinary). The vacuum sealer will likely run you another $70-$180 (via Amazon).
If you're looking for a cheap and easy approximation of tempered chocolate, you can always try candy coatings, which are a chocolate flavored candy that contains vegetable fats instead of cocoa butter, causing them to be more stable at room temperature (via the Spruce Eats). Some confectioners even add paraffin wax to chocolate to create that shiny finish and firm snap, but this isn't advisable since wax isn't food.