Bacon Wrapped Grilled Cheese
A grilled cheese sandwich is a classic yet iconic go-to for lunch, dinner, or a snack. It's incredibly simple, yet the cheesy, decadent goodness keeps people running back again and again. What if you could take that classic grilled cheese and take it up a notch? Thanks to the addition of bacon, your next grilled cheese can upgrade to a fun and incredibly delicious spin on the classic dish without sacrificing any of that cheesy goodness.
Recipe developer Ting Dalton at Cook Simply has crafted an incredibly simple yet effective recipe for a bacon wrapped grilling cheese, and it's just as decadent as it sounds. "This isn't a healthy sandwich in the slightest, but it's worth trying," Dalton explains of the sandwich. "We should have a treat now and then, and if you love grilled cheese, then you'll love this." If you're looking to turn your next grilled cheese into a savory treat, then follow this bacon wrapped grilled cheese recipe to add a simple but crave-worthy twist to the classic sandwich.
Gather your simple ingredients to make a bacon wrapped grilled cheese
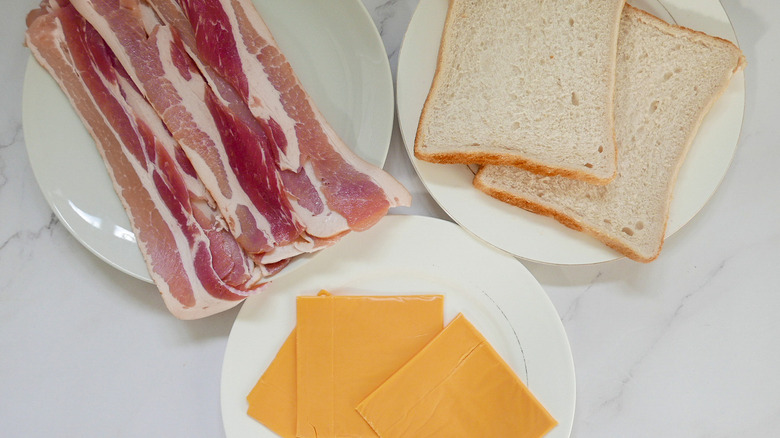
One of the best parts of this bacon wrapped grilled cheese recipe is that the ingredients are incredibly simple — in fact, there's only three of them! If you have white bread, bacon, and some kind of sliced cheese laying around the kitchen, then you're ready to go on this recipe. Dalton used mature cheddar cheese for the recipe, though she notes that you can use your favorite kind of sliced cheese to personalize the recipe and adjust it to your flavor preference. She also notes that you could add mustard to the sandwich "if you like a bit more of a kick," though this ingredient is completely optional.
Start your bacon wrapped grilled cheese sandwich with the bread and the cheese
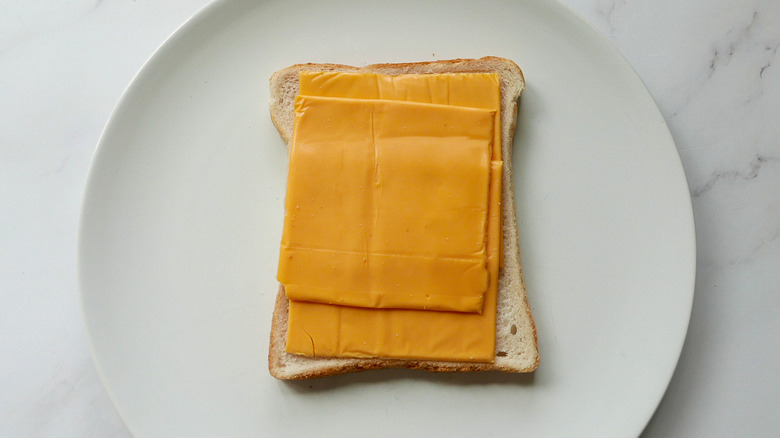
To begin making your bacon wrapped grilled cheese, you'll start by prepping like it's a regular grilled cheese sandwich. Grab your two slices of bread and place your cheese in between the slices, forming a sandwich. You can use as much or as little cheese as you'd like, but you'll probably want at least two or three slices to ensure there's plenty of gooey cheese to stand up alongside the bread and the bacon.
Begin to wrap the sandwich in bacon
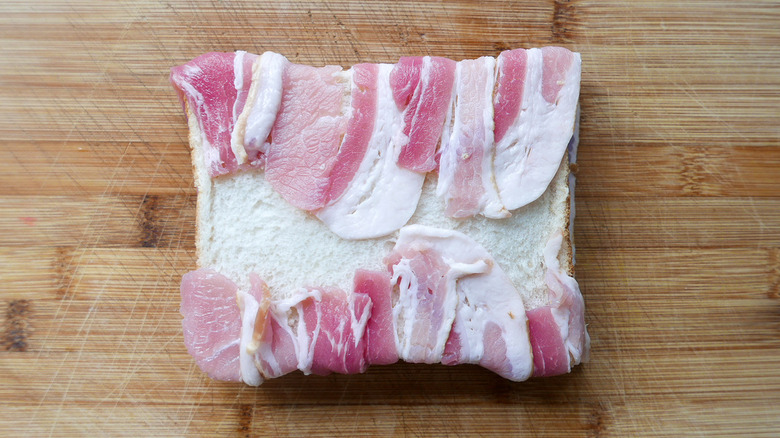
After you fold your sandwich together, you can begin wrapping it with the bacon. You'll start by laying out five strips of bacon vertically and then placing your sandwich in the middle of the strips. Carefully fold over the ends of the bacon so they rest on the other side of the sandwich.
According to Dalton, this step is the most difficult in an otherwise simple recipe, but moving slowly and steadily will ensure that your sandwich comes out correctly. "Wrapping the bacon can be a little fiddly," she explains. "Just take your time. And if you need the bacon to hold better, you could always butter the outside of the bread slices so the bacon will stick better."
Wrap the other side of the sandwich with bacon
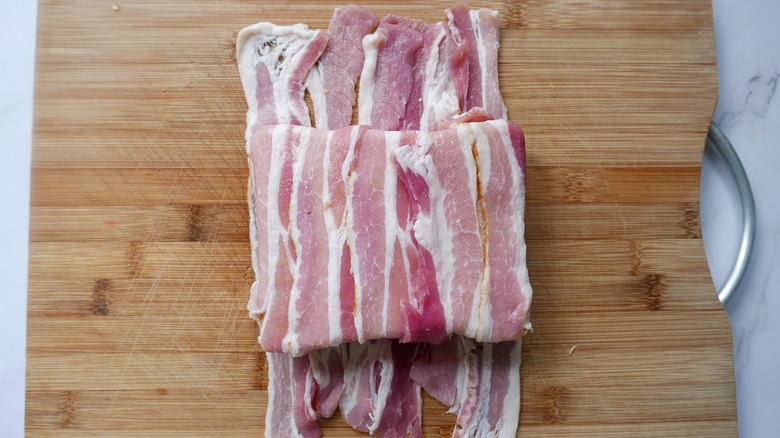
Once you've wrapped one side of the sandwich with bacon, you'll want to repeat that step for the other side. Lay out another five strips of bacon and then place your sandwich in the middle, with the uncovered side facing down. Wrap the bacon around the other side once again, and if you need to, use a little butter to help secure all the pieces in place. (It's not the healthiest hack on an already decadent recipe but it works!) Once you've finished wrapping the bacon, your sandwich should be completely covered.
Cook your bacon wrapped grilled cheese on the stovetop
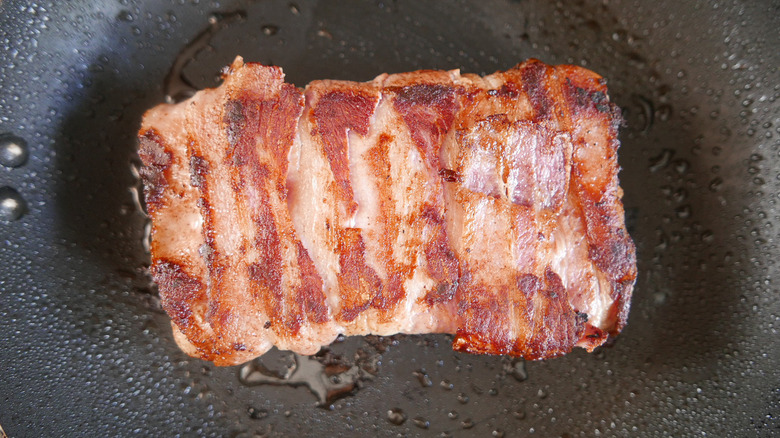
To cook your bacon wrapped grilled cheese, you'll simply heat a skillet on high and place your sandwich down in the pan. Using a spatula, press down on the sandwich — you should hear plenty of sizzling from the bacon. You'll want to keep the sandwich on one side until the bacon crisps up and is fully cooked, which should take about four minutes. From there, you can flip the sandwich and begin cooking the other side for another four minutes. You can also grab some tongs and turn the sandwich on the sides to cook those as well.
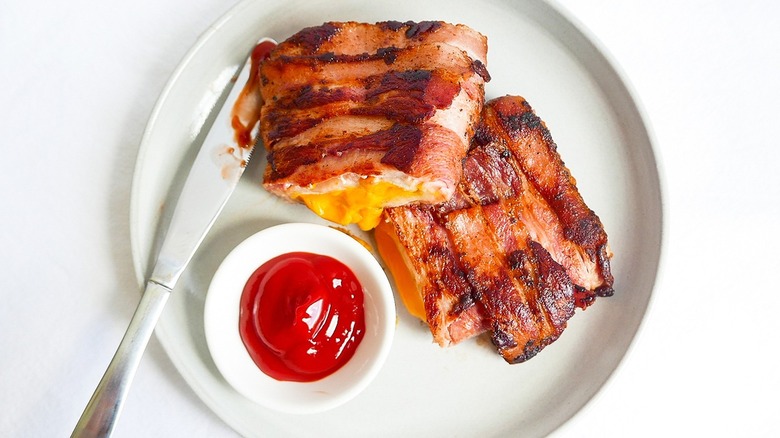
Slice your bacon wrapped grilled cheese and enjoy

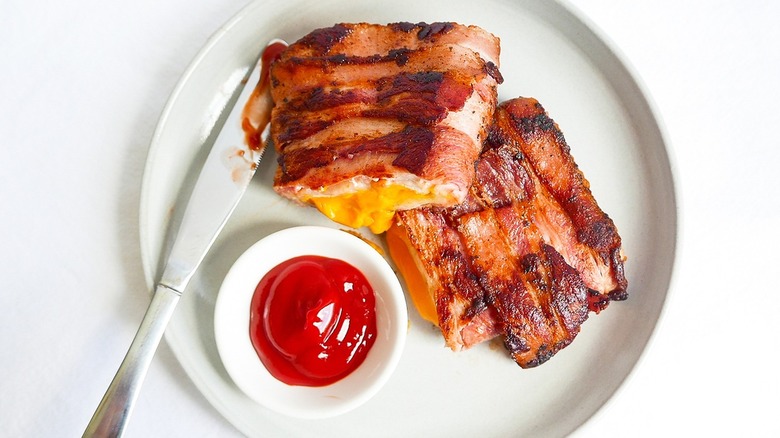
Once all of the bacon on your sandwich has cooked, you can remove it from the heat and slice it in half. You'll notice that the cheese in the middle has melted perfectly, resulting in a beautifully gooey center. "Salty crispy outside and a soft, gooey center," is how Dalton describes the unique texture of the sandwich. You can also add some ketchup on the side for dipping, but otherwise, this sandwich stands alone as a perfectly indulgent snack or meal!
Bacon Wrapped Grilled Cheese
We've all had grilled cheese, but have you had bacon wrapped grilled cheese? The classic sandwich gets a savory upgrade with the addition of bacon.
Ingredients
- 10 slices of bacon
- 2 slices of white bread
- 2 to 3 slices of cheese of your choice
Directions
- Get your pieces of bread and make a sandwich with the cheese slices.
- Next, lay five bacon strips vertically together.
- Put the sandwich in the middle of the strips. Then carefully, fold over the ends.
- Lay another five bacon strips and repeat the process above, but this time you want the uncovered side to be put down first on top of the bacon. Pull the ends over again.
- Heat a skillet on high heat and carefully place the sandwich in the pan. Using a spatula you want to press down on the sandwich. Cook the bacon until it starts crisping up and browning -- around four minutes.
- Then carefully flip it and cook the other side. You can also use tongs to brown the edges in the pan, too.
- Remove from the pan, cut, and enjoy.
Nutrition
| Calories per Serving | 1,648 |
| Total Fat | 140.7 g |
| Saturated Fat | 52.6 g |
| Trans Fat | 1.2 g |
| Cholesterol | 262.8 mg |
| Total Carbohydrates | 32.9 g |
| Dietary Fiber | 2.3 g |
| Total Sugars | 6.5 g |
| Sodium | 2,665.2 mg |
| Protein | 59.6 g |