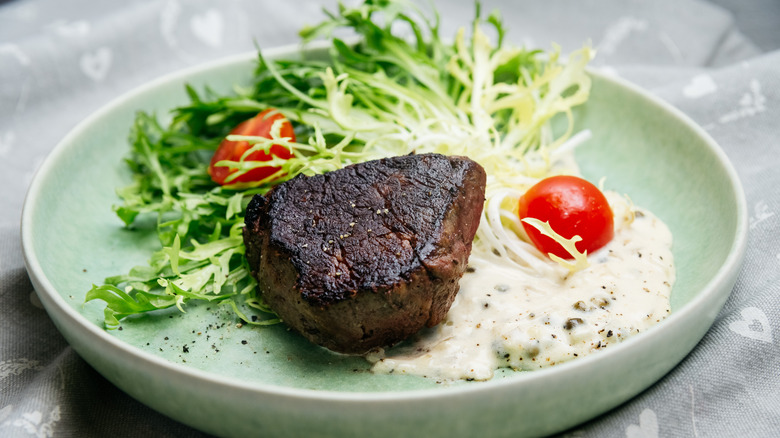
Mistakes Everyone Makes When Searing Meat
The differences between a well-cooked piece of meat and a poorly-cooked piece of meat are stark — and one of the key things that makes a well-cooked piece of meat stand out from a lesser option? The sear. Often overlooked by new cooks, or sometimes skipped over for the sake of time or to save on dirty dishes, the searing process is oh-so-important, whether you're cooking up a fine steak or searing some beef bits for a stew.
Perfecting a sear all comes down to a scientific process called the Maillard Reaction, a chemical reaction that transforms just about any item that you might be cooking to make it more biologically appealing; our prehistoric lizard brain looks at a piece of seared meat and recognizes that it's not only cooked well and safe to eat, but it's also filled with needed nutrients (via Serious Eats).
However, as is the case with any chemical reaction, it's all too possible to get the Maillard Reaction, and thus your sear, wrong. For your best chance at getting it right, here are 14 mistakes to avoid when searing your meat.
Not understanding the importance of searing meat in the first place
Sure, the Maillard Reaction is important and it might encourage your inner caveman (or cavewoman) to chow down on a hunk of juicy steak, but, otherwise, why is searing your meat important?
For starters, scientific studies have shown that seared beef cuts simply taste better. The Maillard Reaction transforms the sugars and proteins in your meat, for an entirely separate aroma and flavor experience than you might get with an un-seared piece of meat (via Serious Eats). If that's not reason enough for you to start searing your meat on a regular basis, it's worth noting that searing meat also helps to kill surface bacteria (in case you like your steak on the rarer side).
The one thing that searing your meat doesn't do, however? It doesn't actually seal in the juices. That's just a searing myth. If you're worried about keeping your seared meat succulent and moist, you'll want to avoid some of the other top mistakes on our list.
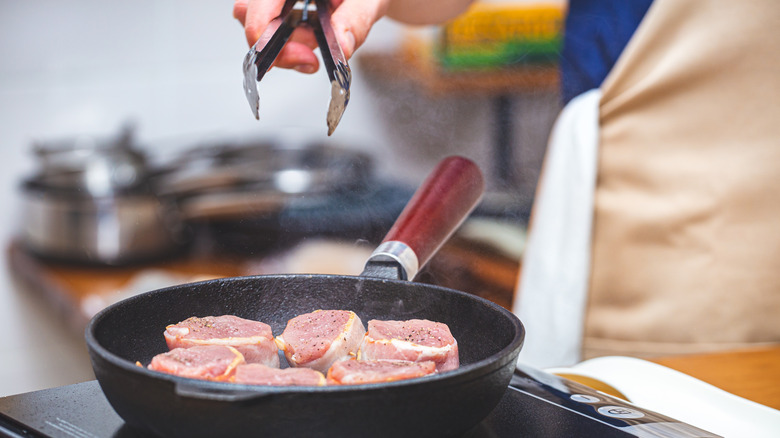
Not choosing the right cooking vessel
If you're going to sear a piece of meat, you're likely not going to do it in your slow cooker. Instead, you're going to reach for your favorite skillet or pan. But hold up — not just any skillet or pan will do the job well.
Safe bets, according to Foodal, include stainless steel-clad cookware (which allows for high temperatures, even heat distribution, and easy deglazing); cast iron cookware (which retains high heat quickly and evenly); or carbon steel cookware (which offers much the same benefits as cast iron, only it's not as heavy). What you absolutely don't want to reach for, though, is your non-stick pan. Non-stick pans are not designed for use in high heat situations and trying to use a non-stick pan for searing can leave you with not only an un-seared piece of meat, but also a ruined pan, and possibly some noxious fumes in your kitchen. Putting a non-stick pan over too high a heat can cause some of its non-stick chemicals to leach out, potentially harming your health.
Not drying your meat
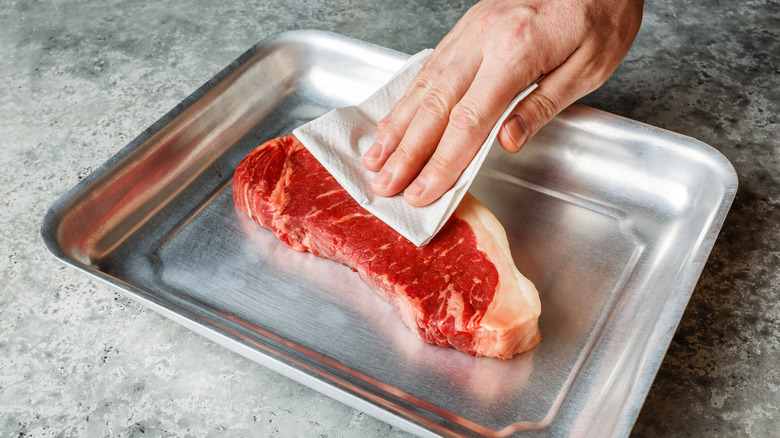
Perhaps you've wondered if there's even really a point in drying off your meat before you popping it in the pan? After all, you're just going to sear it in oil and you also don't want it to dry out. This is exactly the quandary that one Reddit user brought to the Reddit Ask Culinary thread and the answers they received in response were enlightening.
According to the Reddit culinary hive mind, any residual water left on the outside of your cut of meat can severely interfere with your sear and, again, the "why" all comes down to science. Since water boils at 212 degrees Fahrenheit, but the Maillard Reaction doesn't occur until around 275 degrees Fahrenheit or hotter, the water in your pan can prevent your meat from searing completely, as it starts boiling or steaming your meat before the searing occurs. If you do manage to cook away all the water and reach the temperatures needed for a sear, your meat will likely already be cooked-through and tough by that time.
So, to avoid a tough, dry, over-cooked piece of meat (something nobody wants), just pat it dry with a few paper towels before it hits the pan.
Not seasoning the meat before searing it

But before you pat that steak dry, you need to do something else first — season it. The seasoning process for any seared piece of meat should always include salt, and for good reason. Salt, as That Other Cooking Blog explains, draws out excess moisture from your cut of meat (helping you avoid the water-in-the-pan catastrophe discussed above); modifies the texture and proteins in your meat, making for a more tender cut; and, of course, salt helps bring out the flavors of any food, both before and after the cooking process.
That Other Cooking Blog recommends adding salt and any other seasonings you desire to your cut of meat about half an hour before you plan on cooking. You want to let the salt sit on the cut of meat for at least 20 minutes, but up to overnight. The salt will draw out some of that excess moisture over time. When you're ready to cook, go ahead with your drying process before you add the meat to your pan.
Keeping the heat too low

Once you have the meat in the pan, then what? Searing is not as simple as just turning your stove burner to medium-high and letting things cook for a while. As mentioned, the Maillard Reaction doesn't begin until you reach around the 275 degrees mark and searing begins quickly once you hit 350 degrees Fahrenheit (via Thermoworks). However, that doesn't mean you want your pan to be 350 degrees. Instead, you want to aim for a pan surface temperature of about 400 to 450 degrees. This is because your meat is going to be colder than your pan and while you might think the pan will instantly heat the meat, it actually goes the other way around; the meat will decrease your pan's surface temperature. So, aim for a higher temperature than needed to account for this and achieve the temperatures you need for a beautiful sear as quickly as possible.
Not sure how to check your pan's surface temperature? All you need is an infrared thermometer.
Keeping the heat too high
While you don't want to start the searing process at too low a temperature, you also don't want to start at too high a temperature, either. If you heat your pan to too high a temperature before adding in your meat, you could end up with not only a cloud of smoke, as your oil begins to cook off, but also meat that's charred on the outside and raw on the inside, as one Chowhound user explained. Comments to their post revealed it's not an uncommon mistake to make, though. Commenters advise that, if you're using a cast iron pan for your searing, you likely only need to turn your stove up to medium and then allow it to preheat for five to 10 minutes.
If you don't have an infrared thermometer handy, but you still want to check your pan's temperature, commenters recommend the hand test — put your hand over the pan and, if you can't hold it there for more than five seconds, it's ready to go.
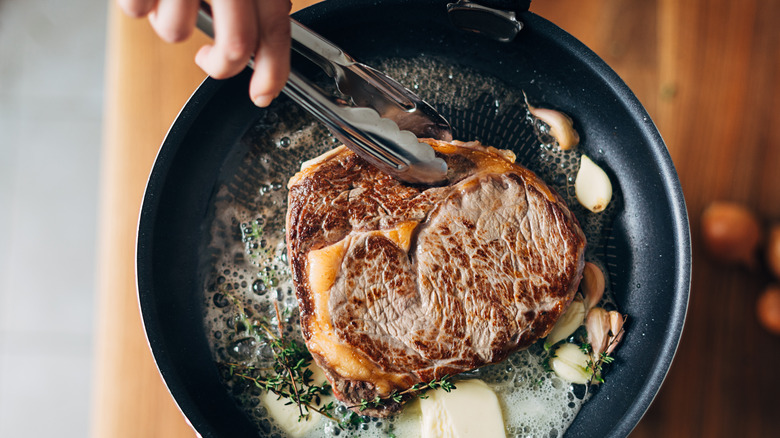
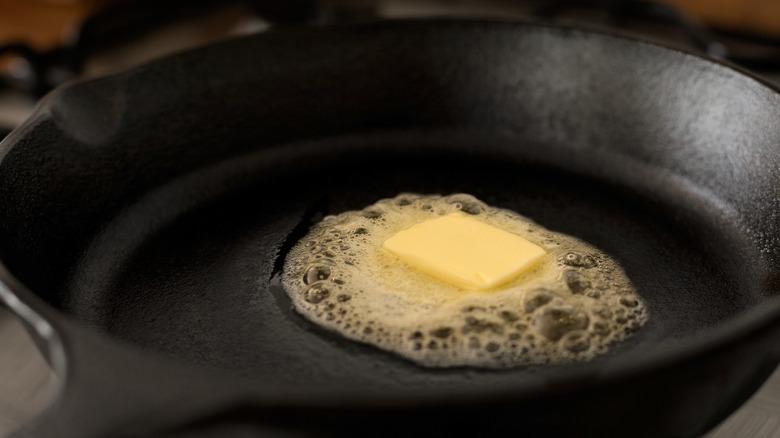
Not using oil in your pan
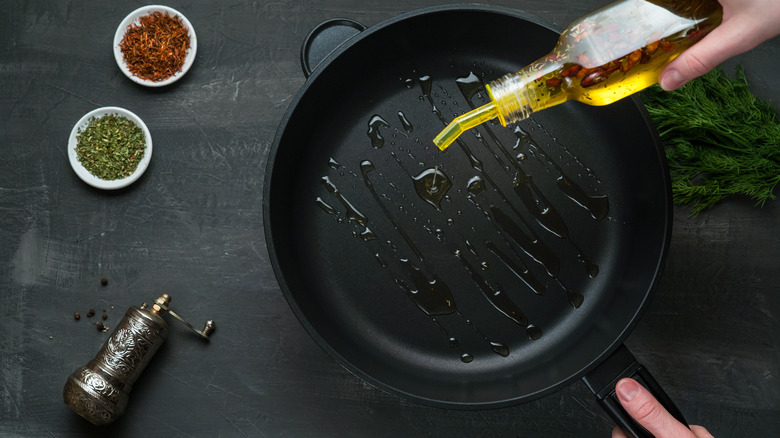
If you're worried about clouds of oil smoke filling your kitchen, you may be tempted to skip using oil when searing altogether, but that could be an unwise decision. As one Reddit user explained in a discussion on the topic, the oil is not only there to help with cooking, but it also helps you to achieve a more even sear. Since your piece of meat is never entirely flat, being in the oil will allow it to still be in contact with the level of heat needed for cooking, as the oil transfers some of that heat from the pan surface, over to your meat. Additionally, while the oil is helping to achieve a more even sear, the oil also helps reduce the chances of you taking your sear all the way to an all-out burn, as it limits your meat's oxygen contact.
If you absolutely must sear a steak or other cut of meat but you don't have any oil on hand, you can actually use the fat of the steak itself, says Our Everyday Life. You'll just want to hold the fatty bits of your steak against your heated pan, using tongs, until it melts off and creates an oily coating.
Using the wrong oil when searing

Choosing the right oil for the job is a key part of cooking, so don't just grab whatever oil is sitting in your pantry cabinet. For searing, since you're cooking at such a high temperature, you'll want to go with an oil that has a high smoke point, or a high temperature at which the oil starts to smoke. When oil starts to smoke, it changes the flavor, thus changing the flavor of your meat (and not in a good way); additionally, some oils emit unhealthy compounds when they begin to smoke.
What's the best oil for searing? Go with an oil with a smoke point of 400 degrees Fahrenheit or higher. Canola, extra virgin olive, and vegetable oil are some of the most common oils with high smoke points, but peanut, sunflower, and soy oil are also fine options, as are grapeseed oil and avocado oil. And if your pan does start to smoke and you're using one of these oils, don't worry — sometimes a little smoking is fine, so long as it's not prolonged.
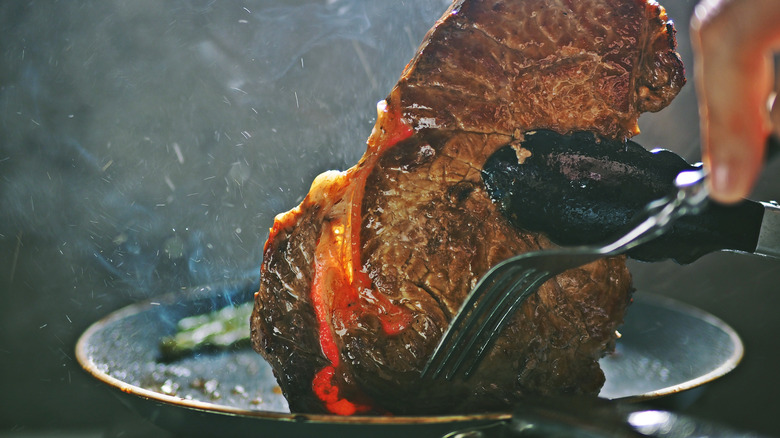
Using a fork to turn your food
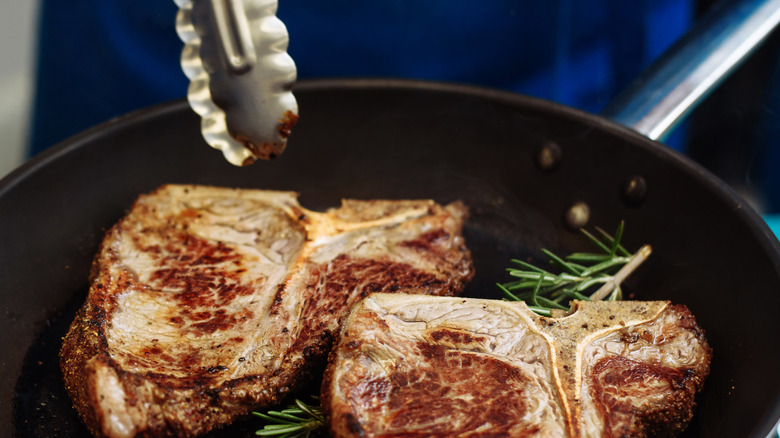
If you're searing a piece of meat — or cooking a piece of meat in any manner — you likely want it to stay moist and juicy. However, sometimes, when you're cooking, you need to make a fast flip and so you reach for whatever utensil is handiest, oftentimes, a fork. But using a fork to turn your seared food can not only be dangerous (it requires you to put your fingers awfully close to that extremely hot oil and pan, after all), it can also result in a drier piece of meat, at least if you listen to the hordes over at Chowhound. There, the decisive take is that tongs are the way to go for flipping seared meat.
When Mashed looked into the matter, we found that the issue is a little more nuanced than simply cut-and-dry, don't-ever-use-a-fork. You should definitely not use a fork to turn your seared meat if you plan on poking and turning a lot. A few pokes are fine, though. Just try not to poke too deep.
Crowding the pan
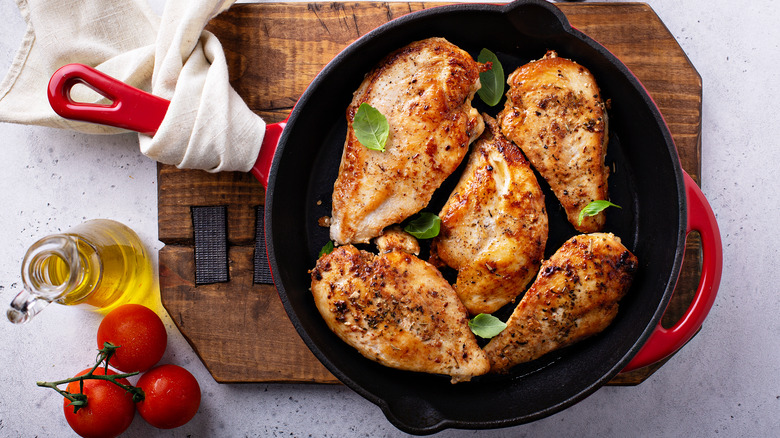
Too much meat, too little pan space? Don't give way to the temptation to crowd the pan, thinking that you'll be able to finish up your cooking a few minutes faster if you do. It's worth it to wait and cook your items one at a time or in batches.
Why? As we've already learned, adding cold meat to a pan lowers the pan's overall temperature — and, as we've also learned, the right temperature is oh-so-crucial to achieving a perfect sear. The more meat you add to the pan, the more the temperature lowers, so your best bet, if you're aiming for perfect, is to keep the pan relatively uncrowded. Otherwise, you end up with food that's not browned at all, and dry. Cooking Clarified recommends leaving an inch or two between the items you're trying to sear, if you're cooking something larger, like chicken thighs or steak; if you're cooking something smaller, like a cubed meat, you can create a single layer that covers the bottom of the pan.
Moving the meat around too much
It's an easy mistake to make. You want to make sure that your pan and oil are actually doing their job. You grab a pair of tongs and gently lift your steak, just to get a peek at what's going on, on the bottom. Then you do it again a few seconds later. And again. And again. But all that fiddling and checking can ruin your sear. According to The Kitchn, moving your meat (or any item) around too much while you cook can either prolong the browning time or make it impossible for your item to brown altogether. Your food just doesn't get enough of that direct heat contact.
Instead of relying on your sight to check on your steak and whether or not it needs to be flipped, it's recommended that you learn to rely on some of your other senses, such as smell and touch, to decide an item is finished.
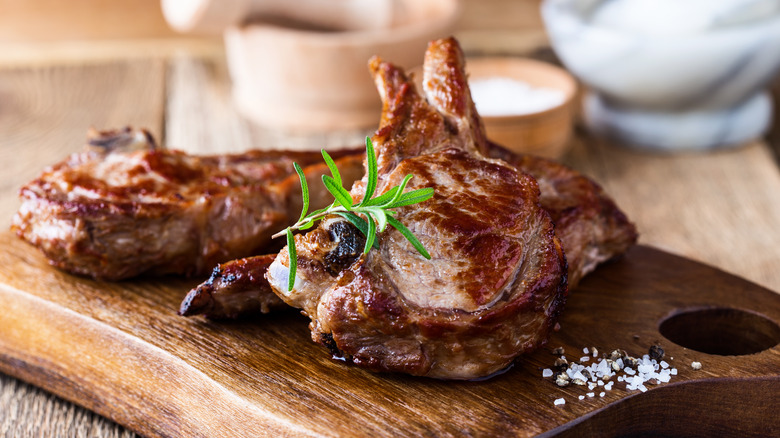
Not finishing the meat at a low temperature, after searing
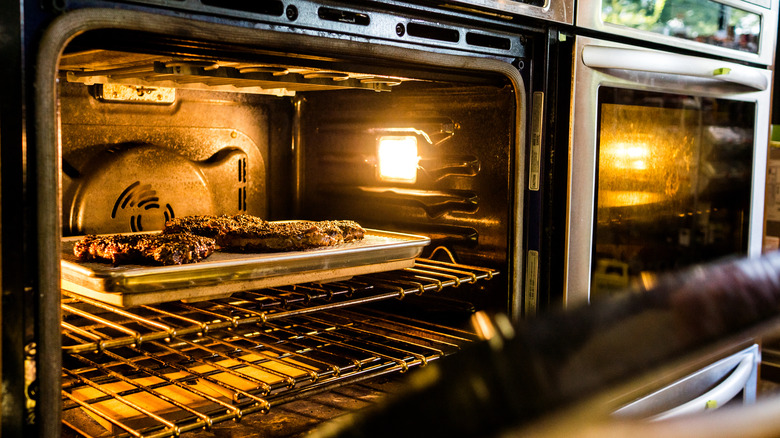
Once you have the perfect sear on your piece of meat, you're ready to serve ... right? Maybe, if you like your meat on the rarer side. However, if you prefer a medium or medium-well piece of meat, you'll need to further cook your cut another way. So how do you do so without overcooking your meat?
The key is to continue cooking your cut at a low temperature, after the searing process is complete (via The Kitchn). You can do this on the stovetop, by adding a little moisture (stock or wine works well) to your pan, covering the food, and letting it cook until done on the inside, or you can do this in the oven, by broiling your item for several minutes on each side. Which method you choose will depend on the type of meat you're cooking, as well as the degree of doneness you're after. The former method is ideal for items like chicken, where you need an item to be completely, 100% cooked; the latter works well for medium steaks.
Not trying the reverse sear method
However, if you like taking that succulent piece of meat straight from the pan to the table, you can still ensure that you reach the proper level of doneness by using the reverse sear method. Rather than searing your meat first, then finishing it off using another method, the reverse sear process slow cooks your meat ahead of time, and then finishes with the sear. Reverse searing, according to Serious Eats, results in a more even doneness, better browning, and a more tender end product.
To reverse sear a steak, slow cook the steak at 200 to 275 degrees Fahrenheit, in the oven, until it reaches an internal temperature of about 10 to 15 degrees below the end temperature you're aiming for (so, for example, 140 degrees Fahrenheit for a medium rare steak). Then, sear your steak like normal. You can then serve the steaks immediately, as the reverse sear method eliminates the resting time that you'd use when traditionally searing your steak.
Not letting your meat rest
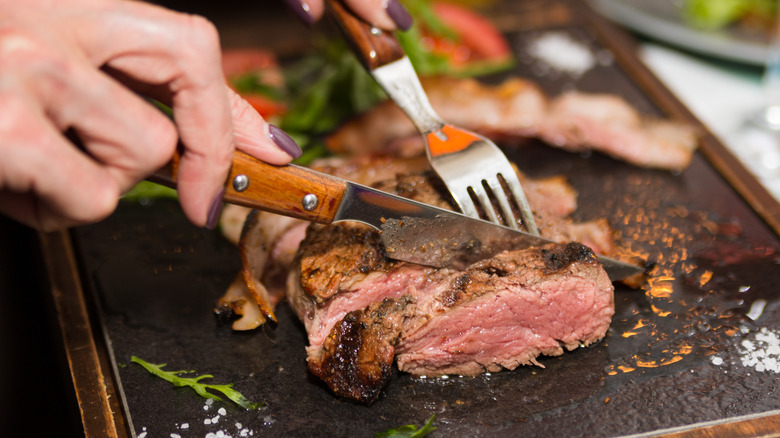
If you are using the traditional sear method, you definitely do want to allow your meat to rest before serving. The resting period allows time for all your meat's locked-in juices to redistribute and settle. Cutting into that piece of meat early reduces the amount of overall moisture throughout the entire cut.
However, it's worth noting that the resting period does allow more time for your food to cook, so if you're worried about overcooking, you might want to pull your meat out of the pan a little earlier than normal, and then let it continue cooking a few more degrees while it waits. According to the Steak School by Stanbroke, a steak should rest for at least five minutes, while a larger item, such as a beef roast, should rest for at least 20 minutes.
And that's it! Once you're done with the resting period, it's time to chow down, and if you managed to avoid all (or at least most) of the mistakes above, you'll be treated to a beautifully seared piece of meat.