Chocolate Kouign-Amann Recipe
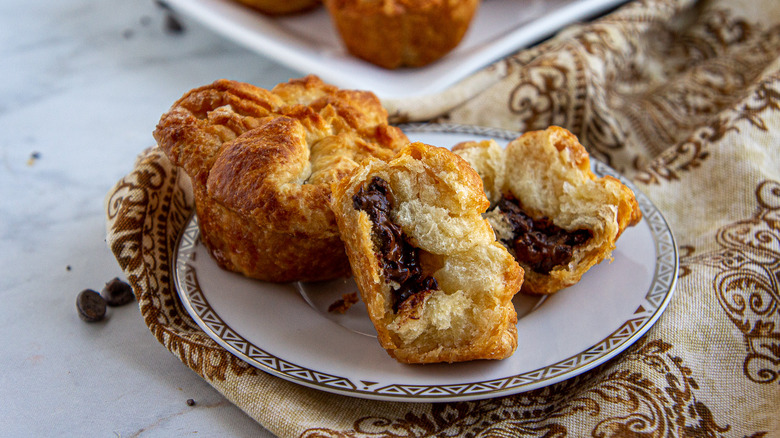
Want to really impress your guests and family with a sweet treat? Chocolate kouign-amann is a French yeast-raised pastry that is flaky and buttery with layers of caramelized sugar and a sweet chocolate surprise baked right into the middle. Homemade pastries like this can seem intimidating, but with recipe developer Mikayla Marin's guidance, anyone can tackle this at home.
In fact, it's not as complicated as it looks or sounds, according to Marin — it's just a matter of patience and time. With step-by-step instructions on making the dough and folding it perfectly for flaky layers, you'll see a beautiful pastry coming to life before your eyes.
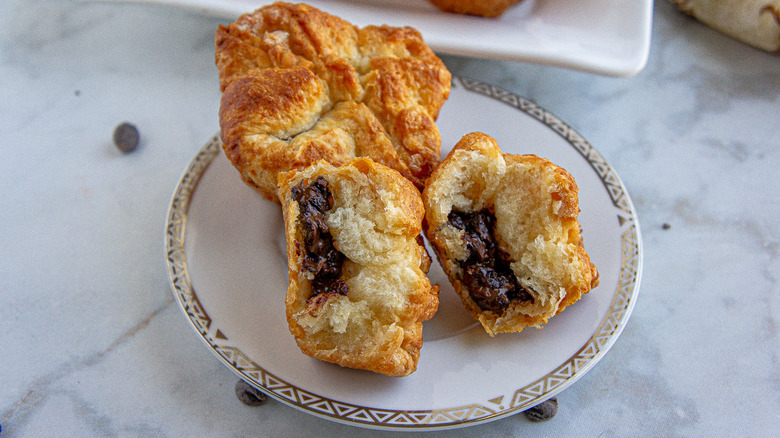
What you'll end up with is twelve deeply golden-brown individual pastries that deliver a caramelized edge reminiscent of sticky buns with the flaky, buttery layers of a croissant. It's the perfect treat to make when entertaining — it'll be a guaranteed hit with guests of all ages.
Get more recipes from Marin on her blog The Flour Handprint.
Ingredients to make laminated pastry with chocolate filling
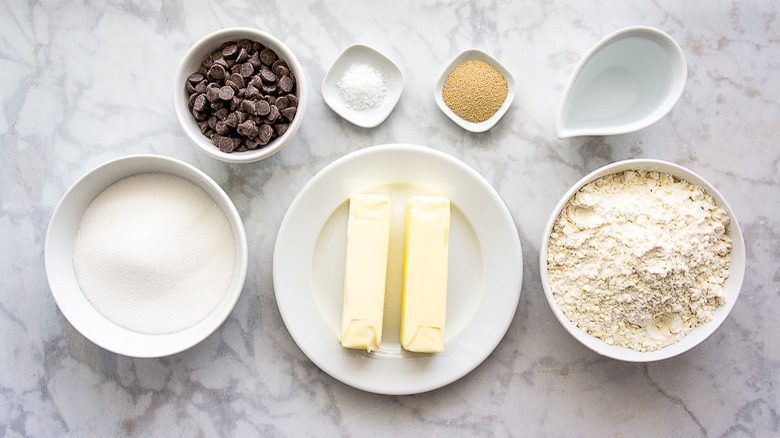
Even though there are a lot of steps that go into making chocolate kouign-amann, there aren't a lot of ingredients you need to make it. It starts with a yeast-based sweet dough that is made with one cup of water, two and a quarter teaspoons of active dry yeast (or one packet), two and three-quarters of a cup of flour, and a teaspoon of salt. Marin notes that instant yeast will work just as well.
For the folding and shaping, you'll also need eight ounces or one cup (two sticks) of unsalted butter and a cup of granulated white sugar.
Finally, to create that chocolate bite in the middle, make sure you have three-quarters of a cup of chocolate chips. Semi-sweet was the choice here, but you could also use milk or dark chocolate. These simple ingredients come together and transform into something truly spectacular!
The first step is to make the dough
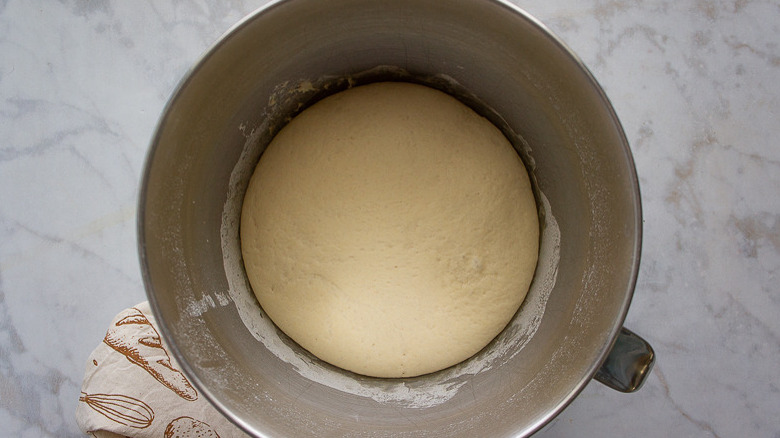
Before anything else can happen, you need a risen yeast dough. To make it is actually very simple. Combine two and a quarters cups of flour in a large bowl with the salt, yeast, and water. It's important that the water is not hot, but Marin notes it's best to work with tepid or lukewarm water. It shouldn't feel much warmer than your skin, she says.
There's also no need to proof your yeast. If you are unsure about the age of your yeast, you can combine the water and yeast first and wait to see if it gets foamy in 10 minutes. But with recently purchased yeast from reliable brands, this isn't necessary and takes extra time on an already long recipe.
Either by hand or with the dough attachment of a stand mixer, mix the dough until it's smooth and soft. This should take about 10 minutes in a machine or 15 minutes by hand. If you're having a lot of trouble with sticky dough, lightly flour your hands and add a tablespoon of flour to the surface you're kneading on or to the bowl of the mixer, but you should needn't to add any more than a quarter of a cup extra.
Let the dough rise at room temperature until it's doubled in size. Punch the dough down and reshape it into a ball, then cover it again and place it in your fridge for at least an hour.
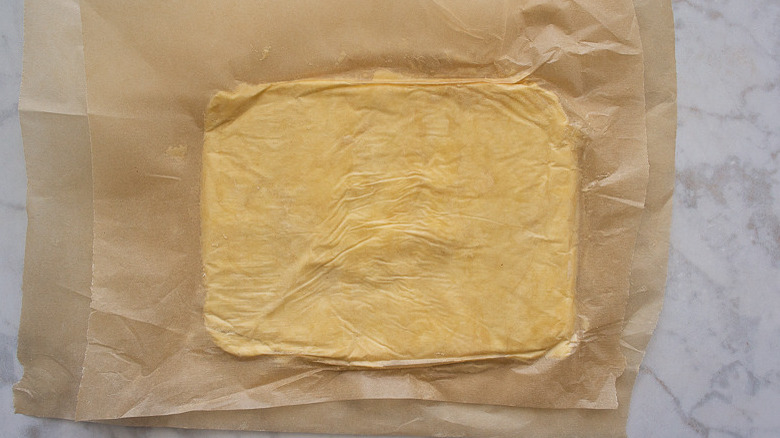
Next, make a butter rectangle
For anyone who wants to finish making their chocolate kouign amann the next day, stop here. The dough can stay tightly covered for up to 48 hours. When you're ready tomorrow, or after 45 minutes of chill time, proceed with the remaining steps.
The trick to creating that croissant-like pastry is layers of cold butter. This creates lamination in the dough that bakes up beautifully flaky in the oven. First, you'll need a sheet of butter to lay on your dough. There are tons of ways to do this from shredding the butter to smashing it to form a flat piece. Marin notes it was easiest for her to slice the sticks into tablespoons and lay the squares out into a rough rectangle on a lightly floured surface. She also recommends either a silicone mat or parchment paper to work on so it's easy to move it around afterward.
Either top the butter with another sheet of parchment or lightly flour a rolling pin, and start pressing, smacking, and shaping it. You're looking to create a six-by-eight-inch rectangle. This gets folded into the dough, so don't stress if it's a little lopsided. Once it's flattened and a uniform thickness, slide it into the fridge for 15 minutes.
Roll out the dough and add the butter
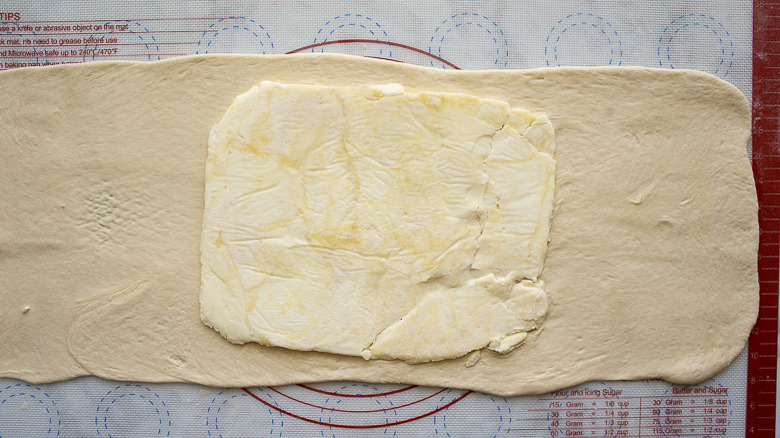
While the butter is chilling, bring out the dough. Again, Marin recommends a large silicone baking mat to avoid over-flouring your dough. Roll the dough out into a long rectangle, about nine by 20 inches. Once you're ready, bring the butter rectangle out and set it right in the middle. It should be about the same width, and the dough should have enough length to fold over the butter like an envelope.
Bring one long side over the butter, then repeat with the second. Then gently roll it out, working from top to bottom, or rolling toward the "open" sides of the dough. When you can no longer see the creases and the dough is about two times as long as it was when you began rolling, repeat the folds. This time, move in the opposite direction as you did last time, folding the top into the middle, then the bottom over that.
Wrap it tightly and place it in the fridge for 30 minutes.
Repeat the folds a second time
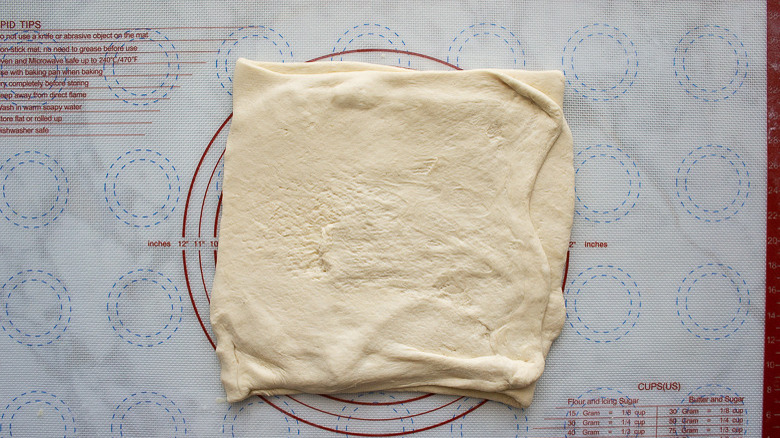
The next set of folds is very easy, you basically already did it once. Simply bring the dough out and roll it flat again, working toward the open ends of the fold. When it's twice as long as it was, fold it in the opposite direction. Then repeat. Every time you do this, you're creating more of those flaky layers. Once it's been folded that second time, wrap and return to the fridge for another 30 minutes.
Make your final folds with sugar
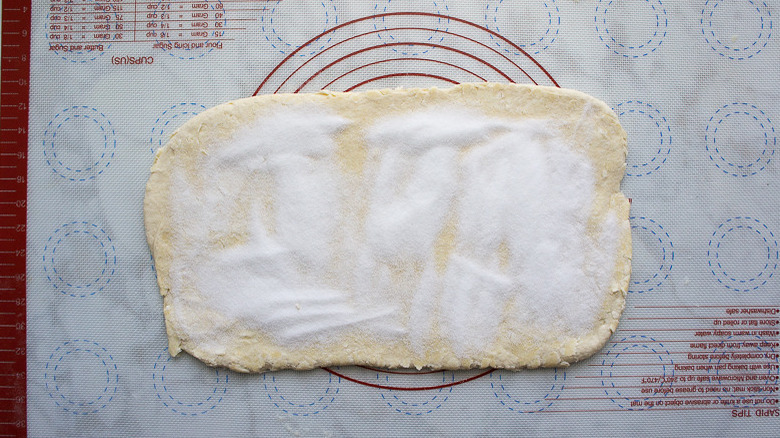
The next and final fold is the same, save for the addition of sugar. This is where that caramelized sugar that kouign-amann is known for comes from, and it is very important to the end result. Simply roll the dough out again, but before making a fold, sprinkle half a cup of sugar across the surface of the dough. Press it gently down with your hands, and then fold. Marin says the sugar will move, and that's okay.
Then roll it out again, add the remaining half cup of sugar, press it in, and fold it. Marin notes that she found the dough easier to work with if she rolled it together just a little bit after this fold. It sandwiched the sugar in a little more. She also advises that you make sure the outside of your dough isn't coated in sugar before wrapping it up, as that can make the dough wet and hard to work with. If there is sugar you can't brush away, give the dough a light dusting of flour before wrapping it up.
Then place it back into the fridge for another 30 minutes.
Roll it out and cut the dough
You're almost at the finish line, and it was pretty easy, right? Before you bring your dough back out of the fridge, liberally grease a 12-cup muffin tin. Make sure to coat the interiors and the rim of each to prevent sticking.
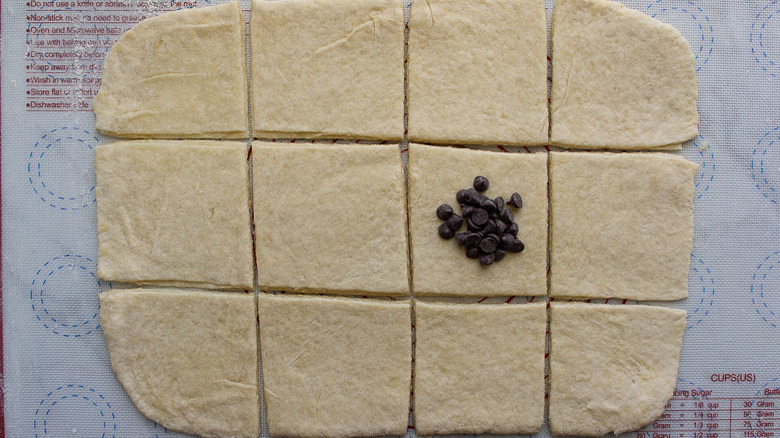
The next step is to roll the dough into a large 12-by-16-inch rectangle. Marin mentions that the sugar can still sprinkle out, so lightly flouring your surface will help. When you have the right dimensions, use a pizza cutter or a sharp knife to cut it into squares. Cut it into three strips along the 12-inch side (so each strip is four inches wide). Then, cut the strips into four pieces, each four inches wide again. Each of these will be a pastry filled with chocolate.
Fill, shape, and place in a greased muffin tin
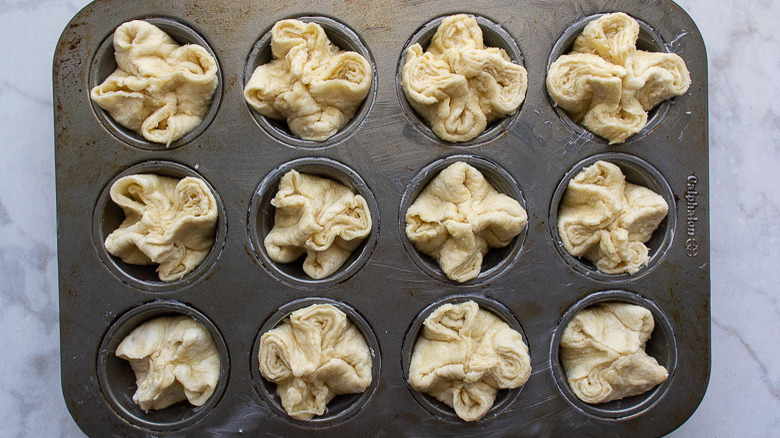
According to Marin, it's best to do this next step one at a time. Place one tablespoon of chocolate chips in the center and bring the corners in over it, pressing them together in the center. This will create a clover shape on top.
Gently lift them up and nestle them into one of the greased muffin cups. Repeat until all 12 are filled and shaped. Then cover and place it back into the fridge for 30 minutes.
The final rise and bake
When the 30 minutes is up, bring the muffin tin out and place it in a room-temperature area to rise for an hour. Do not place the pastries near a warm oven or sunny window — if they get too warm, they will get sticky and mushy.
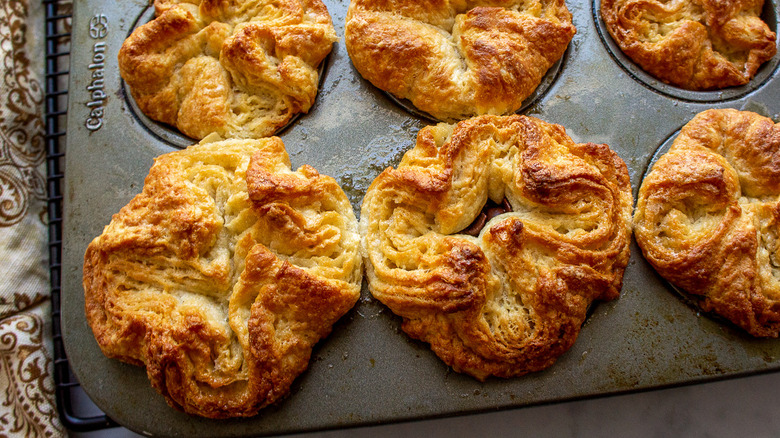
After 30 minutes, preheat your oven to a hot 425 F. Marin notes you want your oven to be well-preheated and very hot when you put in your pastries. That initial burst of hot air is the key to rise and flakiness. When the chocolate kouign-amann are finished rising, place them on the middle rack of the oven. Immediately drop the temperature to 350 F. Let them bake for 35 to 40 minutes or until the tops are so deeply golden brown that they're almost ready to burn.
Take them out of the pan to cool
Marin warns us not to skip this step! It's very important that within a few minutes of taking the pastries from the oven, they get taken out of the pan. During baking, the sugar that was added was caramelized. It makes the pastries taste amazing, and can also make them stick to the pan if it cools.
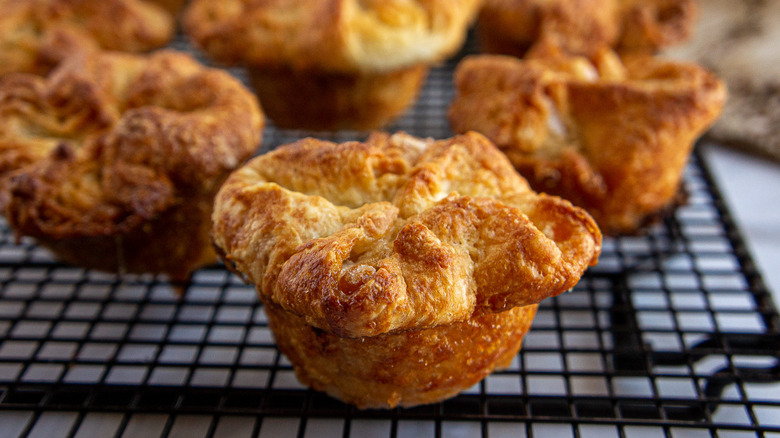
Use a small knife or a pastry spreader to help you, and keep your hands protected from the hot pan. Then, lift the pastries onto a cooling rack. Let them cool completely.
Eating and storing chocolate kouign-amann
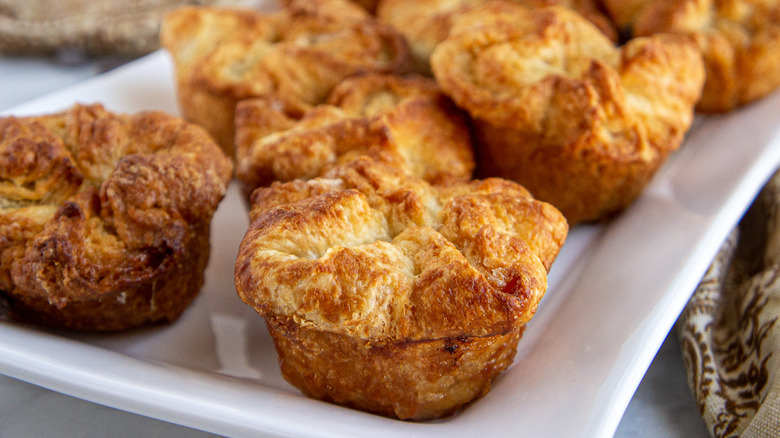
The sweet spot for enjoying your freshly made chocolate kouign-amann is once they're completely cooled but within 24 hours. Marin notes that by day two, they were still pretty good, but they began to get dense and tough after that. If there are any leftovers you'd like to save, store them in an airtight container at room temperature.
Chocolate Kouign-amann Recipe Directions
Chocolate kouign-amann is a French pastry that is flaky and buttery with layers of caramelized sugar and a sweet chocolate surprise baked into the middle.
Ingredients
- 2 ¾ cups all-purpose flour
- 2 teaspoons yeast
- 1 teaspoon salt
- 1 cup water
- 1 cup butter
- 1 cup sugar
- ¾ cups chocolate chips
Directions
- Combine the flour, yeast, salt, and water into a bowl and knead until a smooth soft dough forms, adding up to ¼ cup of flour a little at a time if it sticks, about 10 minutes.
- Cover and let rise for 1 hour or until doubled in size.
- Slice the butter into ½ tablespoon slices and refrigerate.
- Punch down the dough, then cover again and refrigerate for 1 hour.
- Around 10 minutes before you remove the dough, take the slices of butter out of the fridge and place them on a piece of wax, parchment paper, or a floured surface in the shape of a rectangle. Cover with a second piece of parchment, and use a rolling pin or meat tenderizer to firmly pound the butter into a 6x8-inch rectangle. Return to the fridge.
- Remove the dough, and on a floured surface or silicone mat, roll it into a 9x20-inch rectangle.
- Place the butter in the center of the long rectangle of dough, removing the parchment paper. Fold the long edges over the butter.
- Roll the dough back and forth opposite the fold until the crease disappears.
- Gently fold the dough again, opposite the direction of the first fold, wrap the dough, and place it in the fridge for 30 minutes.
- Remove the dough, and on a floured surface, roll the dough opposite the closed edged.
- Fold again, repeat rolling, then fold once more. Wrap and place it back into the fridge for 30 minutes.
- Remove the dough, and on a lightly floured surface, roll it out. Sprinkle ½ cup of sugar on the surface and make your folds.
- Roll it into a rectangle again, sprinkle in remaining sugar, and fold. Wrap and return to the fridge for 30 minutes.
- Grease a 12-cup muffin tin with a good coating of butter.
- Remove the dough, and on a floured surface, roll the dough out into a 12x16-inch rectangle.
- Slice it into 3 strips along the 12-inch side, then slice each strip into 4 squares.
- Scoop 1 tablespoon of chocolate chips into the center of a square, then gently bring each corner into the center and press together, creating a clover shape.
- Place in a muffin cup and repeat with each square.
- Place in the fridge for 30 minutes.
- Remove the muffin tin and let rise for 1 hour.
- After 30 minutes, preheat your oven to 400 F.
- Place the pan on the middle rack of your oven, and immediately drop the temperature to 350 F.
- Bake for 35 to 40 minutes or until deeply golden brown. The edges and tips should be just starting to turn brown.
- Remove from oven and quickly remove the pastries to a cooling rack.
- Let cool completely, then enjoy. Store at room temperature for up to 1 day.
Nutrition
| Calories per Serving | 377 |
| Total Fat | 18.9 g |
| Saturated Fat | 11.8 g |
| Trans Fat | 0.6 g |
| Cholesterol | 42.8 mg |
| Total Carbohydrates | 48.4 g |
| Dietary Fiber | 1.3 g |
| Total Sugars | 25.5 g |
| Sodium | 207.3 mg |
| Protein | 4.1 g |