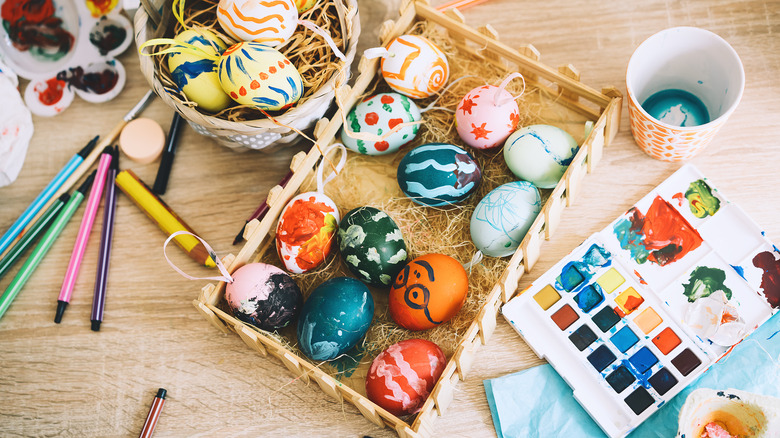
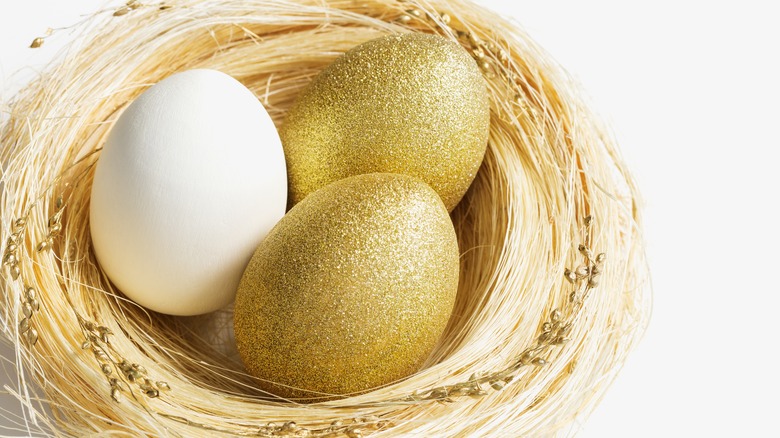
Egg-Cellent Easter Egg Hacks
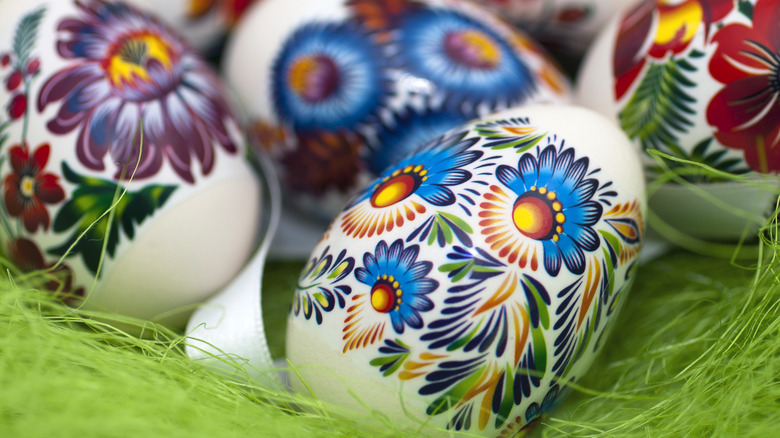
Easter is always a time of fresh hope and possibilities blossoming into life, as spring creates a sense of new beginnings. It's also a time of family get-togethers, sharing memories with a glorious Easter dinner or brunch, along with chocolate bunnies and Easter candy galore. While Easter eggs may be connected with pagan festivals of old, The History Channel reveals that decorating eggs is a custom dating back to the 13th century. One explanation is that eggs were not permitted to be eaten during Lent, which precedes Easter. This led to eggs being decorated at Easter, perhaps to symbolize the end of this fasting season when eggs could once again be enjoyed. Meanwhile, a Folklore Today article states that Eastern European eggs were traditionally the most decorated, using dripped-on wax and dye. Ukrainian tradition is to give decorated eggs as presents to wish good health, even beyond Easter.
Whatever the history, culture, and meaning of decorated eggs in today's digitally connected world, there's something so gloriously simple and heartfelt about the joy of a colored egg. There's also plenty of egg-citing Easter egg hacks to choose from. Here are a few of our favorites. They give youngsters and the young at heart alike an activity that offers simple pleasures at a time when many in the world seek a sense of renewal and rebirth — symbolized by the humble egg.
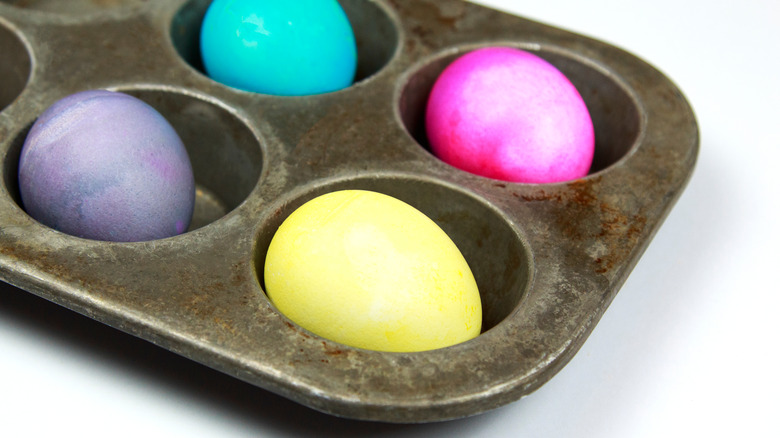
Kool-Aid eggs are bright and colorful
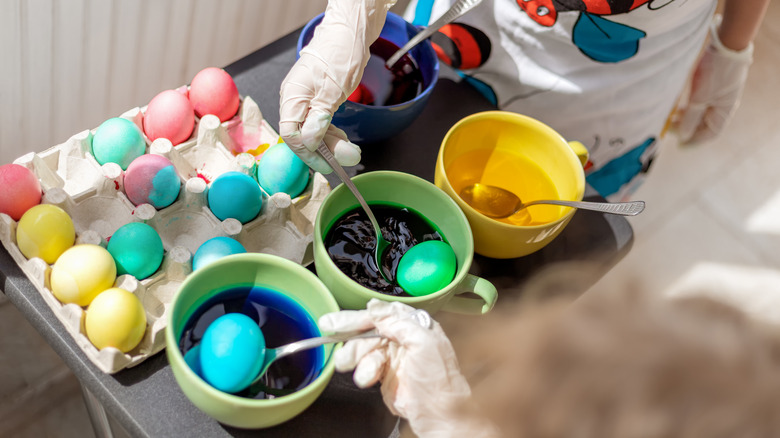
What really makes Easter pop are brightly colored eggs. Not only do they look great, but creating them is a fun activity as well. If you want to dye eggs with young kids, then one idea that's food-safe is to use a colorant that comes from food, isn't toxic in any way, and isn't going to create a huge mess if it's spilled either. One method you may not have tried yet is using Kool-Aid to color Easter eggs.
First, hard boil some eggs. While some instructions say that you should peel the eggs before dyeing them, you can also leave the shells on as usual — this trick works either way. Put the eggs in a bowl and in other containers add one Kool-Aid flavor sachet and a cup of warm water. You can use two packets of yellow Kool-Aid or a yellow packet mixed with a little orange, to get a stronger color. To make green, you can mix a quarter of a teaspoon of the blue lemonade flavor with an entire lemonade packet. You can then use the rest of the blue powder in another bowl, and so on. Dunk one egg at a time into the colored water, and leave for up to five minutes, depending on the color intensity you're trying to achieve. Dry the eggs on a baking sheet, covered in a paper towel. Remember, once you store your Kool-Aid eggs in the refrigerator, they should stay fresh to eat for a week!
Cool Whip designs create marble effects
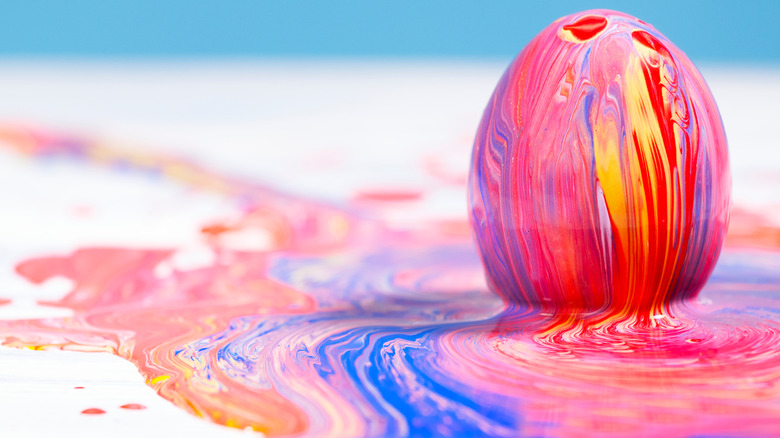
Whipped cream may not be the most obvious ingredient to creating cool Easter eggs, but as crazy as it sounds, it's actually an egg-cellent decoration tip. You can create marble-effect Easter eggs using Cool Whip with this easy hack. Before you get into your creative side, you need to prepare your eggs properly by hard boiling them. Then put them in white vinegar for a couple of minutes, which helps the colors stick to the shells, before thoroughly drying the eggs with a paper towel. You're now all set to get creative and colorful!
Cover a baking tray in Cool Whip, making sure to spread it out so that it's not too thick. Sprinkle food coloring on the cream, adding in several colors. The next part is key to creating a marbling design. You simply move the dye around the cream so that it resembles swirls. The best way to do this is with a toothpick. Next, get messy and cover the eggs with the cream, rolling them so that none of the original egg color is showing through. After leaving them for around 20 minutes, rinse off the cream, and you've got yourself some pretty funky marbled Easter eggs — and each one is totally unique!
Dip eggs using a whisk

So you want to dye some eggs for Easter, but no matter how you do it, you always end up with colored fingers. Does this pretty much sum up your experience? There must be a simple hack, you think, since it's not rocket science, is it? You'd be right, and it's not some far-out idea either. In fact, the eggs-act solution lies right under your nose — well, in the kitchen utensil drawer, anyhow.
Southern Living highlights a great way of coloring eggs, which is so darn simple, it's not surprising it's been shared by other tipsters like Parent Hacks. Grab a wire balloon whisk, and widen one of the spaces before popping in your egg. The metal will spring back into shape to create a cage for your egg — and the perfect tool for dipping into some dye without getting it all over your hands. The key is to make sure the dye, which can be made from food coloring, water, and vinegar, is deep enough and in a container that's wide enough so that you can dunk the whole egg and whisk basket. Leave it there for five minutes, and use gloves if you want something to stop your hands getting stained as you get the egg out from inside the whisk. This method sure beats — no pun intended — balancing eggs on a spoon or dipping fingers into dye!
Blow out eggs for hanging decorations

What's more eggs-citing than decorated hanging eggs, whether you tie them to the branches of a tree in the garden or in the house, perhaps for an Easter brunch or luncheon. To make these eye-catching decorations, you'll first need to hollow out some eggs. Our Best Bites offers a great hack for making blown-out egg ornaments. First, put the eggs in warm water for 10 minutes before piercing each end of the egg with a pin by twisting it. Next, widen the hole with a really small drill bit, unbend a paperclip, and use it to mix up the contents of the egg to help the liquid come out more easily. You're now ready to blow out the egg.
Use a small syringe or bulb syringe and press on it, so that the liquid egg comes out the other hole. Use the paperclip to mix the contents or widen the hole more if the egg still isn't coming out. You can then wash out the inside of the egg by syringing in some warm water, before blowing that out in the same way. It's best to dye your eggs before you blow them out. Once empty, thread ribbon through the holes, tying a knot at one end and creating a loop at the other. You can also add a bead at the knotted end to both cover the hole and add an attractive crafty touch to your decorated hanging egg.
Shake rice in a bag for a creative dyed egg design
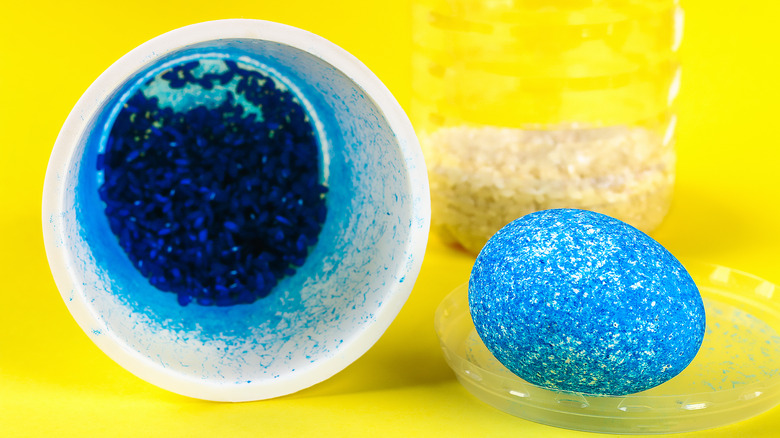
You may have heard of egg fried rice, but have you heard of rice dyed eggs? Yes, that's eggs dyed using rice, which, according to an eggs-planatory Instructables hack and a SurpriseFunTV video, makes coloring Easter eggs far less messy. It also adds a cool speckled look to the shell. All you need are some hard-boiled eggs, a cup of uncooked rice, food coloring, and resealable sandwich bags. You can add vinegar to the dye to make the color fix more if you like, and wear plastic gloves too.
Start off by adding a quarter of a cup of rice to one of the bags and around 10 drops of food coloring, along with a drop of vinegar if you're using it. Add an egg to the bag and shake it, covering the shell with the colored rice and coloring one egg at a time. You can add in more dye after coloring each egg, but make sure to add the color to the rice and not when the egg is in the bag. You can experiment with the amount of color you prefer.
You can also try putting the rice in a plastic cup instead. You then add the dye and egg, before putting cling wrap over the top with a rubber band securing it in place. You then shake the contents. This method creates a more distinct speckled pattern.
Get creative with tie-dye eggs

In case you hadn't noticed, tie-dye is back, and this on-trend pattern can make some pretty funky Easter eggs. Good Housekeeping has the low-down on how to mix it up and create a uniquely designed egg and eggs-press your creativity. This imaginative hack not only requires the requisite hard-boiled eggs and food coloring, but you'll also need a coffee filter, of all things!
Protect your work surface with newspaper, and your hands with rubber gloves before you start. Wrap your cooled-down egg in a coffee filter, and keep it in place by using a twist tie. The egg should be completely covered by the filter. Add different colored drops of the food coloring to the outside of the filter. Make sure the colors are separate, and that you give each color a couple of minutes to be absorbed. Once you're happy with your color selection, spray the whole filter with water and then press on it to make sure it hugs the egg, but not so hard that you crack the shell, of course. Leave your creation for around a quarter of an hour, before taking the egg out of the filter, rinsing it, and letting it dry. Voila! You have your very own tie-dye Easter egg.
Add some sparkle with salt
All that glitters is not gold, but a crystal Easter eggs-permient hack by Science Notes is priceless! You don't need actual gems either, but something more likely to be on hand: salt. You can also use Epsom salts, but only if you want your egg to be purely decorative and not edible. First, fill a bowl with boiling water, adding a few drops of food coloring. Next is where the science bit comes in. To create just the right solution, add salt and stir with a spoon until you can see some of the crystals forming on it. You're now ready to crystallize your egg and bring a little sparkle to your Easter celebrations.
Put a hard-boiled, hollowed-out, or fresh egg into the salty, colored water, leaving it for at least an hour or even longer — up until the next day. Without disturbing the liquid too much, you can gently turn the egg from time to time, so that it gathers more crystals around it. Once you have the desired effect — which should be an egg with sparkly crystals stuck to it — fish it out and let it dry. You can add more sparkles by then repeating this process using a new bowl of water with color and salt added. A good tip is that once you've made the salty water, heat it so more of the salt dissolves, allowing you to add even more salt for better results.
Create cool stripes with rubber bands
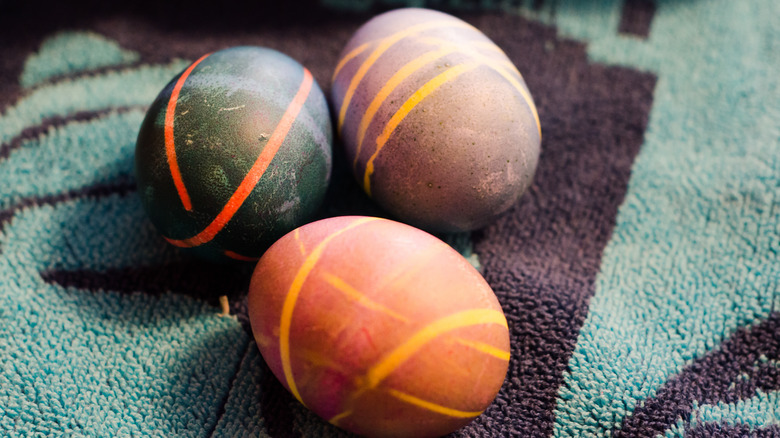
Kids love dyeing eggs, because it's fun, but creating a patterned Easter egg is even better. A great eggs-ample of a fun Easter egg pattern is a striped design. Like so many decorative ideas, it's not complicated and doesn't require expensive or hard-to-source materials. All you need are some rubber bands of various thickness, cups, and an egg carton with a paper towel underneath, plus either a natural dye or some type of food coloring with a few drops of vinegar added. You'll also need some eggs, of course!
Put rubber bands round an egg and dip it into the dye, using different colored dyes in separate cups. Let the egg dry lying lengthwise, not sitting inside an egg carton. Dry one side, then turn it over and dry the other side. Then, take off the bands and add new ones to the dried, dyed egg in different positions than the previous band placement. (Try putting bands across the middle of the egg horizontally first, and then creating a vertical stripe. Diagonal patterns look good, too!) Dip the egg in a different color this time, and dry once again before removing the bands. The choice of whether to create a haphazard pattern or regular stripes is yours.
Vintage red cabbage eggs with herb motifs
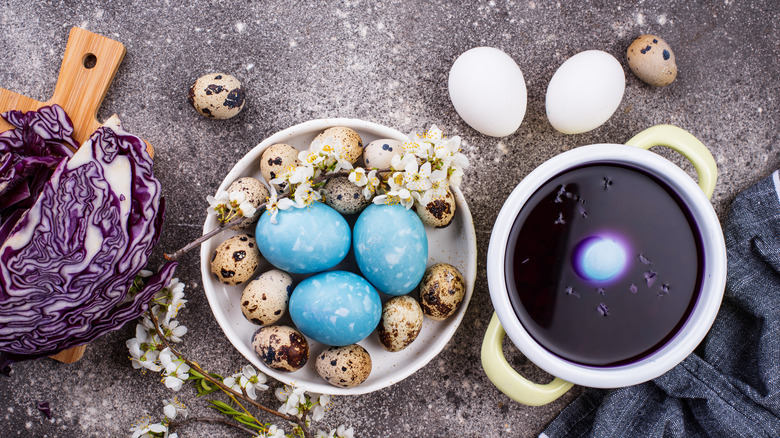
There's something wonderfully timeless about the idea of Easter eggs and handicrafts that involve dyeing eggs can also be done in a traditional way too. Modern-day TikToker @the_vintagearean, who portrays a vintage way of life, makes eggs-traordinary Easter eggs using red cabbage, while adding a surprising design element using fresh herbs.
Hard boil some eggs, while also boiling shredded red cabbage in a separate pot. Meanwhile, cut pieces of cloth, perhaps from an old t-shirt, into squares that are big enough to wrap around an egg. Pour the boiled cabbage water turns purple, pour it into three separate jars with lids. Next, place an herb leaf, such as parsley, onto the middle of three squares of cloth and place a boiled egg on top of each of these. Wrap the cloth around the eggs, securing at the top with some string or twine. Add a tablespoon of vinegar to one of the jars only, and the same amount of baking soda to a different jar, leaving one jar with just the cabbage juice. Each creates a different color intensity, while the herb creates a non-dyed motif. Put the cloth-wrapped eggs, along with a plain hard-boiled egg, into each jar. Close for 24 hours. Take them out, unwrap the eggs that are in the cloth, and dry them all on a wire rack as you marvel at your old-fashioned decorations.
Victorian decoupage eggs add a floral touch
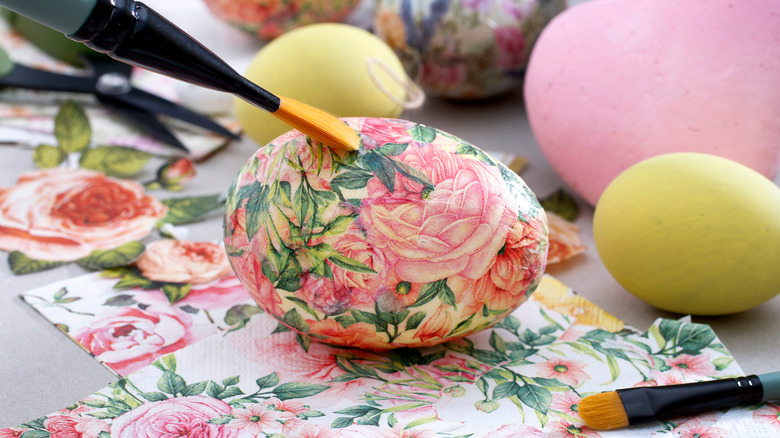
You can add a Victorian theme with floral decorated Easter eggs that are simply eggs-quisite. What's more, you don't have to get all messy using colored dyes either. Honestly Yum inspires a love of springtime with a découpage Easter egg hack that is both nostalgic and romantic. To really create a whimsical wow factor and some drama, you can use an ostrich egg, but a hen's egg will do just fine, too. Here's how.
Cut out several floral designs from some wrapping paper, or perhaps some wallpaper, as close to the edge of the outline as you can. You want to get all these cut out first so that you can work out your design. Apply a thin layer of Modge Podge glue, sealer and finish onto the shell of a hollowed-out egg before sticking on one of the cutouts. Add some more of the glue over the top, making sure the design is smoothed out first using the brush. Continue this process with each botanical application, before adding a coat of glue over the whole egg. A good tip is to put your motifs in position to see how they'll look before you start sticking. Use an egg stand to display your finished ornament.
Ink your egg with temporary tattoos
Unless you're a fabulous artist and have a lot of time to paint beautiful designs, you may be interested in this artistic-looking Easter egg hack from Color Made Happy. All you really need, apart from eggs, are some temporary tattoos and a damp sponge. While you can add designs to dyed eggs, there's nothing to say you can't add designs to white eggs if you want the colorful artwork to really stand out.
Simply cut the tattoo so that it fits on the surface of the egg, whether it's a single design or a pattern that's going around the egg. Take off the layer protecting the tattoo and put the design onto the egg. Sponge over the back of the tattoo, holding it there for around half a minute. Take your time peeling off the back, revealing the egg with the tattoo transferred onto the shell. Glitter tattoos and metallic ones can create a more eye-catching design look, too, which could work well for a party. If you're tattooing lots of eggs, you can create a theme with matching or complementary tattoo styles.
Nail polish eggs look all made up

One clever and eggs-tremely handy Easter egg decorating hack is closer at hand than you might think ... literally! Quest Type reimagines nail polish by turning it into a paint and a dye for your eggs. How you use it is up to you, but a good tip is to only color one part of the egg so that you can dry it before turning it over to paint the rest. This prevents smudges.
You can quite simply paint the polish onto the egg using the brush attached to the top, creating whatever design you like. Another method is to drip different nail polish colors onto the surface of room-temperature water in a cup — more drops for lighter colors, fewer drops for darker ones. Trace a toothpick through the drops of paint so that they create a swirling pattern, and then dunk the egg. When you take it out of the water, the design should have transferred and dried onto the shell straightaway. Meanwhile, there's nothing more satisfying than a spot of stippling. Put small amounts of nail polish on a paper plate. Use a cotton bud and dip this into the color and dot, or stipple, this onto the surface of the egg, creating your own unique design.
Cook a soft-center chocolate cake inside a real egg

It looks like an egg, but when you crack it open, it's actually a moist chocolate sponge cake with a gooey, chocolaty center. It doesn't get much more eggs-hilarating than that! Not only do you have a surprise element, but you also end up with a delicious cake to eat up as well — if you follow this Scrumdiddlyumptious hack, that is.
Pierce the shells of 10 eggs, blowing out the contents of two in one bowl and the eight remaining in another. Rinse the eggshells and leave in brine for half an hour before drying them in an oven set at 125 F. Take them out and turn up the oven to 360 F. Whisk up the two eggs, adding in a pinch of salt and 3.5 ounces of sugar to create a batter. Gently melt 3.5 ounces of dark chocolate and 2.5 ounces of butter in a bain-marie, before adding to the batter. Sieve and mix in a tablespoon and a half of cocoa powder and 2 ounces of flour. Add a drop of oil to the eggshells, swirling around to cover the inside and pipe in the batter mix to three-quarters full. Bake for 20 minutes. Cut off any cake that's come out of the shell and clean the outside with a damp cloth. Next, put a hole in the cake with a skewer, filling with Nutella for a scrumptious soft-center treat.
Dip dye in your muffin tray
Do you like muffins? Well, after you've finished baking some, you can keep the tin out to make some seriously eggs-cellent Easter eggs. Not only does food blogger Pepper Scraps cook her eggs in a muffin tin, she dyes them in there too. All you need to do is fill each of the individual cups in the tin with equal parts water and vinegar, and add in food coloring. Make sure they're not too full, because the next step is adding the eggs in and rolling them around until they're covered with color.
You can also opt to dip an egg and not roll it, so that only half of it is dyed. Let that side dry before turning it over and coloring the other side by dipping it into a different color. And if you have a white crayon, the creativity doesn't have to stop there. Dye an egg in a muffin cup, preferably using a lighter color to begin with. Dry the egg and draw on it using the crayon before dipping it into the dye again. Basically, wherever you've drawn won't change color, keeping the original dye shade and making your crayon design stand out against the darker color.
Decorate Easter eggs with tape
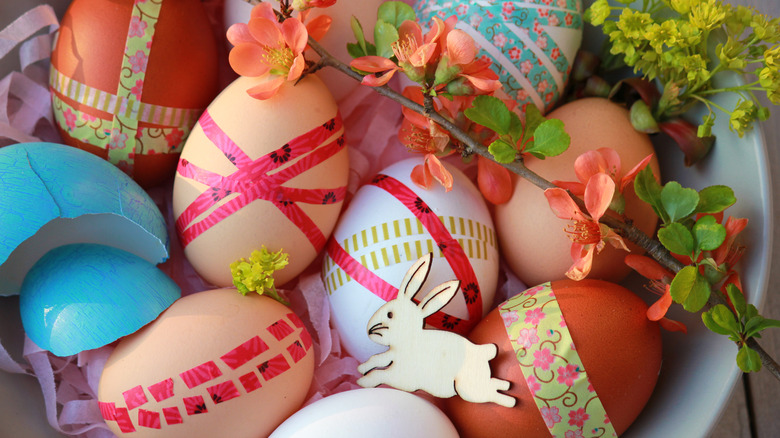
If you're a fan of crafts, you definitely have some washi tape on hand. It's tape, yet unlike some tapes it's easy to tear and cut, which makes this next Easter egg hack perfect for younger kids. The Kitchen Table Classroom suggests that decorating eggs using this tape a great way to eggs-perience a mess-free, colorful handicraft that's not so complicated either. It can also teach little ones about color and design, inspire their creativity, and get them to try cutting out different shapes.
A good preparation step that grown-ups can do before unleashing the decorators is to create tape lengths of up to 8" for each tape design, sticking one end to a table so that young crafters can cut or tear off from these pre-cut strips. This helps to prevent young creatives from using too much tape, and makes it far more manageable for them to decorate their eggs, while cutting down on waste. Using hard-boiled eggs is advised for this decorative method, too.
Add some science to make rubber Easter eggs
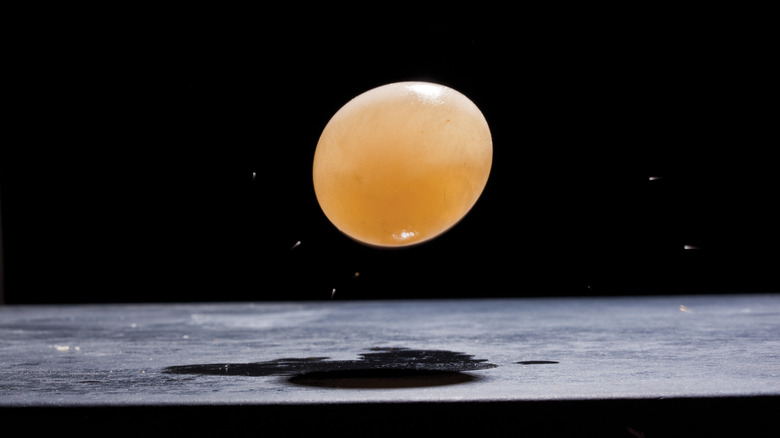
Talk about Easter eggs that are totally different! The only eggs-planation for these rubbery, colorful eggs is science. Chemical Kim has a quirky Easter egg hack that's fun, easy to do, and doesn't require a whole lot of equipment. The results are amazing, which scores this hack extra points from young scientists. You just need fresh eggs, although you can experiment with boiled ones as well, along with some vinegar, food coloring, and glass jars.
Gently place an egg into a glass jar. Cover the egg with vinegar and add some drops of coloring. Leave the egg in the solution for a couple of days, making sure you change the vinegar and food coloring each day. Once you take the egg out, it won't feel hard anymore, just weirdly rubbery — and bigger in size! If you want to know the science, so you can sound smart to kids while making these rubber eggs, then the acid from the vinegar basically dissolves the calcium carbonate eggshell. This leaves the membrane, which lets in water, which also makes the rubbery egg look like it's grown larger!
The ultimate Easter egg bounces and glows in the dark

It's possible that a bouncing, glow-in-the-dark egg may not be your first thought when it comes to Easter decorations. That's because you're not the Crazy Russian Hacker, who demonstrates how to create eggs-tra terrestrial style Easter eggs. Essentially, this hack consists of creating rubbery eggs by adding eggs to white vinegar. However, instead of adding in food coloring, you'll add the contents of a yellow highlighter pen instead. After two days, wipe any remaining eggshell away. If you stick the finished product under a UV light, it will glow. Not only that, but you can also bounce the glowing egg too, although not too hard, as it's still a soft, raw egg inside!
Speaking of eggs that light up in the dark, a great idea for older kids is a nighttime Easter egg hunt. Another way to create glowing eggs is to add glow sticks inside plastic eggs so they light up any Easter party. Sprinkle Some Fun suggests painting eggs with blacklight reactive paint and giving egg hunters a blacklight torch so that in darkness the eggs are totally hidden. Remember, none of these are edible hacks, so you may want to have some chocolate eggs on hand as a surprise prize, too!
Eggs-cellent Easter egg hacks are ultimately about having fun and getting creative, and trying out different ways to bring some color into the world to celebrate springtime!