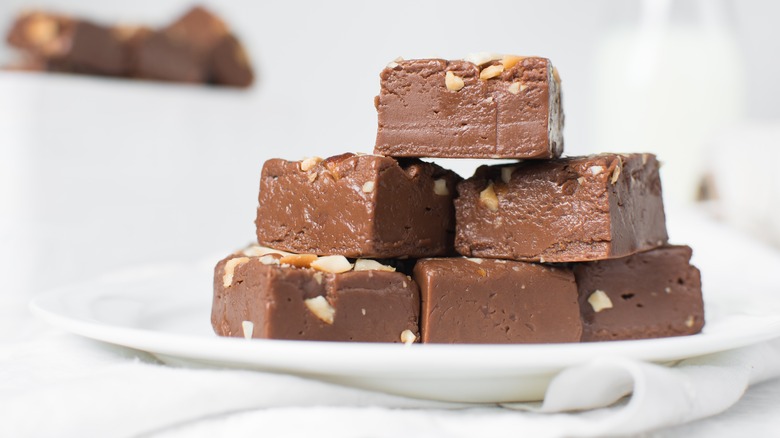
Mistakes Everyone Makes With Homemade Fudge
For a confection invented by mistake, there sure are a lot of things that can go wrong when making a batch of fudge. The historical myth tells us that fudge was invented in Baltimore, Maryland, when a confectioner made a batch of caramels that did not go according to plan. Wanting to salvage the creation, they did their best and created a new confection. The name "fudge" likely derives from the word "fadge," which means to "mess up" — appropriate for the treat reportedly made from a blunder.
Since then, fudge has gone on to become a staple sweet in the United States. Made from simple ingredients — typically sugar, dairy such as butter and milk, and chocolate — creating a perfect, smooth fudge can be remarkably difficult. There are, of course, other kinds of fudge made with other flavors, such as penuche and the molten version that tops ice cream. But we will be focusing on mistakes to avoid when making classic chewy chocolate fudge. Once you perfect that, moving on to more complicated varieties will be a cinch.
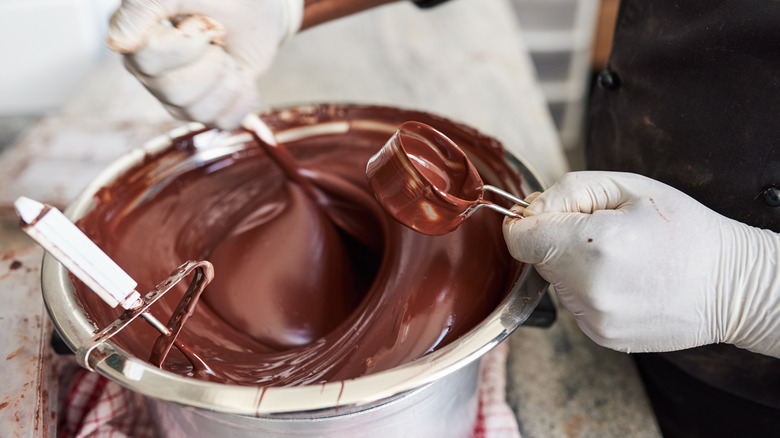
Using a lightweight pot
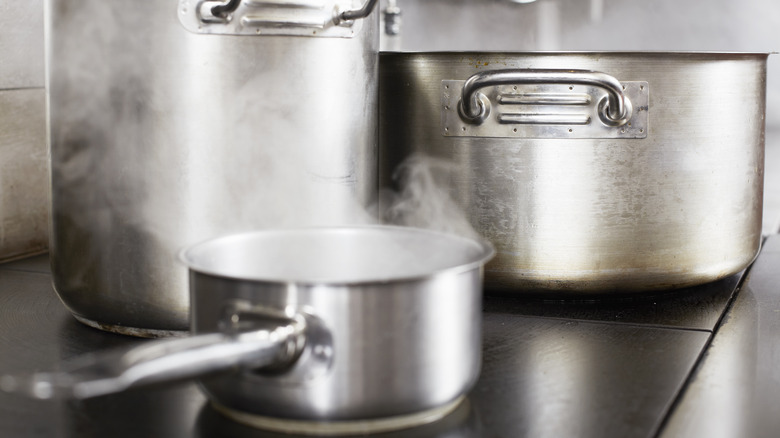
When making fudge on a stovetop, the quality of the pan can make just as much of a difference in the outcome as the ingredients used. Those who have cooked in many settings know that there is a wide variation in the weight of pots and pans. Often the weight of the pan is an indication of quality. Heavy-bottomed pans are typically made using multiple steel, aluminum, and/or copper layers. With these multiple layers, the end result is a heavier and thicker pan bottom. While these do tend to take longer to heat up than the thinner-bottomed variety, they also distribute heat much better and prevent hot spots from forming on the bottom.
For fudge, even heat distribution is key. It will help prevent the mixture from burning during cooking. Sugar and chocolate are temperature sensitive, and a blast of high heat can lead to your mixture going from molten to burned in the blink of an eye.
So what is defined as a thick-bottomed or heavy pan? There is no set, agreed-upon definition; however, recommendations range from about 5 millimeters to 10 millimeters in thickness.
Stirring
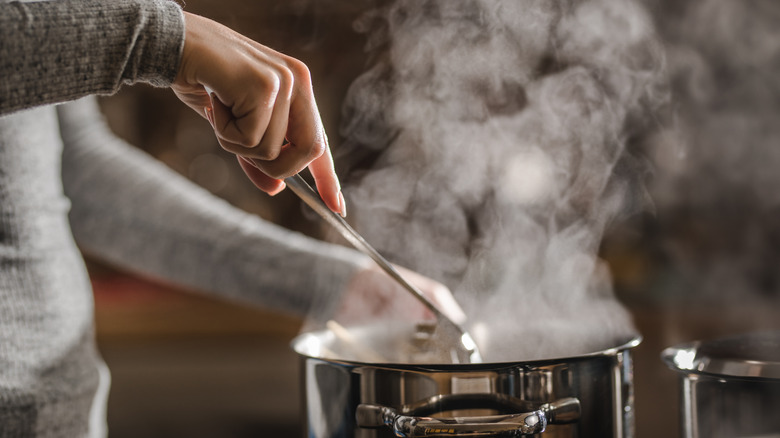
Part of why it is so important to have a high-quality heavy-bottomed pan that provides an even heat is because there will come a point in the cooking process when you cannot stir the fudge. When all the sugar and liquid are first added to the pan, they may be stirred gently, but once they reach the boiling point, you must stop. Do not continue stirring or your fudge will be gritty instead of smooth. While recipes vary, most classic fudge recipes want you to bring the mixture to what is known as the "soft-ball" stage. This means the temperature has reached 234 degrees Fahrenheit. At this stage, the liquid has evaporated and the sugar has liquified so that when cooled, the mixture creates a cohesive food that remains malleable (as opposed to hard like a lollipop).
If you continue to stir during the cooking process, crystalized pieces of sugar could break off from the side of the pan and can cause grainy fudge.
Additionally, there is a period when the fudge should be partially cooled before being beaten, a process by which air is incorporated into the fudge. If you beat or stir the fudge before it reaches the appropriate temperature, large sugar crystals are more likely to form, causing grainy fudge.
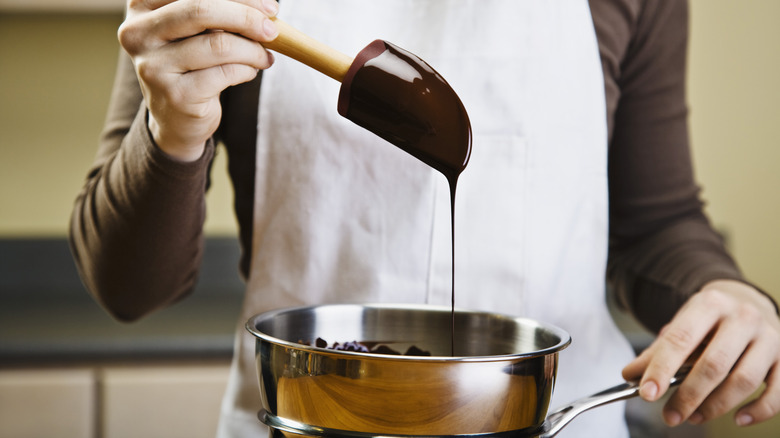
Scraping
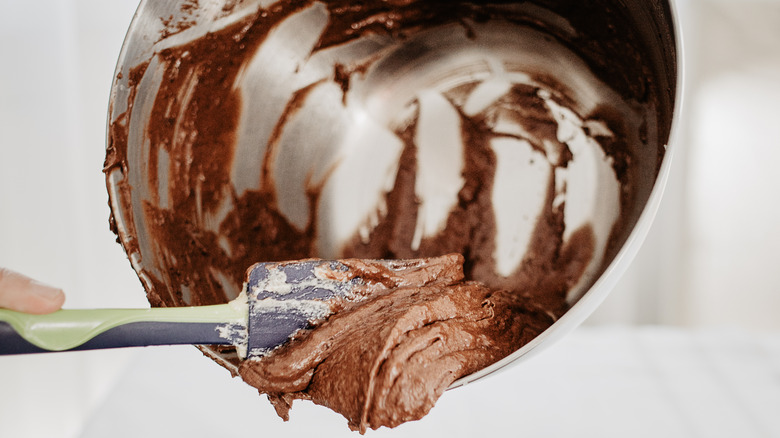
We know no one wants to waste any of that delicious chocolaty goodness, but it is important to refrain from scraping the pan or bowl during the fudge-making process.
During the melting process, we have already emphasized the importance of not stirring. This is to prevent any implement from scraping crystallized sugar off the sides and making grainy fudge. The problems associated with scraping do not stop there. If you are using a recipe that adds the cooked sugar mixture to the chocolate mixture, do not scrape the sides of the sugar pan. Simply pour the mixture into the bowl to avoid crystallized sugar making its way into the mix.
Finally, and we know this is the hardest one, do not scrape the bowl when pouring the mixture into the final mold. Excess crystalized bits tend to cling to the walls of the bowl. We know you do not want to leave behind any of that chocolatey goodness, but think of this as your opportunity to lick the bowl while the rest of the fudge sets.
Not using a candy thermometer
Cooking fudge is, at its root, candy making, which is more of a scientific process than inexperienced candy makers may know. Once ingredients have been added to the pan, they must reach the soft-ball stage, which is generally considered to be around 234 degrees Fahrenheit. There is a bit of a range that you can fall into to meet his stage, but not much of one. During experiments, the brand ThermoWorks found that you really only had about 5 degrees of wiggle room for optimal temperature.
Additionally, when cooling, there is an ideal temperature range to reach before beating that is relatively narrow. Sugar reacts differently at different temperatures, so to ensure you are meeting exactly the right temperatures, a candy thermometer is necessary. Without one, you can end up with fudge that is too soft from underheating, too hard from overheating, or has crystals from not cooling enough. Precision is key for candy making.
There are multiple kinds of candy thermometers. There are traditional flat thermometers that clip onto the side of a pot, digital ones with long probes to stick into the mixture, and even digital infrared ones, so find one that works for you.
Using the wrong chocolate

The star of the show for fudge is the chocolate. When you have minimal ingredients, the quality and the components of those ingredients play a big part in the end result. For example, when it comes to chocolate, there are a range of options. In terms of shapes, bars, baking blocks, and chocolate chips are all common options. While you can use chocolate chips, there are some advantages to using a chocolate bar or block of baking chocolate. Chocolate chips can take longer to melt and have a thicker consistency in the melted state. This is because chocolate chips typically include stabilizers that help them retain their shape. This is great for cookies but not as great for melting in fudge.
Additionally, chocolate comes in different levels of sweetness and cocoa content. A typical milk chocolate bar will have less cocoa and more milk and sugar in it than a dark chocolate bar or baked chocolate. On that note, baking chocolate is often entirely unsweetened, which gives the fudge maker complete control over the sweetness of the end result. Make sure you follow the recipe in regard to what kind of chocolate to get. If no specifications are provided, internet chef Joshua Weissman recommends using 60% dark chocolate.
Not watching the fudge
Do not, we repeat, do not take your eyes off the fudge until it is setting in the pan. As we have already discussed, making fudge is a delicate art that requires precision. Taking your eyes away can cause you to miss important markers in each stage.
Many of these markers are based on thermometer readings. If you don't monitor your fudge, you may miss when it hits the correct temperature. There is also one important step that is done almost entirely by look alone. When it comes time to beat the fudge, you will know you are done when the look of the fudge has changed. The chocolate mixture will go from shiny to dull. Additionally, the mixture will have started to thicken. Once this stage is reached, it is important to stop beating, or your fudge may become too hard. Additionally, if you do not beat the fudge to the appropriate stage, the fudge simply will not set completely. It is important to watch for the optimal matte finish to the fudge to determine when it is time to set the fudge.
Using the wrong utensils
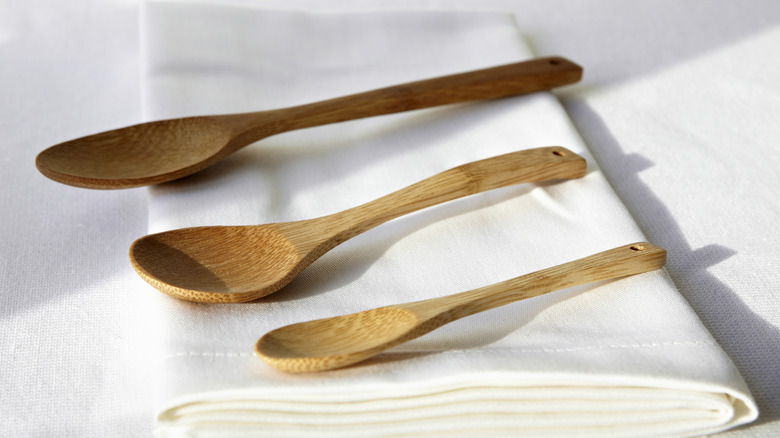
When it is time to beat the fudge, it is important to use the right tool. The generally accepted best tool for the project is the simple wooden spoon. Wooden spoons are ideal because you can put a great deal of force behind them when beating the fudge and the wood does not transfer heat the way a metal spoon will. This will help the mixture reach the correct consistency faster.
That being said, metal spoons are easier to clean and have fewer imperfections which can affect the final outcome of the fudge. So make sure if you are using a wooden spoon that it is clean and free of food residue.
Beating is a difficult task to do by hand, so if necessary, you can use an electric mixer. If you use an electric mixer, make sure you use a paddle attachment (not the whisk), do not place it on a high speed, and keep an eye on the consistency. Because electric mixers are so efficient, it is easy to overbeat your fudge.
Not prepping the pan
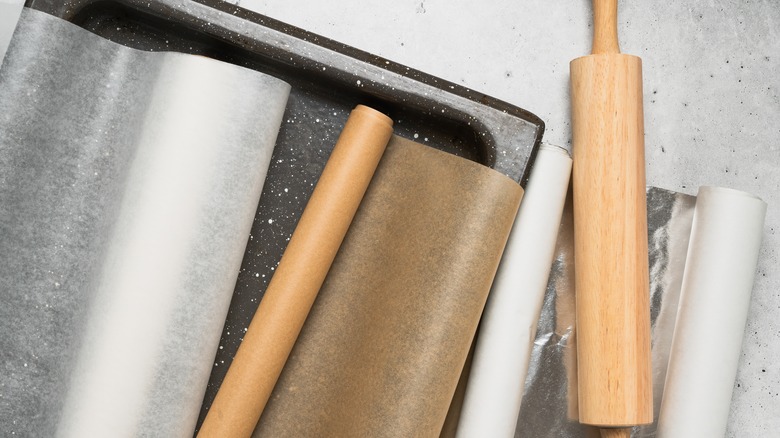
Once you're done beating the fudge mixture, you have to press it into a pan to set. Fudge is, by nature, sticky, especially when it is in its liquid form before it has set. There will certainly be a great deal of cleanup to do once the fudge is complete. If you want to avoid further cleanup and make sure your fudge doesn't stick to the pan it has set in, make sure you have prepped the pan appropriately. Do this before you start cooking because there won't be time after you've finished beating the fudge.
There are a number of ways to prevent fudge from sticking. The most effective way is to line the pan with some sort of removable liner such as aluminum foil or parchment paper. While you cannot bake with wax paper, you can use it to line your fudge pan, as it will not be going in the oven.
Any of these materials will work. To make removal even easier, instead of simply cutting a piece to fit the bottom of the pan, leave an overhanging segment. This will allow you to pull the whole finished block of fudge out with relative ease. Consider also using oil or butter to grease the pan and ensure that any fudge that touches the pan will not stick to it.
Cutting without a plan
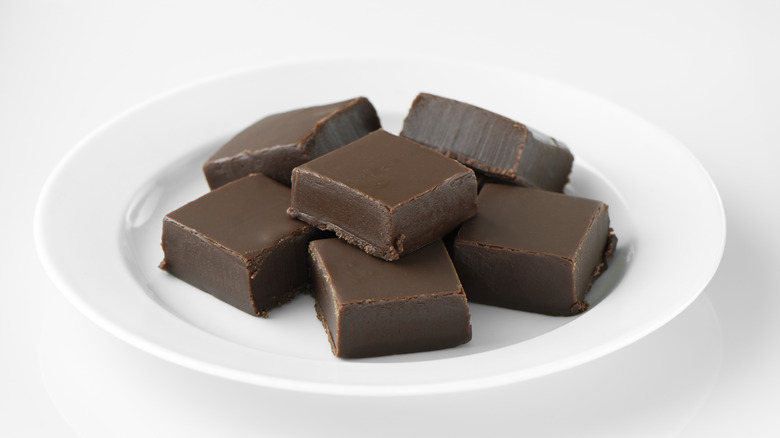
To achieve a perfectly cut fudge that is free from crumbling rough edges, make sure you put some thought into it before just hacking away at your finished block. First, in order to achieve symmetrical pieces, consider scoring the top of the fudge first to create a guide for evenly cut pieces.
Next, make sure you are using a sharp knife, not a dull butter knife. A sharp knife will cut through the fudge more cleanly and easily than a dull knife, which will drag through the mixture and cause ragged edges.
Additionally, heating the blade will help slice through the fudge with ease, ever so lightly melting its way through. To do this, run the blade of the knife through hot water or place it in a cup of hot water to gently warm the blade. Make sure you dry the knife quickly, then proceed to cutting the fudge. The goal here is to make one clean cut down the fudge, not to struggle through each cut.
Storing finished fudge in the fridge
Finally, you have worked so hard to create the perfect fudge. Do not ruin it at the last minute by storing it incorrectly. Fudge is remarkably shelf stable and can last on the counter for two to three weeks with minimal intervention. In fact, the counter is the ideal place for it. Simply wrap the fudge in wax paper and leave it on the counter. Make sure it is wrapped, as unwrapped fudge will become hard and crumbly.
Do not under any circumstances put the fudge in the refrigerator. It has no reason to be there. The fridge will dry out the fudge and make it unpleasant to eat. If you need the fudge to last longer than it can on the counter, you can freeze the fudge. To freeze, make sure the fudge is wrapped tightly in plastic wrap, or alternatively, you can vacuum seal it. Put the wrapped fudge in an airtight container and store it in the freezer for up to a year. When ready to eat it, let the fudge sit out and come to room temperature before enjoying your sweet treat.