12 Homemade Pizza Secrets You'll Wish You Knew Sooner
Who can resist the tantalizing aroma of freshly baked pizza? While ordering a pizza from your favorite pizzeria is convenient, there's a unique joy in crafting your own homemade pizza. Whether you're a beginner in the kitchen or a seasoned home cook, mastering the art of homemade pizza can be a game-changer.
In this article, we'll focus on 12 homemade pizza secrets that you'll wish you knew sooner, offering you insider tips that will turn your homemade pizza from just okay to spectacular. We'll examine all kinds of factors, from the flour you use to make your pizza to cold fermentation to various baking methods. You can also expect some time-saving tips, such as how to get away with not kneading your dough and how to freeze extra dough for later use.
Join us as we unveil these pizza secrets that will transform your kitchen into a pizzeria. Get ready to impress your family and friends with pizzas that not only look and smell amazing but taste truly divine. Let's embark on a pizza-making adventure that will turn you into an enthusiastic pizzaiolo, even if you've tried and failed with homemade pizza in the past.
1. Some types of flour are better than others

Choosing the right type of flour is crucial for making a perfect pizza dough. Different types of flour have varying protein contents, which affects the texture and structure of the dough. Italian Tipo 00 bread flour is a great choice for most pizzas. It is finely ground and has a high protein content of around 12–13%, creating a soft and elastic dough that's easy to bake into a delicate, thin crust if desired. While most 00 flour in the U.S. — particularly the popular Caputo brand — has a good protein content for pizza, there are lower-protein types available that aren't ideal for pizza and will result in a wetter dough.
For a thicker, chewier crust, you can opt for bread flour, which has a higher protein content of around 12–14%. The extra protein provides more structure to the dough, resulting in a substantial, hearty crust. Bread flour is an excellent choice for pan pizzas and deep-dish pizzas. That said, it also works well for thinner crusts. If you can't go out and buy specialty Tipo 00 flour, we'd always recommend using white bread flour instead.
Now, if all you have in your cupboard is all-purpose flour, you can use it as a substitute. However, its low protein content results in somewhat of a lackluster crust. The dough also turns out wetter, so you'll need to add more flour or it'll be tough to work with.
2. Water temperature is important
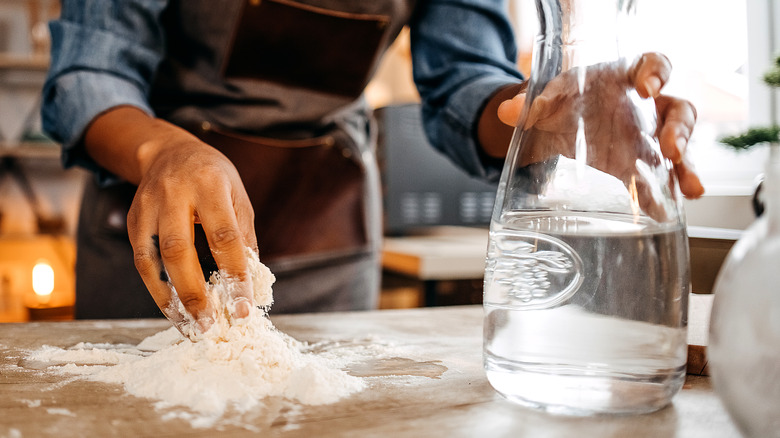
Water temperature is a critical factor when making pizza dough because it directly influences the fermentation process, which in turn affects the texture, flavor, and structure of the final crust. Warm water activates the yeast more quickly, while water that is too hot can kill the yeast; water that is too cold will not activate it sufficiently if you're hoping for a quick rise. Properly activated yeast ensures a good rise and a light, airy texture in the finished crust.
The temperature of the water affects the rate of fermentation. Warmer water speeds up fermentation, allowing the dough to rise faster. Cooler water slows down the process. Controlling the fermentation rate is crucial because it allows you to develop the desired flavor profile in the dough. Longer, slower fermentation (achieved with cooler water) often results in a more complex and flavorful crust.
If you're using active dry yeast, a water temperature of between 105 and 110 degrees Fahrenheit is ideal. If you have a thermometer you can test the water with, great. If not, just test the water with your hands. It should feel lukewarm or tepid. It's better to err on the side of caution with cooler water than to go too hot.
3. Cold fermentation improves the flavor of the crust
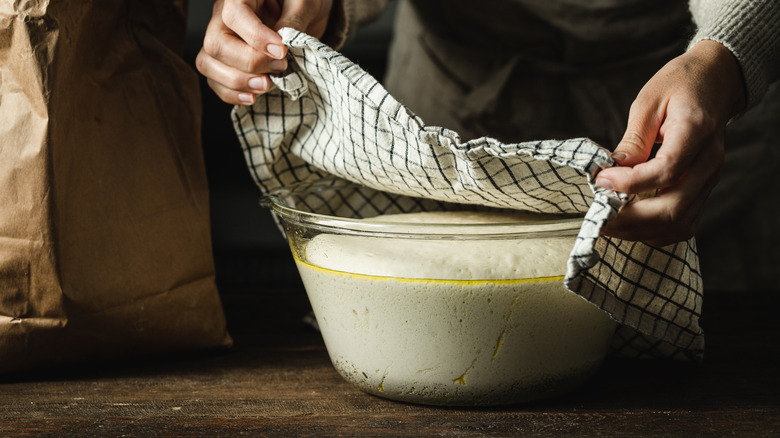
Cold fermentation in pizza making is a process in which the pizza dough is allowed to rise and develop its flavors in the refrigerator over an extended period. During this time, the dough undergoes a slow fermentation process at a lower temperature, usually around 38–40 degrees Fahrenheit. While this usually ranges from 24 to 72 hours, some find the best results from a cold ferment of between three and five days. This slow and cold fermentation has several benefits that significantly improve the crust of the pizza.
Cold fermentation lets the enzymes in the dough break down complex carbohydrates into simpler sugars and proteins into amino acids. This breakdown of compounds results in a more flavorful dough. The longer fermentation period provides time for the development of subtle, nuanced flavors, creating a rich, complex taste in the crust.
A slow, cold rise also contributes to the development of gluten in the dough. During the slow fermentation process, gluten strands become more organized and aligned. This produces a pizza with a thin, airy, and chewy crust. The slow fermentation also leads to a more elastic dough, making it easier to handle and shape without tearing. By allowing the dough to ferment slowly in the refrigerator, you can create a superior pizza crust with a depth of flavor and a delightful combination of crispiness and chewiness.
4. With a long enough fermentation time, you don't need to knead your dough

If you love homemade pizza but hate kneading, we have some good news for you — you don't always have to knead your pizza dough. The principle behind kneading is to develop gluten strands in your dough, which improves the structure of the finished crust.
However, it's not just kneading that develops gluten. Time can do the same job. With a longer fermentation period, gluten continues to develop slowly over time. The enzymes present in the dough work to break down complex proteins into simpler, more elastic forms. This gradual development of gluten structure results in a dough that is easy to stretch and shape and has a great texture and structure when baked, even without kneading.
There are some great, no-knead pizza dough recipes that use a long fermentation time to avoid the need to knead. However, some people still knead pizza dough that's going to undergo a long fermentation — for 24 hours or more — to avoid potentially variable results from the no-knead method. Kneading may lead to a somewhat springier and chewier texture, but a no-knead method is perfect for those times when you don't have the time or the patience to knead dough.
5. You can make extra dough and freeze it
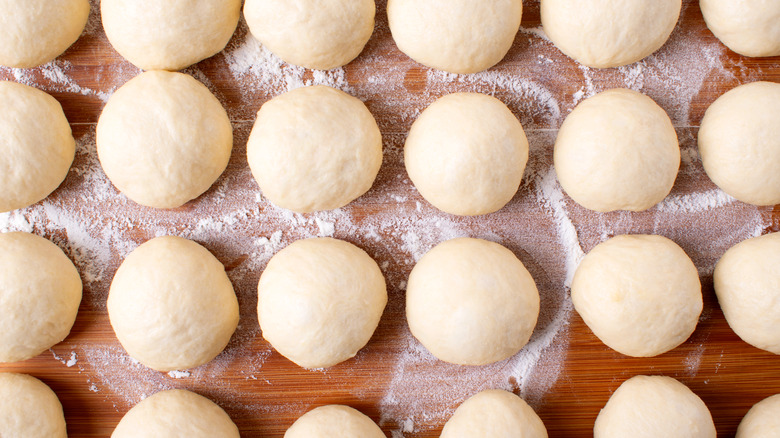
Next time you make pizza from scratch, consider making extra dough and freezing some for those times that you need a quick pizza hit. But, what's the best way to freeze it? You should start by preparing your pizza dough according to your favorite recipe. Allow the dough to go through its initial rise and punching down stages. Once the dough has risen, divide it into individual portions. These portions should be the size of a single pizza, making it easy to defrost and use later.
The next step is to shape the divided portions into smooth, round balls. Lightly coat each ball with a thin layer of olive oil to prevent them from sticking together and to maintain moisture during freezing. Olive oil also adds a subtle flavor to the dough as it freezes. Individually wrap each dough ball tightly in plastic wrap or in a freezer bag, making sure to squeeze out the air. For an extra layer of protection, you can place the wrapped dough balls in an airtight container. Be sure to label the freezer bag or container with the date to keep track of freshness.
When you're ready to make pizza, remove the desired number of dough balls from the freezer. Place them in the refrigerator for a slow, overnight thaw. Then, leave them on the counter at room temperature for another 30 minutes to an hour before stretching and topping.
6. Use semolina flour to dust surfaces and keep your dough from sticking
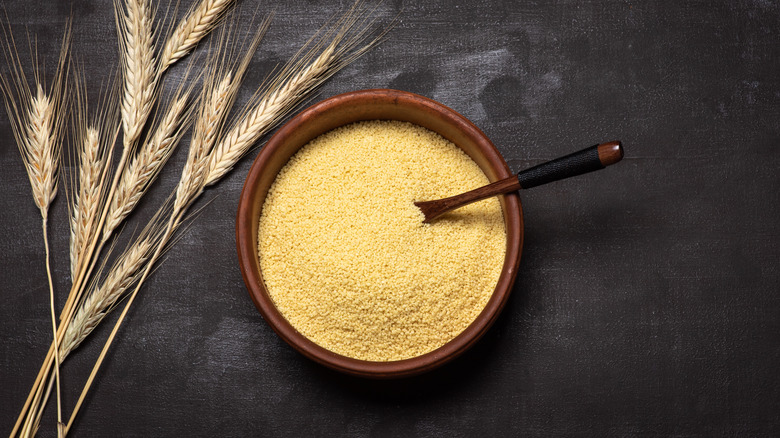
If you've been using white flour to dust surfaces and keep your dough from sticking to the countertop, you need to rethink your choices. Try semolina flour instead. Semolina flour is a coarsely ground flour made from durum wheat, and it's commonly used in pasta and Italian bread making. When it comes to making pizza, using semolina flour to dust surfaces and keep your dough from sticking offers several advantages over regular flour.
Semolina flour has a coarser texture compared to regular flour, which means it creates a more substantial barrier between the dough and the surface. This coarse texture helps prevent the dough from sticking, allowing you to handle and transfer the pizza easily. In fact, the coarse pieces act somewhat like ball bearings, letting you more easily slide your pizza off of the peel into the oven.
Semolina flour has a higher heat resistance than regular flour, so your pizza won't develop a burnt taste or texture on the bottom. Semolina flour can also impart a subtle crispiness to the bottom of your pizza crust that many pizza enthusiasts appreciate. Plus, if you've ever over-floured the bottom of your pizza and ended up with what felt like a mouthful of raw flour, you'll understand why semolina is the superior choice.
7. It's better to stretch your dough by hand

Stretching pizza dough by hand is a traditional technique used by pizzaiolos around the world. While rolling dough with a rolling pin can be quicker and easier, stretching the dough by hand offers several advantages that contribute to a better pizza crust.
First off, when you stretch pizza dough by hand, you're more likely to preserve the air bubbles that have formed during the dough's fermentation process. These air pockets contribute to the light and airy texture of the crust. Rolling the dough with a pin tends to flatten these bubbles and will give you a denser crust.
Stretching your pizza this way also lets the gluten in the dough align naturally. Gluten is the protein responsible for the dough's elasticity and structure. By gently stretching the dough, you encourage the gluten strands to arrange themselves in a way that promotes a tender, chewy texture. Rolling, on the other hand, can compress the gluten network and lead to a tougher crust.
What's more, hand-stretching provides greater control over the thickness of the crust. You can create a thinner center and a slightly thicker, pillowy edge known as the cornicione. It's hard to do this evenly with a rolling pin. Plus, it's an art form that has been passed down through generations in pizza-making cultures. Hand-stretching adds a sense of authenticity and craftsmanship to your pizza preparation, even if there is a bit of a learning curve involved.
8. You don't have to cook your pizza sauce
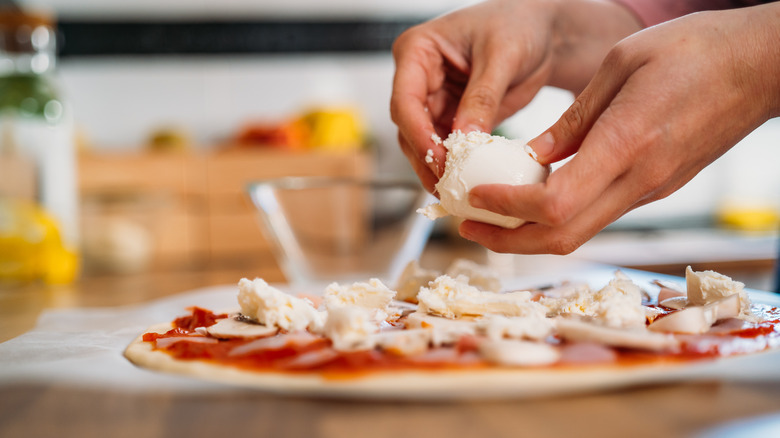
If you've been bemoaning how much time it takes to cook pizza sauce from scratch, the fact is that you don't have to cook it. Actually, many pizza experts agree that it's better if you don't cook it before topping your pizza, giving a fresher flavor to your sauce.
Pizza sauce doesn't necessarily need to be cooked because it is typically baked at high temperatures along with the pizza. During the baking process, the sauce cooks and melds with the other ingredients, infusing the entire pizza with its rich flavors. Using raw sauce preserves the freshness and brightness of the tomatoes and other raw ingredients. Cooking the sauce can give you a final product that tastes a little too rich and overbearing for a pizza. You can even make uncooked pizza sauce with fresh tomatoes, rather than canned, which gives an even more vibrant flavor.
9. Pizza's better if you don't go OTT with the sauce
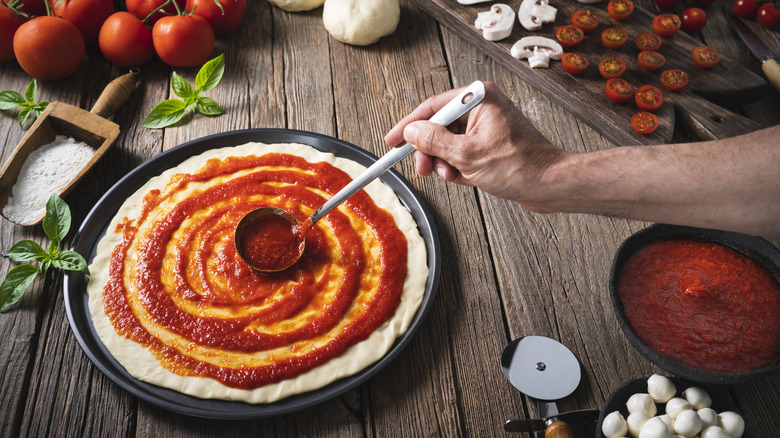
Another sauce-based pizza secret — you don't need too much of it. Have you ever had pizza that just tastes too tomatoey? You taste the sauce, which might be delicious, but it overwhelms the rest of the flavors and leaves your pizza lackluster. So, it's better if you go light on the sauce. Pizza should be a balanced blend of crust, sauce, cheese, and toppings. When you use just the right amount of sauce, it lets the other ingredients shine, as well. Too much sauce can overpower the delicate flavors of the cheese and toppings, disrupting the balance and complexity of tastes that make a great pizza.
Then, there's the issue of texture. Using a thin layer of sauce helps the pizza retain a pleasant texture. Too much sauce can make the crust soggy. By using a moderate amount, you allow the crust to remain crispy and perfectly baked in a satisfying contrast to the toppings. So, how much is the right amount? There's some room for personal preference here, but you should be able to see the dough through the sauce over most of the pizza when it's spread evenly. For a 12- to 14-inch pizza, that means using around ¼ cup.
10. Transferring your dough is easier with a wooden pizza peel
If you're serious about pizza, you'll eventually need a pizza peel. Whether you're using a pizza stone, baking steel, or a dedicated pizza oven, you'll need a peel to launch your pizza into the oven. While you might be tempted by a sleek-looking metal pizza peel, you might find it easier to use a wooden pizza peel. Frustratingly, pizza dough can stick to a peel. This can make it hard to launch your pizza at all or leave you with a misshapen pie. But, using a wooden pizza peel can make it easier to transfer pizza dough to the oven.
It might seem like the slick surface of a metal peel would be less likely to stick to the dough, but actually, the lightly textured surface of wooden peels makes it easier to slide your dough off. It holds onto the semolina you've used for dusting and makes launching your pizza less stressful. The best option is an unfinished or lightly finished wood pizza peel that's simply been rubbed with mineral oil. Those with glossy, varnished finishes aren't that much better than metal peels at preventing dough from sticking.
11. It's worth experimenting with cooking methods
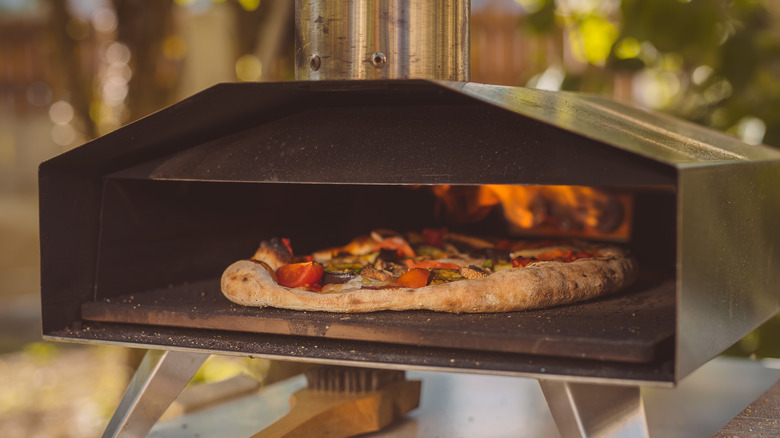
There are many ways that you can cook homemade pizza, and it's worth experimenting with a few of them before settling on your favorite. First off, you have your standard home oven. When cooking pizza in a home oven, you'll need to turn it up as high as it will go — usually 450°F to 500°F — and ideally use either a pizza stone or a baking steel.
You can also cook pizza in a cast iron skillet. To do this, you shape the dough in the skillet, add sauce, cheese, and toppings, and cook on the stovetop until the crust edges are golden. This gives the bottom a crisp finish. Then, you transfer the skillet to a preheated oven or broiler and bake until the cheese is bubbly and the crust is fully cooked.
There's also the option to grill your pizza, which imparts a smoky flavor and a crisp, slightly charred crust. You grill the raw dough on one side first before flipping it, adding sauce and toppings, and closing the lid to finish the cooking.
Or, if you're really dedicated to the art of homemade pizza, you might be ready to invest in either an outdoor pizza oven or an indoor electric pizza oven. These reach much higher temperatures than home ovens, so you get better results, especially if you're aiming for a Neapolitan-style crust.
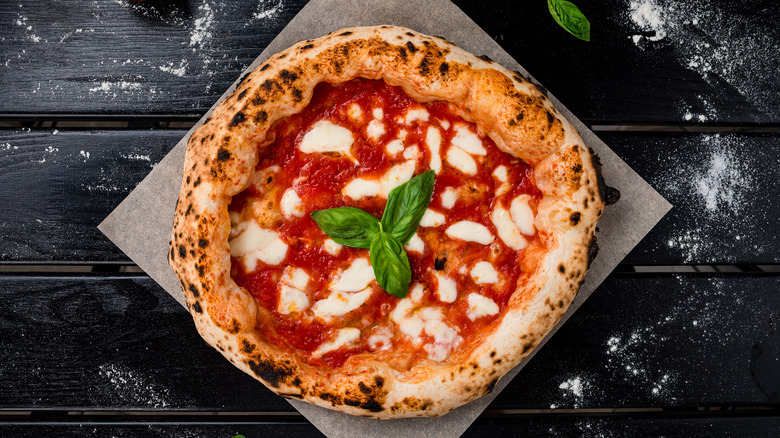
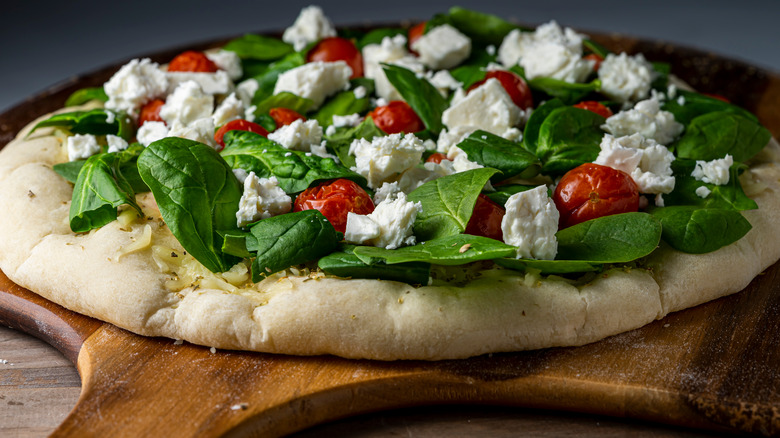
12. Add fresh basil after your pizza has come out of the oven
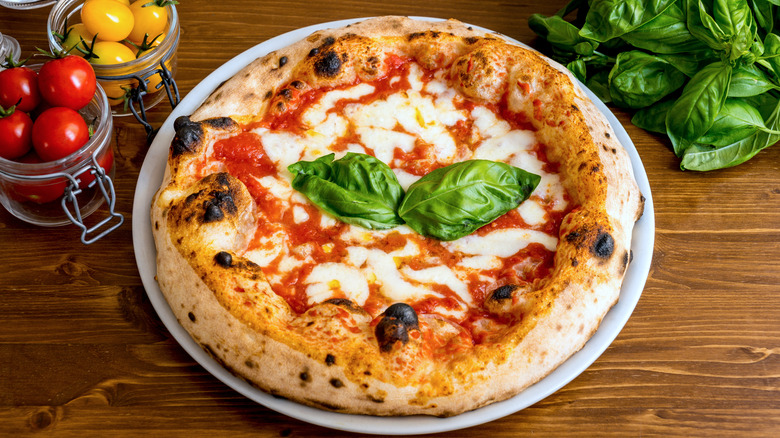
If you've been putting fresh basil on your pizza before cooking it, you've been doing it wrong. Adding fresh basil and other delicate greens to your pizza after it comes out of the oven, rather than before it goes in, preserves their vibrant colors, flavors, and textures.
Fresh basil has a high water content, so it wilts and loses its vibrancy quickly when exposed to high heat. Adding it after baking ensures that it maintains its fresh, crisp texture and bright green color. What's more, the aromatic oils in basil are highly volatile and can be easily destroyed by prolonged exposure to high temperatures. By adding basil after baking, you preserve their essential oils and, subsequently, their intense flavor and aroma. This results in a burst of freshness with each bite.
The same can be said for other soft herbs and fresh greens that you might add to a pizza, including arugula, parsley, or cilantro. Both their texture and flavor will be affected by the high heat at which pizza is cooked, so it's a much better idea to add them after baking.