Mistakes Everyone Makes When Baking With A Silicone Mat
The Silpat silicone baking mat was invented when French baker Guy Demarle mixed silicone and glass fiber to create something that would help him make baguettes. That was back in 1965, and since then, several other brands have gotten into the game; silicone baking mats are now found in many, if not most, kitchens and come in different styles. Their ability to release food with minimal mess is a blessing for anyone who's had to scrape food off a baking tray or peel bits of parchment off the bottom of a cookie.
But you're not going to get the maximum benefit from your new silicone baking mat unless you know how to avoid some common mistakes. Most of these are harmless and simple to fix. However, a few of these mistakes deal with safety, both for you and for the mat. Using a silicone mat can take some getting used to as it can produce different results compared to something like parchment paper, but once you figure out which results you prefer, you'll have a better idea of how and when to use silicone mats instead of other materials. Here are 12 common mistakes that everyone makes when baking with a silicone mat.
Using it in the oven without a tray

Silicone bakeware comes in several shapes and sizes, including molds and pans that seem like they could sit on an oven rack on their own. But silicone baking mats, specifically, should not be used without some sort of support underneath them. They shouldn't go directly on the oven rack because the mats are floppy. The edges could slip between the tines of the rack, leading to dough or other bits of food spilling down onto the floor of the oven, for example. Also, trying to remove a flexible mat covered with food (that could slide off the mat easily) from a hot rack in the oven while wearing mitts is very difficult. And you're not going to want to grab the mat with bare hands.
That being said, don't place the mat on just any tray. Use a perforated baking sheet or a metal grid that allows heat to contact the bottom of the mat. The silicone adds a layer of insulation between the food and the baking sheet or tray, and if the tray is also insulated, that could prevent the food from cooking properly. You can also use a basic, uninsulated cookie sheet if you don't have a perforated version; you just want to avoid having too much of a barrier between the food and the heat.
Not deep cleaning it after use
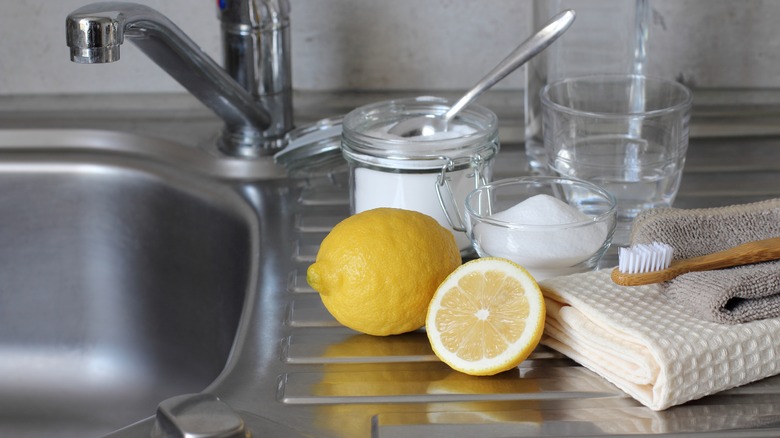
Heat makes silicone expand, allowing it so soak up liquid fats like oils over time. You may find that when your mat is fairly new, cleaning it by washing it with dish soap and water works just fine. But eventually, you're going to notice that the mat feels greasy. What you want to do is give it a thorough cleaning after you use it, rather than just giving it a brief wash. That helps ensure that oil doesn't sit on the surface of the mat for any longer than it has to.
First, use a soap that's neutral and preferably fragrance-free, and use soft sponges to protect the surface of the mat. If you need to really deep-clean the mat because of grease buildup, scrub the mat with cut lemons and then let the mat soak in hot water for about 10 minutes. Wash and let air-dry flat. You can also scrub the mat with baking soda and let that sit (without hot water); rinse off the baking soda, wash, and let air-dry.
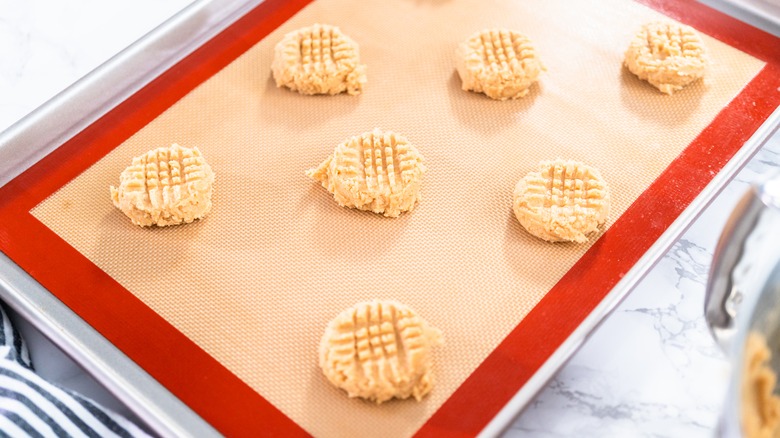
Baking most spreading or soft cookies on it
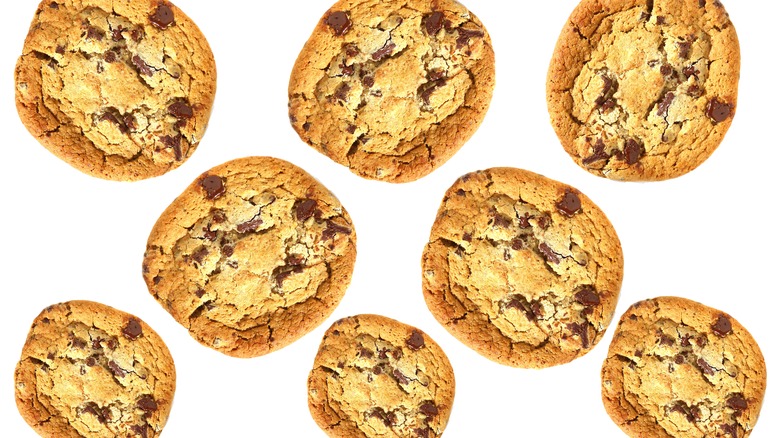
Chances are you've seen many pictures of silicone baking mats with rows of perfect macaron shells or chocolate chip cookies on them, showing how wonderful the mats can be for foods that would normally stick to a cookie sheet. But there's something you need to know before you roll out that cookie dough; if your cookies are meant to spread as they bake or stay puffy and soft, silicone mats aren't the best choice.
There are several problems with using silicone mats for these types of cookies. One is that the silicone is nonstick, so it's slippery and doesn't hold the cookie dough in place quite as well as parchment paper does. The cookie spreads more and ends up being flatter overall. That also leads to the cookie being more crunchy as the thinner dough bakes faster. Last, but not least if you're hoping for a cookie with good texture, those mats insulate the bottom of the cookies from airflow. When the cookies are cooling after baking, don't leave them on the mat. If you do, the bottoms will end up sweating and sitting in overly moist conditions that make them taste odd and look much darker than they should.
Not testing it against parchment paper for baking macarons
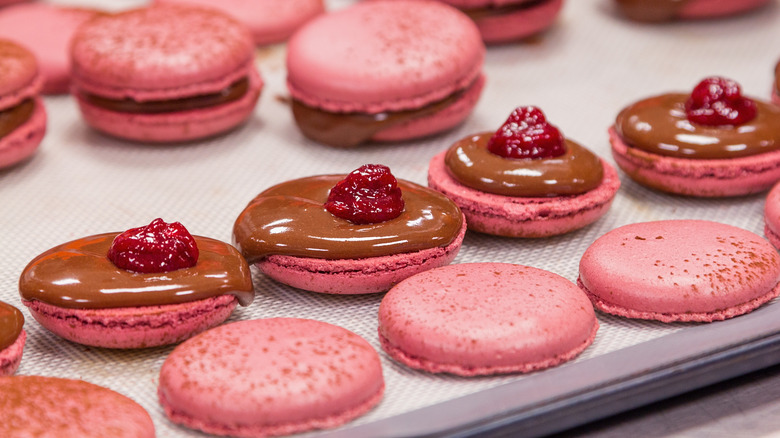
If silicone isn't good for cookies that spread, it should be great for cookies that don't spread, right? Not quite. It is true that cookies that don't spread aren't going to look as affected if you use a silicone mat. But the cookies you bake on silicone can still look different from those you bake on parchment. That includes macarons. You can use either parchment or silicone to make macaron shells; they both work. But you'd be missing out if you didn't try a test batch with each one first because the two versions are going to look very different, advice is mixed on which is better, and the people giving that advice don't always give a reason for preferring one over the other.
If sticking is your main concern, silicone mats are the better choice. Seek out older macaron recipes that recommend parchment, and look at the comments; chances are you'll find at least one complaint about difficulty peeling off the parchment. If you find multiple macaron recipes from the same blogger, compare older and newer ones and see if the newer ones recommend silicone.
If shell height and edge neatness are your thing, then parchment is better. Shells baked on silicone tend to be thinner and have a frilly edge, and while that's a classic macaron shell, it might not be what you want. If you prefer a taller shell with a straighter, cleaner edge, use parchment instead.
Using a cut or torn mat
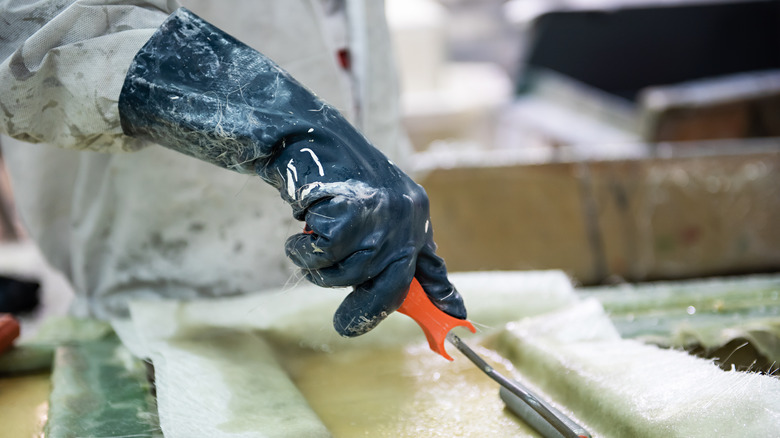
Many of these baking mats contain fiberglass threads inside the silicone to help with heat distribution. Because the fiberglass is sealed inside the silicone, it (the fiberglass) doesn't pose a hazard to anyone using the mat as long as the mat is in good condition. Loose fiberglass fibers can irritate your skin, eyes, throat, and stomach, and they seem to get everywhere very quickly if they're unsealed.
This is why you never, ever, want to use a cut or torn silicone mat. The fibers can escape and get into your food or into the air, making you ill. You may find some baking mats that are meant for cutting, and those should be fiberglass-free. But if you don't see anything about the mat being cuttable, don't slice, chop, or cut anything on it; don't tear it, and don't trim it. If you do find a cut or tear on one, throw it out; the mats aren't recyclable.
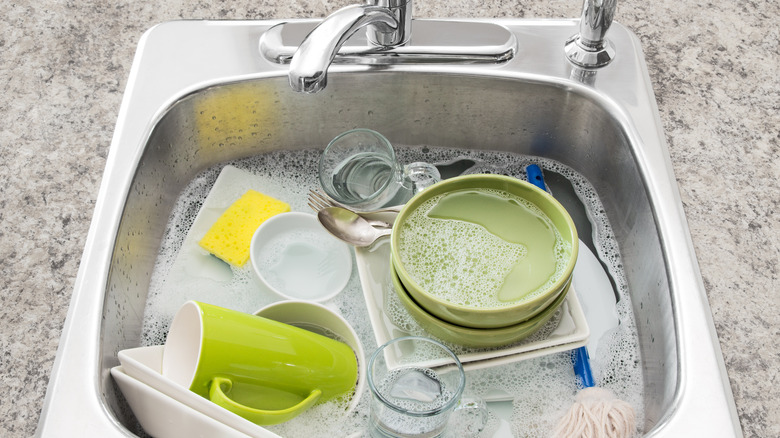
Putting the mat in the dishwasher
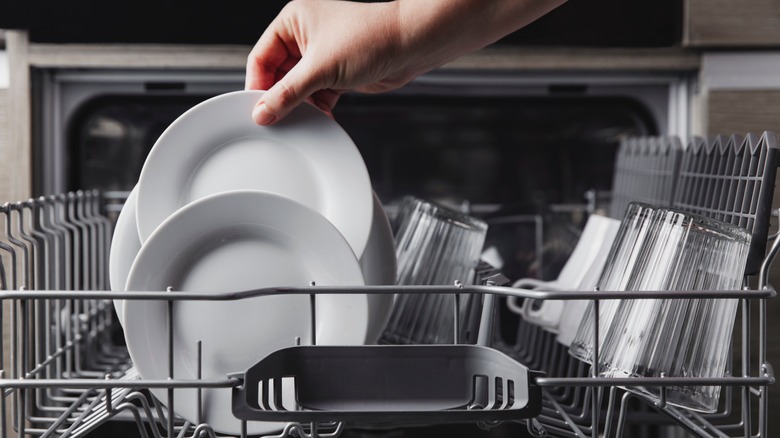
Before readers descend on us, saying that putting silicone mats in the dishwasher is perfectly fine, yes, it is possible to clean the mat in the dishwasher. However, it's not always the best option. Some mat brands such as Silpat actually address this in the care instructions, saying that hand-washing is recommended. Hand-washing is really the only way to ensure that all of the mat gets washed; when it's placed in the dishwasher, it usually has to be rolled up, which makes it harder for water and detergent to reach all parts of the mat. Even if you have a small mat that can lay flat on a rack, the mat will block water from different jets on each side of the mat unless the mat is perforated. That can result in uneven cleaning.
One more reason to hand-wash instead of placing the mat in the dishwasher is that it's better to wash and dry the mat immediately after you're done using it. Unless you're planning to do a dishwasher load right after you're finished baking, the mat will sit for a day or more until you start up the dishwasher. When you do hand-wash the mat, ensure everything you use is gentle, from the dish soap to any towels you use to pat off excess water.
Folding or crushing the mat in storage
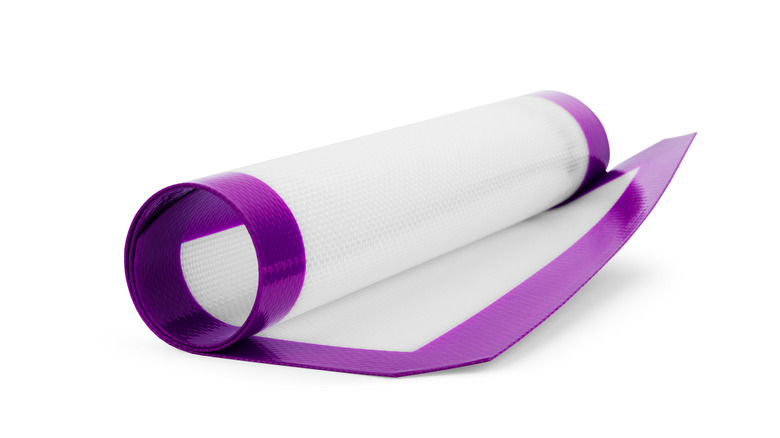
You can store a silicone baking mat rolled up or flat, but never fold or crease it, and never crush it. For the most part, this has to do with the fiberglass mesh inside. While the mesh is flexible enough to allow the mat to roll and bend, it's not flexible enough to bounce back from an actual crease or crush. Not to mention that severely creasing the mat could tear the silicone, allowing some of those fiberglass fibers to escape.
Mats that don't contain fiberglass shouldn't be bent, either. While there's no worry about surface tears and escaping fibers, the mat itself may not flatten out correctly after you make the crease. That affects items with a batter that's kind of runny, like macarons. By the way, when you store the mat, ensure there's nothing on top of it that could affect the mat's shape. Also, keep the mat out of that drawer at the bottom of your oven. In many cases, that drawer is a warming drawer, and the constant heat from the oven, plus that of hot metal from other pans stored in there, could damage the mat's surface. And if that drawer in your oven is actually a broiler, watch out; the silicone could catch fire even at non-broiler temperatures.
Assuming it can withstand any temperature
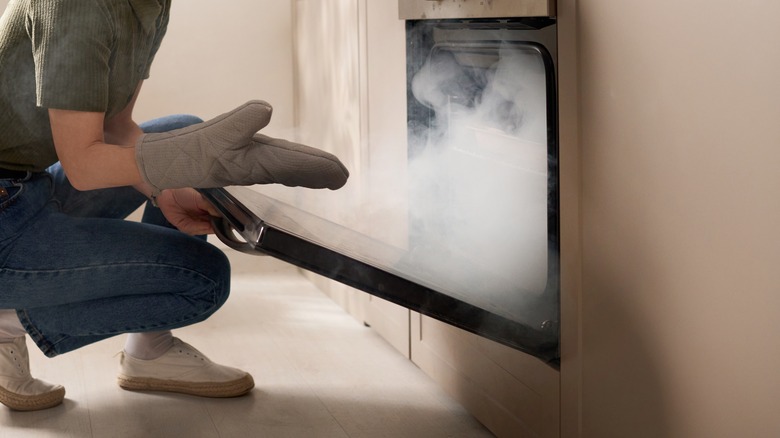
With the proliferation of silicone cooking items including pot holders and trivets, it seems like the go-to material for anything involving handling hot items. But silicone isn't completely heat-proof, and it has its temperature limits. Depending on the brand and the construction of the mat, it's generally safest to use baking mats at temperatures under about 450 to 550 degrees Fahrenheit or even lower. Specific brands will list the limit in the instructions you get with their mats; for example, Silpat's limit is 428 degrees Fahrenheit or 220 degrees Celsius.
Placing a silicone mat in higher temperatures or very close to heat sources can melt it or even lead to fire. You learned in the previous section not to store it in a broiler drawer, and you shouldn't use it to actually broil food in the main oven compartment for even a short time.
Not using it as a base for kneading bread

Silicone mats come in a couple of forms. One's meant for baking, and another (usually called a pastry mat) is meant for rolling out, kneading, and cutting dough, such as for bread. Believe it or not, you might want to try using your silicone baking mat as a base for kneading bread instead of a pastry mat. One reason is that the nonstick surface of the baking mat is perfect for releasing the dough instead of trying to grip it.
Another reason is that the baking mats, as flexible as they are, stay put on the counter a little more easily than pastry mats. Baking mats are made so that they grip the tray a little more and don't slide around as much as you try to place dough on them. Pastry mats, however, can slide around very easily on your counter. That doesn't mean a baking mat won't move at all, and stickier, heavier dough could still make the mat lift up as you try to move the dough around. But using a little water under the mat can eliminate that if the counter under the mat is clean.
Buying a mat from a random, unknown brand

Look online and you'll find seller after seller offering their own brands of silicone baking mat, often at wonderfully low prices. Sometimes you'll find a real deal, but it's advisable to go with a major, known brand even if it costs more. Those cheaper off-brand companies may not have the same standards as the major mat companies and may perform less testing. That doesn't necessarily mean they won't meet standards required by the country you're living in, but they may do an absolute minimum of evaluation. Major brands may have more rigorous requirements. Those off-brands may also use lower-quality materials.
It's also possible that the manufacturers of the cheaper brands have used fillers in the silicone. Fillers aren't always bad in and of themselves, but in the case of baking mats, they can release odors as the mats heat up. Those aren't going to be pleasant to smell and breathe in.
Using them only for baking pastries and cookies
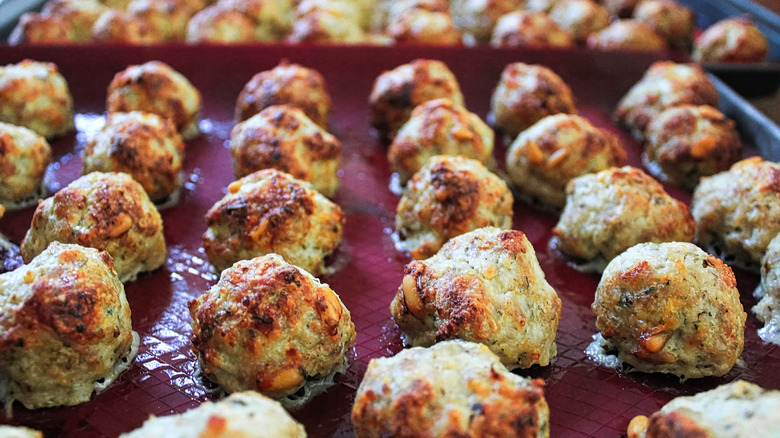
Silicone mats aren't just for baking desserts. You can use them for anything that you don't want sticking to a cooking surface as long as you pay attention to things like using the mats in the proper temperature range. The mats are so nonstick that you can use less oil and flour with whatever you're baking. For example, if you've had problems with vegetables sticking to parchment after roasting, try using your baking mat and reduce the amount of oil in the recipe. If you like to make fruit leather but worry about tearing the leather as you peel it off parchment or plastic, use a silicone mat. The nonstick surface should release the finished leather easily. If having to clean grease off a pan after cooking meatloaf annoys you, use the silicone mat instead. You'll still have to clean the mat, but the job should be easier.
However, what you bake on the mat does affect how the mat looks and smells. If a food sends out odors into your kitchen, you may find those odors also embedded in your baking mat. Fish can be a problem, and even fish sticks have been known to leave their olfactory mark on the mats. Less-smelly foods, such as burritos and chicken, can leave odors even after the mats are washed, too. You can try deep-cleaning the mats with hot water and baking soda or lemon juice to combat this.
Letting the mat soak too long in soapy water
By now you know that silicone expands in heat and absorbs oil and food odors. Did you know that your silicone mat can also retain dish soap and make whatever you bake taste soapy? The culprit is likely a soaking you gave the mat in soapy water. This is another reason why you want to wash and dry the mat immediately after using it instead of letting it sit around, even if it sits in soapy water. It's also a great example of why a fragrance-free or unscented dish soap is better for this job.
You can remove the absorbed soap in a couple of ways. One is the baking-soda deep-clean method; wet the mat, cover it with baking soda to form a paste, let it sit, and wash it with hot water. The other involves white vinegar: Mix hot water with vinegar in a 2:1 ratio and add about a tablespoon of salt per 1/4 cup of vinegar. Soak the mat in this solution for about an hour and wash with hot water and soap. (The mat should be OK as long as you don't leave the soap on it.)