Homemade Choco Taco Recipe
When you think of Taco Tuesday, you probably think of beef, chicken, or pork wrapped in flour or corn tortillas. But here at Mashed, we're equal opportunists when it comes to taco time, and that means we love every kind of taco, whether it's the savory version, or something a little more sweet. Unfortunately, when Klondike made its July 2022 announcement that the brand would be discontinuing its much-loved Choco Taco, Taco Tuesdays suddenly lost some of their sweetness ... literally. But just because Klondike no longer produces the nutty, chocolatey, ice cream-filled, taco-shaped dessert, that doesn't mean you have to live without the concept. In fact, it's surprisingly easy to make your own at home.
"I love this recipe because it is so easy to make and it only takes a few minutes to cook the batter," says recipe developer Susan Olayinka of her Choco Taco rendition. "These are perfect for a hot summer day, or any day you want a delicious treat." And while you may be a newbie at shaping ice cream cone batter into personal-sized tacos (who isn't?), it's a much simpler process than you might think. Even better: Olayinka's recipe doesn't involve a waffle iron, so you don't need to worry about procuring specialty equipment. If you have about 30 minutes to whip up a dessert (with a little extra time required to allow the tacos to set), you can have these taco treats ready to go for your next Taco Tuesday.
Gather the ingredients for homemade Choco Tacos
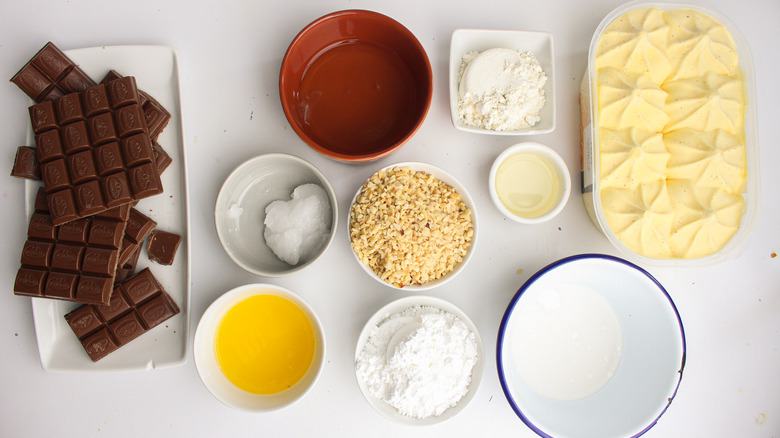
To make your homemade Choco Tacos, you'll need the ingredients for the batter to make the shells, along with the ingredients for the filling and toppings. Luckily, you may keep many of these items stocked and on-hand, as they're fairly common fare. All-in-all, you'll need powdered sugar, all-purpose flour, whole milk, butter, eggs (you'll just be using the whites), milk chocolate, coconut oil, vanilla ice cream, and chopped hazelnuts.
Aside from the ingredients themselves, you'll also want to have a couple tools ready-to-go to make your Choco Tacos. "You will need a pastry brush or the back of a spoon to spread the batter evenly in the skillet," says Olayinka. "You will also need a baking rack to cool the [taco shells] before adding the ice cream." Go ahead and bust out that hand mixer, as well.
Mix the taco shell batter
To get started, mix up the batter for your "taco shells." Don't worry — this batter is nice and sweet, and when cooked, it tastes just like an ice cream cone ... not like a flour or corn tortilla.
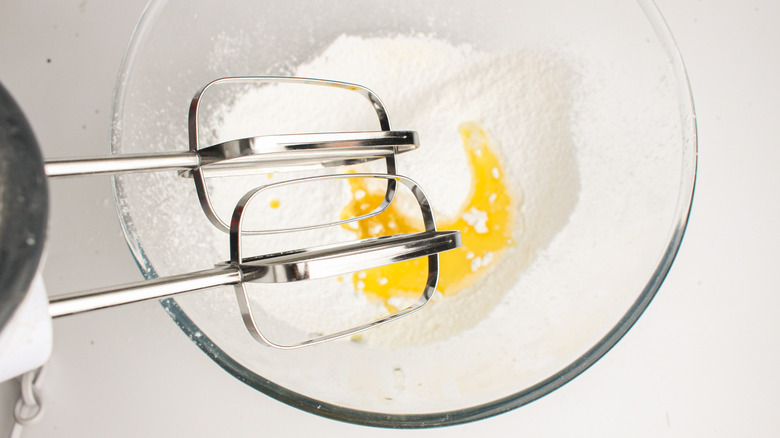
Simply combine the powdered sugar, flour, milk, melted butter, and lightly beaten egg whites together in a medium-sized bowl. Use a hand mixer to whisk them until the batter is smooth.
Cook the taco shells on a griddle
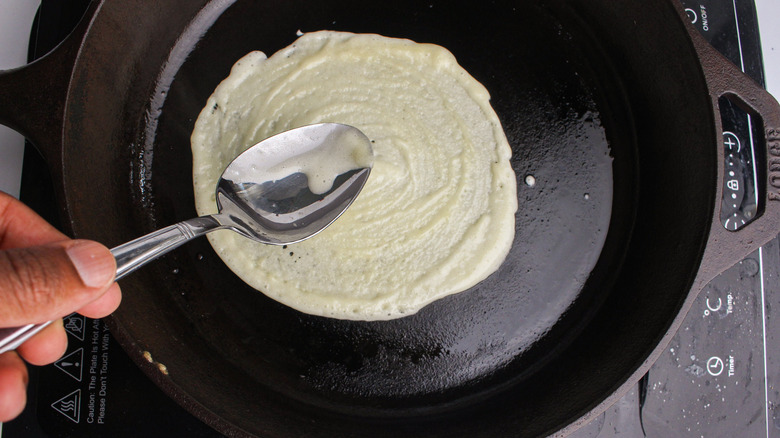
Set a skillet or griddle to pre-heat over medium heat. At the same time, you'll want to take the ice cream out of the freezer to let it soften up as you cook the taco shells. This will make it easier to pipe it into the shells later on.
Ladle 3 tablespoons of the batter onto the preheated skillet, then use a spoon or pastry brush to spread it evenly into a thin circle. Let it cook for 1 minute, or until the bottom is golden brown. "Be careful not to overcook the batter, as it will become hard and difficult to shape into a [taco shell]," Olayinka advises. When you've cooked the shell for a minute, remove it from the heat — you won't be flipping the shell to cook the other side.
Cool and shape the taco shells
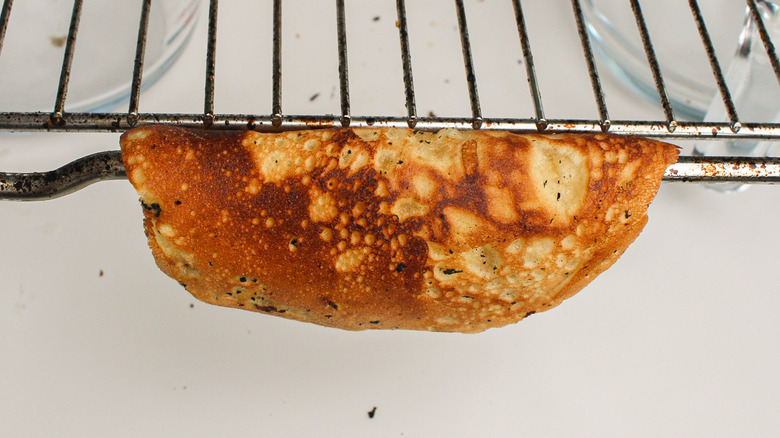
After removing the circular shell from the heat, it's time to form it into a taco shape. "Rest the just-cooked cone on a wire rack, leaving the sides of the circle [pointing] downwards so it can cool and harden in [the taco shell] shape. You might need to help it along by holding it in place for a minute or two," Olayinka says.
You may also need to elevate your wire rack to give the taco shells space to hang down without touching the counter. You can do this by setting the rack on top of bowls or cups of equal heights to give your rack room underneath. And as far as how wide you'll want the gap to be within each taco shell, Olayinka suggests resting the shell over two of the rack's wires to be able to create sufficient space in each "taco" to fill it with ice cream.
Continue making all of your shells, allowing each to cool and set for 5 minutes.
Add the chocolate coating to the Choco Taco shells
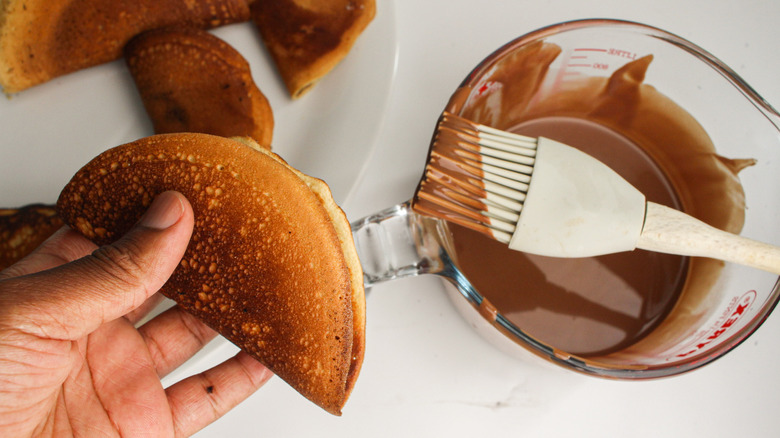
As the taco shells finish cooling, go ahead and place the chocolate and the coconut oil in a microwave-safe bowl and heat them in the microwave for 30 seconds. Stir well, then repeat until the mixture is completely melted and smooth.
Using a pastry brush, spread 1 tablespoon of the melted chocolate mixture inside each of the taco shells, coating the inside completely. When you've spread the chocolate in each of your shells, place them in the freezer to set for 15 minutes.
Fill the shells with ice cream
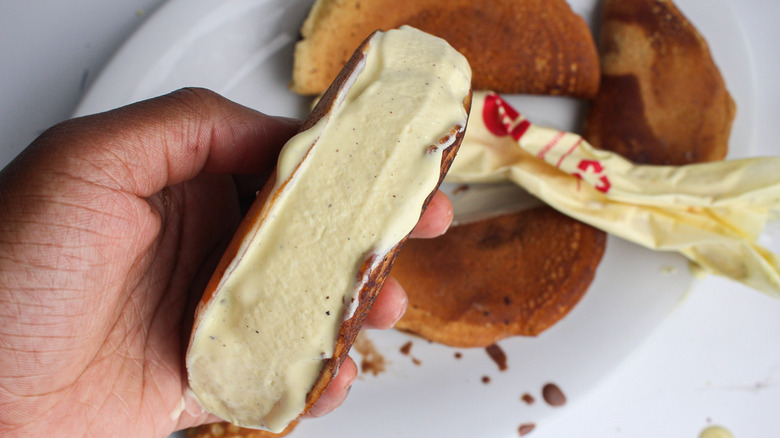
Go ahead and grab the ice cream you set out on the counter — it should be nice and soft — and take your shells out of the freezer.
Scoop the ice cream into a piping bag and use the bag to squeeze the ice cream into each taco shell, filling it completely. If you don't have a piping bag, you can cut a corner off of a zip-top freezer bag and use that instead. After filling each taco shell with ice cream, place the treats back in the freezer to set for another hour.
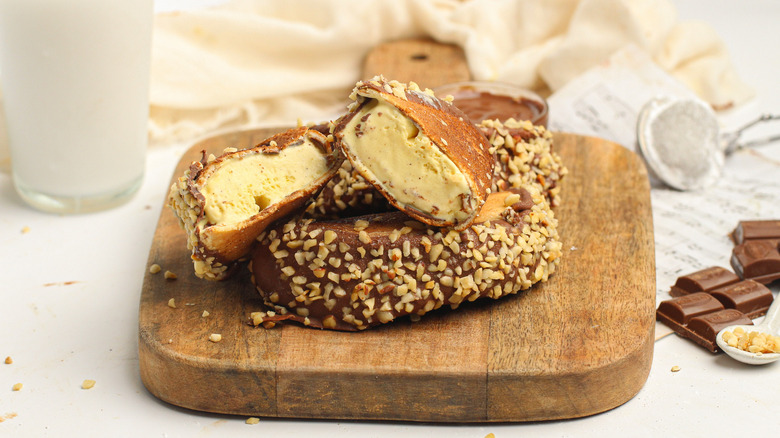
Seal the top with chocolate and nuts
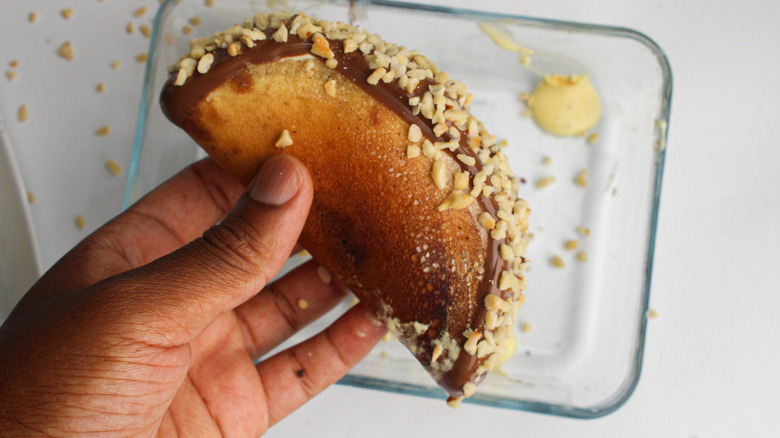
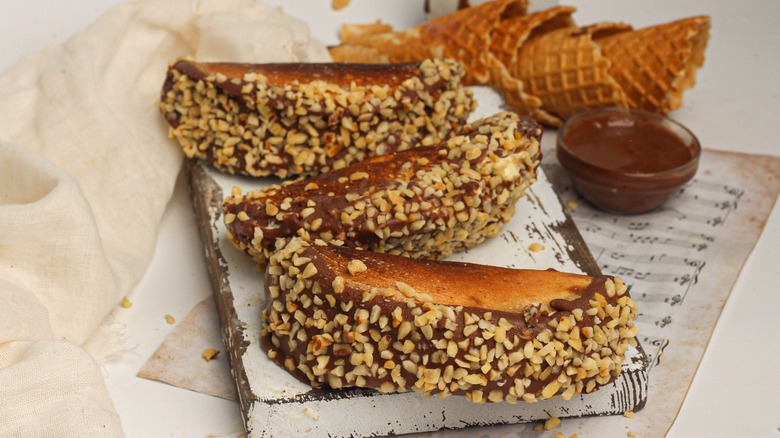
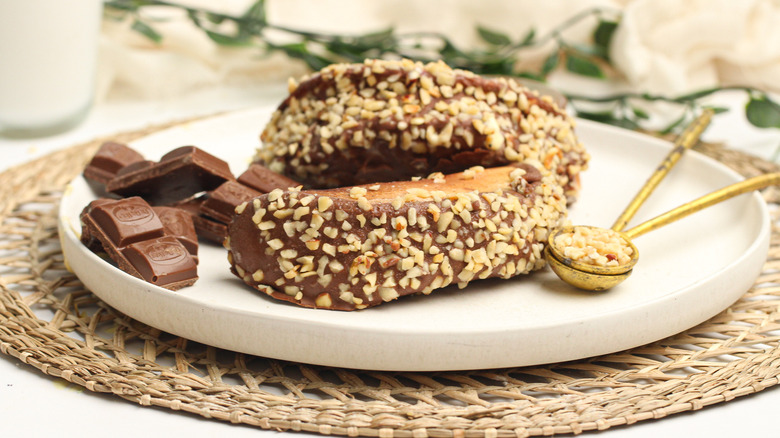
Now that the ice cream has set in the shell, all that's left to do is add the chocolate "seal" at the top of the taco and decorate it with nuts. Dip each of the taco shells into the chocolate, covering the open side completely to conceal the ice cream underneath. Then, sprinkle the chopped hazelnuts onto the wet chocolate so as the chocolate dries, the nuts will stick in place.
This recipe is completely customizable, so while Olayinka uses milk chocolate and chopped hazelnuts, you can use whatever type of chocolate or nuts you like when making your own.
Serve immediately or store in the freezer
When you've finished assembling all your Choco Tacos, they're ready to eat! "This recipe is best enjoyed fresh. However, if you need to store them, they can be stored in an airtight container in the freezer for up to 2 weeks," Olayinka shares. And while of course they're delicious as-is, there's no reason you can't add a little extra something to your homemade version. "Pair with your favorite toppings such as whipped cream, caramel sauce, or chocolate sauce. You could add a little flair by adding some chopped fruit or sprinkles on top," Olayinka says.
Homemade Choco Taco Recipe
While the beloved Choco Taco may be leaving grocery store freezers, you'll be relieved to know it's not difficult to make your own version of the tasty treat.
Ingredients
- For the cone shells
- ½ cup powdered sugar
- ¼ cup all-purpose flour
- 2 tablespoons whole milk
- 3 tablespoons melted butter
- 2 egg whites, lightly beaten
- For the Choco Tacos
- 10 ounces milk chocolate
- 1 tablespoon coconut oil
- 3 cups vanilla ice cream
- ½ cup chopped hazelnuts
Directions
- In a medium bowl, combine the powdered sugar, flour, milk, melted butter, and egg whites.
- Beat with a hand mixer until the batter is smooth.
- Preheat a seasoned skillet or griddle over medium heat.
- Take the ice cream out of the freezer to soften for 30 minutes.
- While the ice cream is softening and once the skillet is heated, pour 3 tablespoons of the batter onto the skillet, carefully spreading it out with a pastry brush or the back of a spoon, to form a circle.
- Cook for 1 minute, or until the bottom is golden brown.
- Carefully remove the disc from the skillet with a spatula and drape it over a baking rack to cool for 5 minutes into the shape of a taco shell. Repeat until all of the batter is used.
- Melt the chocolate and coconut oil in a microwave-safe bowl in 30-second intervals, stirring after each interval until it's melted and smooth.
- Brush 1 tablespoon melted chocolate into the inner part of each taco shell. Place them in the freezer for 15 minutes.
- Scoop the ice cream into a piping bag and fill each shell with the ice cream. Place the tacos back in the freezer for 1 hour.
- Dip the top of each shell into the chocolate, then cover with chopped nuts.
- Repeat with the remaining shells. Serve immediately, or store in an airtight container in the freezer until ready to serve.
Nutrition
| Calories per Serving | 703 |
| Total Fat | 42.4 g |
| Saturated Fat | 23.2 g |
| Trans Fat | 0.3 g |
| Cholesterol | 66.8 mg |
| Total Carbohydrates | 71.4 g |
| Dietary Fiber | 3.8 g |
| Total Sugars | 58.6 g |
| Sodium | 129.6 mg |
| Protein | 10.9 g |