Mistakes Everyone Make When Making Homemade Almond Milk
There are plenty of reasons why you may have swapped dairy milk in favor of plant-based alternatives like nut milk. Whether you simply don't like the taste or are concerned about possible health implications, nutrition, or environmental consequences, per BBC, there's no need to drink cow's milk if you don't want to. Among the various plant-based contenders, almond milk boasts countless fans, placing it firmly at the top of the U.S. market with over $300 million of annual sales in 2021, according to Statista.
Of course, visiting any well-stocked grocery store will provide you with several brands of almond milk, but it's worth reconsidering the store-bought stuff. With various additives, costly price tags, and added waste, the idea of making your own is undoubtedly tempting. All the same, even homemade almond milk can waver in quality. For the best results every time, we've collected the biggest mistakes people fall prey to, so that you can be sure to steer clear.
Using roasted or seasoned almonds

The best kinds of snacking almonds are unlikely to be ideal for making almond milk. Salted nuts or varieties coated in seasoning (smoked hickory, anyone?) will impart these qualities to your liquid product. Unless you're in the market for salty milk, we would recommend skipping flavored nuts. If you're stuck with a bag of salted almonds and a yearning for almond milk, you can give it a shot, but you'll want to soak and rinse the nuts especially well to eliminate as much of the salt as possible.
Meanwhile, opinions on whether or not to use roasted or raw almonds vary and ultimately depend on the product you want to make. Know Your Pantry points out that raw almonds tend to have a minimal flavor to impart, especially if they are blanched and consequently peeled. The outlet explains that roasted almonds, on the other hand, provide a pleasant nuttiness that enhances the overall flavor. If you want milk with pronounced qualities, this is a fair option. However, you also run the risk of extra oil from the roasting process, which isn't desirable in your milk.
Raw almonds offer a neutral flavor that can be adapted to your needs for a subtler, sweeter, and creamier take. Furthermore, if you want to minimize the amount of pulp to strain, stick with blanched almonds that are already peeled.
Forgetting to soak the nuts
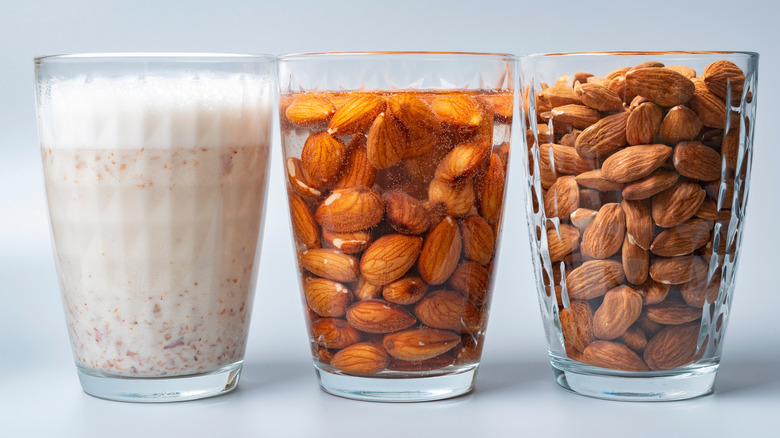
The thing about making your own almond milk is that you have to plan ahead. While you could simply blend almonds and water, the result isn't going to have the delightfully creamy properties of almond milk you're after. According to Healthline, the research is divided on whether soaking almonds reduces the phytic acid content, which tends to get in the way of healthy mineral absorption. The founder of aMYLK company, Amy Colville, notes that soaking also makes almonds easier to digest for some people (via Insider).
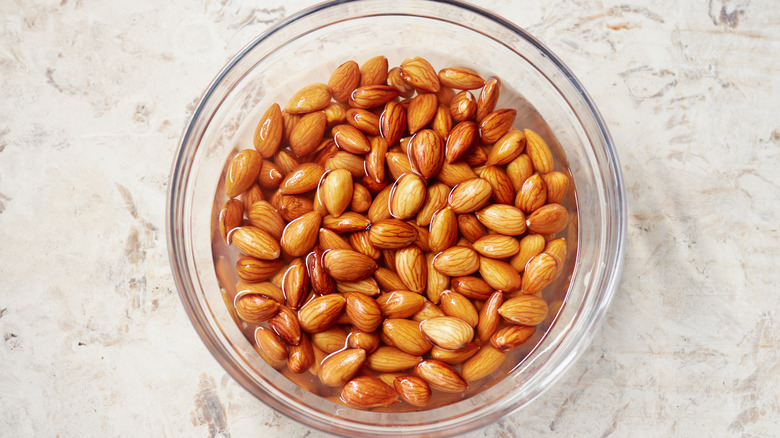
The recommended soaking duration varies depending on the source, but aim to keep the almonds in water between eight hours and 24 hours for optimal results. This gives the nuts sufficient time to absorb water, essentially causing them to bloat. Additionally, as the almond pulp takes in more liquid, Colville explains that the blended result is guaranteed to give you a greater volume of creamier almond milk.
If you really don't have time to soak your almonds, a clever shortcut consists of blending almond butter with water (genius, right?).
Using too much or too little water
We've looked at the importance of soaking the almonds in water, but it turns out, there's also an optimal quantity of liquid they should sit in. According to TODAY, the almonds should be covered with about two inches of water. Alternatively, a two-to-one ratio of water to nuts should be suitable, too. Once you're through soaking the almonds, draining off the water, and rinsing the nuts to eliminate any residue, it's time to get blending.
Here, using the right amount of water will affect the consistency of the final product. Too much water and your almond milk will be more like almond water; too little and you might as well be drinking an almond smoothie. Of course, consistency is entirely subjective, as well as dependent on how you plan to use the almond milk, so it's worth starting with slightly less water and adding it as needed. Across a wide range of recipes, we've seen as little as 2 cups of water added to as much as 5 cups per 1 cup of almonds.
Using average quality water

Your almond milk is only as good as its components, and, across the board, recipes emphasize the use of filtered water as a core ingredient. Tap water quality ranges widely from region to region and even among neighborhoods in certain parts of the country. While a small town that sources its water from mountain spring water can boast about the properties of its pure tap water, circumstances can be significantly different elsewhere. Furthermore, in large cities, several contaminants can be found in the water supply, both intentionally added or as a byproduct of pollution (via Aquasana).
We're not suggesting using bottled water to make almond milk, which would evidently counter the environmental benefits of making your own. However, a basic water filter pitcher — which is worth having whether or not you're making almond milk — will do the trick. Ultimately, since water comprises a significant proportion of your nut milk, ensuring it doesn't have any off-flavors to begin with will maximize the milk's taste and quality. Similarly, soaking your almonds in filtered water is important, or else the nuts will absorb all of the impurities in the water.
Only sticking to the basic ingredients
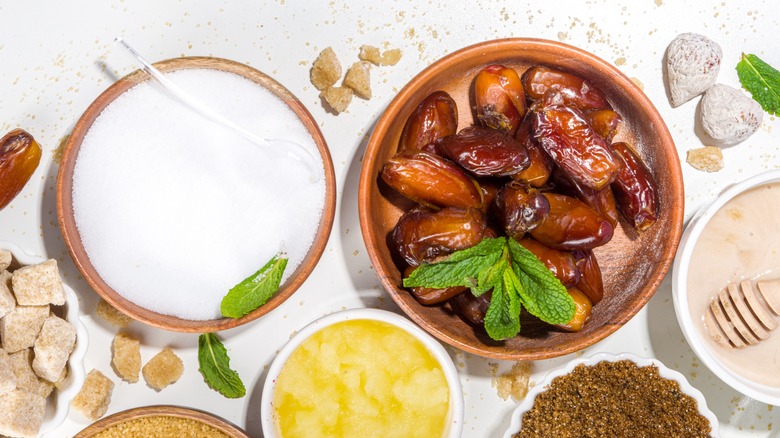
Store-bought almond milk tends to contain a variety of additives to stabilize, preserve, and improve the texture (via Healthline). And while that may be the driving force that pushes you to make your own at home, that's not to say you should only ever use raw almonds and filtered water. For starters, it's no secret that a pinch of salt goes a long way in enhancing flavors, per BBC Science Focus, and almond milk is no exception. We're not suggesting a teaspoon or tablespoon of salt, but merely a sprinkle.
Next comes the experimental side of your homemade creation. If you like your almond milk slightly sweet, there are several alternatives to granulated white sugar. Dates, maple syrup, agave, and honey are less processed ways to satisfy your sweet tooth, not to mention they'll also infuse flavor. If you're a fan of chocolate milk, sweetener and cacao powder will do the trick. Meanwhile, if your usual go-to is vanilla almond milk, that's an easy option, too, as a splash of vanilla extract goes a long way. Spiced concoctions are equally delicious; cinnamon or cardamom are foolproof pairings, or channel pumpkin spice vibes by adding nutmeg, cloves, allspice, and ginger.
Not blending the ingredients long enough
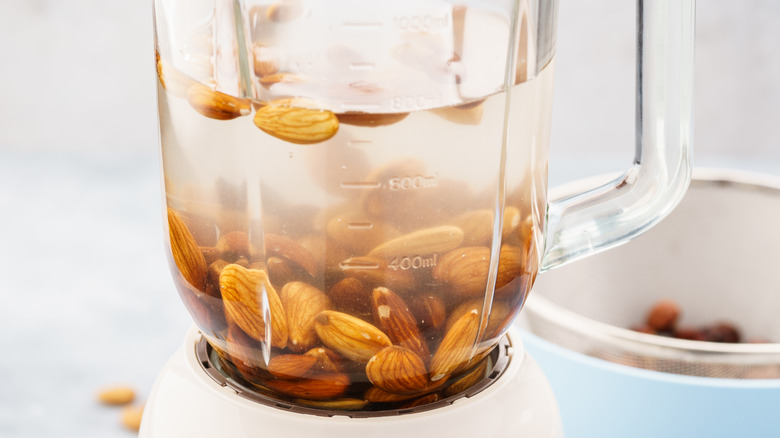
Blender quality is worth examining, but no matter what you're working with, you'll want to give it time to do its job. A high-end appliance will take less time to complete the task and can't really be compared to a basic blender. Although some outlets only recommend using high-speed blenders to make almond milk, if you're stuck with something less than ideal, you can still make it work.
The important consideration is to determine the desired outcome in order to know when to stop blending. According to Forbes, the milk should be frothy and smooth, with no remaining almond chunks. Insider suggests starting at a low speed for half a minute and then increasing the speed to high for another minute or two. Still, depending on your blender, this can easily take a few minutes, so be sure to work in intervals to prevent your machine from overheating. If you smell anything burning, stop immediately and let the device cool down.
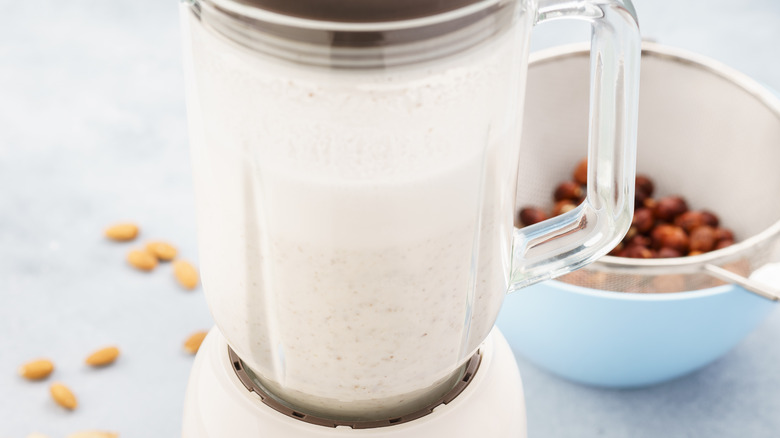
Not straining the mixture sufficiently
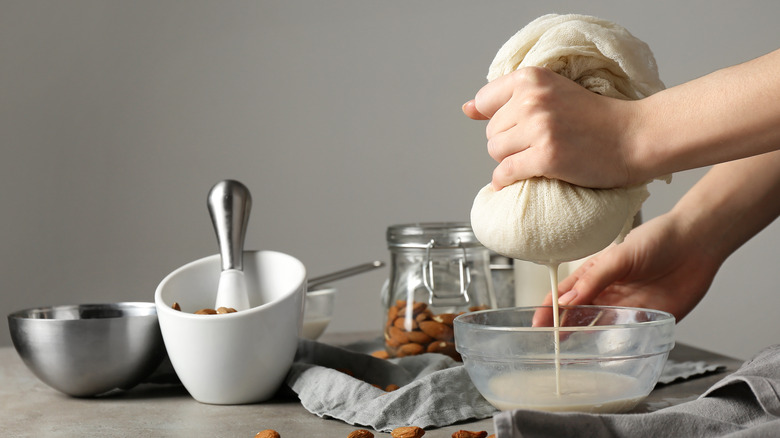
Orange juice with pulp is one thing, but sipping on chunky almond milk isn't as desirable (for most people, at least). Once you've finished blitzing your almonds and water to oblivion, it's necessary to strain the mixture to separate the milk from the pulp. You'll be left with a perfectly creamy result that doesn't split into two parts.
Depending on the tools you have and the effort you're willing to put into it, the final product can vary. You might opt for a simple fine-meshed sieve, a cheesecloth, or ideally a nut milk bag. Yes, the latter's only purpose is to separate nut pulp from the milk. TODAY points out that although it's the type of kitchen article that only has one very specific job, it's cheap and gets that job done very well. Meanwhile, no matter how fine the sieve, chances are you'll see some pulp in the milk. In this case, filtering the milk twice is your best option for a smooth result.
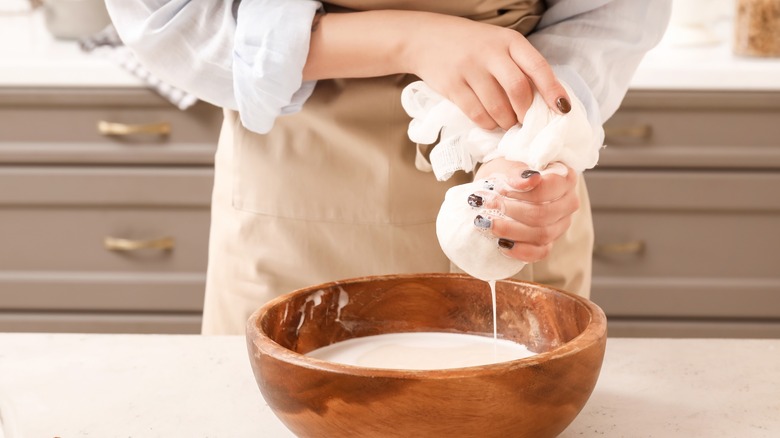
You'll want to place a bowl or large jug to catch the milk before pouring the blended liquid into your filtering device. Nut milk bags have the benefit of being resistant to the type of pressure you're exerting. We're talking squeezing, twisting, massaging, pressing — anything to increase the quantity of almond milk coming out of the pulp.
Wasting the almond pulp

If you're looking at the masses of leftover almond pulp after you've finished straining out the milk and are dismayed at the thought of throwing it out, there are plenty of ways to avoid that outcome. As it turns out, countless recipes eagerly make use of leftover almond pulp, since it consists of fibrous material that can be incorporated into several preparations.
A quick online search for almond pulp recipes comes up with directions to make everything from almond flour and crackers to cookies and vegan cheese (via the Academy of Culinary Nutrition). The range is wide since the remaining pulp is mostly devoid of flavor and lends itself well to being manipulated and seasoned into your latest gourmet creation. Depending on the outcome you are seeking, you may need to bake the almond pulp at a low temperature to dry it out, or it could be as easy as mixing it directly into a batter.
If you're itching to step outside of the kitchen once you've finished making your almond milk, the pulp can be frozen to use at a later date, according to Prana Organic. No matter how you end up using it, you'll get double the investment out of each portion of almonds.
Storing it incorrectly

Most store-bought almond milk labels advise consuming it between seven-to-10 days from the time you open the container. When you're making your own stuff, however, remember that it is devoid of additives that tend to prolong shelf-life. Furthermore, Raw Blend points out that most brands pasteurize their almond milk to prevent it from spoiling.
For starters, how you store it will affect freshness. Be sure to keep homemade almond milk in an airtight container such as a jar with a properly sealed lid. This will minimize the chance of oxygen and bacteria creeping into your milk, ultimately giving you an extra day or two to enjoy it. Israeli cookbook author Adeena Sussman recommends transferring your milk into a smaller sealed container as you use it up, in order to minimize the amount of oxygen within (via Forbes). All the same, you're looking at three-to-five days in the fridge before your homemade product starts to turn.
If you made a large batch and can't get through it immediately, freezing your homemade milk is an option. However, Robust Kitchen cautions that it will show more signs of separation once thawed. Additionally, you'll still have to consume it within a few days once it's back to a liquid state. Nonetheless, if you're using it in baked goods or for cooking, having a perfectly creamy consistency is less essential.
Not paying attention to the almonds' freshness
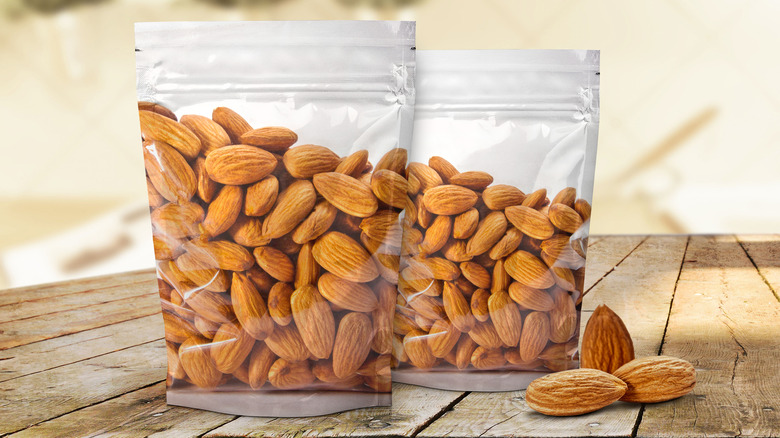
Since almonds are often categorized together with dried fruits and other seemingly shelf-stable items, it's easy to forget that they have an optimal state of freshness. According to the California Almonds, almonds contain minimal moisture paired with high-fat content. Unfortunately, as Verywell Fit explains, while this feature offers heart-health benefits, it also means that the oils can quickly become rancid if they are in contact with oxygen.
While this doesn't mean you have to eat your almond stash the second you bring it home, how you store the nuts has an important impact on their freshness. If you're planning on keeping them for more than a few days, almonds will do best in an airtight container in the refrigerator. Alternatively, if you only pull them out now and then to make almond milk, you can even leave them sealed in the freezer.
It's worth considering that even before you purchase almonds from the store, they have gone through various levels of processing, distribution, and packaging (via California Almonds). Their characteristics may have been compromised along the way, so to guarantee they remain fresh, be sure to keep them in a cool and dry location. Rancid almonds probably won't make you sick, but the flavor will be off and the quality of your almond milk will be inferior.
Using subpar equipment
You can always make do with what you have, but there's no doubt that high-quality equipment will yield better results more quickly. For starters, a top-notch blender will guarantee that your almond-making endeavors are successful. If you don't already own the best blender for your needs, Vitamix and Ninja appliances are consistently praised among the nut milk community.
Next, you'll need some sort of straining tool, which can be as multipurpose as a fine-mesh sieve or cheesecloth, or else a nut milk bag, specific to the task at hand. These are shaped like a pouch and often have a drawstring at the top to assist in squeezing the milk out of the pulp (via Be Kind & Co.). They come in various materials like cotton, hemp, and nylon, the latter being especially resistant and a breeze to clean. Unlike a basic sieve, you're sure to have a smooth result that's free of fine particulate.
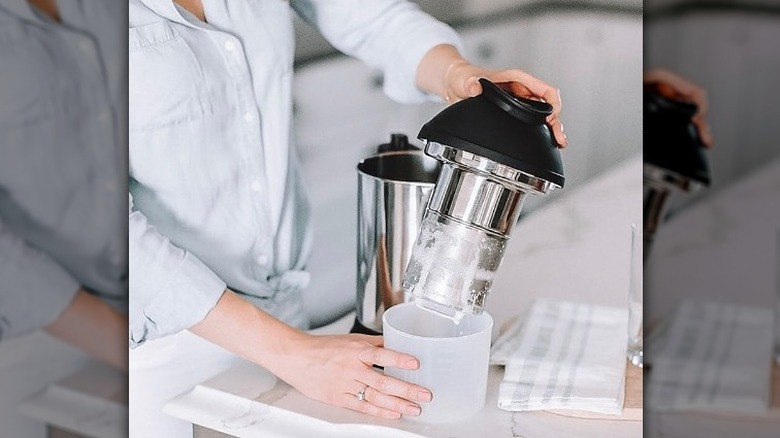
And if you're really serious about making almond milk, you might want to invest in a device whose sole purpose is making the stuff: The Almond Cow Milk Maker does it all from start to finish. In a mere few minutes, you can go from almonds and water to deliciously creamy nut milk, without having to strain out the solids.
Accidentally contaminating the components
It's always necessary to maintain a clean working space in the kitchen, and this is essential when making almond milk. Unless you own the Almond Cow's Milk Maker, several steps involve transferring ingredients from one vessel to another. From the bowl you use to soak the almonds to the blender and finally the storage container, every item must be properly cleaned.
Plant-based food blog Love is in My Tummy highlights the importance of using sterile equipment to avoid contamination. Beyond tools, your hands are another potential source of bacteria, not to mention natural oils. Neither is desirable in your almond milk so be sure to sanitize your hands before touching the almonds and straining the pulp. Additionally, your filtering device should be free of any residue from previous almond-milk production.
Finally, the jar or bottle you're using to store the milk had best be nice and clean. Ensure there is no soapy residue and consider microwaving the empty container (if it's glass) on high heat to kill any remaining bacteria (via Love is in my Tummy). If you follow each of these precautions, you may even be able to squeeze an extra day or two of shelf-life out of your almond milk.