The Simple Chicken Kiev Recipe You Have To Try Tonight
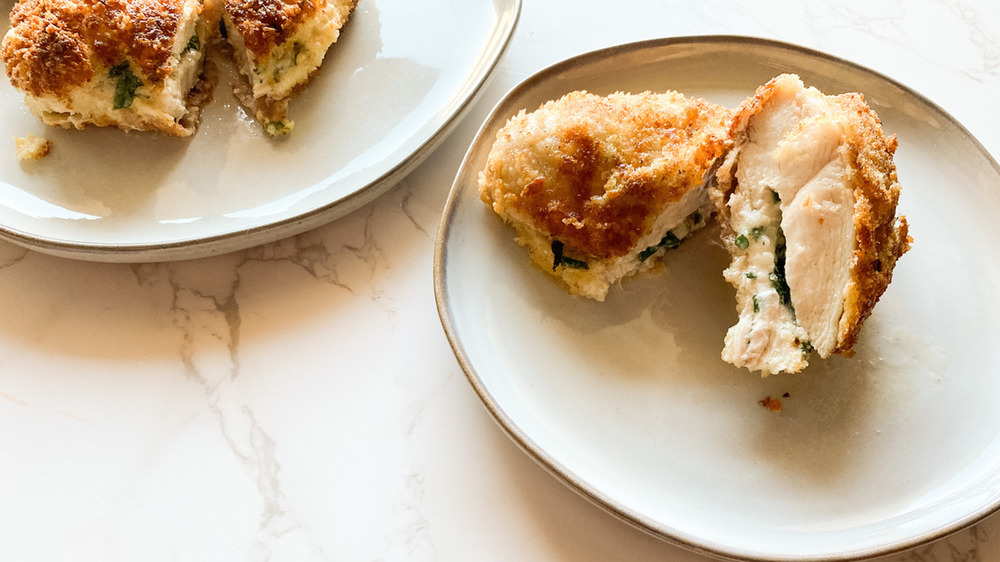
Chicken Kiev is a retro classic, and it's prime time to bring back into fashion. The recipe, which was invented by a Russian chef in the early 1800s, sees boneless, skinless chicken breasts stuffed with butter, parsley, and garlic. Coated in breadcrumbs and shallow fried before being finished in the oven, the chicken emerges crispy on the outside and boasting a self-saucing, buttery interior. Remind us again why this dish fell out of fashion?
Recipe developer Kristen Carli has all the secrets to help you master this dish at home — and not a moment too soon.
"It really can elevate the flavor of chicken, which is often too dry or boring," she says of the recipe, noting that she loves serving it with an asparagus salad or roasted broccoli. Consider, too, adding a side of rice or mashed potatoes — or even just a crusty slice of bread — to mop up all that buttery sauce.
Gather the ingredients for the chicken Kiev
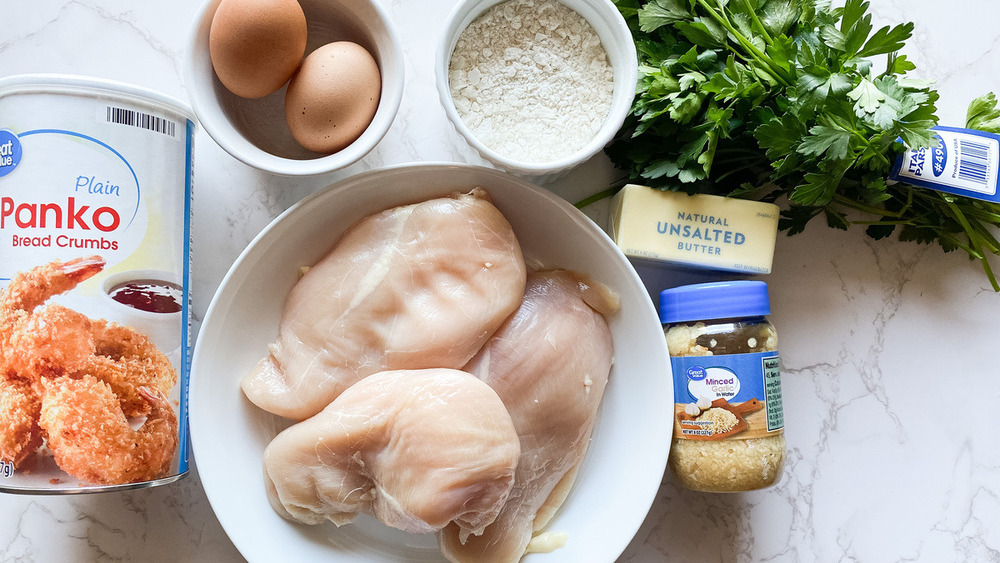
To make this chicken Kiev, you will, of course, need chicken breasts. You'll also need butter, cut into pats, as well as chopped parsley and minced garlic. For the breading, you'll need two beaten eggs, all-purpose flour, and Japanese panko, which fries up even crispier than other breadcrumbs.
Canola oil and a touch of salt round out the ingredients list for this recipe. You may also want to take the time now to wrap a baking sheet in aluminum foil, onto which you'll be transferring the chicken breasts after frying them.
Cut pockets into the chicken breasts for this chicken Kiev
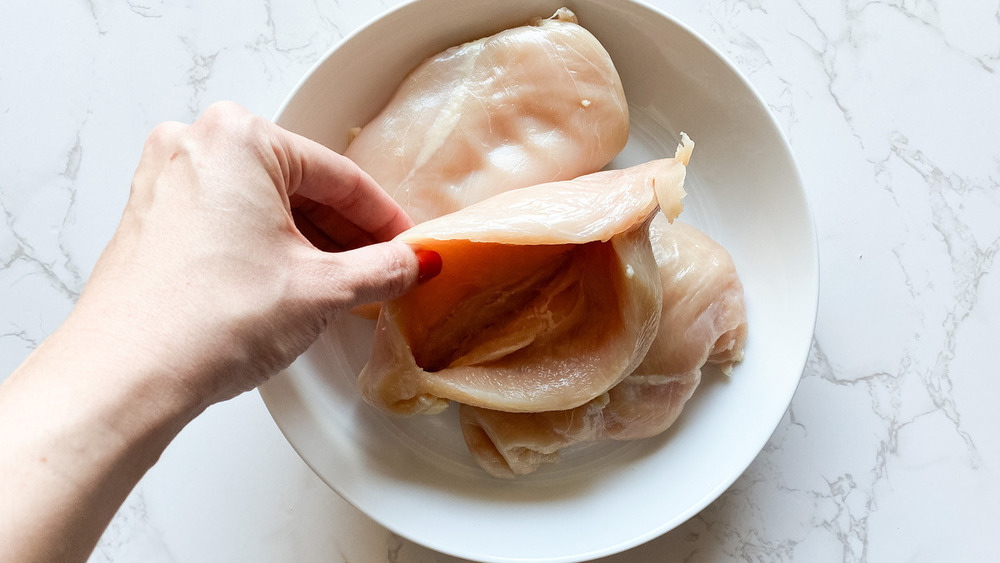
Before you begin working, preheat the oven to 350 degrees Fahrenheit. While it heats, it's time to cut a pocket into each of the chicken breasts, creating a space to stuff with butter, parsley, and garlic.
To do this, first lay the chicken breast down flat on a cutting board, and place your palm flat down on top of it. Then insert your knife tip into the side of the chicken breast, slicing a pocket into the widest part. Take care not to cut all the way through. Otherwise, the seasoned butter will leak out while the chicken cooks.
Stuff the chicken breasts for your chicken Kiev
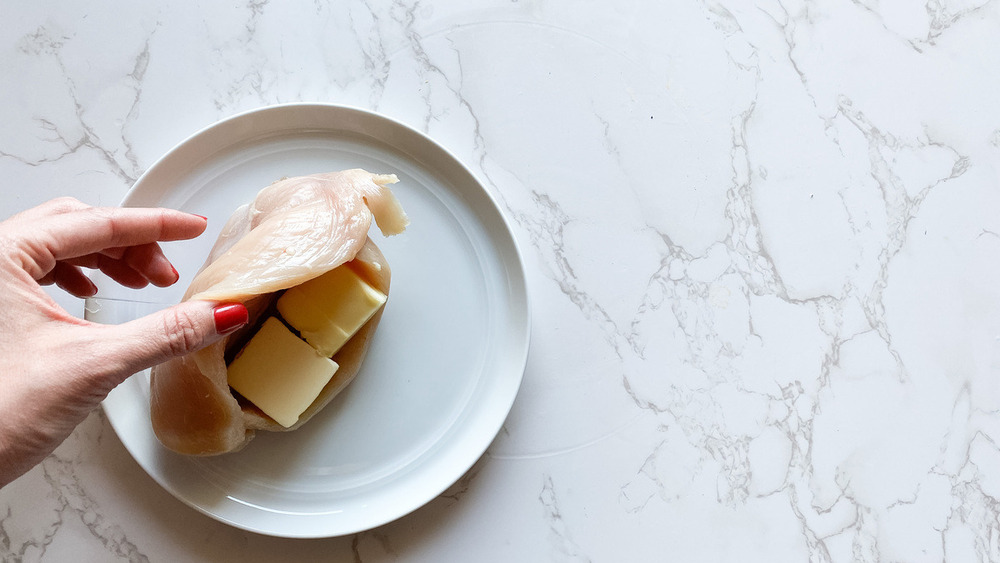
Now it's time to stuff! Into each chicken breast, place two tablespoons of butter, one teaspoon of minced parsley, and one teaspoon of minced garlic. No need to mix the ingredients ahead of time, Carli notes. All of the flavors will meld while the chicken cooks. Do try to sprinkle the parsley and garlic evenly over the inside of the chicken breast, though. You don't want to end up with uneven pockets of seasoning or clumps of garlic in the finished chicken breasts.
Bread the chicken breasts for the chicken Kiev
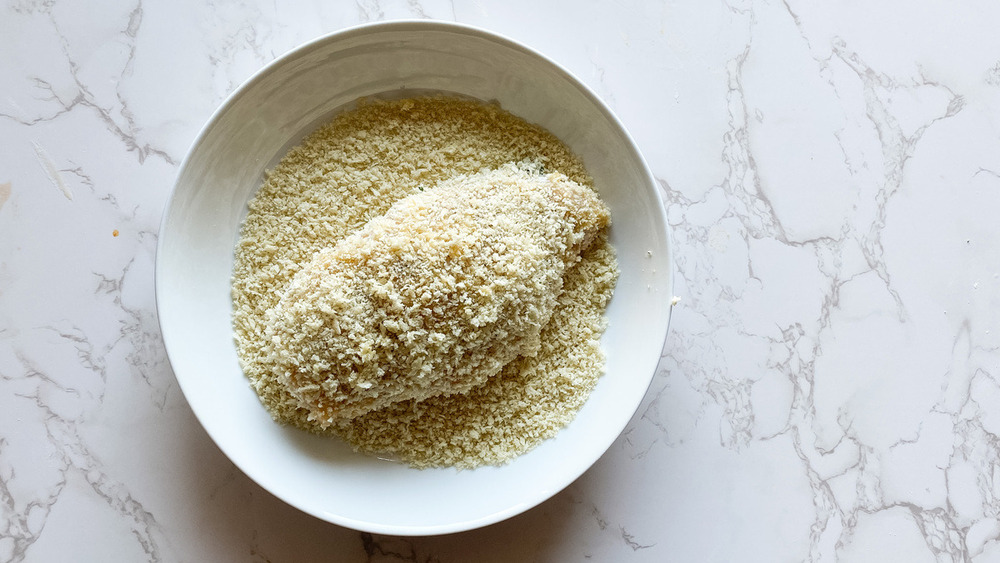
The key to successful breading of your chicken Kiev is organization.
First, arrange three shallow bowls in a line. In the first, add the flour seasoned with the salt, stirring together with a fork or whisk until combined. In the second, beat the eggs well. And in the final bowl, add the panko.
Now that your assembly line is ready, carefully coat each chicken breast on both sides first in the flour, then in the eggs, and then, finally, in the breadcrumbs. Take care to keep one hand clean while you work — this won't just allow you to pick up the phone if it rings, but it'll also ensure that you don't end up with breadcrumbs in your egg wash.
Fry the chicken breasts for your chicken Kiev
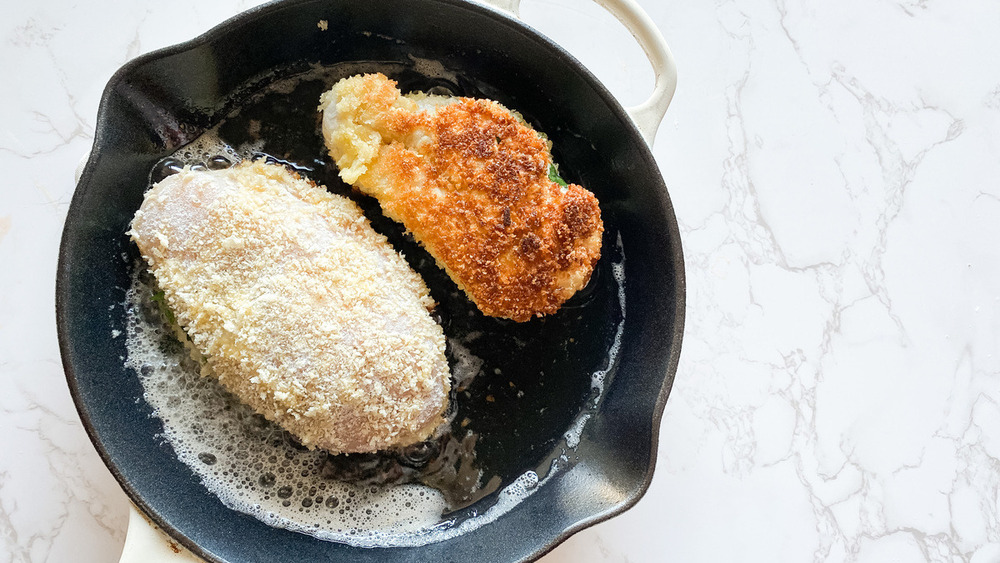
It's time to fry! Heat the canola oil in a large skillet over medium heat, and then carefully add the chicken breasts. Cook for five minutes per side, or until nice and golden brown.
We're not done yet!
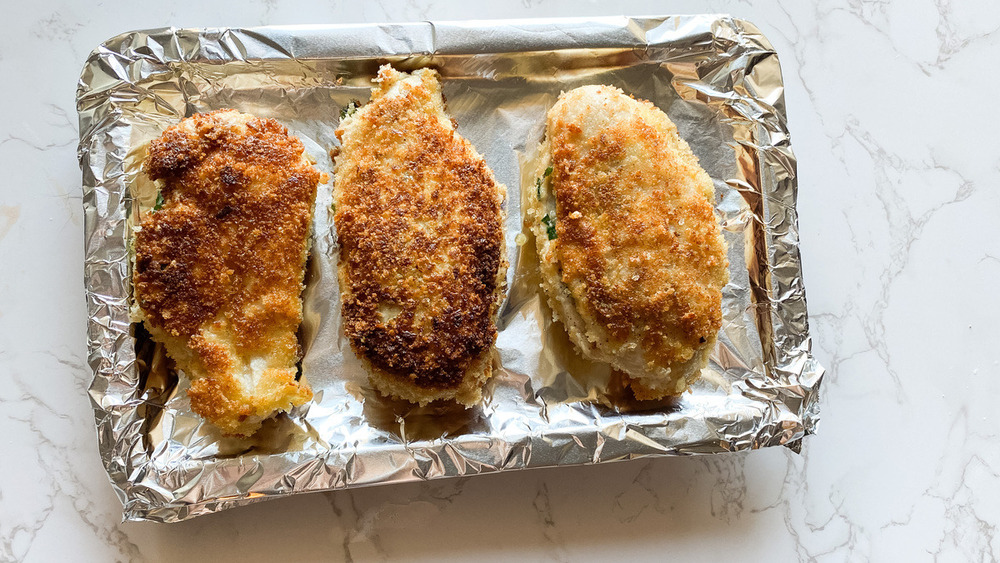
When the chicken breasts are nice and crispy, transfer them to a foil-wrapped baking sheet and bake for 10 to 15 minutes. This double-pronged cooking method ensures that the chicken is golden and crispy on the outside and fully cooked in the center by the time you serve it: an essential step with any chicken recipe, but especially chicken Kiev, given the cold starting temperature of the butter. After 15 minutes in the oven, it will be fully melted and seasoned — get ready to dig in!
Chicken Kiev directions
Chicken Kiev is a retro classic, and it's prime time to bring back into fashion. We have all the secrets to help you master this dish at home.
Ingredients
- 3 boneless skinless chicken breasts
- 6 tablespoons unsalted butter, divided
- 3 teaspoons parsley, chopped and divided
- 3 teaspoons minced garlic, divided
- 2 eggs
- 2 cups panko breadcrumbs
- 1 cup all-purpose flour
- 1 teaspoon salt
- 1/2 cup canola oil
Directions
- Preheat the oven to 350 degrees Fahrenheit. Lay the chicken breasts flat and cut a pocket into each breast, leaving the edges intact.
- Place 2 tablespoons butter, 1 teaspoon parsley, and 1 teaspoon minced garlic inside each chicken breast.
- In one shallow bowl, add the beaten eggs. In another shallow bowl, add the panko. In the last shallow bowl, add the flour and salt.
- Carefully cover each chicken breast in the flour, then the eggs, and then the panko, making sure to cover each side well. Set aside.
- Heat a large skillet over medium heat. Add the canola oil. Once heated, add the chicken breasts. Cook for 5 minutes per side, or until the panko is golden brown.
- Place the chicken breasts on a foil-wrapped baking sheet. Bake for 10 to 15 minutes or until chicken is cooked through.
Nutrition
| Calories per Serving | 1,188 |
| Total Fat | 70.9 g |
| Saturated Fat | 19.8 g |
| Trans Fat | 1.1 g |
| Cholesterol | 366.3 mg |
| Total Carbohydrates | 61.0 g |
| Dietary Fiber | 2.5 g |
| Total Sugars | 1.6 g |
| Sodium | 1,000.6 mg |
| Protein | 73.4 g |