Rosanna Pansino's Instagram Brownies Recipe With A Twist
There's no doubt about it: Rosanna Pansino's Instagram brownies are a major hit. The YouTube star made the recipe for her now-famous Instagram brownies back in January 2016, and since then, the video has been viewed more than 3 million times. That's a whole lot of people who can't get enough of these Instagram brownies that are so worthy of an Instagram post, because duh. Pansino also has the recipe linked on her website, and we're not going to lie, those brownies look incredibly decadent.
Recipe developer Melissa Olivieri of The Olive Blogger gave this delightful dessert a little twist that will surely please your family and friends alike. She notes that what she enjoys most about this recipe is the chocolatey flavor. "What I love about these brownies — besides how incredibly easy they are to make — is their rich and fudgy centers," Olivieri raves. "The addition of the chocolate chips to my variation of the original recipe also gives them the extra pop of chocolate you want in each bite."
Keep reading to find out how to prepare this delicious dessert in your own kitchen. Trust us — you don't want to miss out on this totally on-trend recipe.
Gather the ingredients to prepare Rosanna Pansino's Instagram brownies with a twist
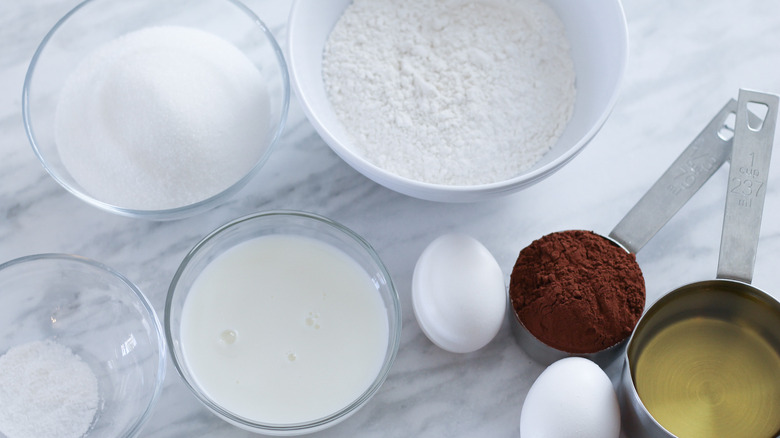
For the first step in the process, it's best to make a grocery list. For this recipe, you will need to round up vegetable oil and all-purpose flour. You'll also need to gather sugar, salt, baking powder, and vanilla extract, as with most baking recipes. Hopefully, you already have a few of these ingredients in your kitchen pantry.
In addition, grab some unsweetened cocoa powder, eggs, and milk. For a bit of sweetness, don't forget the semi-sweet chocolate chips and a few containers of white frosting. Last but not least, you will need pink, yellow, and purple food coloring. Once your ingredients are lined up, you're officially ready to get started!
Preheat the oven, and prepare the brownie batter

Start by turning your oven to 375 F, and let the oven heat up while you begin to prepare the batter. Take out a medium bowl, and toss in the sugar, flour, cocoa powder, salt, and baking powder. Be sure to whisk everything together well. Next, take out a separate large bowl, and add in the oil, milk, vanilla extract, and eggs. Using your whisk, blend everything together. Next, pour the dry ingredients into the wet mixture, and whisk again until it's smooth. Now you have your brownie batter.
Fold in the chocolate chips
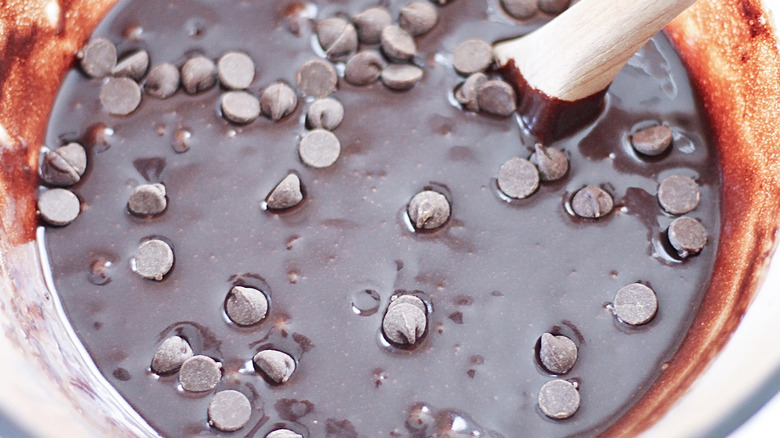
There's one more step that you need to take with the brownie batter. Add in your chocolate chips, and stir the mixture using a wooden spoon so that they don't break. Then, take out an 8x8-inch baking pan, and make sure you have greased it so that nothing sticks to the bottom. Pour the batter into the pan, and then gently tap the pan on the counter to ensure the mix is even.
Stick it in the oven for 40 to 45 minutes. You will know it's done when you stick a toothpick in the middle and it comes out clean. Get ready for your kitchen to fill up with the most heavenly aroma.
Cut the brownies
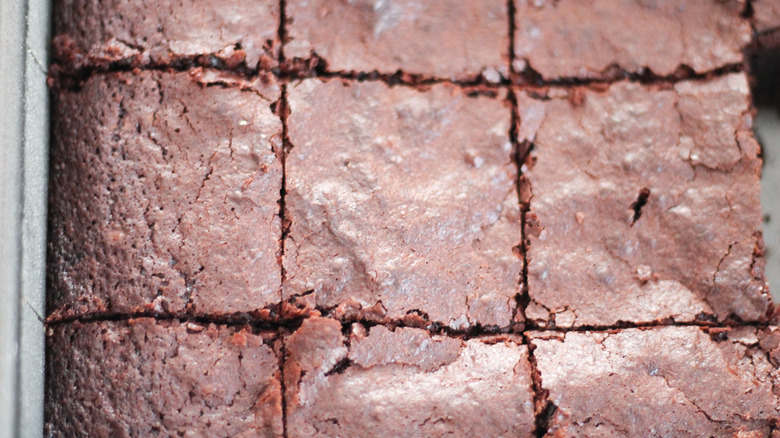
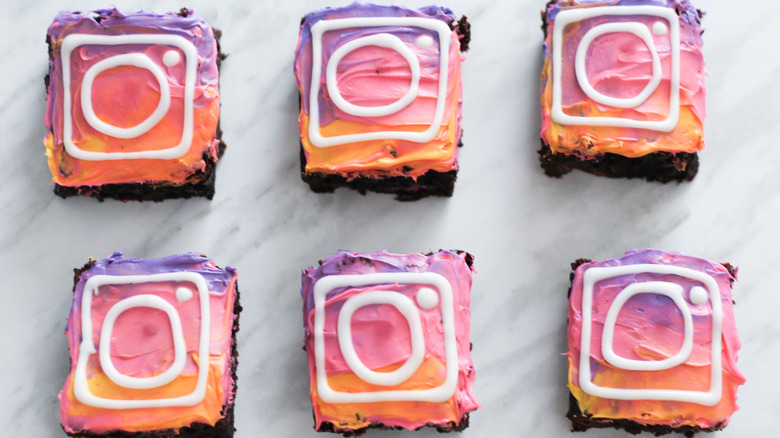
Once your timer goes off, take the brownies out of the oven, and let them cool off a bit. Cut them into small squares using either a knife or a square-shaped cookie cutter. (A cookie cutter is best if you have it so that the brownies are cut evenly.) Once you have the brownies cut into perfect squares, it's time to decorate them so they resemble the Instagram icon.
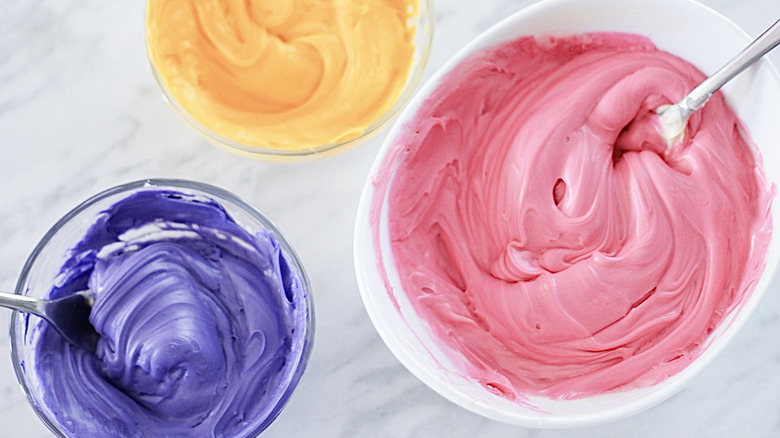
Take out the icing, and mix it with the food coloring. Grab three bowls, and put in frosting followed by purple, pink, and yellow coloring. Each color should go in its own bowl. Be sure to keep some extra white frosting to the side so that you can use it for the final details.
Mix and spread the colorful frosting
Start by spreading a thin layer of pink across the entire brownie. Then, take out a spatula or a metal spoon, and add a little bit of yellow icing along the bottom. Next, mix it into the pink as you gradually pull it across. Note that the brighter yellow should stay in the bottom left corner.
After that's done, use the same process to spread the purple along the top. Make sure to delicately mix it into the pink as you go, so it looks gradient. Doesn't it look just like the Instagram icon?
Decorate the brownies to resemble the Instagram icon
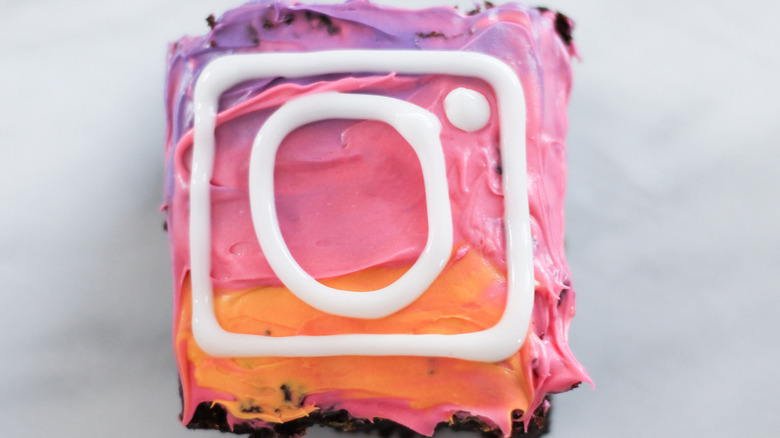
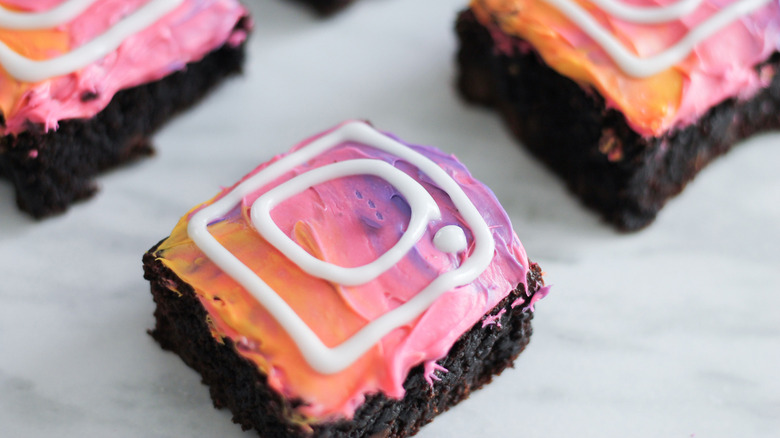
For the last step, you will need your white frosting. Put it in a piping bag (or sandwich bag, if you don't have one). Fill the bag with frosting, and begin piping a square and then a circle within the square. Add a dot in the upper right corner of the square to replicate the camera flash. Now, these brownies look worthy of the 'gram!
Luckily, these will also keep for a few days for you to enjoy. "If stored correctly (a sealed container in the fridge), these brownies will easily last five days," Olivieri shares. Now, go ahead and take a big bite of one, and wash it down with a cold glass of milk!
What did we change?
This recipe has a slight twist that makes it a little different than the original. Olivieri opted to add some chocolate chips to the batter, adding even more chocolate flavor to the already delicious chocolate base. After all, there's no such thing as too much chocolate.
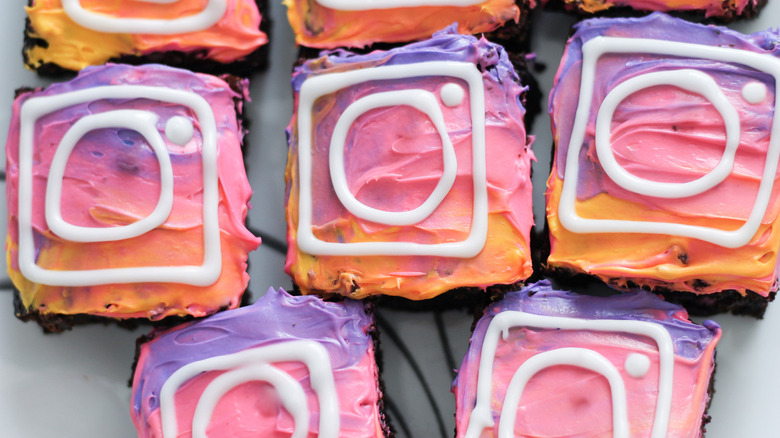
In addition, Olivieri changed the front of the brownies to Instagram's new icon, using three colors of frosting to give it that beautiful, vibrant Instagram vibe. As you can tell, these brownies are pretty legit, and they really resemble the actual Instagram icon. So snap away and post ASAP, because your followers are sure to be impressed with these little masterpieces.
Rosanna Pansino's Instagram Brownies Recipe With A Twist
This fun spin on Rosanna Pansino's Instagram brownies recipe gives these delights an extra chocolatey touch and a vibrant pop of color.
Ingredients
- 2 ¼ cups sugar
- 1 cup all-purpose flour
- 2/3 cup unsweetened cocoa powder
- ½ teaspoon salt
- ½ teaspoon baking powder
- 1 cup vegetable oil
- 2/3 cup milk
- 2 teaspoons vanilla extract
- 2 large eggs
- ¾ cup semi-sweet chocolate chips
- 2 (340-gram) containers white frosting
- pink food coloring
- yellow food coloring
- purple food coloring
Directions
- Preheat oven to 375 F.
- In a medium bowl, whisk together the sugar, flour, cocoa powder, salt, and baking powder.
- In large bowl, whisk together the vegetable oil, milk, vanilla extract, and eggs.
- Mix the dry ingredients into the wet mixture using a whisk, and whisk until almost smooth.
- Add in the chocolate chips, and stir to combine using a wooden spoon.
- Pour the batter into a greased 8x8-inch baking pan, and gently tap on the counter to ensure the batter is even.
- Bake for 40 to 45 minutes, until a toothpick comes out clean.
- Cut the brownie into small squares using either a knife or a square-shaped cookie cutter.
- To decorate the brownies, first mix your icing with the food coloring. Place a few spoonfuls of icing into 3 small bowls. Add the pink food coloring to one, the yellow to the next, and the purple to the last bowl. (Reserve some white frosting for the final details.)
- Spread a thin layer of pink icing across the entire brownie. Then, using an offset spatula (or metal spoon), add a little bit of yellow icing along the bottom. Mix into the pink as you gradually pull it across, keeping the yellow brighter in the bottom left corner. Repeat, but with the purple frosting along the top. Gently mix it into the pink as you go.
- Fill a piping bag with the tip cut off (or a sandwich bag) with some of the white frosting. Begin by piping a square and then a circle within the square. Add a small dot in the upper right corner of the square to resemble the camera flash.
- Serve, and enjoy!