Mini Chocolate-Covered Cheesecake Bites Recipe

Skip past the cardboard-flavored store-bought cheesecake, because we've got a homemade dessert made easy! Recipe developer Kit Hondrum from Kit's Kitchen is showing us how to make mini chocolate-covered cheesecake bites, and we are here for all of it.
Cheesecake was first made in ancient Greece (via Cheesecake.com). Before cream cheese was invented, the earliest cheesecake recipes included real cheese and honey. After baking, Grecians would enjoy the cheesecake warm rather than chilled, as is customary in the states. This delectable pie was served at a spectrum of venues, from Olympic pre-games to wedding parties (as the actual wedding cake).
Hondrum scaled these down to a portable size, so we can enjoy them without a wedge (pun intended). These bundles of creamy goodness are made with 12 simple ingredients, and they are the ultimate treat to conclude any dining experience. This recipe yields 16 small servings. You can freeze these cheesecake bites and hand-deliver them as special gifts, or keep them cool to treat yourself after a long day! Now, let's get ready to bake.
Gather the ingredients to prepare mini chocolate-covered cheesecake bites
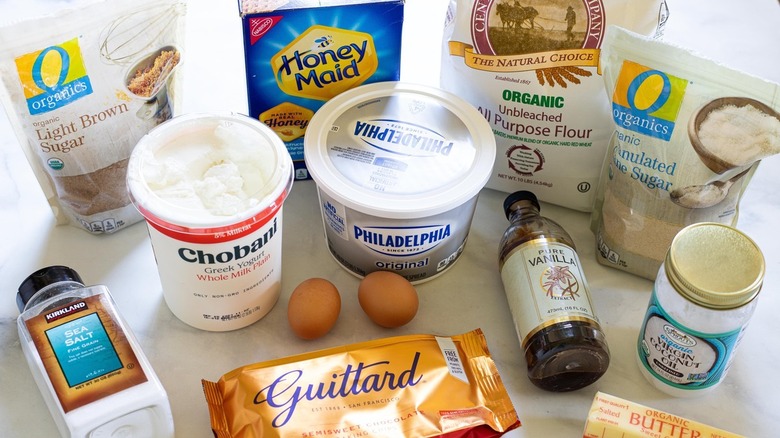
This yummy dessert has a short shopping list. To make these chocolate-covered cheesecake bites, you'll need graham crackers (any brand), salted butter, granulated white sugar, and light brown sugar. These next ingredients should be kept at room temperature: cream cheese, full-fat Greek yogurt, and eggs. Additional dry ingredients include all-purpose flour, vanilla extract, fine sea salt, semisweet chocolate, unrefined coconut oil.
Here's a quick tip from Hondrum: "Remove [the] cream cheese, Greek yogurt, and eggs from [the] refrigerator about two hours before beginning, to [allow them to meet] room temperature." Once you have all of the ingredients rounded up and ready to go, you can officially get started.
Preheat the oven, and prep your baking pan
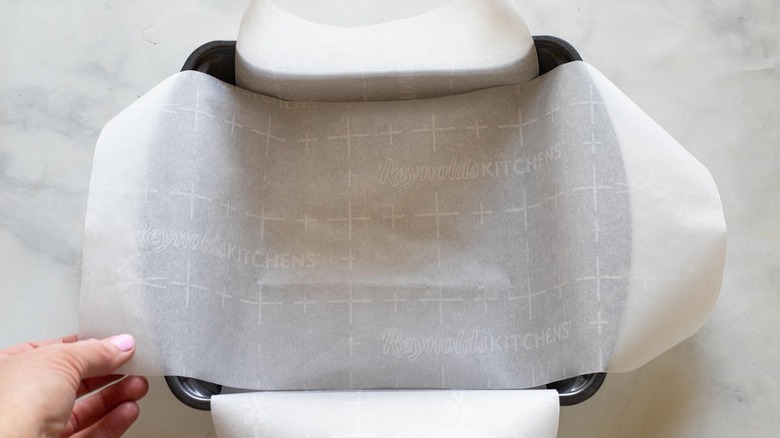
For the first step, preheat your oven to 350 F. As the oven heats up, line an 8x8-inch brownie pan with parchment paper. Be sure to cut the two pieces longer on opposite sides so each side has extra paper overhanging. This gives you "handles" to remove the cheesecake from the pan after it's baked. It is essential to follow this direction accurately for easy removal. (Any brand of parchment paper will do.)
Crush the graham crackers for the crust
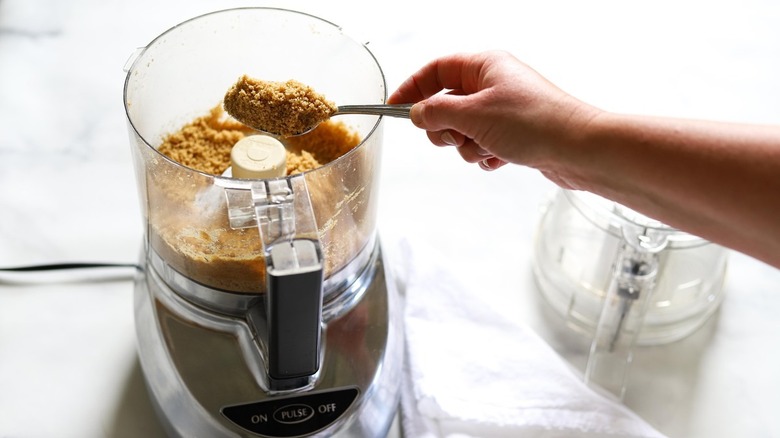
Now let's crush this graham cracker crust! Place six graham crackers in a food processor, and blend them for about one minute, until you get fine crumbs (about 3/4 cup of crumbs), as pictured above. Hondrum notes that you can try this the old fashioned way. "You can also crush the graham crackers with a bag and rolling pin if you don't have a food processor," she says. But FYI — the machine makes for a faster cleanup.
Once the graham crackers have formed a grainy texture, add in 3 tablespoons of melted (salted) butter and 1 tablespoon of light brown sugar. Pulse (or mix) again to fully combine and coat the crumbs.
Pack the graham cracker base
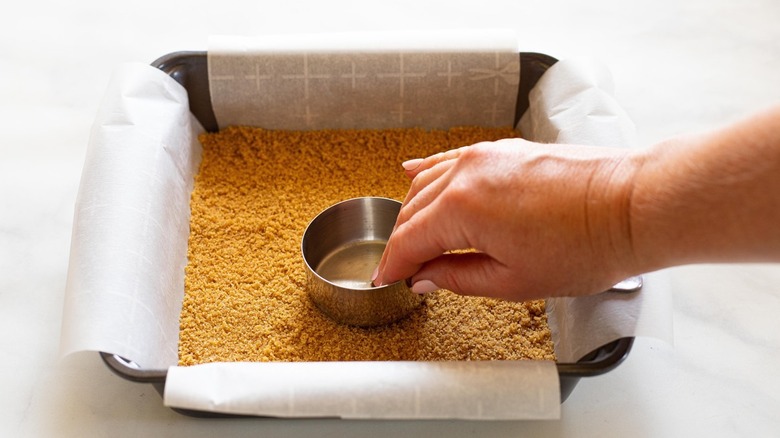
Pour the crust mixture into the parchment paper-lined brownie pan. Spread the crumbs out to make an even layer of crust. Using the back of a spoon or a cup, pack the crust down so it lays tightly in the bottom of the pan. Then, place the crust in the freezer to set. While the crust freezes, it will hold its shape, and you can gather the wet ingredients to blend.
Whip up the wet ingredients
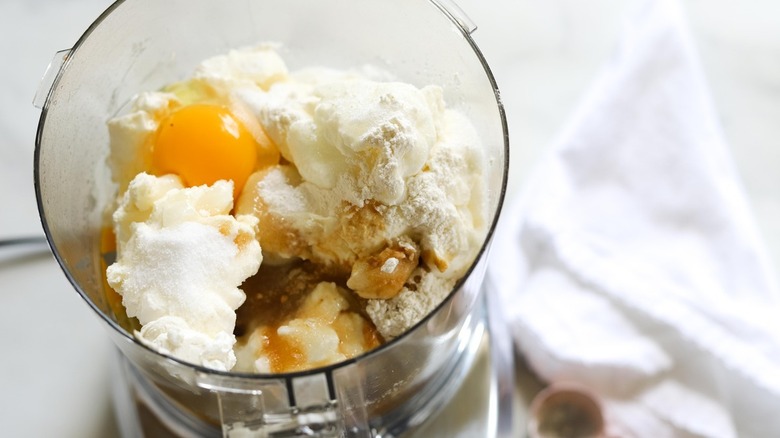
You'll want to clean out the food processor before you start the filling. Remember these ingredients are best at room temperature. Place 16 ounces of cream cheese, ½ cup of sugar, ¼ cup of full-fat Greek yogurt, and break 2 large eggs into the food processor. Add 1 tablespoon of all-purpose flour, 1 ½ teaspoons of vanilla extract, ¼ teaspoon of fine sea salt in the food processor as well. Blend until all ingredients are combined. Be sure to pause and scrape the edges as needed. Hondrum says to pay close attention to this step. "Don't overblend," she advises. The desired texture is a velvety consistency.
Without a food processor, a bowl and hand mixer can be used for this step. Hondrum says, "But take care not to over-whip it, because if there is too much air in the filling, it will rise and sink during the cooking process and cause the top to crack."
Bake the cheesecake in a water bath
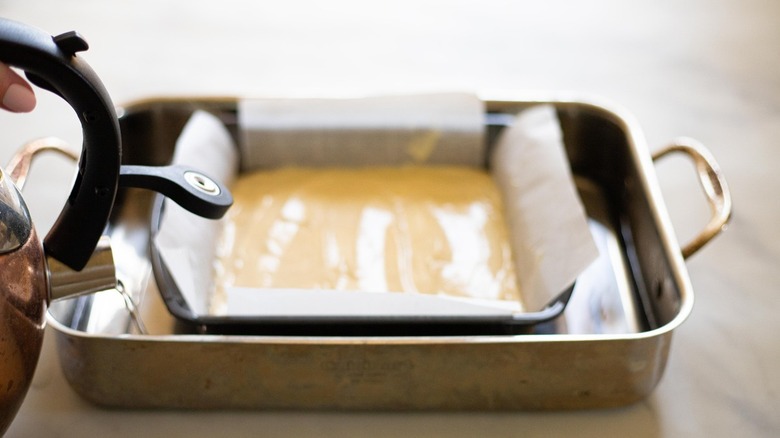
When the filling reaches a creamy consistency, pour it out over the top of the crust. Smooth out the top with a spatula or large spoon.
Next, place the filled brownie pan in the middle of a roasting pan or deep sided baking dish. Boil some hot water to pour into the roasting pan to surround the brownie pan full of cheesecake. You'll want to pour about 1 inch of water into the bottom of the roasting pan.
With the oven heated to 350 F, place the roasting pan on the center rack of your oven. Bake the cheesecake in the water bath for 50 minutes, or until the center is set.
Once it's baked, remove the entire roasting pan from the oven, and allow the cheesecake one hour to cool in the water. Then, transfer the brownie pan onto a cooling rack, and let it cool to room temperature (this may take about four hours). To secure its shape, place the brownie pan of the cheesecake into the freezer overnight.
Melt the chocolate coating
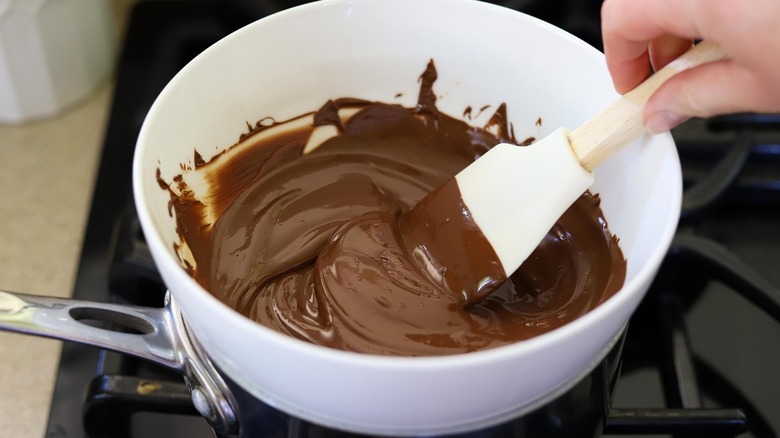
Now let's make the chocolate covering! Start by adding 12 ounces of semisweet chocolate and 2 tablespoons of coconut oil into a bowl. There are a few ways to melt the chocolate, one option is to set up a double boiler. According to Food52, a double boiler can be made with a small saucepan filled with (boiling) water and a large bowl set over top. The purpose of the double boiler is to heat the chocolate from below. The second option is to melt it in the microwave.
Whichever option you use, stir the chocolate until it comes out smooth. Once it is liquified, allow the chocolate to cool down completely.
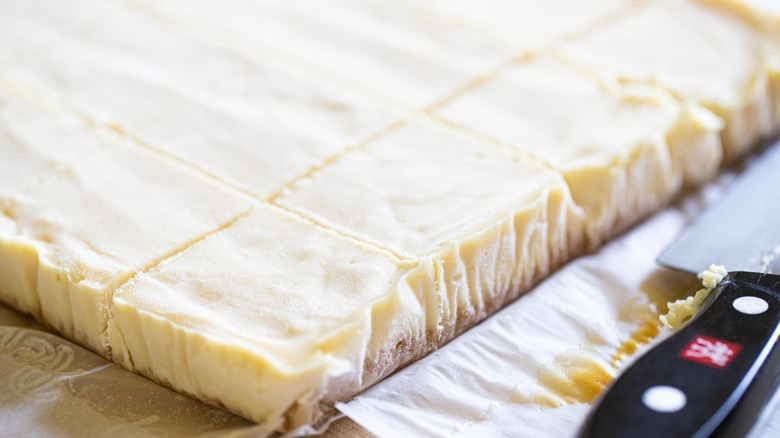
Cut the cheesecake into squares
Separately, line a large baking sheet with parchment paper or a silicone mat, and set that aside (for the finished product).
Now, back to the cheesecake. Remove the brownie pan from your freezer and, using the parchment overhang, lift the cheesecake out of the pan and onto a cutting board. With a very sharp knife, cut the cheesecake into 16 squares.
Prepare yourself to coat the perfectly cut cheesecake squares. Be sure to have some practical utensils on hand for the upcoming steps.
Encase the mini cheesecake bites in chocolate
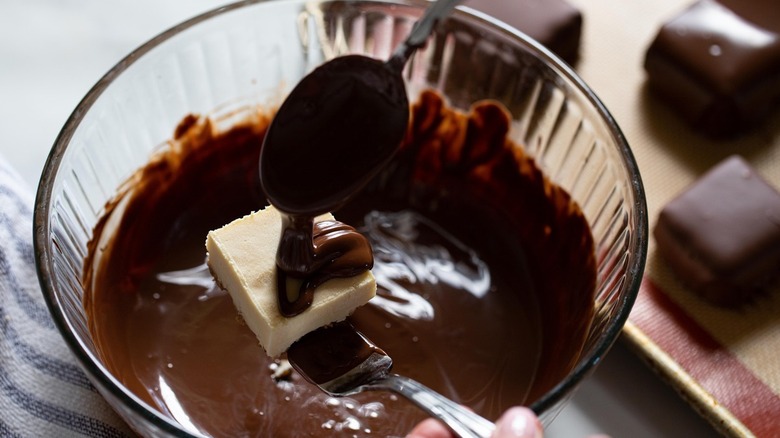
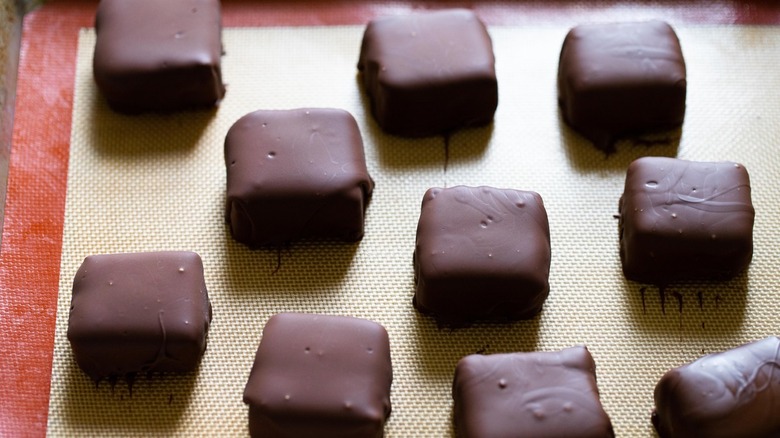
To coat your cheesecake bites in this creamy chocolate, you will lift one square onto a fork, hold it over the bowl of chocolate, and use a spoon to dollop beads of chocolate over it until it's fully draped in chocolate. If you find excess chocolate surrounding the cheesecake square, use the spoon to tap the fork gently until the extra has dripped into the bowl. With a toothpick, gently slide the cheesecake bite from the fork and onto your parchment-lined baking sheet. Repeat the same system with the remaining cheesecake bites. Keep in mind that it gets easier as you go!
Once all the mini cheesecake squares are coated, place the baking sheet into the refrigerator for about 10 minutes, or until the chocolate coating has hardened.
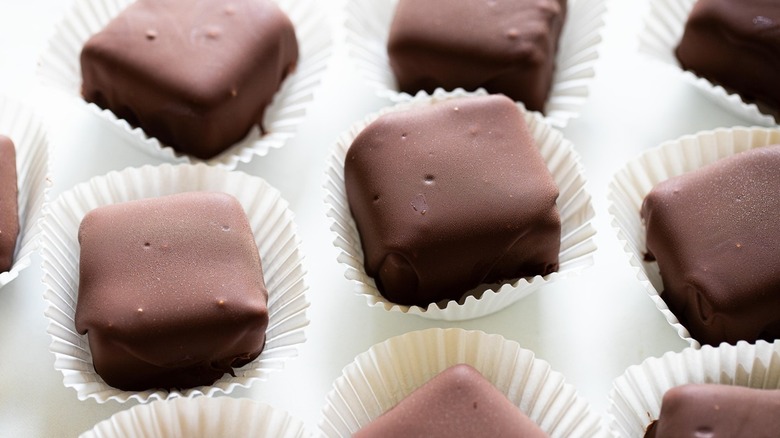
Enjoy your mini desserts
Once the chocolate casing has cooled, you can be as creative as you want! Hondrum inspired our artiste by adding, "You can also drizzle with some melted chocolate or white chocolate for a fancier look. Package them up in cupcake liners, and place in a gift box to bring to a party or give as gifts (similar to chocolate-covered strawberries)."
These rich chocolate-dipped cheesecake bites can be stored in the refrigerator or freezer. These desserts are ideal for parties, birthdays, holiday gatherings, or simply for an evening treat. Hondrum says, "It's a fun dessert that is perfect for kids and adults! You can also cut them into smaller squares to make even smaller servings, but you may need more chocolate to cover them."
We hope you'll accept the challenge to craft these delicious beauties, and share them with your family or friends. You may find the greater challenge to not eat them all at once.
Mini Chocolate-Covered Cheesecake Bites Recipe
These mini bundles of creamy cheesecake goodness are made with 12 simple ingredients, and they are the ultimate treat to conclude any dining experience.
Ingredients
- 6 graham crackers
- 3 tablespoons salted butter, melted
- 1 tablespoon light brown sugar
- 16 ounces cream cheese, room temperature
- ½ cup granulated sugar
- ¼ cup full-fat Greek yogurt, room temperature
- 2 large eggs, room temperature
- 1 tablespoon all-purpose flour
- 1 ½ teaspoons vanilla extract
- ¼ teaspoon fine sea salt
- 12 ounces semisweet chocolate
- 2 tablespoons coconut oil
Directions
- Preheat oven to 350 F.
- Line an 8x8-inch brownie pan with parchment paper (two pieces with overhanging sides).
- Place the graham crackers into a food processor, and blend until you get a fine crumb, about 1 minute.
- Add in the melted butter and brown sugar, and pulse to combine and coat the crumbs.
- Pour the crust mixture into the lined brownie pan, spreading to make an even layer. Then, pack down with the back of a spoon or a cup. Put the crust in the freezer.
- Clean out the food processor before starting the filling. Place the cream cheese, sugar, Greek yogurt, eggs, flour, vanilla, and salt into the food processor, and blend until combined, stopping to scrape down the sides as needed.
- Pour the filling on top of the crust, and smooth out the top.
- Place the brownie pan in the middle of a roasting pan or deep dish baking pan. Pour hot water into the roasting pan (around the cheesecake) — you'll want about 1 inch of water in the bottom.
- Bake in the water bath on the center rack for 50 minutes, or until the center is set.
- Remove cheesecake from the oven, and allow it to cool in the water bath for 1 hour.
- Remove brownie pan to a cooling rack, and allow it to cool to room temperature, about 4 hours. Then, place it in the freezer overnight.
- Melt the chocolate and coconut oil together over a double boiler or in the microwave. Stir until smooth. Allow the chocolate to cool completely.
- Line a baking sheet with parchment paper or a silicone mat.
- Remove the brownie pan from the freezer, and, using the parchment overhang, remove the cheesecake from the pan to a cutting board. Using a very sharp knife, cut the cheesecake into 16 squares.
- To cover the cheesecake bites in chocolate, place one on a fork, hold it over the bowl of chocolate, and use a spoon to spoon the chocolate over it. Tap the fork gently a few times to allow excess chocolate to drip off. Use a toothpick to gently slide the cheesecake bite off the fork and onto the parchment-lined baking sheet. Repeat with the remaining cheesecake bites.
- Place cheesecake bites in the refrigerator for about 10 minutes, or until hardened.
Nutrition
| Calories per Serving | 297 |
| Total Fat | 21.3 g |
| Saturated Fat | 12.5 g |
| Trans Fat | 0.1 g |
| Cholesterol | 60.8 mg |
| Total Carbohydrates | 26.2 g |
| Dietary Fiber | 1.4 g |
| Total Sugars | 20.8 g |
| Sodium | 180.6 mg |
| Protein | 4.1 g |