9 Big Mistakes Everyone Makes When Grating Cheese
There are many different types of cheese, from soft to hard, with or without rind, and more, plus thousands of varieties, with mozzarella being the most popular and most produced in the U.S. because of its use on pizzas. Grated cheese is perfect as a melted topping or used to make a smooth, cheesy sauce for a dish such as one-pot mac and cheese. It can also be sprinkled onto hot food, added to salads, and naturally used to make the cheesiest dish of all, the fondue, which is even eaten by heads of state.
A good grater, and even a variety to suit different grating styles, is an essential kitchen tool and was first invented way back in the 16th century in France by Francois Boullier. With so many amazing French cheeses, the origins of grating seem apt. However, during the Great Depression in 1930s America, it was Jeffrey Taylor from Philadelphia who created his own version. Designed to make food stretch further during a time of desperate scarcity, he used a shower drain and sharpened the metal holes (via The Tingle Factor Box). Since then, people the world over have been using graters and as with any prep in the kitchen, it's easy to get into either bad habits or just not think about how to do things differently. There are universal big mistakes everyone makes when grating cheese that a few tips and food hacks can help with.
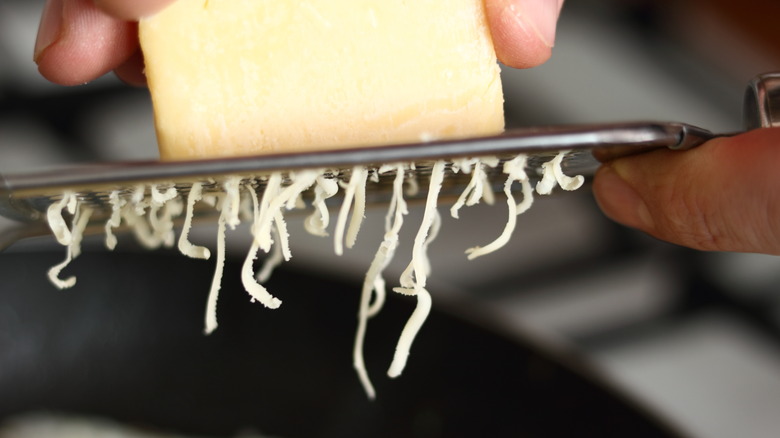
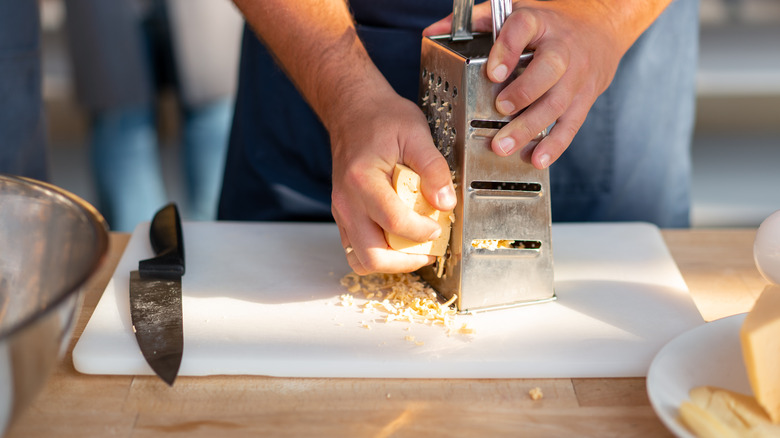
1. You're going up and down, not side to side
If you're used to standing your four-sided box grater upright and grating up and down then you might be shocked to find out you're apparently grating cheese in the wrong way. You're supposed to lay your grater on its side and grate your cheese on the top in a side-to-side motion. This lets the cheese fall down so that it can be easily tipped out into a bowl as you grate, rather than stacking up inside the grating side. It also means you're less likely to get cramps in your hand from holding onto a block of cheese. With so many cheese recipes to make, it's time to grate more easily.
This cheese-grating hack went viral when a British woman posted an Instagram video on her Twitter account showing cheese being grated in this way from what was a food-focused account. She was incredulous that she hadn't known how to use a grater using this method before and it seemed a lot of people were not aware of this simple grating technique either. It certainly sparked interest as a top cheese-grating tip to avoid grating knuckles and nails, and also to prevent clogging up the grater with shredded cheese. However, it was pointed out by some people that graters are designed to stand up, with rubber on the bottom of some graters, so not everyone it seems is convinced.
2. The cheese is too soft to grate
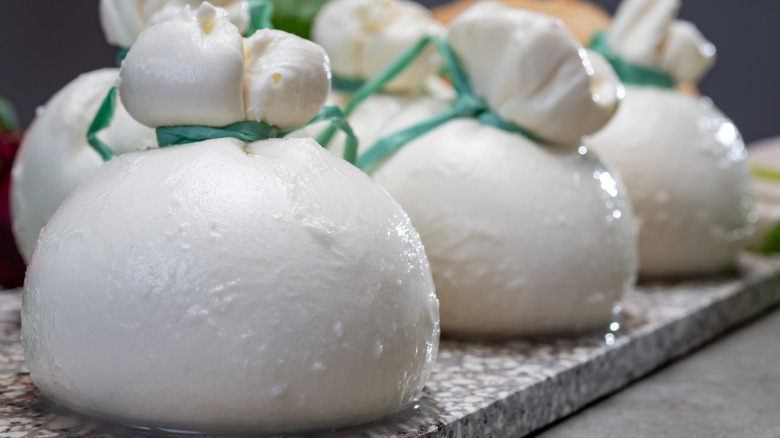
The world of cheese if wonderfully diverse from hard cheddars to salty blues and gorgeously soft varieties such as mozzarella. Another popular soft cheese is the silky, smooth, melt-in-the-mouth texture of buffalo milk burrata which is renowned for its creamy taste. Although this cheese is often eaten with bread, tomato, and a sprinkle of sea salt, there are a lot of dishes that include grated or shredded mozzarella, such as pizzas.
According to an article in Pizza Today, expert in the dairy industry, Dr Mali "Cheese King" Reddy believes that the consistency of shredded mozzarella adds the right melt and stretchy elements to fit with American tastes when compared with slicing it. As a consultant to top pizza chains from Domino's Pizza to Papa John's, he has more than a passing interest in what makes a good cheesy-topped pizza.
However, grating soft cheeses can be difficult because it often creates more mush rather than well-defined grated curls. One good tip, from Tasting Table, is to put soft cheese in the freezer for around 15 minutes. The idea is to make the cheese harder, without freezing it, so that it grates more easily. The article features a video showing the difference when grating mozzarella, with the softer, unchilled cheese virtually impossible to grate successfully and the harder version grating well.
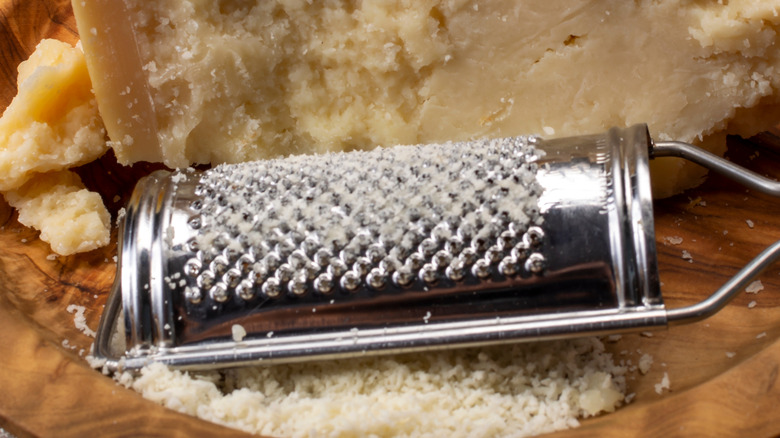
3. Not using the right type of grater
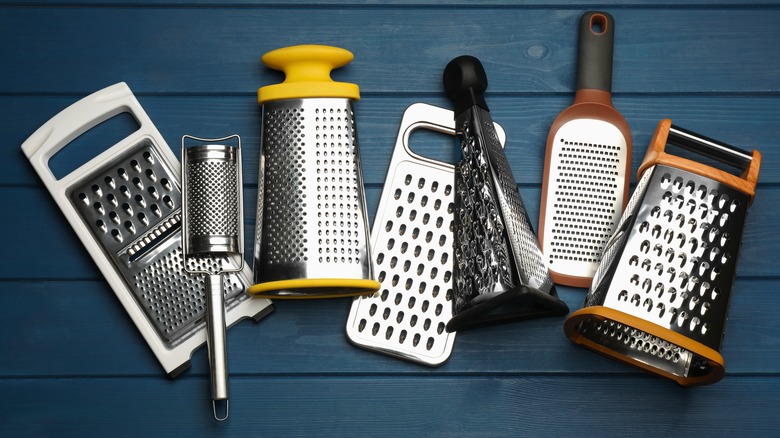
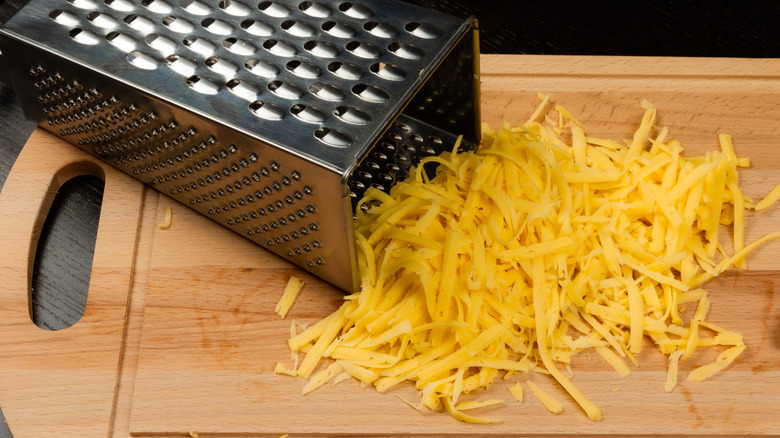
Not all cheese graters are the same, and some graters are just not designed for cheese. For example, nutmeg can be grated, as well as fresh ginger and the zest of citrus fruits. There are plenty of grated carrot recipes too, while you can also make a quick-fix mashed potato recipe using a grater. Aside from non-cheese grating, there are many different types of graters, and a big mistake everyone makes when grating cheese is to use the wrong one. The classic box grater is a good, standard grater, with a variety of different holes to choose from. It's probably the best for grating cheddars and other hard cheeses, especially if a lot of grated cheese is needed.
Other types include zesters and microplane graters which are small graters that can also be used for hard cheeses for small, finely textured quantities. There are also different types of nutmeg graters which are either hand-held or grinders with a handle. Another type is the rotary cheese grater, which can sometimes come with different grating inserts and is ideal again for small quantities of really hard cheese such as parmesan, which really adds flavor to any pasta dish. Boska has been making cheese graters for a long time, and these include not just equipment for the kitchen, but also ones that can be used at the table too. Meanwhile, a mandoline is perfect for grating over a pan.
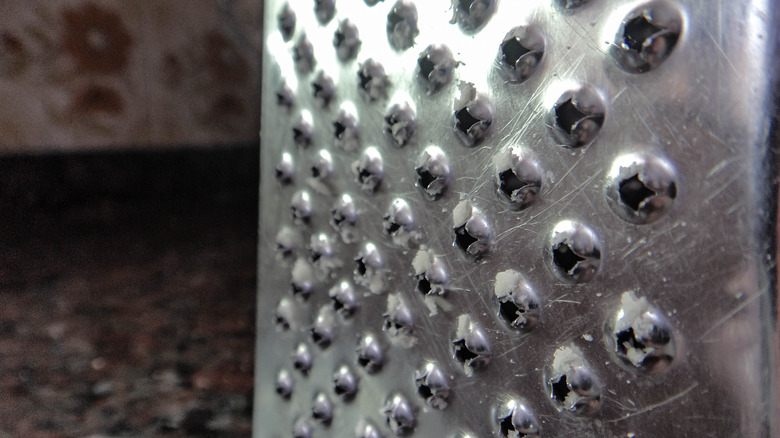
4. You don't know how to use a box grater

With a traditional box grater, there are generally four grating sides to choose from. A mistake everyone makes is using the wrong side with the wrong type of cheese and getting the wrong type of grated cheese as a result. With this type of grater, there are different-sized holes on three sides with slits along the fourth side. It's important to know how to use your box grater in the right way before you start grating so that you get the best grated cheese possible(via Martha Stewart).
Two of the sides have slanted holes and these are the classic cheese-grating sides. The larger holes create bigger grated pieces, and are ideal for semi-hard cheeses whereby the cheese needs to be grated or shredded, and there is no recipe requirement for this to be really fine. It's also good for hard cheeses if a larger grated result is desired. The smaller-holed side is more suitable for when a finely grated hard cheese is required, such as with a caesar salad or pie recipe.
The third side also has holes, but these look like they've been punched out of the metal. This is a zester, and when it comes to grating cheese this produces a fine dust that can be used in dishes such as risotto. Finally, the fourth side is best suited to thin slices of cheese and can also be used to create shavings such as a salad with shaved parmesan.
5. You're not using your palm to spare your knuckles
One of the most common dangers when grating cheese is either catching nails in the sharp holes or grating knuckles, which can obviously be a painful grating result. Bleeding in the kitchen because your grater has broken the skin is something to avoid on a hygiene level, as well as a personal injury one, while a sore hand could hinder cooking abilities. Thankfully, advice in the way of food hacks are always offered to make cooking easier and avoid culinary pitfalls, such as using the palm of the hand to grate small pieces of cheese. With the palm, rather than fingertips, you can apply pressure without the risk of knuckles getting in the way or fingers slipping toward the jagged edges.
This is a great way to not waste end bits of blocks that otherwise may be left ungrated so that your fingertips don't end up being shredded too. There are other hand-saving grating techniques too, such as using a fork to help when grating small chunks of cheese. Both these pieces of "grate" advice mean that grating can be faster, too. However, this last tip may not be favored by some who don't like the idea of the metal fork hitting against the metal of the grater. Instead, a fork can be used to scrape at the cheese like a grater. Yet another idea, is to make sure the grater is on its side and to grate slowly toward the body.
6. Not considering a food processor to grate cheese instead of a grater
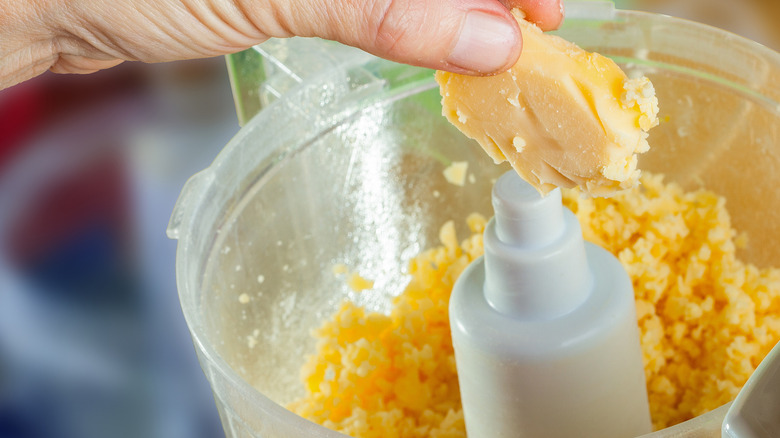
From bulk grating to shredding certain types of cheese, the best way to grate cheese might be not with a grater at all, but a food processor. Grating cheese to add to a single dish or a simple recipe is one thing, but if you're making really cheesy meals then you may find using a machine far less tiring. Some people even find that traditional grating can cause pain in the hands. Not only is grating with a food processor less arduous, but it's also faster as well (via Chicago Tribune).
The key to grating cheese in this way is to make sure that the speed and settings are adjusted to create the grated texture you want. This is much the same as choosing which type of grater and what size of holes to use. A good tip is to pulse the cheese and stop before it's shredded to make sure it's looking how you want it to. Once again, the harder the cheese the less likely it is to clump together, so a little chill beforehand can help. It's also a good idea to add in cheese cut into pieces that are a similar size. This will help to give you a better idea of how much grated cheese you'll have. A ballpark rule-of-thumb is that around 4 ounces of cheese is equivalent to a cup of grated cheese if this is what a recipe is asking for.
7. Your cheese is sticking to the grater
One of the more annoying cheese grating issues is when the holes on your grater become clogged up with cheese and the cheese, perhaps because it is warming up and becoming softer smears on the grater. This can make grating harder work and a much slower process, as well as being mighty frustrating. However, this might be happening because you're not oiling your cheese grater before you use it.
Food Republic recommends spritzing oil on the surface of your equipment so that the grated cheese doesn't stick to the grater. Aside from this, tapping the grater will ensure that the cheese falls down and doesn't stay put which allows it to build up. One big advantage of using oil or cooking spray as a lubricant is that cleaning can be far easier too, and avoids having to scrub away at a sharp kitchen tool to get rid of stuck-on cheese that hasn't quite made it into the grated cheese bowl. Of course, it's not just cheese sticking to the grater that can be the only problem, but also cheese sticking together after it's grated too. One tip for saving grated cheese from forming these clumps of cheese is to add in some flour, if you want to store it, before freezing. That way it stays separated and ready for when it's needed for a recipe again or when you want to grab a handful to make some delicious cheesy beans.
8. The cheese is too crumbly to grate
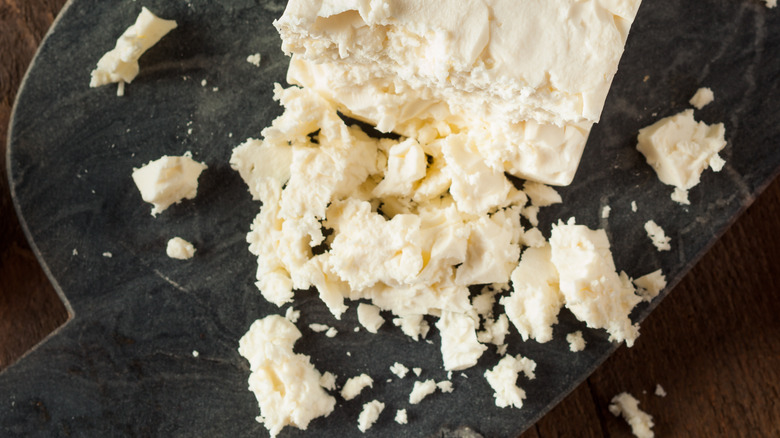
There is something wonderfully delicious about a crumbly cheese whether it's creamy, salty feta cheese, which is traditionally made from sheep's milk, or a Mexican cow's milk variety such as Cotija cheese. Parmesan is another cheese with a less bendy texture, however, this cheese does vary. For example, authentic Parmigiano Reggiano has to come from a certain region in Italy and undergoes a strictly monitored process and aging period of at least a year before it qualifies. The longer the cheese ages the more crumbly it gets, and it's often grainy too. This isn't the longest cheese to be left to mature, however, with the oldest edible cheese (via Luxe Adventure Traveler) being the Italian Bitto Storico which can be left for up to 18 years, with a 15-year one selling to a buyer in China for thousands of dollars.
As with other cheeses, there are many recipes that require smaller pieces of crumbly cheese such as a classic Greek salad. Breaking up this type of cheese with a grater can be a challenge, although, there are ways to grate cheese without a grater. A LEAFtv article suggests breaking off a couple of pieces of this type of cheese and holding one in each hand between the thumb and index finger. With pieces of cheese jutting out, rather than close to the palm, the cheese can be rubbed together so that small bits fall. In effect, you're using cheese to grate cheese!
9. Your grater needs sharpening
Graters use the sharp "teeth" to cut up the cheese and over time these holes flatten, meaning that your grater seems duller or blunter. The best approach is prevention, by using a cover to protect the surface and washing a grater by hand rather than putting it in the dishwasher. Of course, one simple way to improve your grater may be to simply buy another one and if your cheese selection is high-end then this might appeal the most. There are some pretty luxurious (and expensive!) cheeses out there, from Serbian donkey-milk cheese, to Swedish moose-milk cheese, and British cheese with edible gold flakes (via Tasty Craze).
If grater holes need pushing out, and you really don't have the time and energy to do this hole by hole yourself, then there are other cheese grater sharpening tips you can try. One hack is to use sandpaper, which is rubbed along the grater in the same fashion as when you're grating, washing the grater afterward. Definitely an interesting hack is to use a ceramic cup, rubbing its bottom across the holes. You can also sharpen a knife with a coffee mug in the same way. A knife and a file can be used to sharpen the edges of the holes and then push them back out so they are less proud. Once you're good-to-go, the next step is to avoid all those big mistakes everyone makes when grating cheese and perhaps celebrate with a cheese souffle.