

We Tested 8 Appliances To Find The Best Way To Make Grilled Cheese
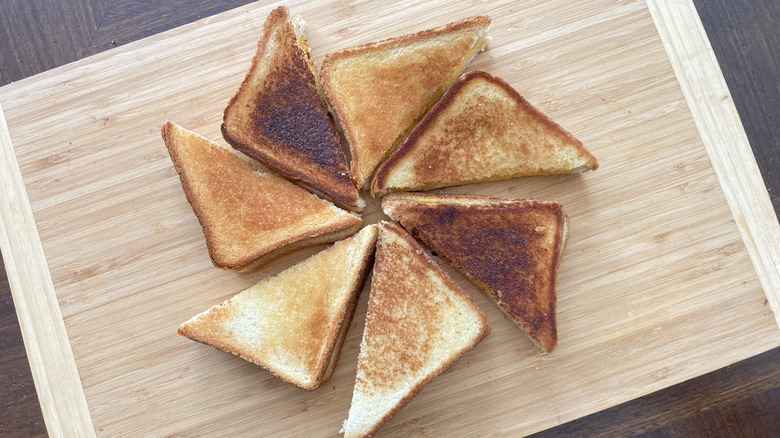
Every grilled cheese connoisseur has a preferred method for making sandwiches to their specific tastes, using familiar appliances that offer an array of delicious possibilities. There are quick, effective techniques, such as popping the sandwich in a toaster oven, that require little attention and essentially no kitchen know-how. Then there are mid-level options, like using an air fryer to do the heavy lifting with a timer that tells you when everything is ready. And there are more sophisticated approaches, such as pan and oven grilling, which require some basic cooking acumen and yield a variety of desirable finishes, from tenderly seared to aggressively crisped — all achieved under a watchful eye.
When it comes to ease of prep and overall messiness, some appliances offer advantages that others don't. While none of these are the wrong way to make a grilled cheese sandwich, it's best to know for sure which of your cooking contraptions gets you to the finish line in grand style and with the least effort and cleanup. So I fired up every cooker in my collection to see how each fared in the quest for a grilled cheese that's tasty and well-textured without leaving you in the lurch when it's all said and done. There may be no more delicious way to get to the bottom of a culinary question than to jump from the frying pan and into the fire. So let's do it.
Stainless steel pan on stovetop
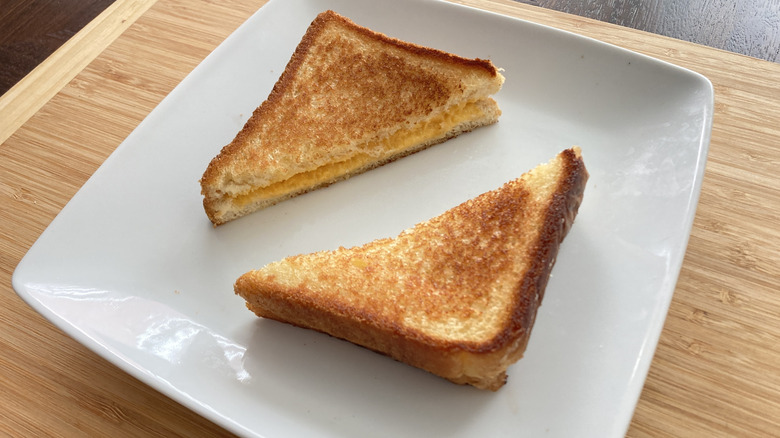
Ah, the good-ol' stainless steel pan, a kitchen classic that always gets the heat where it needs to go for a perfect grilled cheese sandwich. This is the way I usually make a grilled cheese; no matter what combination of cheeses and bread selections I may be in the mood for, it never disappoints. But as any seasoned home cook will attest, the potential for scorching that leads to a burnt bite and a stuck-on mess at the bottom of the pan is often headache enough to inspire easier alternatives. The old standbys aren't always the best.
Since my stainless steel pan is a full-sized vessel, I made sure to keep the sandwich directly in the center so it would cook as evenly as possible. I heated it on medium and melted an extra teaspoon of butter in the bottom to make sure there was as little scorching as possible. Then I laid the sandwich in, and I also did my darndest to avoid any sort of sticking or smoking by keeping a keen eye on the bread as it cooked. After four minutes on medium heat (two minutes on each side), the browning was perfect, and the cheese was duly melted. There was a bit of clean-up afterward, thanks to the greasy interior of the pan, but the lack of scorch made it easier.
Nonstick pan on stovetop
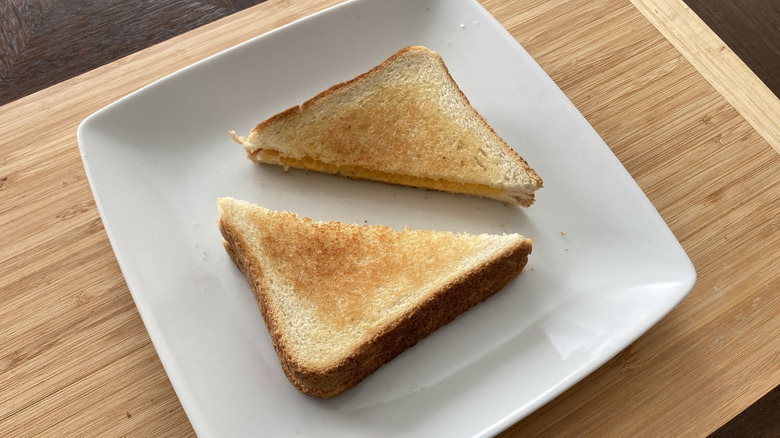
A nonstick pan is one of the most tempting techniques for minimizing mess while maximizing toasted finish and an ooey-gooey center, and it seems like a grilled cheese maker's best friend. It reduces the need for extra butter. This, in turn, reduces the overall fat content of your sandwich, though it can mean the flavor of the bread is a little less intense, too. For anyone looking to keep the clean-up task as simple as possible, it may be a worthy sacrifice.
My nonstick pan is a small one, just the right size for a single sandwich, with enough space to fit a spatula when it's time to flip. Like the stainless steel pan, I let the nonstick cook for four minutes on medium heat, two minutes on each side; the browning was less intense than the stainless steel frying pan, which felt to me like I had greater control over the heating. There was also no greasy mess to clean up, but the tasty browned surface flavor was also less intense than that of the stainless steel sandwich produced.
Toaster oven
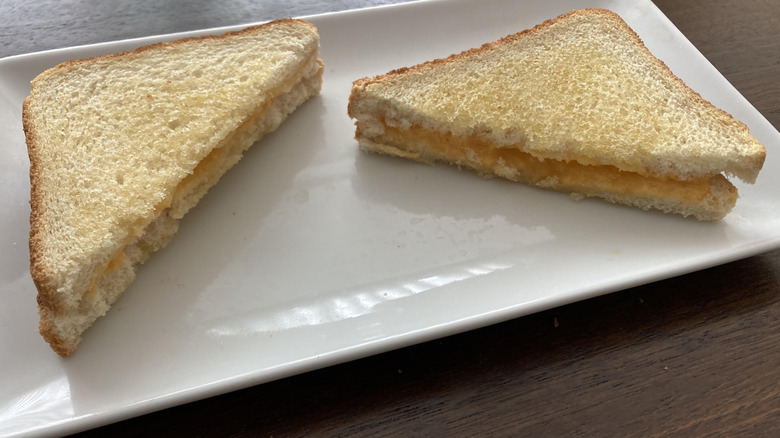
Serious question: Why would you not use a toaster oven to make your grilled cheese sandwich every single time? You drop the pre-assembled sammie on the tray, slide it onto the rack, twist the dial, and let the cooking happen. If you're particular about it, you may flip it at the halfway point to make sure both sides get even heating and proper toasting. But even if you don't, you still end up with a largely hands-free cook and a finished morsel that's perfectly passable, if not a dazzling grilled cheese specimen. It's a no-brainer, but it has to live up to its potential.
I prepped a test sandwich and placed it on a foil-lined tray to keep the heat even and the mess to a minimum. Then I heated it to the mid-toast setting on my oven and let the cheese melt and the bread toast a bit. After the bell rang, I put it back at half-heat without the tray to get a nice browning on the toast. I was surprised to see how little color the bread picked up after nearly ten minutes of cooking. That's not a bad thing, per se, considering how easily it could have gone from undercooked to thoroughly on fire. But it took more babysitting than I had anticipated to achieve the tell-tale crispness and color. This is a great method if you like lighter toasting, or if visual flair isn't a part of your plans.
Griddle
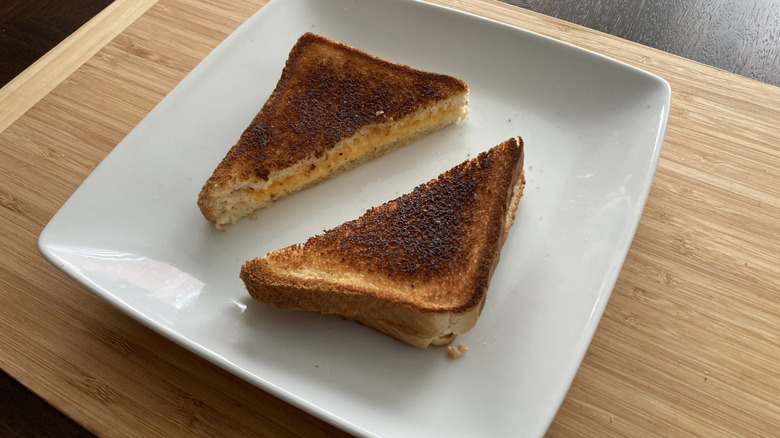
A griddle always seems like a can't-miss way to cook quantities of food while keeping a close eye on how the heat is being applied. Easy flipping for creations like grilled cheese sandwiches is guaranteed thanks to the broad, flat surface and open workspace surrounding the cooker. You may have to rename your finished dish to a "griddled" cheese sandwich, but that's the sort of culinary word play sandwich lovers go gaga for — or at least I do, anyway. As long as the mess is minimal and the eating is good, a griddle should be the prime candidate for your cheesy enterprise, right?
My griddle browned the surface nicely while melting the cheese without overspill, though this was one I had to watch over the whole time. Even at 350 degrees Fahrenheit, even the most amazing grilled cheese recipes can go from perfectly brown to super scorched if you take your eye off it for a minute. Any upgrades to your grilled cheese creation can also easily alter the time and heat requirements.
As it was, the finish was a little deeper than I usually like. If your griddle is nonstick like mine is, clean-up is just a wipe-down once the top cools before you put it away for next time — a practically mess-free appliance overall.
Sheet pan in oven
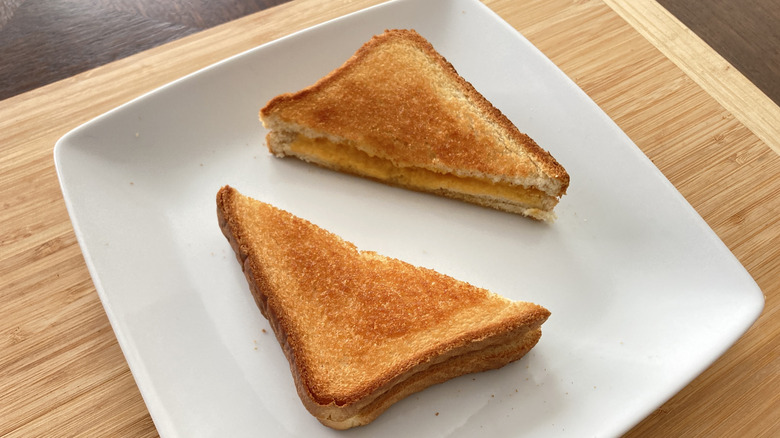
One of the more obvious appliances for making your grilled cheese sandwiches sits at the heart of your kitchen: the oven. Its massive capacity means you can make a full load of cheesy bakes at one time. Once you have the process down, you can set a timer for the flipping to make sure both sides get even browning. You can also experiment with broiler settings to make things go quicker; I stuck with the bake setting for this test so I could keep things even-steven across the various appliances.
I set it to 350 degrees Fahrenheit and preheated it before sliding the pan in and giving each side four minutes. That hardly had time to toast the bread, let alone melt the cheese, so I cranked the heat up to 400 and gave it four more minutes on each side. The finished sandwich was a rich golden color, with a perfect crispness that felt toasted rather than grilled, even with generous butter applied to each side. The cheese was creamy yet contained between the crusts, keeping mess to a minimum. This would be a great one to use for feeding a hungry house without making each sandwich individually, as long as you control the heat and keep a close eye on your pan.
Air fryer
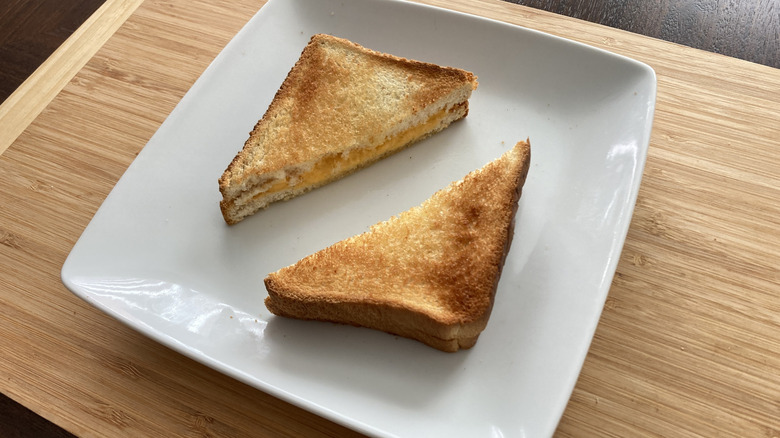
Is there anything this modern wonder of compact convection cuisine can't cook up with precision and ease? Whatever you drop into the basket seems to come out crisp on the outside, tender on the inside, and ready to hit the plate for your enjoyment. I've come to depend on my air fryer for roasting veggies to perfection, heating pizza like a champ, and crisping up pitch-perfect fries while my brain stays largely on autopilot, but I've never tried a grilled cheese sandwich, so I was giddy — yes, giddy — at the thought of finding out how exceptional an air-fried version would turn out.
I preheated the air fryer to 350 degrees Fahrenheit, then put the sandwich in a silicone tray and cooked it for four minutes at the same temperature, then flipped it and repeated. It turned out to be firmer than the stainless steel pan and held its shape better when I sliced it in half. Not having the extra butter on the surfaces also made it a little less greasy, which may be a matter of preference as far as taste and enjoyment go. The crusts were just a little tougher than the other methods, which means I probably won't depend on air frying for future grilled cheese endeavors. Using a dedicated air fryer grilled cheese sandwich recipe may remedy some of these downfalls.
Waffle iron
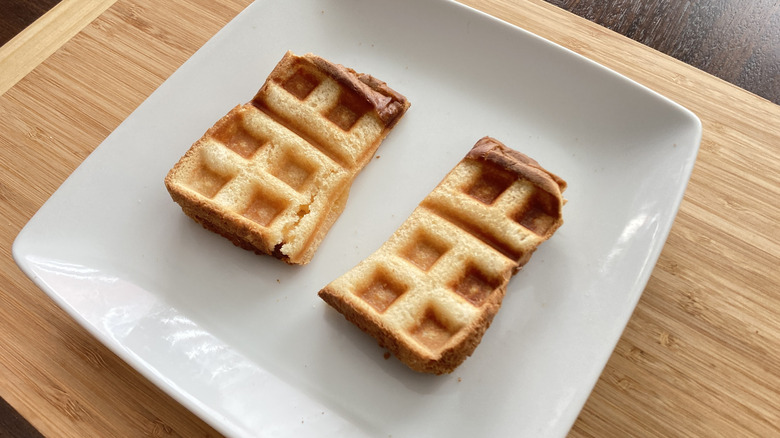
What madcap antic is this, making a grilled cheese sandwich in a waffle iron? Aren't these countertop cookers custom-crafted for batter-based bakes like, well, waffles? They sure are, but they're also akin to a panini press when it comes to applying surface heat in a compressed environment, sizzling up both surfaces of a toasted sandwich while speed-melting the cheesy center. The only possible obstacle is the prospect of divots in the bread, but even that invites thoughts of novelty. It may not be an Alton Brown grilled cheese sandwich — or any celebrity chef's version for that matter — but how many grilled cheese fans can say their finished sandwich comes with an artful geometric sear on top?
This one turned out to be a fun experiment. I thought for sure the bread would squish down to nothing and the cheese would come oozing out of the side. Instead, the sandwich held together very well, and the form of the waffle iron created extra regions of crispy texture. I heated the iron to medium, closed the lid until the sandwich was pressed flat, and left it on for six minutes or so. It did flatten the sandwich more than the other methods, which made it difficult to cut through, but it also created a perfect cross in the middle for cutting guidelines, plus it sealed the side shut. I call it a success!
Foreman grill
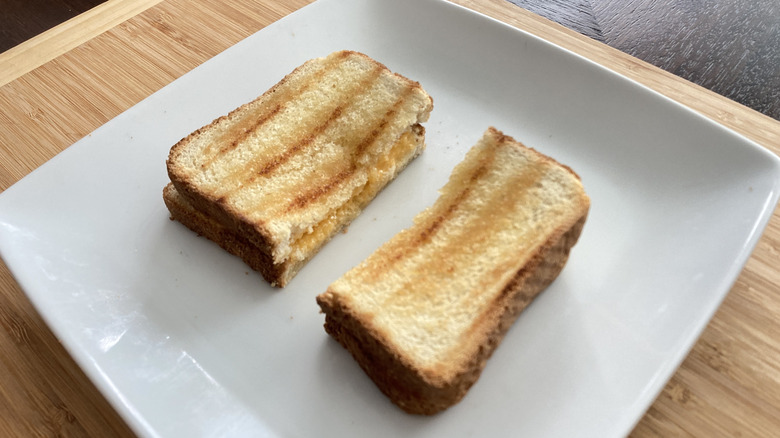
A Foreman grill is as close as I get to a panini press. Something about the mechanical fanciness of the more complex kitchen appliances means that I've kept them at arm's length in the past. But a Foreman grill? Now, that's a cooker I can figure out. Mine happens to be a barbecue-style grill, one with a domed lid instead of a two-surface press-down arrangement. This may have prolonged the process a bit, but it was a great learning moment and showed me that sandwiches with grill marks can come from a variety of sources.
To start, I set the heat to level three and let the sandwich cook for four minutes on each side to gauge how hot it was actually getting. That started the cooking, so I dialed it up to a four and put it on for another five minutes to decently brown the bread. This process gave grilled lines like a panini press, which was kind of cool, but it felt like the cooking took too long and just didn't feel completely browned. Since it was a non-stick surface, I didn't add any extra spray, though it might have sped things up. Still, it was mess-free and resulted in a fine finished sandwich.
Verdict: Stovetop frying in a stainless steel pan gives the best results
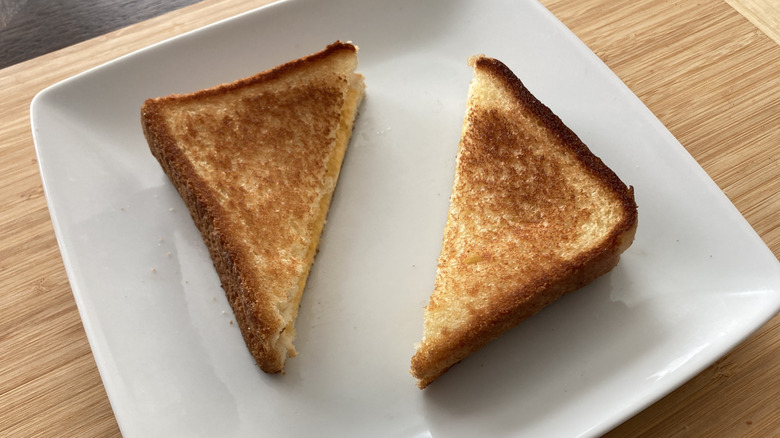
Maybe it was the butter or the extra attention I paid while I cooked my grilled cheese in a stainless steel pan, but the overall finished product just seemed superior to the others. The sear, the melt, and the crunch were firing on all cylinders, while the others seemed to be missing one element or another. That's not to say that each appliance couldn't be as successful as a traditional pan with a little tinkering. But for a foolproof path to grilled cheesers that don't disappoint, the proof is in the pan.
Even when it came time for clean-up, the stainless steel pan proved its mettle. Pre-heating the pan and adding butter or oil to the bottom can prevent food from sticking by giving the food a ready surface to rest on right from the start. The results would have been wildly different in a cold pan or one without the additional butter. But having everything dialed in properly revealed that the most dependable appliance for a tasty grilled cheese that doesn't require hours of scrubbing pans afterward is still your trusty stovetop — no fancy additional appliances required.
How I tested these appliances
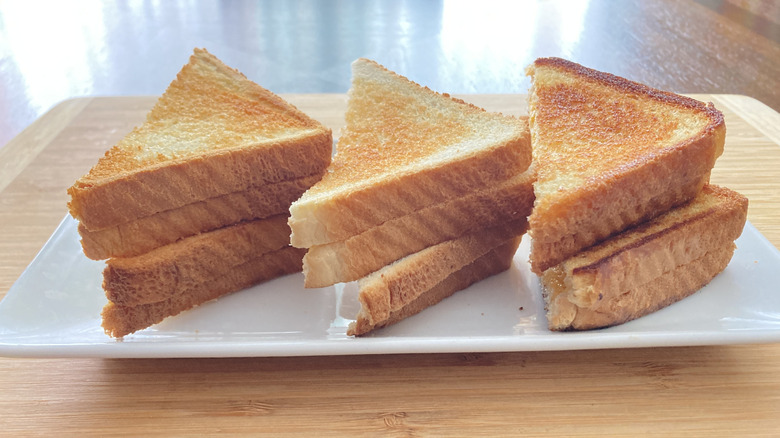
I kept my ingredients list simple and straightforward to make the playing field among these appliances as level as possible; Sara Lee white sandwich bread, Country Crock olive oil plant butter, and Kroger American cheese slices were my elements of choice. I prepared each sandwich the same way, with melted plant butter brushed onto the outer surfaces of both slices of bread and a single cheese slice sandwiched between. This gave me a common standard on which I could base the various finished sandwiches and their toastiness and meltiness — two totally valid words in the world of grilled cheese cookery.
For heat and timing, I started every cooker on medium heat for two to four minutes per side, then gauged doneness and extended the process until the cheese was melted and the toast was properly browned. This meant something slightly different for each appliance, but it gave me the best shot at control regardless of the idiosyncrasies of their surfaces and heating potential.