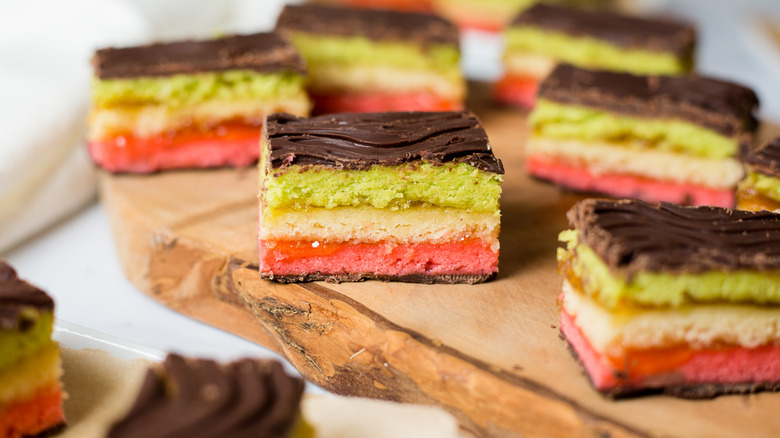
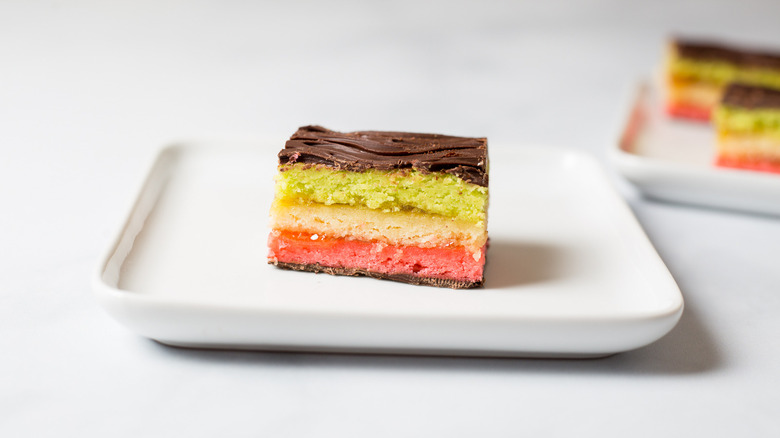
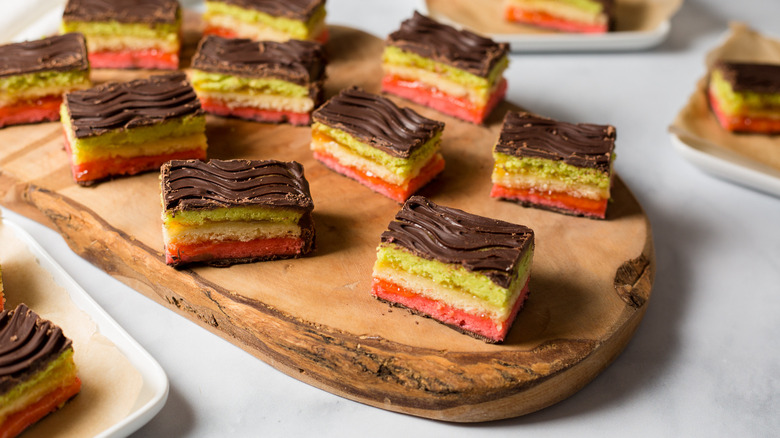
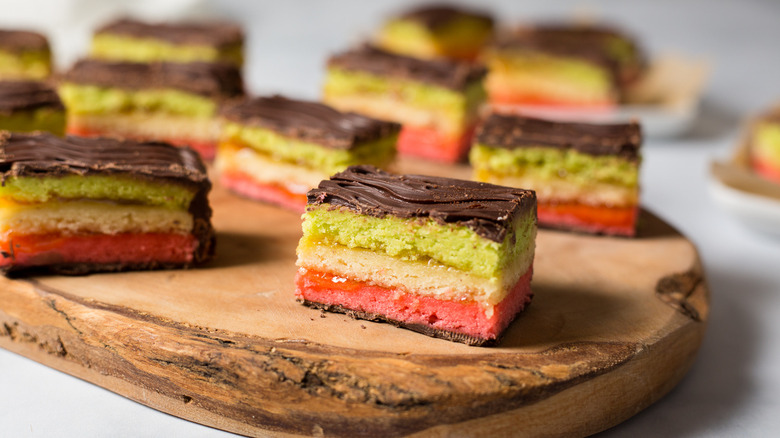
Italian-American Rainbow Cookies: Layered, Sweet, And Delicious
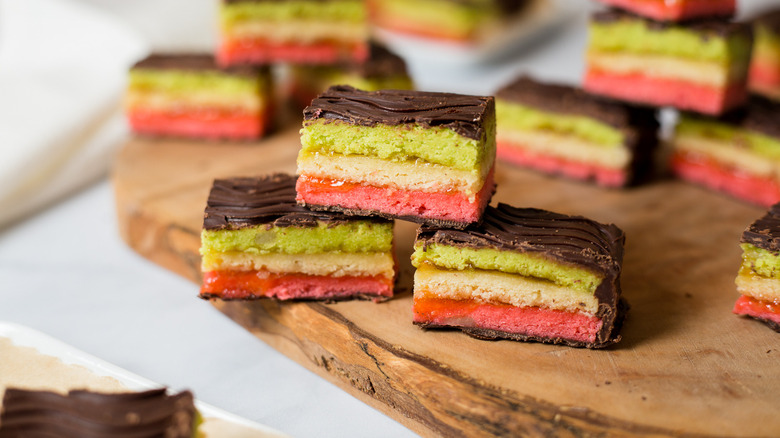
There are many contenders in our list of desserts that will transport you straight to Italy – and we want to (eventually) try them all — but there's one delicious cookie that isn't as Italian as you might think. Seven-layer rainbow cookies happen to be Italian-American, and they are pure deliciousness. The seven layers come from three colored cake layers, two jam layers between the cake, and two chocolate layers on the top and bottom. They're more like dense almond-flavored cakes cut into cookie shapes, but we're usually too busy eating them to quibble.
Some cookies are simple to make. These are not. Before we scare you off, let us clarify that they're not difficult to make. They just have many steps, so you'll need to set aside some time. On a positive note, most of the prep time is passive waiting time as the cookies rest. Recipe developer and Italian food lover Michelle Bottalico has created a recipe for Italian-American rainbow cookies that walks you through the steps of making them in a clear and easy-to-follow way.
If you're looking for a fun project or want to make a dessert that's as visually stunning as it is delicious, try these cookies. With a solid almond flavor and aroma from almond paste, tart-sweetness and moisture from jam, and soft and fluffy cake layers (colored like the Italian flag!), and of course, the chocolate, these cookies are just heavenly and well worth the effort.
Gather your Italian-American rainbow cookie ingredients
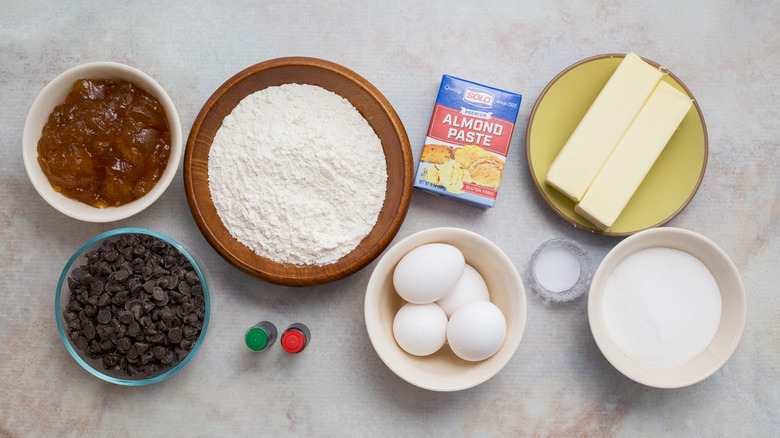
For this recipe, you will need unsalted butter (make sure it's softened before you start) and large eggs at room temperature. You will also need almond paste, which you can find in the baking aisle of the supermarket (don't confuse almond paste with marzipan). The other ingredients are sugar, all-purpose flour, salt, red and green food coloring, apricot and raspberry jam, and semi-sweet chocolate chips.
Step 1: Preheat the oven
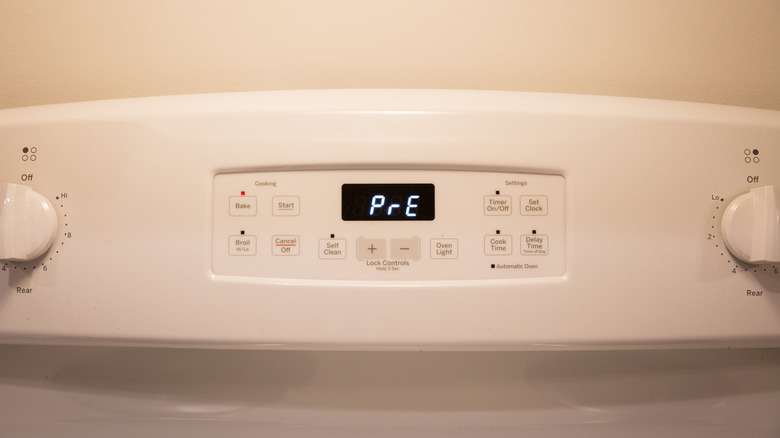
Preheat the oven to 350 F.
Step 2: Prepare the pans
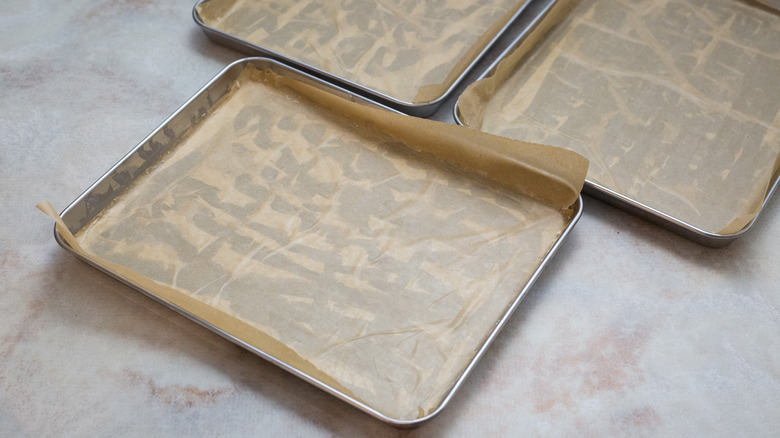
Lightly butter 3 (9 x 13-inch) quarter-sheet pans and then place parchment paper in the pans and butter the paper.
Step 3: Start whipping the egg whites
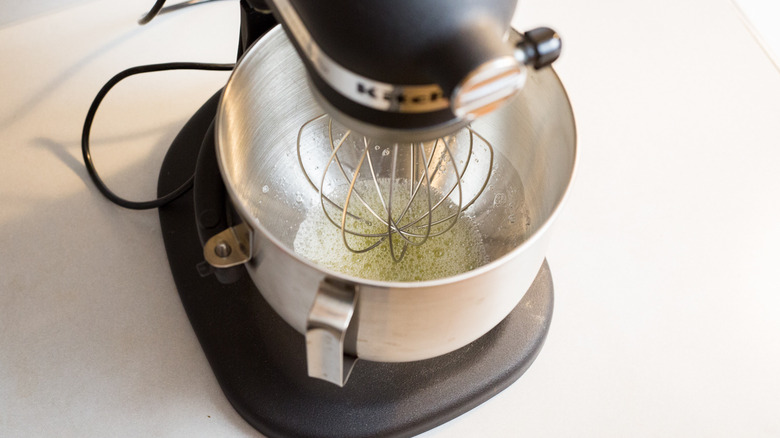
Separate the eggs and place the egg whites in the bowl of a stand mixer fitted with the whisk attachment. Beat on medium until frothy.
Step 4: Finish whipping the egg whites
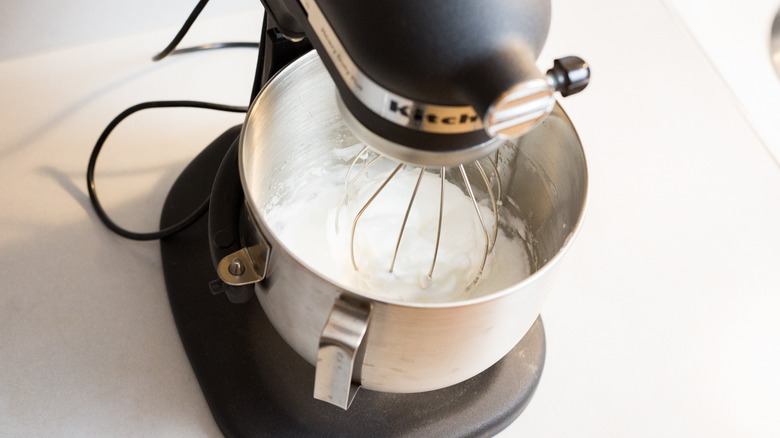
Increase the speed to medium-high and beat until stiff peaks form.
Step 5: Transfer the egg whites to a bowl
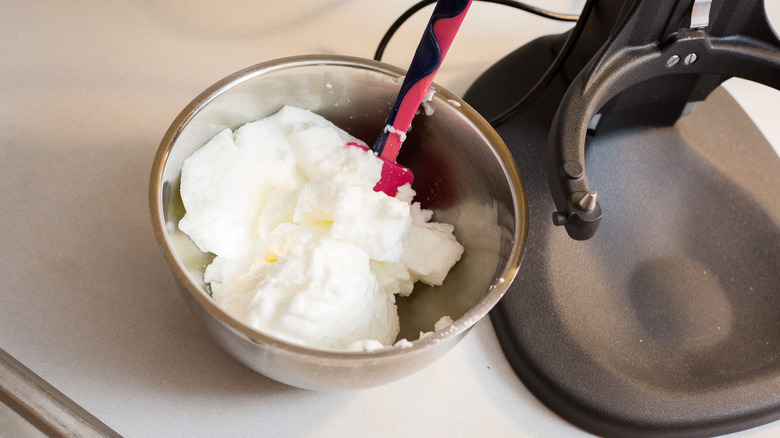
Gently transfer the egg whites to a separate bowl.
Step 6: Add the almond paste to the mixer bowl
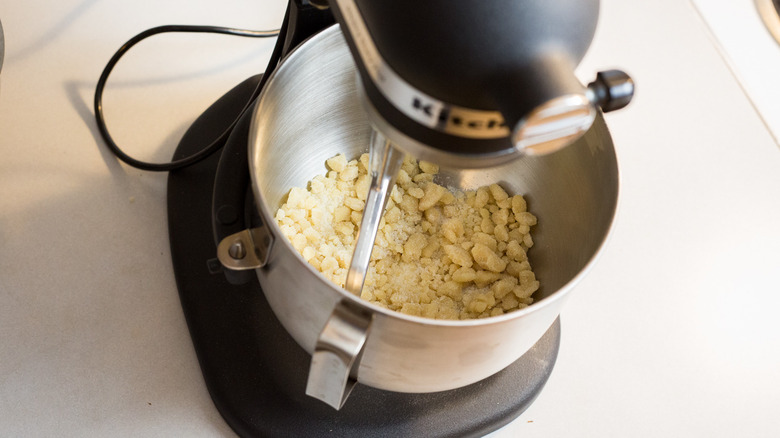
Place the almond paste and sugar in the bowl of the stand mixer fitted with the paddle attachment and mix on medium until crumbly.
Step 7: Add the butter
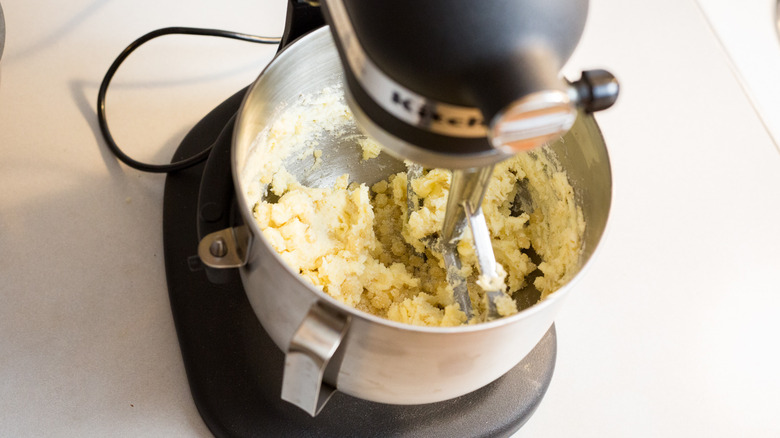
Add the butter and beat until fluffy.
Step 8: Add the egg yolks
Add the egg yolks and beat until smooth.
Step 9: Add the flour
Gradually add the flour and salt and mix until just combined.
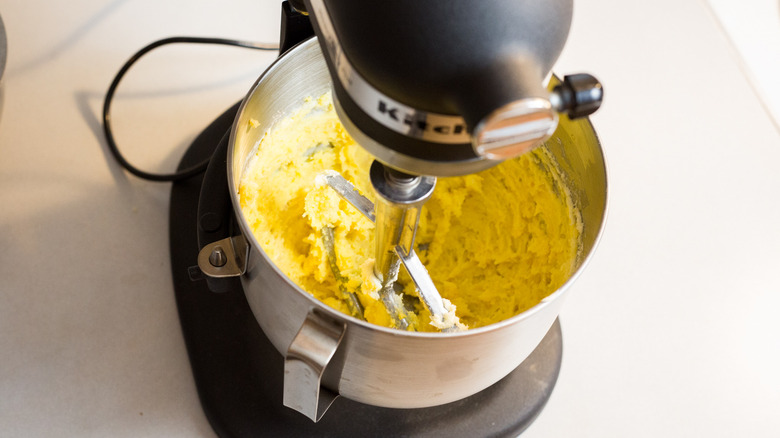
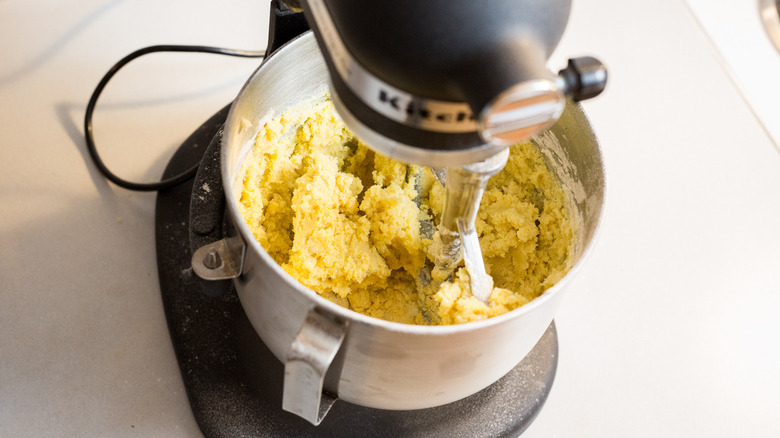
Step 10: Fold in the egg whites
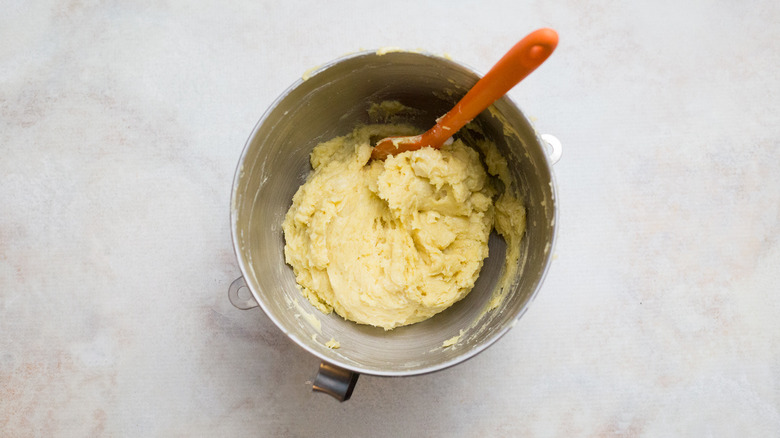
Fold half of the egg whites into the batter, and then gently fold in the other half of the whites until just combined.
Step 11: Divide the batter

Divide the batter into three evenly-sized pieces. Weigh the pieces on a kitchen scale if you can to ensure they are the same size. Place 2 of the pieces in separate bowls and set the third piece aside.
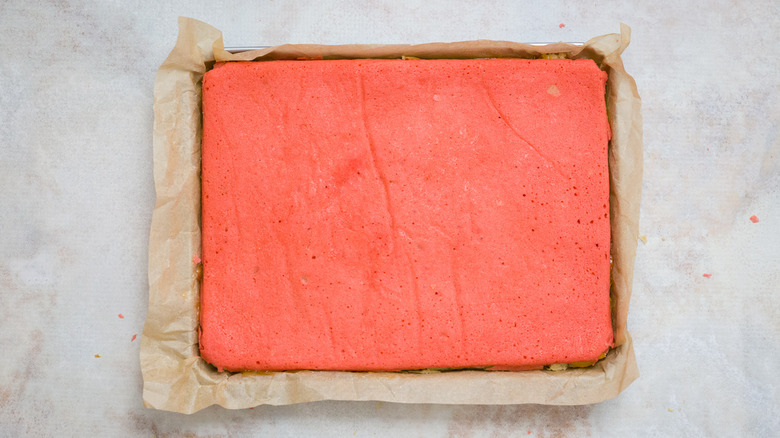
Step 12: Color the batter
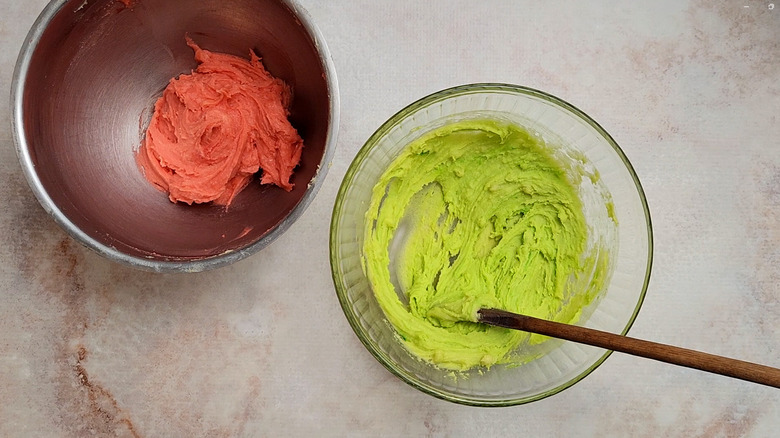
Add red food coloring to the batter in one of the bowls a little at a time while stirring until it turns a light red color. Repeat with the green food coloring and the other bowl of batter to color it light green.
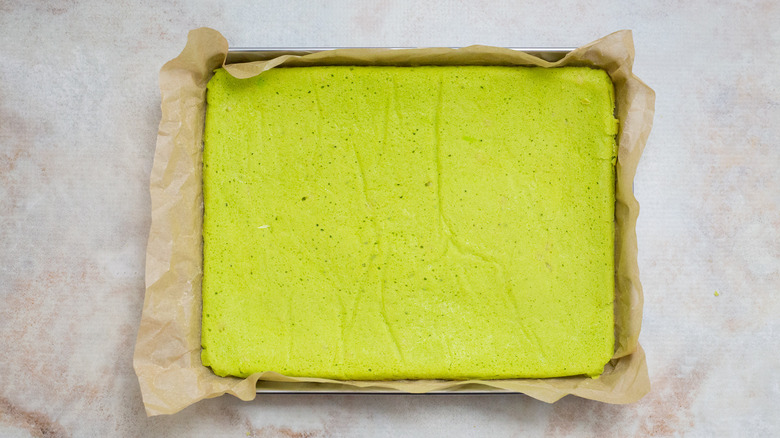
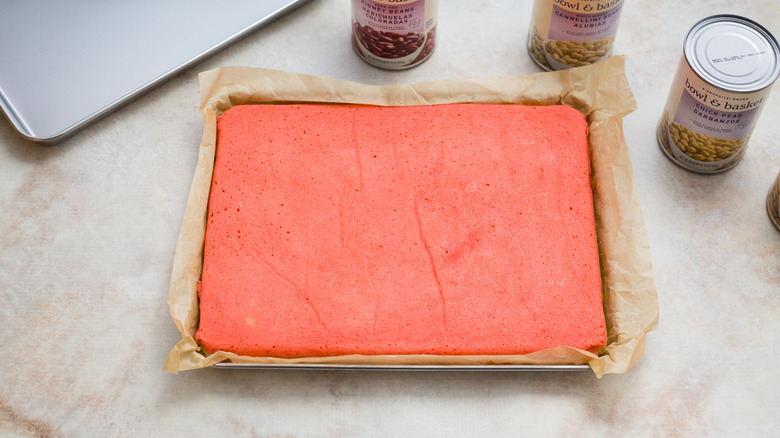
Step 13: Spread the batter in the pans
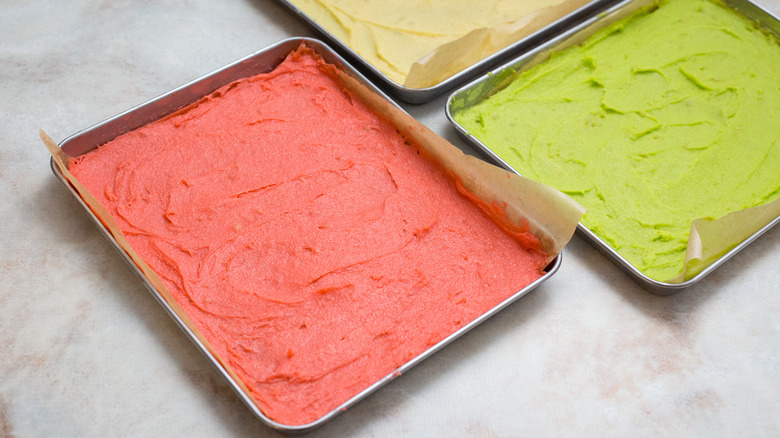
Transfer the red, green, and plain batter each into one of the prepared pans, spreading the batter with a spatula to reach all sides of the pan and leveling the tops.
Step 14: Bake the cakes
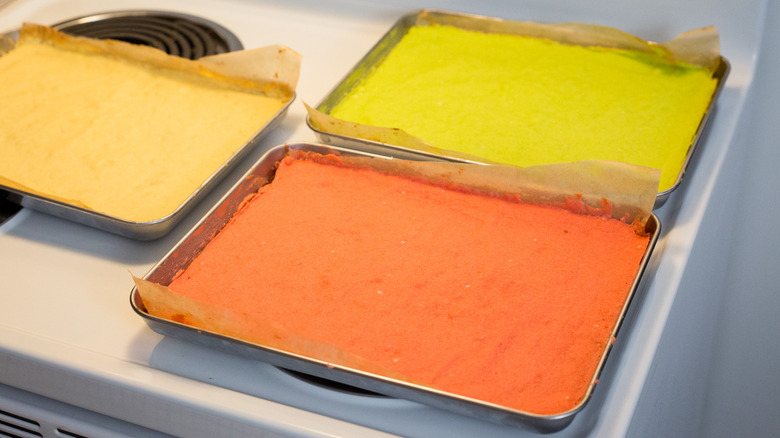
Bake for 8-10 minutes until the cakes are barely golden around the edges.
Step 15: Let the cakes cool
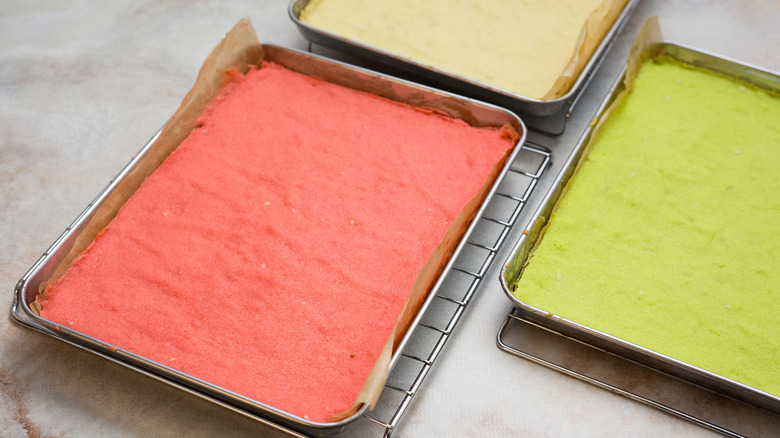
Place the pans on wire racks and let them cool completely.
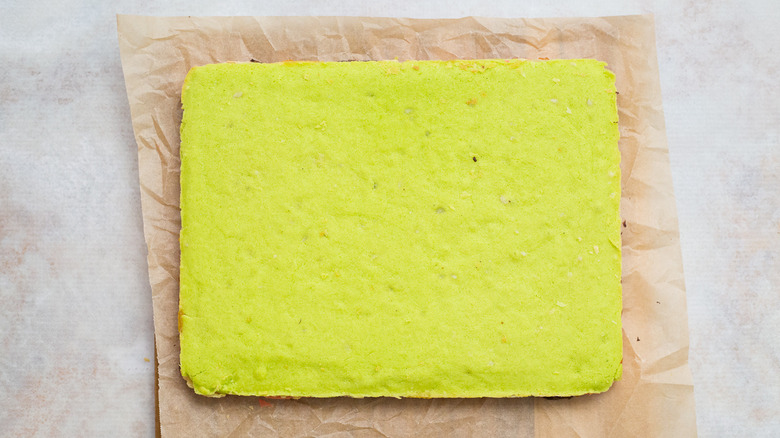
Step 16: Invert the green cake
Once cool, carefully invert the green cake onto a new piece of parchment paper or plastic wrap and place it in a clean quarter sheet pan.
Step 17: Spread a jam layer
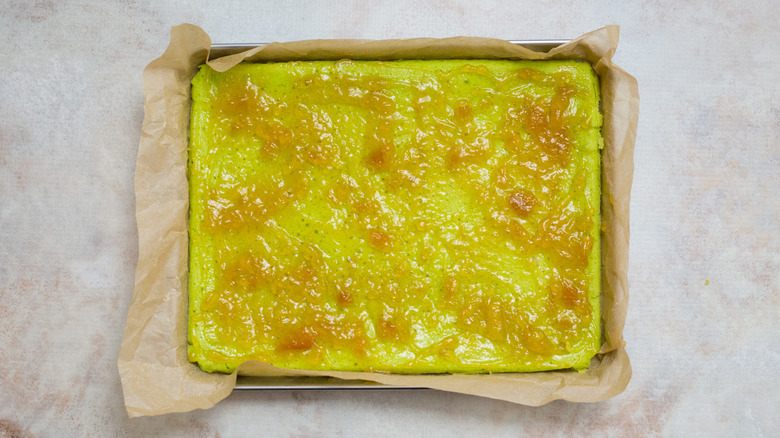
Spread half the jam evenly in a thin layer over the green cake.
Step 18: Prepare the white cake layer
Invert the white cake on top of the green cake and spread the other half of the jam on top.
Step 19: Prepare the red cake layer
Invert the red cake on top of the white cake and press the top with your hands to flatten it and help the jam adhere.
Step 20: Weigh down the cake and chill
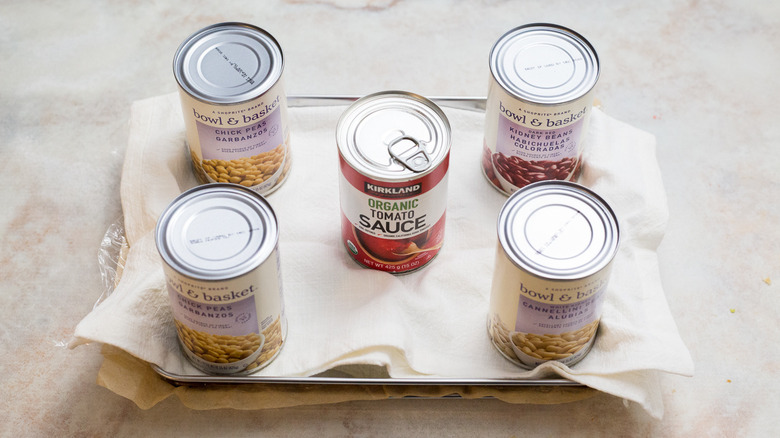
Place another piece of parchment paper or plastic wrap on top of the red cake, followed by another clean quarter sheet pan. Weigh down the top pan with something heavy, like cans or cookbooks. Place the pan in the refrigerator and chill for at least 4 hours or up to overnight.
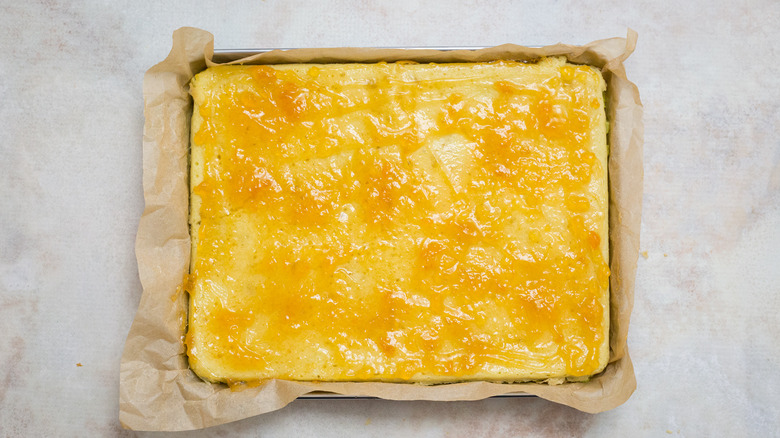
Step 21: Melt some of the chocolate
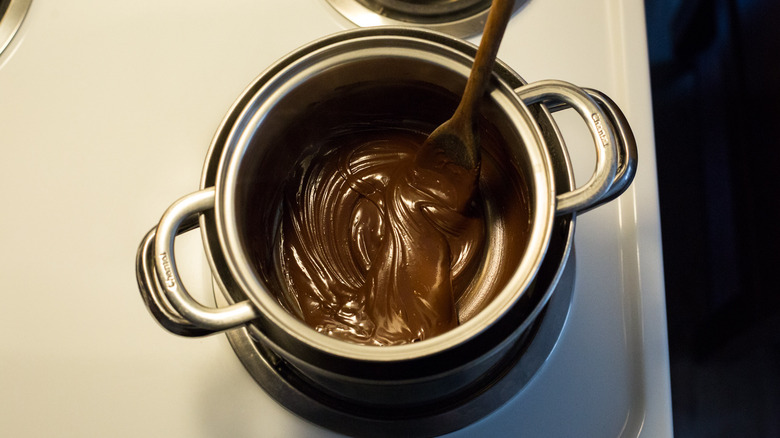
Melt ⅓ of the chocolate in a double boiler.
Step 22: Remove the cake from the refrigerator
Remove the chilled cake from the refrigerator and uncover it. Trim the 4 outer edges of the cake if they are not even.
Step 23: Spread chocolate on the bottom of the cake
Pour the chocolate on the top of the cake and spread it into a thin layer with an offset spatula. Refrigerate, uncovered, until the chocolate is fully hardened, about 30 minutes.
Step 24: Melt the remaining chocolate
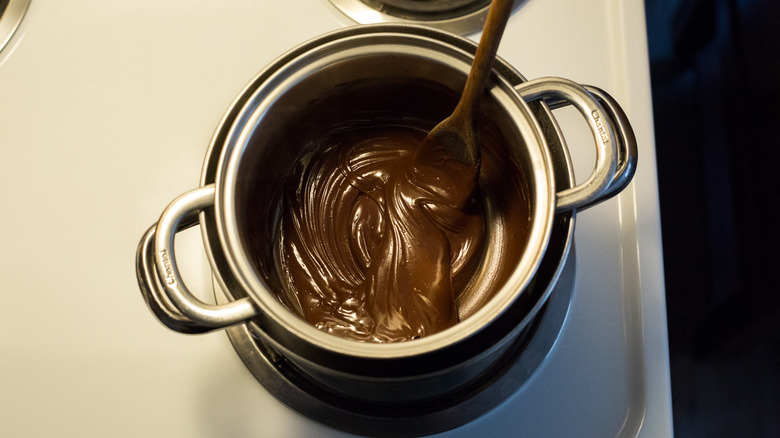
Melt the remaining chocolate in a double boiler.
Step 25: Invert the cake
Carefully invert the cake onto a clean sheet of parchment paper placed on a large cutting board. The green side should now be facing up.
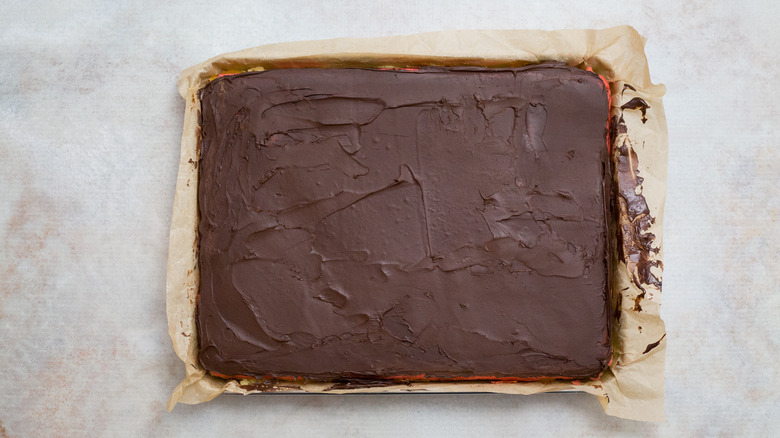
Step 26: Spread chocolate on the top and sides of the cake
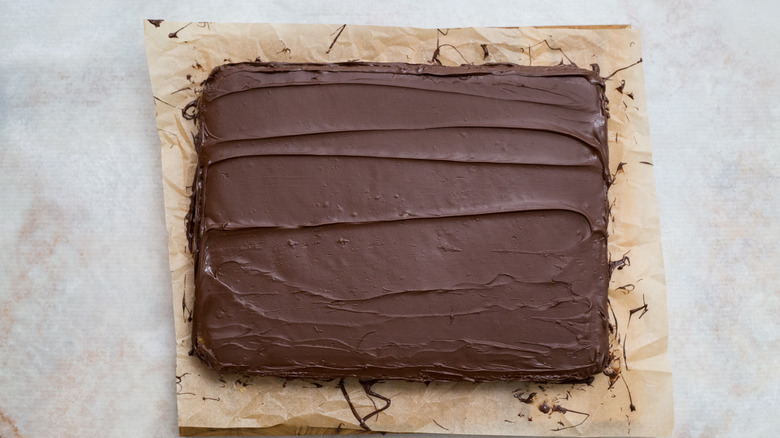
Pour the remaining chocolate over the top of the cake and carefully spread it over the top and the sides with a spatula. Return to the refrigerator to let the chocolate harden again.
Step 27: Decorate the cake

After about 5-10 minutes, before the chocolate is fully set, remove the cake and scrape the tines of a fork over the top of the chocolate in a wavy pattern to decorate it. Return to the refrigerator until the chocolate is fully hardened.
Step 28: Cut the cookies
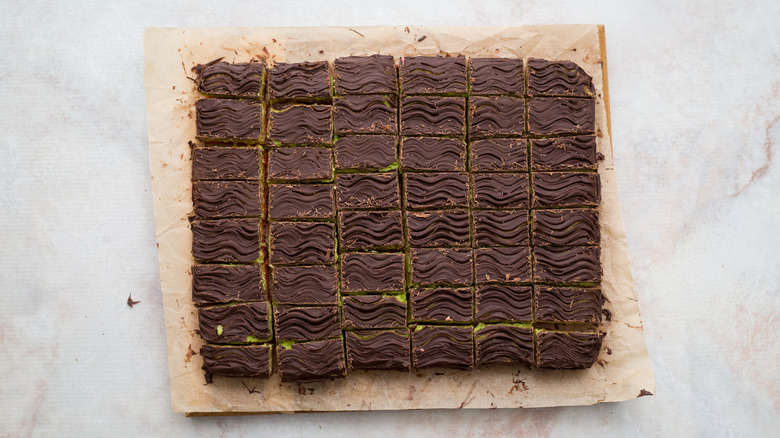
Score the top chocolate layer into 6 widthwise strips and 9 lengthwise strips for 54 cookies that are each about 1x2 inches. Cut slices with a serrated knife along the marks all the way down. Wipe the knife in between cuts to keep the slices clean.
Step 29: Serve the Italian-American rainbow cookies
Serve and enjoy. These cookies can be refrigerated in an airtight container for 2-3 weeks. They also freeze well for up to 3 months.
What pairs well with Italian rainbow cookies?
Italian-American Rainbow Cookies Recipe
Our pretty, bakery-quality Italian American rainbow cookies have seven layers of tender almond cake, tart-sweet jam, and rich chocolate coating.
Ingredients
- 2 sticks unsalted butter, softened, plus more for greasing the pan
- 4 large eggs, room temperature
- 8 ounces almond paste
- 1 cup sugar
- 2 cups all-purpose flour
- ½ teaspoon salt
- Red and green food coloring
- 1 cup apricot or raspberry jam
- 2 ¼ cups semi-sweet chocolate chips
Directions
- Preheat the oven to 350 F.
- Lightly butter 3 (9 x 13-inch) quarter-sheet pans and then place parchment paper in the pans and butter the paper.
- Separate the eggs and place the egg whites in the bowl of a stand mixer fitted with the whisk attachment. Beat on medium until frothy.
- Increase the speed to medium-high and beat until stiff peaks form.
- Gently transfer the egg whites to a separate bowl.
- Place the almond paste and sugar in the bowl of the stand mixer fitted with the paddle attachment and mix on medium until crumbly.
- Add the butter and beat until fluffy.
- Add the egg yolks and beat until smooth.
- Gradually add the flour and salt and mix until just combined.
- Fold half of the egg whites into the batter, and then gently fold in the other half of the whites until just combined.
- Divide the batter into three evenly-sized pieces. Weigh the pieces on a kitchen scale if you can to ensure they are the same size. Place 2 of the pieces in separate bowls and set the third piece aside.
- Add red food coloring to the batter in one of the bowls a little at a time while stirring until it turns a light red color. Repeat with the green food coloring and the other bowl of batter to color it light green.
- Transfer the red, green, and plain batter each into one of the prepared pans, spreading the batter with a spatula to reach all sides of the pan and leveling the tops.
- Bake for 8-10 minutes until the cakes are barely golden around the edges.
- Place the pans on wire racks and let them cool completely.
- Once cool, carefully invert the green cake onto a new piece of parchment paper or plastic wrap and place it in a clean quarter sheet pan.
- Spread half the jam evenly in a thin layer over the green cake.
- Invert the white cake on top of the green cake and spread the other half of the jam on top.
- Invert the red cake on top of the white cake and press the top with your hands to flatten it and help the jam adhere.
- Place another piece of parchment paper or plastic wrap on top of the red cake, followed by another clean quarter sheet pan. Weigh down the top pan with something heavy, like cans or cookbooks. Place the pan in the refrigerator and chill for at least 4 hours or up to overnight.
- Melt ⅓ of the chocolate in a double boiler.
- Remove the chilled cake from the refrigerator and uncover it. Trim the 4 outer edges of the cake if they are not even.
- Pour the chocolate on the top of the cake and spread it into a thin layer with an offset spatula. Refrigerate, uncovered, until the chocolate is fully hardened, about 30 minutes.
- Melt the remaining chocolate in a double boiler.
- Carefully invert the cake onto a clean sheet of parchment paper placed on a large cutting board. The green side should now be facing up.
- Pour the remaining chocolate over the top of the cake and carefully spread it over the top and the sides with a spatula. Return to the refrigerator to let the chocolate harden again.
- After about 5-10 minutes, before the chocolate is fully set, remove the cake and scrape the tines of a fork over the top of the chocolate in a wavy pattern to decorate it. Return to the refrigerator until the chocolate is fully hardened.
- Score the top chocolate layer into 6 widthwise strips and 9 lengthwise strips for 54 cookies that are each about 1x2 inches. Cut slices with a serrated knife along the marks all the way down. Wipe the knife in between cuts to keep the slices clean.
- Serve and enjoy. These cookies can be refrigerated in an airtight container for 2-3 weeks. They also freeze well for up to 3 months.
Nutrition
| Calories per Serving | 137 |
| Total Fat | 7.1 g |
| Saturated Fat | 3.6 g |
| Trans Fat | 0.0 g |
| Cholesterol | 22.8 mg |
| Total Carbohydrates | 18.0 g |
| Dietary Fiber | 0.8 g |
| Total Sugars | 12.0 g |
| Sodium | 30.5 mg |
| Protein | 1.7 g |
What is a double boiler and can I melt chocolate without one?
A double boiler, also known as a bain-marie, is a piece of kitchen equipment that allows you to cook or melt food without direct contact with the heat. It's a two-part system. The pot on the bottom holds water, which is brought to a simmer, and the pot on the top holds the food. The water steams and heats the lower surface of the upper pot, thus allowing the food inside to gently cook. A double boiler is useful for melting chocolate, which can break or burn when put directly on the heat. It's also useful when something needs to be gently cooked on low. Hollandaise sauce, for example, is heated on low so the egg whites temper and the butter melts without the sauce breaking.
If you don't have an actual double boiler, don't despair. You can easily make one with common kitchen items. Pour a small amount of water into a medium pot and place it on the stove. Place a heat-proof mixing bowl on top of the pot. That's it. Just make sure the bottom of the bowl hangs above the water level. You can also use two pots. Set a smaller pot with two handles on a larger pot, making sure it doesn't touch the water. This also works well, although it won't trap all the steam since there will be open space around the rim of the upper pot.
What tips do I need to know to make rainbow cookies correctly?
First of all, to whip the egg whites properly, make sure the eggs are at room temperature, and the stand mixer bowl and whisk attachment are very clean and not contaminated with any oil or egg yolks. Bottalico recommends weighing the batter on a kitchen scale when you divide it into three pieces so the pieces are uniformly the same size. This will ensure the cookie layers come out even. When you spread the jam over the cake, make a very thin layer, because if the jam is too thick, the layers will slide around when you cut them. Using a smooth jam without any chunks or seeds also helps. On a similar note, make sure to weigh down the layered cake with heavy enough items so it sets well.
Many people are concerned about how to cut out the cookies without the chocolate cracking. First of all, make sure the chocolate is fully hardened before you start cutting. Don't cut the slices all the way down at first. Just score the top of the chocolate to mark where you want to cut the lines. Using the tip of a sharp chef's knife or serrated knife works well. After that, wipe the blade clean and cut along the first line all the way down. Then continue to alternate between cleaning the knife and cutting slices until you've cut down all the lines. For further insurance against cracking, dip the knife in hot water before scoring and slicing.