Homemade Chocolate MoonPie Recipe
We may receive a commission on purchases made from links.
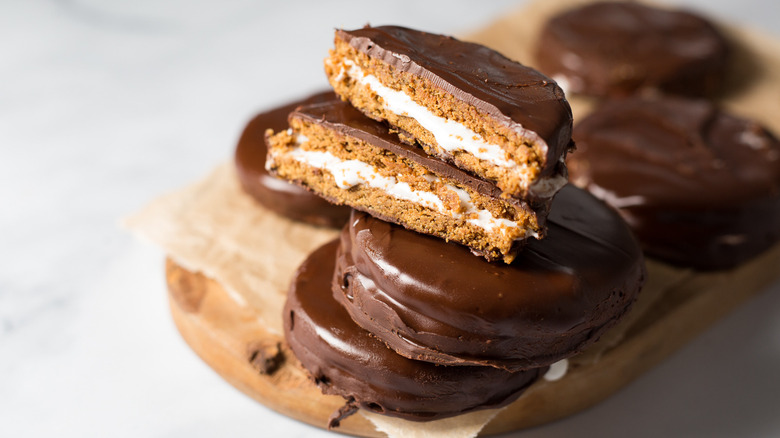
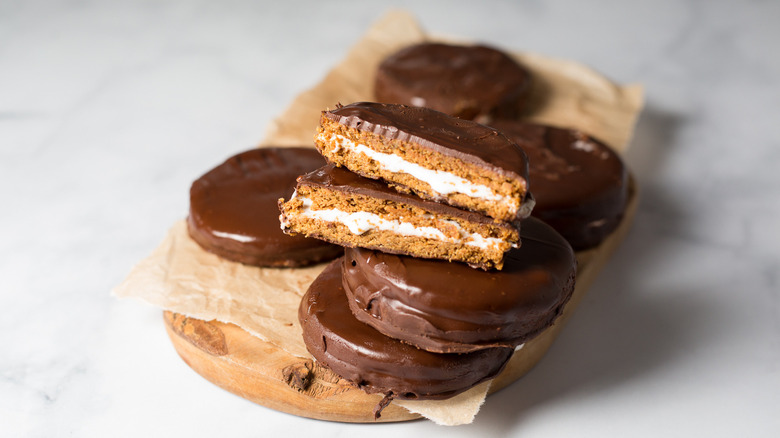
With a creamy marshmallow filling sandwiched between soft graham cracker cookies and a rich chocolate coating, MoonPies have been enjoyed as a sweet treat since 1917, when they were invented in part to be a filling snack for coal miners. Although they're associated with the Southern United States (enjoyed with RC Cola), MoonPies can be found all over the country, and Americans are still crazy about them after all these years (just don't confuse MoonPies with Whoopie Pies). It's easy to buy these packaged treats ready made, but making a homemade version can be quite satisfying and just as delicious.
Recipe developer Michelle Bottalico has created a recipe that guides you through the steps of making DIY MoonPies right at home. It takes some time to make these, but much of the preparation time is passive waiting time for chilling, freezing, and cooling. You'll make a graham cracker cookie dough and a filling with a base of marshmallow fluff. A melted chocolate coating is the final touch, and they'll be ready to eat after a final rest to set the chocolate. Homemade MoonPies are rich and decadent, and as a plus, they're made without extra preservatives like the original processed version. Grab one when you're looking for a substantial sweet and filling snack or dessert, coal miner or not.
Gather your homemade chocolate MoonPie ingredients
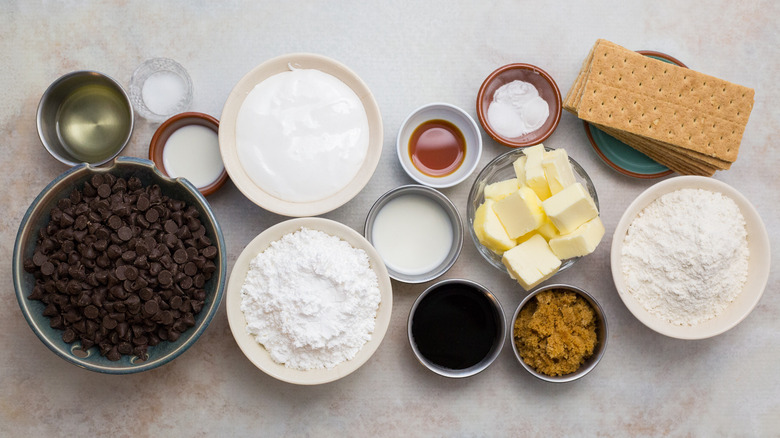
For this recipe, you'll first make a cookie dough. You'll need graham crackers, all-purpose flour, baking powder, baking soda, salt, unsalted butter, brown sugar, molasses, vanilla extract, and whole milk. Make sure you soften the butter before you begin. The filling ingredients are marshmallow fluff, whole milk, powdered sugar, and salt. Finally, grab semi-sweet chocolate chips and vegetable oil for the chocolate coating.
Step 1: Process the graham crackers
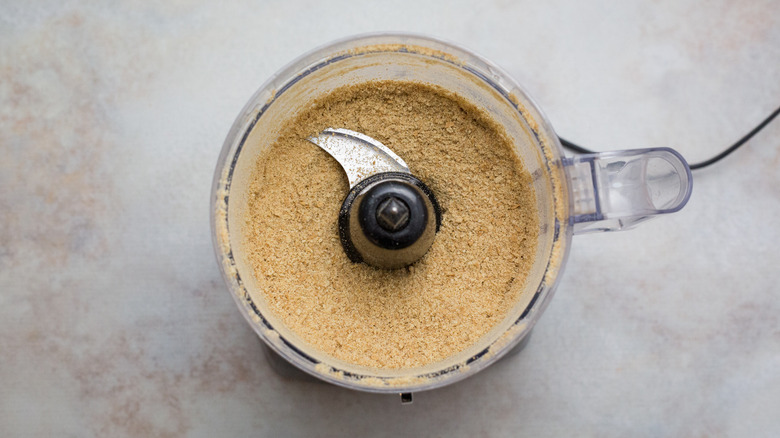
Begin the cookie dough: Place the graham crackers in a food processor and pulse until they turn into crumbs. Measure out 1 ¼ cups of crumbs, reserving any extra for another use.
.
Step 2: Whisk the dry ingredients
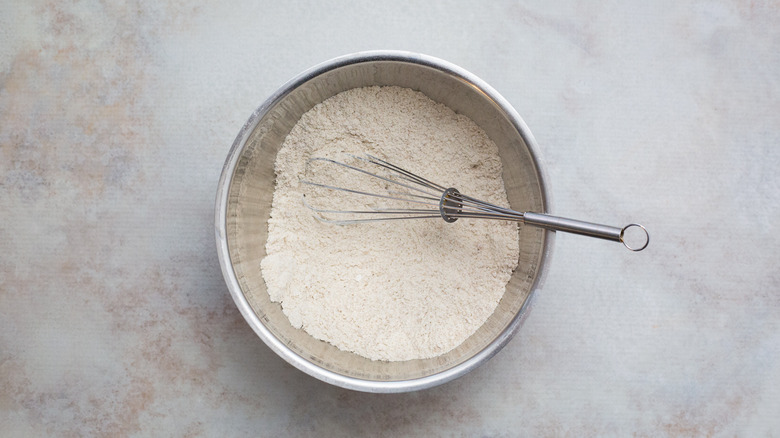
Transfer the 1 ¼ cups of crumbs to a mixing bowl and add the all-purpose flour, baking powder, baking soda, and salt. Whisk until combined.
Step 3: Cream the butter and sugar
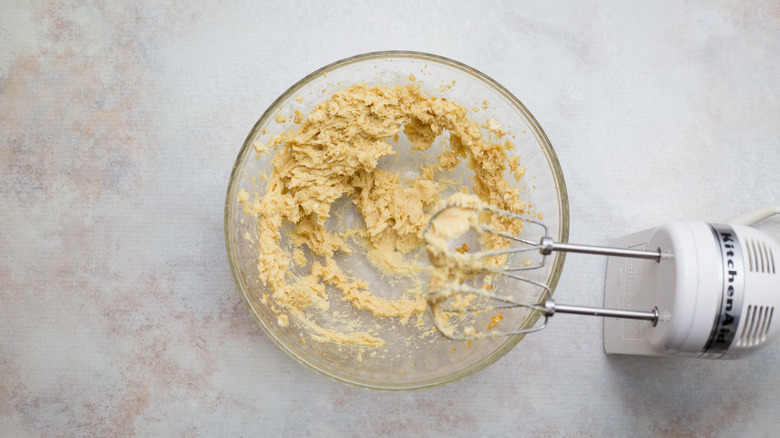
Place the butter and brown sugar in a separate mixing bowl and beat with an electric beater on medium for 2-3 minutes until creamed and fluffy, scraping the sides of the bowl as needed.
Step 4: Add the molasses and vanilla
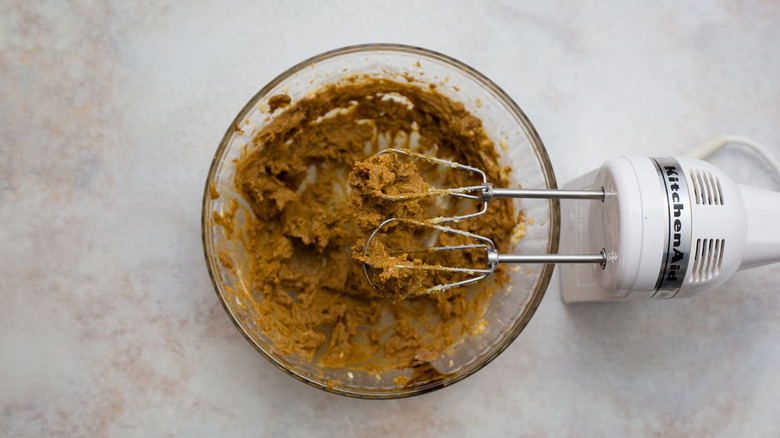
Pour in the molasses and vanilla and beat until smooth.
Step 5: Combine the wet and dry ingredients
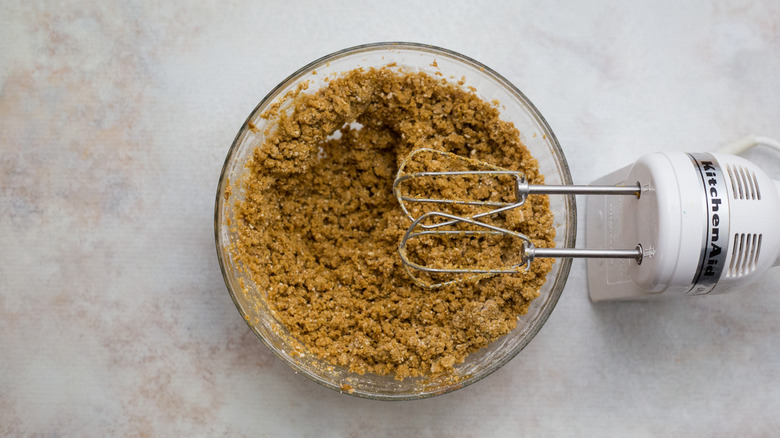
Gradually add the flour mixture to the bowl with the butter and beat on low until homogenous and crumbly.
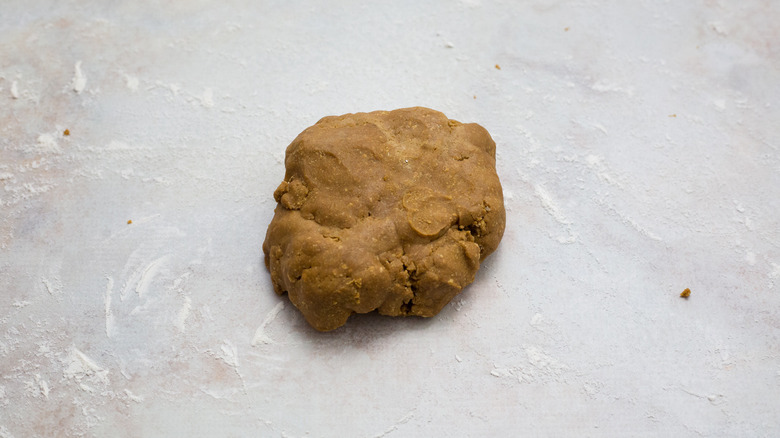
Step 6: Beat in the milk
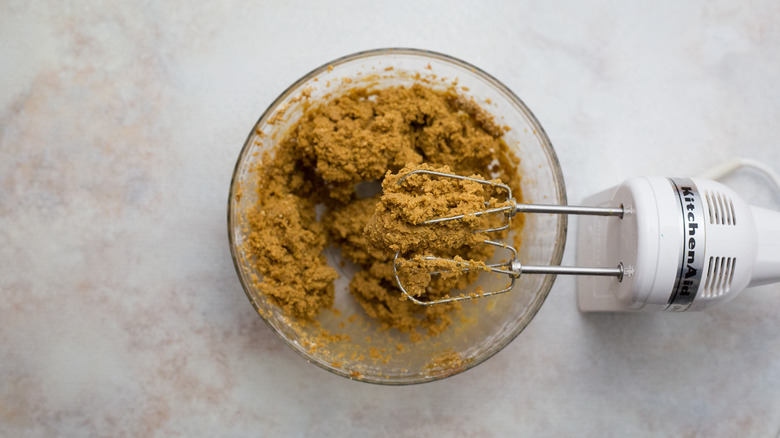
Slowly add the 2 tablespoons milk and continue to beat on low until the dough comes together, about 30 seconds. Place the bowl in the refrigerator and chill for 1 hour to firm it up.
Step 7: Preheat the oven
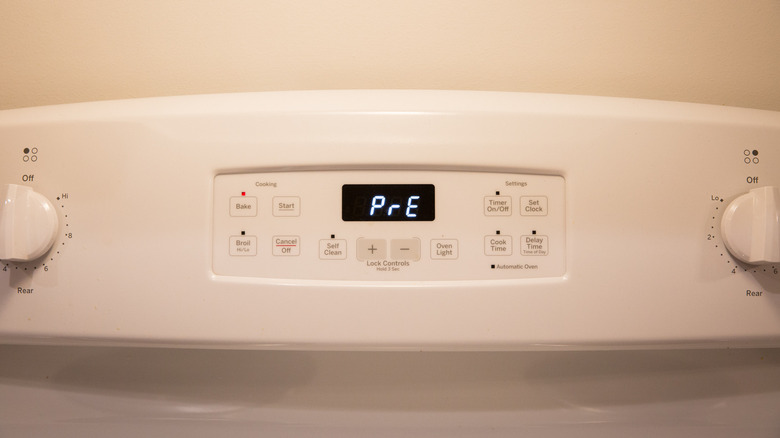
Preheat the oven to 350 F.
Step 8: Line the cookie sheets
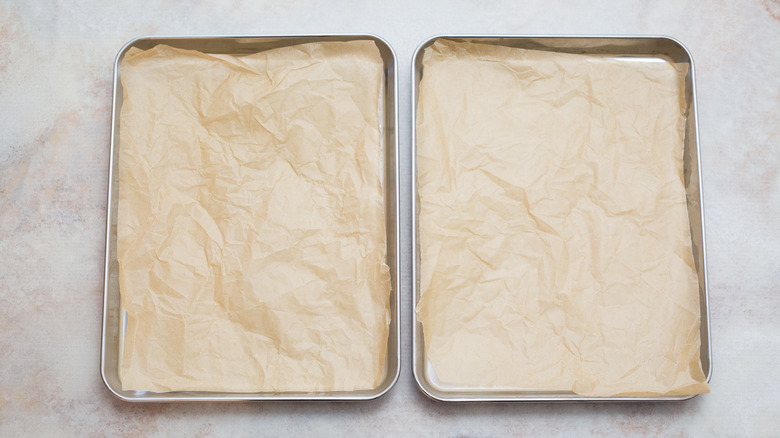
Line 2 cookie sheets with parchment paper.
Step 9: Prepare the dough for rolling
Remove the dough from the fridge and place it on a lightly floured work surface. Let it thaw for 5-10 minutes if it's too hard to roll out.
Step 10: Roll out the dough
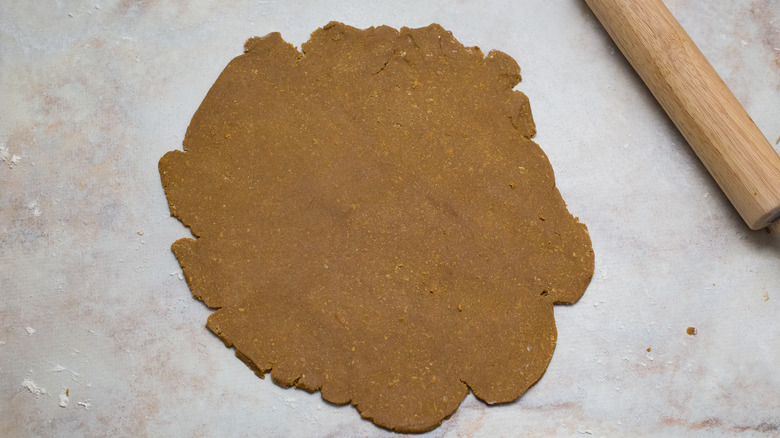
Roll the dough out into a large disk about ¼-inch thick.
Step 11: Cut out the dough
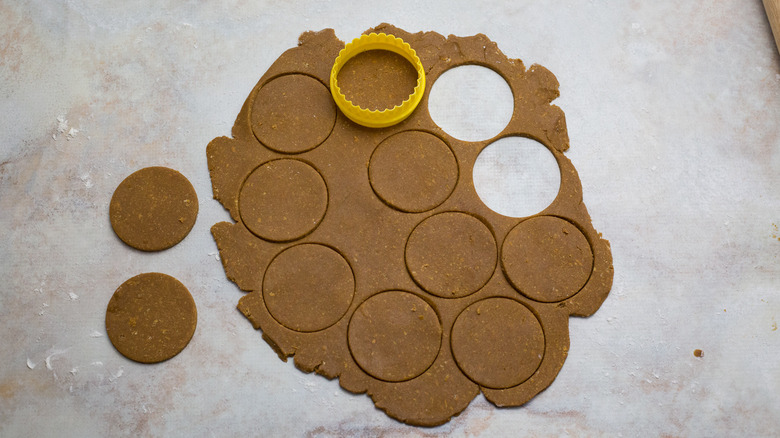
Cut out circles with a 3-inch round cookie cutter. Gather the scraps into a ball, roll them out, and cut out more cookies until all of the dough is used up. There should be about 18 cookies. You may need to chill the scraps to firm them up before rolling.
Step 12: Transfer cookies to baking sheets
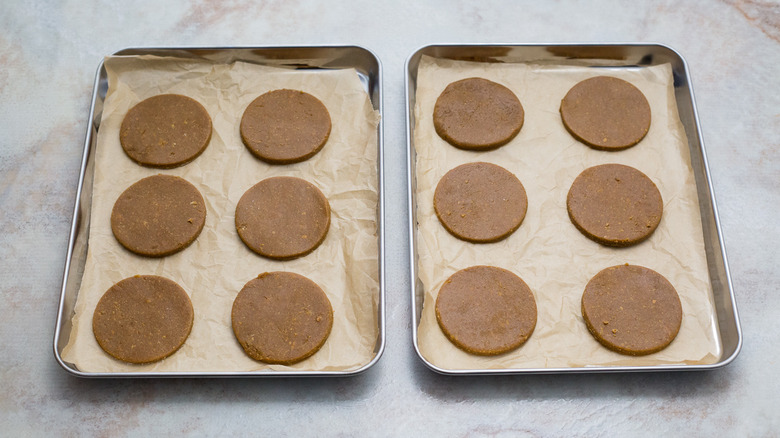
Place the cookies on the prepared baking sheets.
Step 13: Bake the cookies
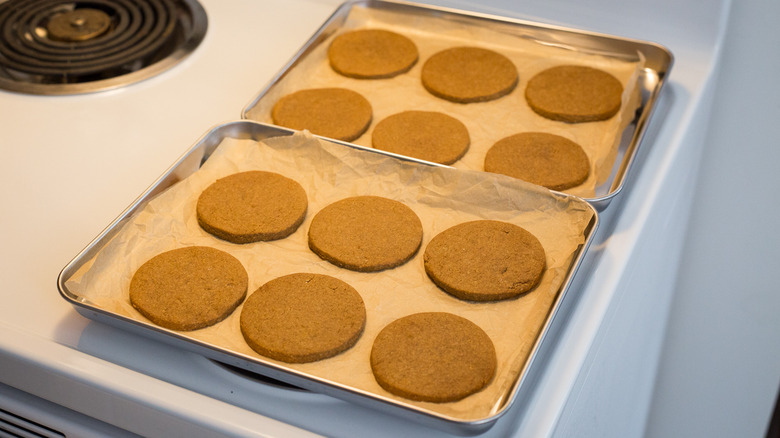
Bake the cookies for 8-10 minutes.
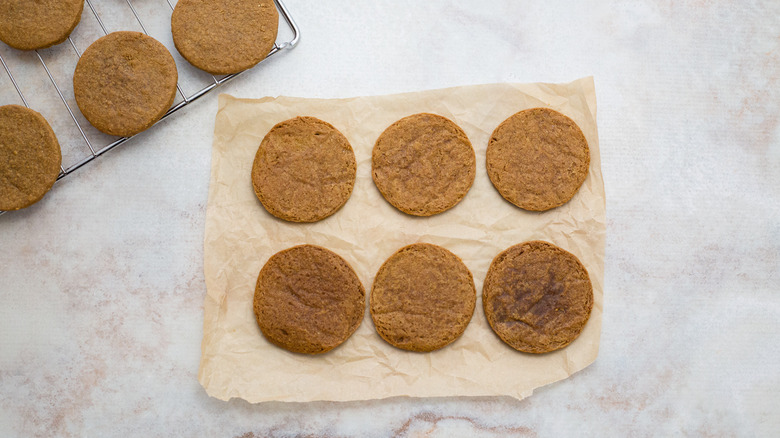
Step 14: Cool the cookies
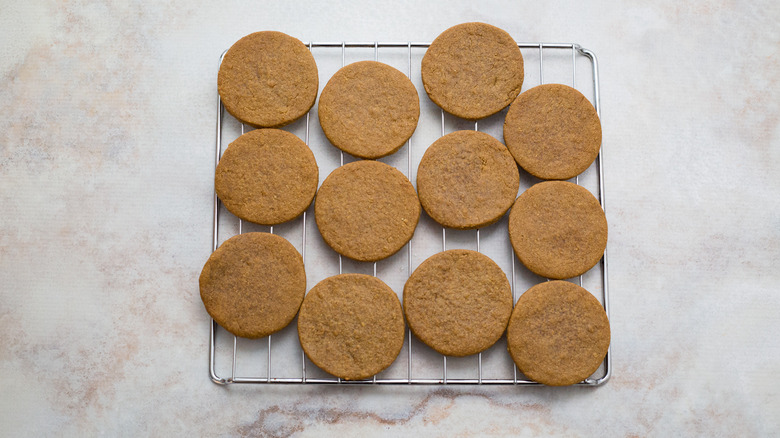
Cool the cookies untouched in the pan for 10 minutes before transferring them to a wire rack to cool completely. Handle them carefully as they will still be very soft.
Step 15: Make the marshmallow filling

Begin the filling: Place the marshmallow fluff, whole milk, powdered sugar, and salt in a mixing bowl and beat with an electric beater until smooth.
Step 16: Fill a piping bag

Transfer the marshmallow mixture to a piping bag fitted with a round tip.
Step 17: Flip the cookies
Gently flip half the cookies so the undersides are facing up, being careful not to break them.
Step 18: Pipe the filling onto the cookies
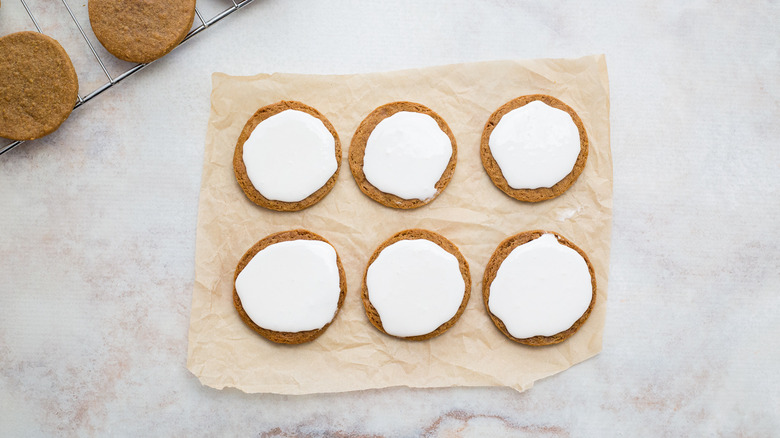
Pipe the marshmallow mixture onto the surfaces of the flipped cookies, leaving about ¼ inch of space around the edges.
Step 19: Close the cookies

Place the other half of the cookies on top of the filled halves and gently press until the filling reaches the edges.
Step 20: Freeze the cookies
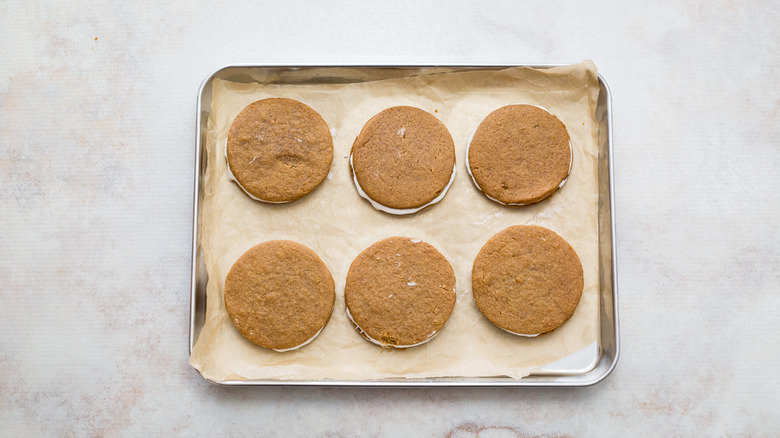
Place the filled cookies on a cookie sheet and freeze for 30 minutes to make them easier to dip in chocolate. Make sure the sheet is level or the tops can slide off.
Step 21: Melt the chocolate
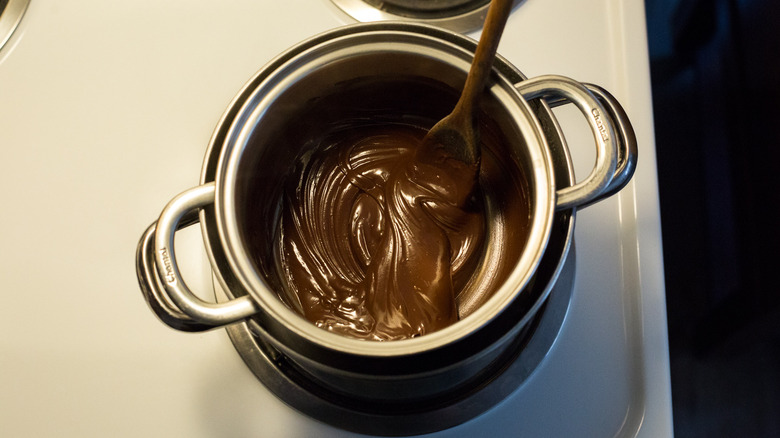
Melt the chocolate chips in a double boiler, stirring until smooth.
Step 22: Add the oil
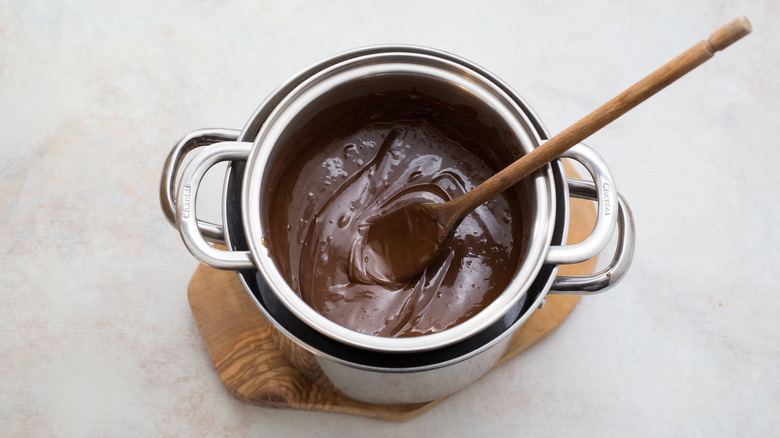
Remove the chocolate from the heat, let it cool for about 5 minutes, and whisk in the oil.
Step 23: Dip the cookies
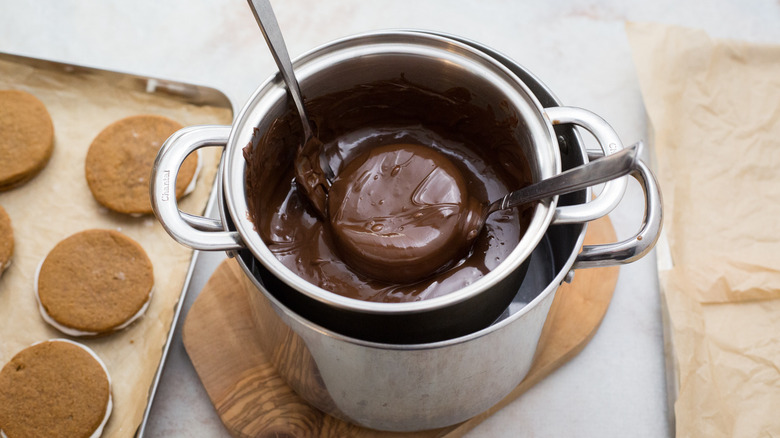
Dip the cookies into the chocolate one at a time, flipping them with a fork to coat both sides.
Step 24: Let excess chocolate drip off the cookie
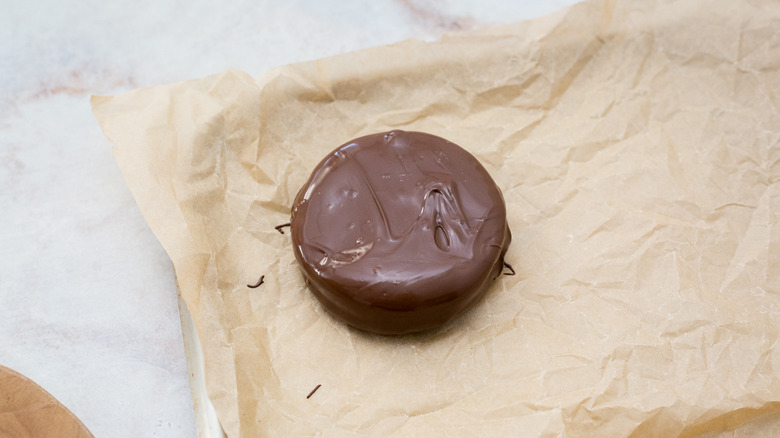
Remove the coated cookies from the chocolate with 2 forks and let them drip before placing them on a parchment-lined cookie sheet.
Step 25: Serve the homemade chocolate MoonPies
Let the cookies sit for about 30 minutes to set before serving.
Pairs well with homemade chocolate MoonPies
Homemade Chocolate MoonPie Recipe
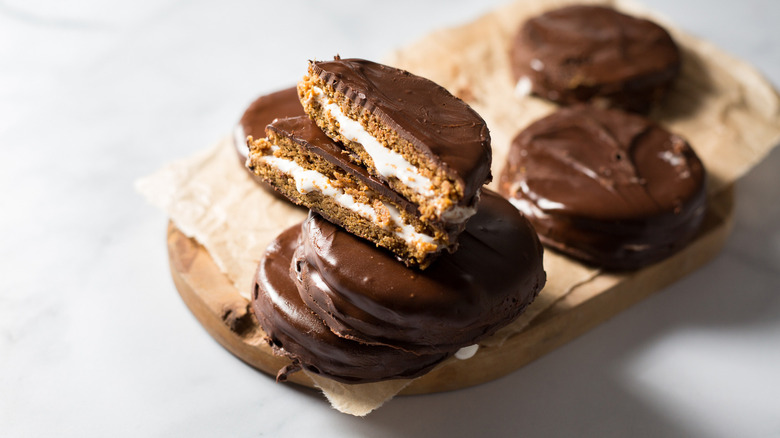
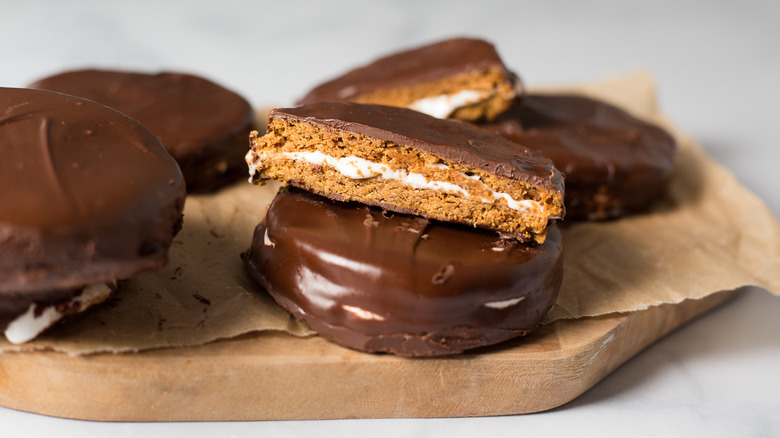
These homemade chocolate MoonPies are just as good as the store-bought version, featuring graham cracker cookies, marshmallow filling, and a chocolate coating.
Ingredients
- For the cookie dough
- 9 graham crackers (1 sleeve)
- 1 ½ cups all-purpose flour
- ½ teaspoon baking powder
- ½ teaspoon baking soda
- ¾ teaspoon salt
- 12 tablespoons unsalted butter, softened
- ¼ cup brown sugar
- ¼ cup molasses
- 1 teaspoon vanilla extract
- 2 tablespoons whole milk
- For the filling
- 1 ½ cups marshmallow fluff
- 2 teaspoons whole milk
- 1 ½ cups powdered sugar
- ¼ teaspoon salt
- For the chocolate coating
- 16 ounces semi-sweet chocolate chips
- 1 ½ tablespoons vegetable oil
Directions
- Begin the cookie dough: Place the graham crackers in a food processor and pulse until they turn into crumbs. Measure out 1 ¼ cups of crumbs, reserving any extra for another use.
- Transfer the 1 ¼ cups of crumbs to a mixing bowl and add the all-purpose flour, baking powder, baking soda, and salt. Whisk until combined.
- Place the butter and brown sugar in a separate mixing bowl and beat with an electric beater on medium for 2-3 minutes until creamed and fluffy, scraping the sides of the bowl as needed.
- Pour in the molasses and vanilla and beat until smooth.
- Gradually add the flour mixture to the bowl with the butter and beat on low until homogenous and crumbly.
- Slowly add the 2 tablespoons milk and continue to beat on low until the dough comes together, about 30 seconds. Place the bowl in the refrigerator and chill for 1 hour to firm it up.
- Preheat the oven to 350 F.
- Line 2 cookie sheets with parchment paper.
- Remove the dough from the fridge and place it on a lightly floured work surface. Let it thaw for 5-10 minutes if it’s too hard to roll out.
- Roll the dough out into a large disk about ¼-inch thick.
- Cut out circles with a 3-inch round cookie cutter. Gather the scraps into a ball, roll them out, and cut out more cookies until all of the dough is used up. There should be about 18 cookies. You may need to chill the scraps to firm them up before rolling.
- Place the cookies on the prepared baking sheets.
- Bake the cookies for 8-10 minutes.
- Cool the cookies untouched in the pan for 10 minutes before transferring them to a wire rack to cool completely. Handle them carefully as they will still be very soft.
- Begin the filling: Place the marshmallow fluff, whole milk, powdered sugar, and salt in a mixing bowl and beat with an electric beater until smooth.
- Transfer the marshmallow mixture to a piping bag fitted with a round tip.
- Gently flip half the cookies so the undersides are facing up, being careful not to break them.
- Pipe the marshmallow mixture onto the surfaces of the flipped cookies, leaving about ¼ inch of space around the edges.
- Place the other half of the cookies on top of the filled halves and gently press until the filling reaches the edges.
- Place the filled cookies on a cookie sheet and freeze for 30 minutes to make them easier to dip in chocolate. Make sure the sheet is level or the tops can slide off.
- Melt the chocolate chips in a double boiler, stirring until smooth.
- Remove the chocolate from the heat, let it cool for about 5 minutes, and whisk in the oil.
- Dip the cookies into the chocolate one at a time, flipping them with a fork to coat both sides.
- Remove the coated cookies from the chocolate with 2 forks and let them drip before placing them on a parchment-lined cookie sheet.
- Let the cookies sit for about 30 minutes to set before serving.
Nutrition
| Calories per Serving | 685 |
| Total Fat | 34.7 g |
| Saturated Fat | 19.0 g |
| Trans Fat | 0.0 g |
| Cholesterol | 41.2 mg |
| Total Carbohydrates | 97.0 g |
| Dietary Fiber | 4.0 g |
| Total Sugars | 66.6 g |
| Sodium | 357.3 mg |
| Protein | 5.7 g |
Can I customize these homemade MoonPies?
Yes, there are several ways you can make this MoonPie recipe your own. Commercial MoonPies are a bit larger than these homemade ones, so feel free to use a larger cookie cutter if desired. You'll need to scale the recipe up a bit if you want to make the same number of cookies. On the other hand, you could use a small cookie cutter and make mini MoonPies you can pop in your mouth.
For a quicker filling, use store-bought marshmallow cream rather than making your own filling with marshmallow fluff, powdered sugar, milk, and salt. If you're feeling ambitious, you may like to make your own marshmallow cream from scratch. Making fluffy marshmallow batter takes skill, but some people enjoy the challenge. Before piping the filling, you could spread peanut butter or jam on the bottom cookie for an extra flavor.
The chocolate coating is made with semi-sweet chocolate chips, but you could use dark or even white chocolate chips for a different version. We don't recommend milk chocolate, which doesn't set as well and gets too messy. After the moon pies are dipped in the chocolate coating and before the chocolate sets, feel free to sprinkle a garnish on the top of the MoonPies for extra flavor and color. Chopped pistachios or other nuts, shredded unsweetened coconut, vibrant dried rose petals, or sprinkles are some ideas.
How can I use MoonPies as a base for other recipes?
While MoonPies are usually enjoyed on their own, you can use them as an ingredient in other desserts. Try placing a layer of MoonPies at the bottom of a baking dish (cut them into pieces if that makes them easier to fit), and then pour brownie batter over them. Bake the dish for a unique layered brownie recipe. Make a MoonPie ice cream sundae by placing a single MoonPie at the bottom of a dessert dish, adding a scoop of ice cream, and topping the ice cream with your favorite sundae toppings like chocolate syrup, whipped cream, sprinkles, and a cherry. Or, turn it into a MoonPie banana split by chopping the cookie and placing the pieces over the banana, then adding scoops of ice cream and toppings as desired.
Make a MoonPie ice cream sandwich by slicing a MoonPie in half (horizontally through the marshmallow layer), spreading a thick layer of ice cream in the middle, re-closing the sandwich, and freezing until the cookie layer is firm. Before freezing, press mini chocolate chips onto the outer edge of the ice cream if desired. Finally, you can also microwave a MoonPie to soften it, remove the top, and add ingredients like chopped nuts, coconut flakes, pretzels, gummies, or fruit. Add a little whipped cream or chocolate syrup if desired before replacing the top and enjoying.